

Boat Plans, Patterns and Supplies For the Amateur Boat Builder!
- Boat Plans Catalog – 300 Boats You Can Build!
- Boatbuilding Supplies & Epoxy
- Inboard Hardware
- Electrical Design Plans
- Books, DVD’s & Audio
- Boat Trailer Plans
- Raptor® Fastenings & Tools
- Glen-L RV Plans
- Gift Certificates
- Boatbuilder Blogs
- Boatbuilder Galleries
- Newsletter Archives
- Customer Photos Archives
- Where Do I Start…
- About Our Plans & Kits
- Boatbuilder Forum
- Boatbuilder Gatherings
- Boatbuilding Methods
- Featured Design on TV’s NCIS
- Our Boats in Action
Small boat kick-up rudder
Rigging small sailboats.
….. deck fittings
Some comments on winches have been made previously. The variety and type of winches available to the sailor is enormous, but for the small boat sailor, winches usually are restricted to the smaller sizes used to control the jib and Genoa sheets. Winches can be used for the halyards, boom vang, and mainsheets, if desired. On small boats the cost is usually prohibitive, and the extra power gained is not required, as these lines can be handled by the crew or by other means, such as tackles, equally well.
RUDDER FITTINGS
Small sailboats usually have rudders which are called “outboard” rudders because they hang onto the aft end of the boat in full view. Boats which have rudders under the hull and the rudder stock passing through the hull bottom are said to have “inboard” rudders, but these are usually associated with large boats. The ordinary small boat rudder is attached to the boat with fittings that also allow the rudder to pivot or turn. These fittings are called GUDGEONS and PINTLES. These are arranged in pairs, with the gudgeons usually being attached to the boat, and the pintles fastened to the rudder. The pintles are strap-like fittings with the rudder fitting between the straps, and with a pin at the forward edge which fits into the “eye” of the gudgeons (see Fig. 6-10). As with most fittings, many sizes and types are available. Often gudgeons and pintles come in pairs which have a long pintle and a shorter one. These types make it easier to put the rudder on the boat, as the long pintle will be in position first, thereby acting as a guide for the short one. If both pintles are the same length, both must fit into the gudgeons at the same moment, which is frustrating at times, especially when trying to place the rudder in position when afloat. Because many small boat rudders are made of wood, the tendency is for these to float up and out of the gudgeons, of course, making for an immediate loss of steering and much embarrassment. A device called a RUDDER STOP can be used to prevent this from occuring. These are standard marine hardware items very simple in nature.
| FIG. 6-11 – This special factory-made kick-up rudder fitting incorporates the rudder gudgeons and pintles. The fitting mounts to the transom of the boat but allows the rudder to be removed. This fitting is normally used on small boats only. (You can order an updated version of this part in the ). | |
For small sailboats which land on the beach, it is desirable to have the rudder “kick up” when approaching shallow waters. Special “kick-up” rudder fittings such as shown in Fig. 6-11 are available, which also have the gudgeons and pintles attached as an integral unit, and perform this function. With a little effort, you can make your own “kick-up” rudder similar to the detail shown in Fig. 6-12.
FIG. 6-12 – One method of making a kick-up rudder using wood. When the pin is removed, the rudder will automatically come up when hitting the beach.
FIG. 6-13 – This tiller extension was made by merely cutting the tiller in half at the forward end and fastening it with a bolt. A more convenient type uses a swivel connection in lieu of the bolt for universal action. The line shown is a rope traveler which can be adjusted in length and is secured to the jam cleat on the deck.
The rudder is controlled by a handle called the TILLER. Sometimes the tiller passes through a hole in the transom (back of the boat), but usually it is located above the aft deck area and pivots up and down so the crew can move about easily. The length of the tiller is best determined in actual use, so it should be made longer than necessary. It’s much easier to cut off a long tiller than to add length to a short one. A device recommended for easier control, especially when tacking or sailing to windward, is a TILLER EXTENSION or “hiking stick,” an example of which is shown in Fig. 6-13. When sailing to windward in a small boat, the boat usually heels considerably and the crew must lean out to windward (or “hike out”) to counteract this. In order to hang onto the tiller in this position, an extension is required, fixed to the forward end of the tiller and preferably fitted with a universal-type joint. Naturally, the length of such a unit is best determined in actual use, so it is best to get a long one which can be cut, instead of getting one too short which can’t be added to.
The next WebLetter will start Part II …how to install the rigging.
Comments are closed.
Connect with us:
Customer builds.

Useful Information
- Cost & Time To Build
- Links & Suppliers
- Online Glossary
- Support Knowledge Base
- Teleseminars
- Wood & Plywood
Building Links
- How Fast Does It Go?
- Install A Jet Ski Motor
- Modifying The Motorwell
- Sailboat Hardware Notes
Glen L Marine Design
- About Glen L
- How To Place an Order
- Privacy Policy
Copyright Info.
Copyright 2006-2022 by Glen L Marine Designs. All rights reserved.
Mailing Address: 826 East Park Ave. Port Townsend, WA 98368
Web design by Big Guns Marketing , LLC.
How to Build a Sailboat Rudder From Scratch

Introduction: How to Build a Sailboat Rudder From Scratch

Step 1: Previous Rudder

Step 2: Rebuild

Step 3: Sanding

Step 4: Fiberglass Layup

Step 5: First Layer and Sanding

Step 6: Additional Layers and Difficult Spots

Step 7: Notes of Caution

Step 8: Hardware Holes

Step 9: Painting

Step 10: The End!

Recommendations

Microcontrollers Contest

Art and Sculpture Contest

Outdoor Life Contest

Building, restoration, and repair with epoxy

How to Build Rudders & Centerboards
by Captain James R. Watson
When the centerboard of my Searunner trimaran broke in the middle of a windy race around the Black Hole, the question I kept asking was “Why now, after working fine all of this time, and when we were leading the race?”
“Guess it just wore out” was my excuse to myself. This centerboard was built of laminated layers of plywood, resulting in a thickness of 2″. It was then covered with two layers of 6-oz woven fiberglass fabric. It was a deep and wide board with a lot of area, and like any rudder or centerboard on a boat that is sailed hard, it was exposed to a fair amount of stress.
The answer to “Why now – while leading the race?” could have been fate. But there is a more scientific answer. Extensive laboratory testing at Gougeon Brothers, Inc. defines why the centerboard failed. Understanding why can help us design and construct components that will perform more efficiently and last much longer.
The plywood centerboard did, in fact, wear out – or more accurately – it failed from rolling shear fatigue. Fatigue cracks in a material result from repeated (cyclic) stress. Fatigue is a reality of all structures and materials and eventually culminates in structural failure. Repeated loading and unloading or even worse, loading one way and then the other (reverse axial), rapidly reduces a material’s physical integrity and accelerates degradation. The higher the load is as a percentage of the material’s ultimate strength, the more rapid is the deterioration.
Some materials have a greater fatigue life than others. Ounce per ounce, wood is capable of operating at a much higher percentage of its ultimate stress level than most other materials. That is why such wonderfully efficient structures can be built with wood. However, plywood is not a good choice for cantilevered structures such as rudder blades and centerboards. This is because plywood is susceptible to rolling shear, shearing forces that roll the structural fibers across the grain. Plywood’s unidirectional wood fibers are laid in alternating layers, approximately half of them are oriented 90 degrees to the axis of the loads. Like a bundle of soda straws, which resist bending moments quite well one way, they simply lack cross-grain strength laterally and can roll against one another and fail under relatively low stress, especially in a cyclic environment. Therefore, when anticipated loads are primarily unidirectional, it is ideal to use a material with good unidirectional strength. Since only half of the plywood’s wood fiber is used to advantage, a plywood rudder blade or centerboard going from tack to tack (reverse axial loads) will fatigue much more rapidly than one built as described in this article.
If you were to look at the end of the board, say a fish’s view of a centerboard or rudder blade, you’d view its cross-section. A section that has a faired airfoil shape is preferred over one that is flat with parallel sides. This is because the airfoil shape produces lift when moving through the water, thereby counteracting the sideward forces exerted by the sail rig. A flat section produces less lift and at a great expense of drag, slowing the boat and making it more difficult to steer.

“Turn every other ripping end-for-end to neutralize the effects of any grain that does not run exactly parallel to the blank, and to reduce tendencies to twist. Rotate the rippings 90 degrees to expose the vertical grain and to permit easier shaping with a plane.
The selection of a proper camber and section can be a subject of great theoretical debate. One can become intimidated with technical terms such as thickness distribution, Reynolds number, boundary layer, and so on. These terms do relate to the subject, however, for the builder/sailor whose boat floats forlornly in need of a rudder blade the following will do just fine. In fact, the best designers and builders will be hard-pressed to do better.
An excellent choice for most craft is a realistically accurate and fair NACA (National Advisory Committee for Aeronautics) 0012 airfoil, where maximum board thickness is 12% of the fore/aft length (chord length). Maximum thickness is located about 30% of the chord length measured from the leading edge (see sketch). The dimensions used to establish a specific shape (called offsets) are given in the appendix of Abbott & Doenhoff’s The Theory of Wing Sections. You’ll also find further information in my article How to loft Airfoil Sections.
From offsets make a good drawing of half the section on transfer paper.
Western red cedar and redwood are good choices of wood to use for rudder blades and centerboards for boats up to 25 feet. Both of these woods bond very well are generally clear and straight-grained, have good dimensional stability, are easily worked and affordable. Cedar is just a little heavier than the foams used for rudders, is much stiffer, and has far greater shear strength values. On larger craft, a higher-density material like African mahogany is a better choice. Oak is not a good choice.
Buy flat-grained 2’x6″s or 2’x8″s, and then rip them to the designed board thickness. Turn every other ripping end-for-end to neutralize the effects of any grain that does not run exactly parallel to the blank, and to reduce tendencies to warp or twist (see sketch). Rotating the rippings 90 degrees to expose vertical grain will permit easier shaping with a plane. The last trick is to rip the end pieces of the nose and tail in half. Bonding with a couple of layers of glass tape between keeps the fine edge of the tail from splitting too easily and offers a precise centerline.
Bond the ripping with a slurry of epoxy and 404 High-Density filler. Plastic strips prevent inadvertent bonding to leveled sawhorses (see sketch). With both sawhorses leveled, you’re positive no twist exists in the laminated blank. Bar clamps should be snugged until excess glue squeezes from the joints. Over tightening only stresses joints and tends to squeeze all the adhesive from them. When the laminate is cured, a light planing to clean the surfaces is all that is needed before shaping begins.

Centerboards and rudder blades are often overlooked components that are vital to a boat’s performance.
First, tack the 1/8″-thick plywood template that describes the cross-section shape to the blank’s ends. This is sawn from the impression made when traced with the transfer paper you originally drew it on. The key to producing an accurate and symmetrical board is maintaining a systematic removal of material from one side, then from the other. To do this, mark the shape to be removed, stick to straight-line shapes (see sketch). Use a smoothing plane to remove the wood.
After planing to the guidelines on one side, flip the blank over and plane the same shape on the other side. The procedure is similar to producing a round shape from a square by first forming an octagon, and then flattening the resulting eight corners to produce a 16-sided shape and refining that until very minute flat surfaces exist. Fifty-grit sandpaper bonded with 3M brand feathering disc adhesive to a 1/2″-thick by 11’x4.5″-wide plywood sanding block is a good tool to use for fairing this out.
Now you should decide if the board needs reinforcement. Your board requires reinforcement if the chord thickness is at or below 4% of the unsupported span. The unsupported span of a daggerboard or centerboard is that measurement from where it exits the hull, to its tip when fully lowered. The unsupported span of the rudder blade is the distance from the rudder case to the tip. If it is a non-retracting blade, measure from the waterline to the tip. So, if the board extends 48″ below the bottom of the hull and is 2″ thick, .04″, it should be reinforced for strength and stiffness.
If the board needs reinforcement, graphite fibers are a good choice as the strain-to-failure values of wood and graphite fiber are quite similar, hence they enhance each other’s performance. The high-modulus qualities of the graphite fibers provide stiffness. The addition of graphite will efficiently increase stiffness and ultimate strength. Don’t be intimidated by the high-tech qualities of graphite fibers, they are easy to work with.
The amount of reinforcement needed is usually figured at 10% chord thickness. Using the same board for our example, the board is 2″ thick, then 10% equals .20″ total reinforcement, .10″ per side. Graphite fiber tows are .01″ thick, so 10 tows per side should give the necessary reinforcement to do the job.

The graphite fibers will be laid into a channel routed into the shaped centerboard.
The graphite fibers will be laid into a channel that is routed into the shaped board (see sketch). The specific depth of the channel is determined by the above rule. Make the channel a little deeper than what’s required (1/16″) so you won’t be sanding the graphite fibers.
The profile of the channel is similar on all boards. The centerline of the channel is usually located at the point of maximum chord thickness (about 30% from the leading edge). The widest point of the channel is where the board exits the hull when completely lowered. The channel width at this point should be about 16% of chord length. Toward the ends of the board, the width of the channel narrows by about one-third that of the widest dimension. Keeping this in mind, more graphite can be laid in that area, a little above and more below that point that exits the hull. Maintain a consistent channel depth throughout.
Take a one-inch-square stick to serve as a router guide. It’s best to bevel the edge of the channel to reduce stress concentration. A rabbet plane serves best for this task. A layer of 6-oz fiberglass cloth is laid in the channel first (this serves as an interface between the wood and graphite fiber), followed by the schedule of graphite. You can complete the entire bonding operation for a side in one session. Try to do the other side the next day. Finally, fair the reinforcement area with WEST SYSTEM brand epoxy and a low-density filler.
A layer of 6-oz woven-glass fabric should then be bonded to the faired board to improve the cross-grain strength and abrasion resistance. The radius of the leading edge should be about a 1% radius of the chord length, and may not permit the fiberglass fabric to lie flat around the radius. In that event, cut a strip of woven glass fabric on the bias (which will lie around a tighter radius) and bond it around the leading edge.
It is better to leave the trailing edge slightly squared rather than razor-sharp. This will cause less drag and the centerboard will be less vulnerable to damage. Flatten the trailing edge to 1/16 or 1/8 of an inch on small boards, and closer to 1/4 of an inch on larger boards.
Any board, no matter how stiff, will deflect. To prevent the axle hole that the centerboard pivots on from binding when deflection occurs, make the hole somewhat larger than the pin diameter. The perimeter of the axle hole should be thoroughly protected with fiberglass, as exposed end grain can absorb moisture.

To prevent the axle hole from binding when deflection occurs, make the hole a little larger than the pin diameter.
Abrasion of the axle against the axle hole dictates that you should bond fiberglass into the hole’s perimeter. To do that, wrap fiberglass tape around a waxed (use auto paste wax) metal rod that is about 10 to 15% larger in diameter than the actual axle pin. The hole should be heavily chamfered on each side, so when the wet layup is placed in the hole and the nuts tightened, the fiberglass is pressed by the large washers into the chamfers on both sides of the board (see sketch). The same procedure may be used on retractable rudder blades, but the tolerance between axle hole diameter and the diameter of the axle pin should be closer.
You can bond control lines for centerboards and rudders-in-place by wetting a slightly oversized hole (about 1.5″ to 2″ deep) with epoxy/404 High-Density filler mixture. It helps to mark the hole’s depth on the rope with vinyl electricians tape to serve as a guide. Then, after soaking that end of the rope to be bonded in epoxy for a minute or so, shove it in the full depth of the hole.
Centerboards and rudder blades are often overlooked components that are of vital importance to a boat’s performance. Built correctly, they will reliably operate with the efficiency of a fish’s fin, and you should note a measurable improvement in the quality of pointing and steering of your windship.
References:
1. Jozset Bodig, Ph.D., Benjamin A Jayne Ph.D., Mechanics of Wood and Wood Composites 2. Johnston, Ken, Some Thoughts on Rudder Sections , Multihulls Magazine (Jan/Feb 1980) 3. Eck Bransford, Everything You Ever Wanted To Know About 505 Fins 4. Lindsay, Mark, Centerboards and Rudders , Yacht Racing/Cruising Magazine (April 1981) 5. Abbott and Doenhoff, Theory of Wing Sections, Dover Publications, Inc. New York (1959) 6. Captain James R. Watson, How to Loft Airfoil Sections , Epoxyworks 1 (Fall 1992)

- Sailboat Equipment
- Sailboat Steering
Pintles & Gudgeons

ILCA Laser Gudgeon

Allen Brothers Pintle For A 7000

Allen Brothers 6MM Stainless Steel Optimist Transom Gudgeon

Allen Brothers 6MM Stainless Steel Short Optimist Rudder Pintle

Allen Brothers 6MM Stainless Steel Long Optimist Rudder Pintle

Allen Brothers 8mm X 43mm Stainless Steel Rudder Gudgeon

Allen Brothers 7.8mm Stainless Steel Transom Gudgeon

Allen Brothers 8MM Stainless Steel Transom Gudgeon

Allen Brothers 8MM X 11MM Short Rudder Pintle

Allen Brothers 8MM X 11MM Long Rudder Pintle

Allen Brothers 8mm X 38mm Stainless Steel Rudder Gudgeon 120mm

Allen Brothers 8MM Stainless Steel H/D Transom Gudgeon

Allen Brothers 8mm Pin Hole Stainless Steel Transom Gudgeon

Allen Brothers 8MM Stainless Steel H/D Transom Pintle

Allen Brothers 8MM Stainless Steel Transom Pintle

Allen Brothers 8mm X 38mm Stainless Steel Rudder Gudgeon 92mm

Allen Brothers 8MM X 54MM Stainless Steel Rudder Gudgeon

Allen Brothers 8MM X 51MM Stainless Steel Rudder Gudgeon

Allen Brothers 8MM X 45MM Stainless Steel Rudder Gudgeon

Allen Brothers 8MM X 42MM Stainless Steel Rudder Gudgeon

Small Craft Advisor

Build Your Own Kick Up Rudder
William mantis offers up plans for a creative and effective diy rudder.
by Bill Mantis
I built a rudder for my 8.5’ x 4.5’ sailboat—named City Slicker 2. 0—the same time I built the boat itself, two years ago . Since I was in a hurry to get it done, I didn’t bother designing a kick-up rudder, figuring I could make the modification at a later date. But then I lost it. I lost my rudder. How does one lose a rudder? I can’t explain how it happened. I only know I had it when I came ashore one day, and didn’t have it the next time I tried to launch. Fortunately, I’d been designing a kick up rudder before suffering the loss, and I had the necessary epoxy and lumber on hand. Only the material for the rudder blade and new pintles had to be ordered. As a result, I lost only one week of the sailing season.

Keep reading with a 7-day free trial
Subscribe to Small Craft Advisor to keep reading this post and get 7 days of free access to the full post archives.
My Cruiser Life Magazine
All About the Rudder on a Sailboat
The rudder on a sailboat is one of those important parts that often gets overlooked. It’s hidden underwater most of the time and usually performs as expected when we ask something of it.
But when was the last time you seriously considered your sailboat rudder? Do you have a plan if it fails? Here’s a look at various designs of sail rudder, along with the basics of how it works and why it’s there.
Table of Contents
How are sailboat rudders different than keels, how does the rudder work, wheel steering vs. tiller steering, full keel rudder sailboat, skeg-hung rudders, spade rudder, variations on designs, emergency outboard rudder options, looking to sail into the sunset grab the wheel, steer your sail boat rudder, and get out there, sail boat rudder faqs.

What Is a Boat Rudder?
The rudder is the underwater part of the boat that helps it turn and change direction. It’s mounted on the rear of the boat. When the wheel or tiller in the cockpit is turned, the rudder moves to one side or another. That, in turn, moves the boat’s bow left or right.
When it comes to sailing, rudders also offer a counterbalance to the underwater resistance caused by the keel. This enables the boat to sail in a straight line instead of just spinning around the keel.
Sailboat hull designs vary widely when you view them out of the water. But while the actual shape and sizes change, they all have two underwater features that enable them to sail–a rudder and a keel.
The rudder is mounted at the back of the boat and controls the boat’s heading or direction as indicated by the compass .
The keel is mounted around the center of the boat. Its job is to provide a counterbalance to the sails. In other words, as the wind presses on the sails, the weight of the ballast in the keel and the water pressure on the sides of the keel keeps the boat upright and stable.
When sailing, the keel makes a dynamic force as water moves over it. This force counters the leeway made by air pressure on the sails and enables the boat to sail windward instead of only blowing downwind like a leaf on the surface.
The rudder is a fundamental feature of all boats. Early sailing vessels used a simple steering oar to get the job done. Over the years, this morphed into the rudder we know today.
However, thinking about a rudder in terms of a steering oar is still useful in understanding its operation. All it is is an underwater panel that the helmsperson can control. You can maintain a course by trailing the oar behind the boat while sailing. You can also change the boat’s heading by moving it to one side or the other.
The rudders on modern sailboats are a little slicker than simple oars, of course. They are permanently mounted and designed for maximum effectiveness and efficiency.
But their operating principle is much the same. Rudders work by controlling the way water that flows over them. When they move to one side, the water’s flow rate increases on the side opposite the turn. This faster water makes less pressure and results in a lifting force. That pulls the stern in the direction opposite the turn, moving the bow into the turn.
Nearly all boats have a rudder that works exactly the same. From 1,000-foot-long oil tankers to tiny 8-foot sailing dinghies, a rudder is a rudder. The only boats that don’t need one are powered by oars or have an engine whose thrust serves the same purpose, as is the case with an outboard motor.
Operating the Rudder on a Sailboat
Rudders are operated in one of two ways–with a wheel or a tiller. The position where the rudder is operated is called the helm of a boat .
Ever wonder, “ What is the steering wheel called on a boat ?” Boat wheels come in all shapes and sizes, but they work a lot like the wheel in an automobile. Turn it one way, and the boat turns that way by turning the rudder.
A mechanically simpler method is the tiller. You’ll find tiller steering on small sailboats and dinghies. Some small outboard powerboats also have tiller steering. Instead of a wheel, the tiller is a long pole extending forward from the rudder shaft’s top. The helmsperson moves the tiller to the port or starboard, and the bow moves in the opposite direction. It sounds much more complicated on paper than it is in reality.
Even large sailboats will often be equipped with an emergency tiller. It can be attached quickly to the rudder shaft if any of the fancy linkages that make the wheel work should fail.

Various Sail Boat Rudder Designs
Now, let’s look at the various types of rudders you might see if you took a virtual walk around a boatyard. Since rudders are mostly underwater on the boat’s hull, it’s impossible to compare designs when boats are in the water.
Keep in mind that these rudders work the same way and achieve the same results. Designs may have their pluses and minuses, but from the point of view of the helmsperson, the differences are negligible. The overall controllability and stability of the boat are designed from many factors, and the type of rudder it has is only one of those.
You’ll notice that rudder design is closely tied to keel design. These two underwater features work together to give the boat the sailing characteristics the designer intended.
The classic, robust offshore sailboat is designed with a full keel that runs from stem to stern. With this sort of underwater profile, it only makes sense that the rudder would be attached to the trailing edge of that enormous keel. On inboard-powered sailboats, the propeller is usually mounted inside an opening called the aperture between the keel and rudder.
The advantages of this design are simplicity and robustness. The keel is integrated into the hull and protects the rudder’s entire length. Beyond reversing into an obstacle, anything the boat might strike would hit the keel first and would be highly unlikely to damage the rudder. Not only does the keel protect it, but it also provides a very strong connection point for it to be attached to.
Full keel boats are known for being slow, although there are modern derivatives of these designs that have no slow pokes. Their rudders are often large and effective. They may not be the most efficient design, but they are safe and full keels ride more comfortably offshore than fin-keeled boats.
Plenty of stout offshore designs sport full keel rudders. The Westsail 38s, Lord Nelsons, Cape Georges, Bristol/Falmouth Cutters, or Tayana 37s feature a full keel design.
A modified full keel, like one with a cutaway forefoot, also has a full keel-style rudder. These are more common on newer designs, like the Albergs, Bristols, Cape Dorys, Cabo Ricos, Island Packets, or the older Hallberg-Rassys.

A design progression was made from full keel boats to long-fin keelboats, and the rudder design changed with it. Designers used a skeg as the rudder became more isolated from the keel. The skeg is a fixed structure from which you can mount the rudder. This enables the rudder to look and function like a full keel rudder but is separated from the keel for better performance.
The skeg-hung rudder has a few of the same benefits as a full keel rudder. It is protected well and designed robustly. But, the cutaways in the keel provide a reduced wetted surface area and less drag underwater, resulting in improved sailing performance overall.
Larger boats featuring skeg-mounted rudders include the Valiant 40, Pacific Seacraft 34, 37, and 40, newer Hallberg-Rassys, Amels, or the Passport 40.
It’s worth noting that not all skegs protect the entire rudder. A partial skeg extends approximately half the rudder’s length, allowing designers to make a balanced rudder.

With higher-performance designs, keels have become smaller and thinner. Fin keel boats use more hydrodynamic forces instead of underwater area to counter the sail’s pressure. With the increased performance, skegs have gone the way of the dinosaurs. Nowadays, rudders are sleek, high aspect ratio spade designs that make very little drag. They can be combined with a number of different keel types, including fin, wing keels , swing keels, or bulb keels.
The common argument made against spade rudders is that they are connected to the boat by only the rudder shaft. As a result, an underwater collision can easily bend the shaft or render the rudder unusable. In addition, these rudders put a high load on the steering components, like the bearings, which are also more prone to failure than skeg or full keel designs. For these reasons, long-distance cruisers have traditionally chosen more robust designs for the best bluewater cruising sailboats .
But, on the other hand, spade rudders are very efficient. They turn the boat quickly and easily while contributing little to drag underwater.
Spade rudders are common now on any boat known for performance. All racing boats have a spade rudder, like most production boats used for club racing. Pick any modern fin keel boat from Beneteau, Jeanneau, Catalina, or Hunter, and you will find a spade rudder. Spade rudders are common on all modern cruising catamarans, from the Geminis to the Lagoons, Leopards, and Fountaine Pajots favored by cruisers and charter companies.

Here are two alternative designs you might see out on the water.

Transom-Hung or Outboard Rudders
An outboard rudder is hung off the boat’s transom and visible while the boat is in the water. Most often, this design is controlled by a tiller. They are common on small sailing dingies, where the rudder and tiller are removable for storage and transport. The rudder is mounted with a set of hardware called the pintle and gudgeon.
Most outboard rudders are found on small daysailers and dinghies. There are a few classic big-boat designs that feature a transom-hung rudder, however. For example, the Westsail 38, Alajuela, Bristol/Falmouth Cutters, Cape George 36, and some smaller Pacific Seacrafts (Dana, Flicka) have outboard rudders.

Twin Sailing Rudder Designs
A modern twist that is becoming more common on spade rudder boats is the twin sailboat rudder. Twin rudders feature two separate spade rudders mounted in a vee-shaped arrangement. So instead of having one rudder pointed down, each rudder is mounted at an angle.
Like many things that trickle down to cruising boats, the twin rudder came from high-performance racing boats. By mounting the rudders at an angle, they are more directly aligned in the water’s flow when the boat is healed over for sailing. Plus, two rudders provide some redundancy should one have a problem. The twin rudder design is favored by designers looking to make wide transom boats.
There are other, less obvious benefits of twin rudders as well. These designs are easier to control when maneuvering in reverse. They are also used on boats that can be “dried out” or left standing on their keel at low tide. These boats typically combine the twin rudders with a swing keel, like Southerly or Sirius Yachts do. Finally, twin rudders provide much better control on fast-sailing hulls when surfing downwind.
Unbalanced vs. Balanced Rudders
Rudders can be designed to be unbalanced or balanced. The difference is all in how they feel at the helm. The rudder on a bigger boat can experience a tremendous amount of force. That makes turning the wheel or tiller a big job and puts a lot of strain on the helmsperson and all of the steering components.
A balanced rudder is designed to minimize these effects and make turning easier. To accomplish this, the rudder post is mounted slightly aft of the rudder’s forward edge. As a result, when it turns, a portion of the leading edge of the rudder protrudes on the opposite side of the centerline. Water pressure on that side then helps move the rudder.
Balanced rudders are most common in spade or semi-skeg rudders.
Sail Rudder Failures
Obviously, the rudder is a pretty important part of a sailboat. Without it, the boat cannot counter the forces put into the sails and cannot steer in a straight line. It also cannot control its direction, even under power.
A rudder failure of any kind is a serious emergency at sea. Should the rudder be lost–post and all–there’s a real possibility of sinking. But assuming the leak can be stopped, coming up with a makeshift rudder is the only way you’ll be able to continue to a safe port.
Rudder preventative maintenance is some of the most important maintenance an owner can do. This includes basic things that can be done regularly, like checking for frayed wires or loose bolts in the steering linkage system. It also requires occasionally hauling the boat out of the water to inspect the rudder bearings and fiberglass structure.
Many serious offshore cruisers install systems that can work as an emergency rudder in extreme circumstances. For example, the Hydrovane wind vane system can be used as an emergency rudder. Many other wind vane systems have similar abilities. This is one reason why these systems are so popular with long-distance cruisers.
There are also many ways to jury rig a rudder. Sea stories abound with makeshift rudders from cabinet doors or chopped-up sails. Sail Magazine featured a few great ideas for rigging emergency rudders .
Understanding your sail rudder and its limitations is important in planning for serious cruising. Every experienced sailor will tell you the trick to having a good passage is anticipating problems you might have before you have them. That way, you can be prepared, take preventative measures, and hopefully never deal with those issues on the water.
What is the rudder on a sailboat?
The rudder is an underwater component that both helps the sailboat steer in a straight line when sailing and turn left or right when needed.
What is the difference between a rudder and a keel?
The rudder and the keel are parts of a sailboat mounted underwater on the hull. The rudder is used to turn the boat left or right, while the keel is fixed in place and counters the effects of the wind on the sails.
What is a rudder used for on a boat?
The rudder is the part of the boat that turns it left or right

Matt has been boating around Florida for over 25 years in everything from small powerboats to large cruising catamarans. He currently lives aboard a 38-foot Cabo Rico sailboat with his wife Lucy and adventure dog Chelsea. Together, they cruise between winters in The Bahamas and summers in the Chesapeake Bay.
Leave a comment
Your email address will not be published. Required fields are marked *
Save my name, email, and website in this browser for the next time I comment.
- Paddle Board
What Is a Sailboat Rudder? An Overview of Its Function and Design
Sailboats have been used for thousands of years to traverse water. They have undergone many changes and improvements over the years, and one of the essential components of a sailboat is the rudder.
Quick Facts
| Topic | Description |
|---|---|
| Rudder | It is essential for steering and balancing the boat. |
| The main components are the stock, the blade, pintles, and gudgeons. | |
| Transom-mounted, skeg-mounted, keel-mounted, and spade rudders. | |
| Wood, aluminum alloy, stainless steel, and fiberglass-reinforced plastic. | |
| Influenced by the boat’s size, weight, speed, water and wind conditions, and the sailor’s skill level. | |
| Size, shape, placement, hydrodynamic, and aerodynamic factors. | |
| Involves regular inspection for signs of wear and tear, corrosion, loose components, and ensuring smooth operation. | |
| Corrosion, damage to the blade or stock, and loose components. | |
| Necessary when damage is extensive or to upgrade to a newer design for improved performance. |
Understanding the Sailboat Rudder
The rudder is a vital component of a sailboat that plays a crucial role in steering and maneuvering the vessel. The rudder works by changing the direction of the water flow around it, which moves the boat in the opposite direction. Without a rudder, it would be impossible to navigate a sailboat effectively, especially in different water and wind conditions.
Components of a Sailboat Rudder
A sailboat rudder comprises several components, each with a unique function that contributes to the rudder’s overall effectiveness. The stock is the main vertical shaft that connects the rudder blade to the boat’s helm. It is usually made of stainless steel or aluminum alloy and is designed to withstand the forces exerted on the rudder during navigation.
The blade is the flat portion of the rudder that faces the water current and directs the water flow in the opposite direction to steer the boat. The blade is typically made of fiberglass-reinforced plastic or aluminum alloy and is designed to be lightweight and durable. Pintles and gudgeons are the two connections between the rudder and stern that allow for easy installation and removal of the rudder. Pintles are the vertical metal pins that fit into the gudgeons, which are the horizontal metal brackets attached to the boat’s stern.
Different Types of Rudders
There are several types of rudders used in sailboats, each with its advantages and disadvantages. Transom-mounted rudders are the most common type of rudder, and they are mounted on the stern of the boat. Skeg-mounted rudders are attached to a fixed fin called a skeg, which provides additional stability to the rudder.
Keel-mounted rudders are attached to the boat’s keel, which is the central structural element that runs along the bottom of the hull. Spade rudders are free-standing rudders that are not attached to any part of the boat and are commonly used in racing sailboats. The type of rudder used depends on the boat’s size, design, and intended use.
Materials Used in Rudder Construction
Rudders can be made from various materials, each with its advantages and disadvantages. Wooden rudders are the traditional choice and are still used in some sailboats today. However, they are relatively heavy and require regular maintenance to prevent rot and decay.
Aluminum alloy rudders are lightweight and durable, making them an excellent choice for racing sailboats. Stainless steel rudders are also durable but are heavier than aluminum alloy rudders. Fiberglass-reinforced plastic rudders are the most common type of rudder used today, as they are lightweight, durable, and require minimal maintenance.
The sailboat rudder is an essential component that plays a crucial role in steering and maneuvering a sailboat. Understanding the different types of rudders, their components, and the materials used in their construction can help sailors choose the right rudder for their boat and navigate more effectively in different water and wind conditions.

The Function of a Sailboat Rudder
Steering and maneuvering.
The primary function of a sailboat rudder is to steer and maneuver the boat. The rudder’s blade directing the flow of water in a specific direction allows for the steering of the boat as the blade changes direction. Sailors can use the rudder to turn the boat in any direction they choose, allowing them to navigate through narrow channels or around obstacles in the water. It is essential to note that the rudder works in conjunction with the sails to control the boat’s direction and speed.
Balancing the Sailboat
The balance of the sailboat is critical to ensure safe maneuvering, and the rudder plays a crucial role in achieving this. A balanced rudder helps in keeping the boat steady, reducing drag, and preventing unwanted turning. Sailors can adjust the rudder’s angle to keep the boat balanced and on course, especially in rough water conditions. A well-balanced rudder also helps to reduce the risk of capsizing or losing control of the boat .
Rudder Effectiveness in Different Conditions
Rudder effectiveness varies depending on the boat’s size, weight, and water and wind conditions. A larger boat may require a bigger rudder for proper maneuvering, while a smaller boat can work with a smaller rudder. Sailors must also consider the water and wind conditions when choosing the right rudder for their boat. In calm waters, a smaller rudder may be sufficient, but in rough water, a larger rudder may be necessary to maintain control of the boat. Additionally, the rudder’s effectiveness can be affected by the boat’s speed, with higher speeds requiring more significant rudders to maintain control.
It is also important to note that the rudder’s effectiveness can be impacted by external factors such as weeds or debris in the water. These factors can reduce the rudder’s ability to steer the boat and require sailors to make adjustments to maintain control. Additionally, the rudder’s effectiveness can be impacted by the sailor’s skill level, with more experienced sailors able to make more precise adjustments to the rudder to control the boat’s direction and speed.
Design Considerations for Sailboat Rudders
Sailboat rudders are an essential component of a boat’s steering and maneuvering system. A well-designed rudder can make all the difference in a boat’s performance , especially in challenging weather conditions. In this article, we will explore some of the key design considerations for sailboat rudders.
Rudder Size and Shape
The size and shape of a rudder play a crucial role in determining its effectiveness in steering and maneuvering a boat. A larger rudder provides more leverage and maneuverability, allowing the boat to turn more sharply. However, a larger rudder may also produce more drag, which can slow down the boat’s speed.
The shape of the rudder is also important. A well-designed rudder should be streamlined to reduce drag and turbulence. The thickness of the rudder should be carefully considered to ensure that it is strong enough to withstand the forces exerted on it while remaining lightweight.
Rudder Placement and Configuration
The placement of the rudder on the boat can significantly affect its performance. A rudder that is too far forward can cause the boat to become unstable, while a rudder that is too far aft can make it difficult to steer. The location of the rudder must also take into account factors such as the propeller’s placement and the boat’s shape.
The configuration of the rudder can also determine its effectiveness and balance. A single rudder is the most common configuration, but some boats have twin rudders to provide more steering control. The angle of the rudder blade can also be adjusted to optimize its performance.
Hydrodynamic and Aerodynamic Factors
The design of a rudder must take into consideration the hydrodynamic and aerodynamic factors affecting the boat’s performance. Hydrodynamic factors include water flow, pressure, and turbulence, which can significantly affect the rudder’s performance. The shape and placement of the rudder must be carefully designed to minimize these effects.
Aerodynamic factors consider the wind and air resistance’s impact on the boat’s performance. The rudder’s size and shape must be designed to minimize the wind’s effect on the boat while providing sufficient steering control.
The design of a sailboat rudder is a complex process that requires careful consideration of many factors. The size and shape of the rudder, its placement on the boat, and its configuration must be optimized to provide effective steering and maneuverability. By taking into account the hydrodynamic and aerodynamic factors affecting the boat’s performance, a well-designed rudder can significantly improve a sailboat’s overall performance.

Rudder Maintenance and Repair
The rudder is a crucial component of any sailboat, providing steering and control. As such, it’s essential to keep it in good working order through regular maintenance and inspections.
Inspecting Your Rudder
Regular inspection of the rudder is essential to ensure its continued performance and longevity. A thorough inspection includes checking for cracks, wear and tear, and loose components such as hinges, pins, and screws. It’s also important to check the rudder’s alignment and ensure it moves smoothly and without any obstructions.
During your inspection, be sure to check for signs of corrosion, particularly on metal components. Corrosion can weaken the rudder and cause it to fail, so regular cleaning and maintenance are essential to prevent this.
If you notice any issues during your inspection, it’s important to address them promptly. Small cracks or damage can often be repaired, but if the damage is extensive, it may be necessary to replace the rudder entirely.
Common Rudder Issues and Solutions
One common issue with rudders is corrosion, particularly on metal components. Regular cleaning and maintenance help prevent corrosion and ensure the rudder’s longevity. If you do notice signs of corrosion, it’s important to address it promptly to prevent further damage.
Another common issue is damage to the blade or stock. This can be caused by impact with debris or other boats, or simply wear and tear over time. If the damage is minor, it may be possible to repair the rudder. However, if the damage is extensive or compromises the rudder’s structural integrity, it may be necessary to replace it entirely.
Loose components such as hinges, pins, and screws can also cause issues with the rudder. These should be checked regularly and tightened or replaced as needed.
When to Replace or Upgrade Your Rudder
Sailboat rudders can last for many years, but at some point, replacement or upgrade may be necessary. This includes upgrading to a newer design or larger rudder to improve the boat’s performance or replacing a damaged or worn-out rudder that is beyond repair.
If you’re considering upgrading your rudder, it’s important to consult with a professional to ensure that the new rudder is compatible with your boat and will provide the desired performance improvements.
Regular maintenance and inspections are essential to ensure the continued performance and longevity of your sailboat’s rudder. By staying on top of any issues and addressing them promptly, you can ensure that your rudder will continue to provide reliable steering and control for many years to come.

A sailboat’s rudder is a crucial component that helps steer and maneuver the boat safely. The size, shape, placement, and construction materials must all be taken into consideration when designing or replacing a rudder. Regular maintenance and inspection help ensure its continued performance and longevity.
Rudder FAQS
How does a sailboat rudder work.
A sailboat rudder works by changing the direction of the water flow past the boat’s hull, which in turn changes the direction of the boat. The rudder is attached to the stern of the boat and can be turned left or right. When the rudder is turned, it creates a force that pushes the stern in the opposite direction and turns the bow towards the direction the rudder is turned. This is how a rudder steers a boat.
What is a rudder and its purpose?
A rudder is a flat piece, usually made of metal or wood, attached to the stern of a vessel such as a boat or ship. The main purpose of the rudder is to control the direction of the vessel. It does this by deflecting water flow, creating a force that turns the vessel. Without a rudder, steering a vessel would be significantly more challenging.
Can you steer a sailboat without a rudder?
Steering a sailboat without a rudder is challenging but not impossible. Sailors can use the sails and the keel to influence the direction of the boat. By trimming the sails and shifting weight, it’s possible to cause the boat to turn. However, this is a difficult technique that requires a deep understanding of sailing dynamics and is usually considered a last resort if the rudder fails.
What controls the rudder on a sailboat?
The rudder on a sailboat is typically controlled by a steering mechanism, like a tiller or a wheel. The tiller is a lever that is directly connected to the top of the rudder post. Pushing the tiller to one side causes the rudder to turn to the opposite side. On larger boats, a wheel is often used. The wheel is connected to the rudder through a series of cables, pulleys, or hydraulic systems, which turn the rudder as the wheel is turned.
How do you steer a sailboat with a rudder?
To steer a sailboat with a rudder, you use the tiller or wheel. If your sailboat has a tiller, you’ll push it in the opposite direction of where you want to go – pushing the tiller to the right will turn the boat to the left and vice versa. If your sailboat has a wheel, it operates like a car steering wheel – turning it to the right steers the boat to the right and turning it to the left steers the boat to the left.
How do you steer a sailboat against the wind?
Steering a sailboat against the wind, also known as tacking, involves a maneuver where the bow of the boat is turned through the wind. Initially, the sails are let out, and then the boat is steered so that the wind comes from the opposite side. As the boat turns, the sails are rapidly pulled in and filled with wind from the new direction. This maneuver allows the boat to zigzag its way upwind, a technique known as “beating.” It requires skill and understanding of sailing dynamics to execute effectively.

John is an experienced journalist and veteran boater. He heads up the content team at BoatingBeast and aims to share his many years experience of the marine world with our readers.
What to Do If Your Boat Engine Won’t Start? Common Problems & How to Fix Them
How to launch a boat by yourself: complete beginner’s guide, how to surf: complete beginner’s guide to get you started.
Comments are closed.
Type above and press Enter to search. Press Esc to cancel.

World Class Rudders, Tillers, and other Gear for Real Life Sailing
Sailboat rudders, sailboat tillers, custom rudders/ tillers, sailboat accessories, rudder repair worksheet, instructional handbook, looking for a product for your sailboat.
Can't Find your Sailboat?
Why Rudder Craft?
At Rudder Craft we build every sailboat rudder with the singular focus of improving your sailboat’s steering performance. In order to accomplish this our sailboat rudders incorporate a hydrofoil design, as a matter of course. Sailboats ranging from the West Wight Potter 15, all the way up to the MacGregor 36 and Catalina 42, will find a more accurate helm once a Rudder Craft hydrofoil sailboat rudder is installed.
Why Hydrofoil?
Operating on principles similar to airplane wings, the foiled sailboat rudder design generates lift as the sailboat makes way. By employing the sailboat rudder to reduce drag, and increasing the force the sailboat rudder is able to exert, any sailboat will find themselves performing better: weather helm is reduced, tacking is crisper, points of sail are easier to keep, and helm effort is greatly reduced in light and moderate air.
Why Use a Kick-up Rudder?
Subscribe to our blog.
Join our mailing list to receive the latest news and updates from our team.
You have Successfully Subscribed!
No results found.
The page you requested could not be found. Try refining your search, or use the navigation above to locate the post.
Blog Coming Soon!
Customer reviews.

How To Make A Rudder For A Sailboat
Key Takeaways:
- Choose a strong and durable wood for the rudder blade, such as oak or mahogany.
- Consider the shape of the rudder blade: flat blades provide more lift, while curved blades reduce drag.
- Use lightweight materials like fiberglass or carbon fiber for the rudder frame to provide strength without adding unnecessary weight.
- Test and fine-tune the rudder in different weather conditions to optimize handling and maneuverability.
If you’re itching for the freedom of the open water, why not make your own rudder for a sailboat? In this article, we’ll show you how to select the right materials, design the perfect rudder, and build it from scratch.
With a little effort and some handy tools, you’ll be steering your sailboat with ease in no time. So, get ready to take control and experience the true joy of sailing on your own terms.
Table of Contents
Selecting the Right Materials
You should start by gathering the necessary materials for making a rudder for your sailboat.
As someone who desires freedom, it’s essential to choose the right materials that will withstand the forces of the wind and waves. Firstly, you’ll need a strong and durable piece of wood for the rudder blade. Look for a hardwood like oak or mahogany that can withstand the harsh marine environment.
You’ll need stainless steel or brass hardware to attach the rudder to the boat. These materials are corrosion-resistant and will ensure the rudder stays securely in place. Additionally, you’ll need screws or bolts to fasten everything together . Make sure to choose the appropriate size and length for your specific sailboat.
You’ll need a high-quality marine-grade varnish or paint to protect the wood and prevent water damage. This won’t only add a touch of style to your rudder but also prolong its lifespan.
Check this Youtube Video that might be helpful:
Designing Your Rudder
When designing your rudder, carefully consider its shape and size for optimal performance on the water. Y our rudder plays a crucial role in maneuvering your sailboat, so it’s important to get it right.
Start by thinking about the shape of your rudder blade. A flat blade will provide more lift, allowing for better control and responsiveness. On the other hand, a curved blade will reduce drag, increasing your boat’s speed. It’s all about finding the right balance that suits your needs.
Consider the size of your rudder. A larger rudder will provide more control and stability, especially in strong winds and rough waters. However, keep in mind that a larger rudder also means more drag, which can slow you down. Again, finding the right balance is key.
Take into account the material you’ll use for your rudder. Lightweight materials such as fiberglass or carbon fiber are popular choices as they offer strength without adding unnecessary weight. Remember, the lighter your rudder, the less drag it will create.
Overall, designing your rudder is a personal process that requires careful consideration of shape, size, and material. Take the time to experiment and find what works best for you and your sailboat.
Enjoy the freedom of customizing your rudder for optimal performance on the open waters.

Building the Rudder Frame
Once you have designed your rudder, it’s time to start building the rudder frame. Building the frame for your sailboat’s rudder is an exciting step towards bringing your vision to life.
Here are three key steps to help you construct a sturdy and reliable rudder frame:
- Gather the materials : Start by gathering the necessary materials, such as marine-grade plywood, fiberglass cloth, epoxy resin, and stainless steel screws. Ensure that you choose high-quality materials that can withstand the harsh marine environment and provide long-lasting durability.
- Cutting the plywood : Using the measurements from your rudder design, carefully cut the marine-grade plywood into the required shape and size for your rudder frame. Make sure to be precise and take your time to achieve accurate cuts.
- Assembling the frame : Once the plywood pieces are cut, assemble them according to your design. Apply epoxy resin to the edges of the plywood and secure them together with stainless steel screws. Reinforce the joints with fiberglass cloth and additional layers of epoxy resin for added strength.
Attaching the Rudder Blade
To attach the rudder blade, you’ll need to follow these steps carefully.
Ensure that the rudder blade is aligned properly with the rudder frame. Take the blade and slide it into the rudder head, making sure it fits snugly.
Secure the blade in place by inserting the rudder pin through the holes in the rudder head and blade. This will prevent the blade from coming loose while you’re sailing. Once the rudder pin is in place, use a cotter pin or a hairpin clip to secure it. Make sure it goes through the hole in the rudder pin, preventing it from slipping out. This will ensure that the rudder blade stays attached during your sail.
After securing the rudder blade, give it a test by moving it from side to side. It should move smoothly without any resistance. If you notice any stiffness or difficulty in movement, check if the blade is properly aligned or if there are any obstructions that need to be addressed.
Testing and Fine-Tuning Your Rudder
Before you begin sailing, you should test and fine-tune your rudder to ensure optimal performance on the water. Here are three important steps to follow:
- Test in calm waters : Find a calm and protected area where you can safely test your rudder. This will allow you to focus solely on the rudder’s performance without any external factors affecting your observations. Start by sailing in a straight line and make note of any deviations or difficulties in steering. Pay attention to how the rudder responds to your inputs and make adjustments accordingly.
- Adjust the rudder angle : Fine-tuning the rudder angle can greatly impact the handling of your sailboat. Experiment with small adjustments and observe the changes in how the boat responds. A slight change in the angle can make a significant difference in maneuverability and overall performance. Keep testing and adjusting until you find the sweet spot that allows for smooth and effortless steering.
- Consider weather conditions : Remember that weather conditions can greatly affect the performance of your rudder. Test your rudder in different wind speeds and directions to understand how it responds in various scenarios. This will help you anticipate how your sailboat will handle in different weather conditions and make necessary adjustments to optimize your sailing experience.
What Are Sailboat Rudders Made Of
Ever wondered what keeps your sailboat steering straight, slicing through those waves like a hot knife through butter? Well, that’s all thanks to your rudder, the unsung hero of your seafaring adventures. A sailboat without a rudder is like a kite without a string – sure, it’ll still move, but good luck controlling where it goes!
But what are these crucial pieces of marine machinery made of, you ask? Good question! Sailboat rudders are crafted from a variety of materials, each with its own unique set of properties. So, let’s dive in and take a look at some of the most common materials used in rudder construction:
- Fiberglass: Highly durable and resistant to corrosion, fiberglass is a top choice for rudder construction. Often, it’s used in a sandwich-like structure with a foam or honeycomb core to increase stiffness and decrease weight.
- Wood: Traditional and still used in some applications, wood offers a natural aesthetic and is relatively easy to work with. Typically, it’s sealed with varnish or epoxy to make it more durable and water-resistant.
- Metal: Materials like stainless steel or bronze are sometimes used for rudders, especially on older or larger boats. Metal is extremely durable but can be prone to corrosion, especially in saltwater environments.
- Carbon Fiber: Used in high-performance and racing sailboats, carbon fiber is extremely strong and light. It’s also pretty pricey, so it’s not often seen in your everyday cruising sailboat.
- Plastic: Yes, you read that right. Some smaller or more affordable sailboats use plastic rudders. While they’re not as durable or efficient as other materials, they’re easy to replace and quite cost-effective.
So there you have it — a behind-the-scenes look at what’s keeping your sailboat on course.
Fiberglass is one of the most popular materials used to make sailboat rudders. It is lightweight , strong , and can be easily molded into a variety of shapes and sizes . It also resists corrosion and does not require much maintenance . The disadvantage of fiber glass is that it is not as strong as metal , so it may need to be reinforced with additional material such as carbon fiber or Kev lar .
Wood is another material commonly used to make sailboat rudders. It is strong and durable, and can be easily shaped into the desired design. Wood can be susceptible to rot and decay, so it needs to be properly sealed and maintained.
Metal is the most durable material used to make sailboat rudders. It is strong and can withstand the forces of the sea. Metal is also heavier than other materials, and can be difficult to shape into the desired design and the task of how to make a rudder for a sailboat might be more difficult.
What is the best wood for rudder
Oak is an ideal wood for r udd ers due to its strength and durability . Oak is also resistant to water and humidity and can hold up to harsh weather conditions . In addition , oak is fairly inexpensive compared to other hard woods , making it a cost - effective material for rud der construction . It is very good for sunfish boats and other light sailing vehicles.
What You Will Need
The most important materials that you will need to make a sail boat rud der are wood , metal , and fiber glass . To build a rudder for a boat, you will need a piece of wood (or other material like fiberglass or metal) cut to the desired size and shape of the rudder, a set of hinges to attach the rudder to the boat, and some tools such as a saw, drill, and screws. You will also need some filler material such as wood putty or epoxy to finish and seal the rudder.
Before you can make your own rudder, you need to gather a few materials. Here is a list of the supplies you will need:
• Wooden boards • Screws • Nuts and bolts • Drill • Sandpaper • Epoxy resin • Paint
In terms of tools, you will need a saw, a drill, a hammer, and some sandpaper. You will also need a few clamps to help hold the pieces together while you are working on them.
Designing the Rudder
The first step in making a rudder for your sailboat is to design it. This is an important step as it will determine the size and shape of the rudder you will make. You should consider the size of your boat and the type of rudder you want to make. You will also need to determine the location of the rudder in relation to the keel. This will help you calculate the size of the rudder and the type of materials you will need.

After you have designed the rudder, you can now start to cut the wood. You will need to measure and mark the wood according to the design of the rudder. Make sure to use a saw or other cutting tool that is suited for the job. You should also use a drill to make holes for the nuts and bolts.
Shaping the Rudder
Once the wood has been cut to size, you can start to shape the rudder. This is an important step as it will determine how the rudder looks and how it performs. To do this, you can use a combination of sandpaper and a chisel to sculpt the wood into the desired shape. Make sure to sand the wood down until it is smooth and even.
Sh aping the rud der for a boat involves cutting and sand ing the rud der blank to the desired shape . This involves using a j igsaw , a s ander , and a file to achieve the desired shape . The rud der should be sand ed smooth and free from any sharp edges . It is important to ensure the surface of the rud der is smooth and free of any irregularities . Once the desired shape is achieved , it can be coated with a protective layer of paint or var n ish for added protection .
Attaching the Parts
Once the rudder is shaped, you can now attach the parts together. You will need to use screws, nuts, and bolts to secure the pieces of wood together. Make sure to use epoxy resin to help bond the pieces together.
Painting the Rudder
The last step in making a rudder for your sailboat is to paint it. This will help protect the wood from water damage and UV rays. You should use a marine-grade paint that is designed for boats. Make sure to apply a few coats to ensure the best protection.
Installing the Rudder
Once the rudder is painted, you can now install it on your boat. This is a relatively simple process that involves attaching the rudder to the stern of the boat. You will need to use bolts and nuts to secure the rudder in place.
Testing the Rudder
The last step in making a rudder for your sailboat is to test it. This is an important step as it will help you determine how the rudder will perform on the water. You should take the boat out on the water and try to steer it in different directions. This will help you make sure the rudder is working properly.
How to make a rudder for a small boat

To make a rud der for a small boat , you will need to first create a rud der template that is proportional to the size of the boat . This template should be cut out from a sheet of wood or plastic and should include the rud der blade , t iller arm , and mounting holes . Once the template is cut out , you will need to trace it onto the material that you will use to make the rud der .
After drilling the necessary holes , you will need to assemble the rud der blade and t iller arm . The rud der blade will need to be securely attached to the boat ’s trans om with bolts and screws . The t iller arm should also be attached to the boat ’s trans om using bolts and screws . Y ou will need to add a rud der g ud geon and pint le to the rud der blade and trans om , respectively . This will allow the rud der to be moved up and down and side to side .
Can I make a rudder from any type of wood, or does it have to be marine-grade plywood?
It’s best to stick with marine-grade plywood when crafting your rudder. Why? It’s specially designed to resist water, so it’ll last longer and perform better in the harsh marine environment. While you could technically use other types of wood, they may not stand up to the task and could leave you rudderless in the middle of the lake.
Is it necessary to paint the rudder after applying epoxy resin?
While the epoxy resin does provide a water-resistant seal, adding a layer of marine paint gives your rudder an extra layer of protection against UV damage and wear-and-tear.
Can I still make my own rudder?
Yes you can. While building a rudder does require some hands-on work, with the right tools, materials, and a bit of patience, it’s totally doable as a DIY project. Remember, every expert was once a beginner. Don’t be afraid to give it a try! If it seems overwhelming, there are plenty of tutorials and guides out there to help you navigate the process. Worst case scenario, you can always call in a pro.
Related posts:

Leave a Reply Cancel reply
Your email address will not be published. Required fields are marked *
Save my name, email, and website in this browser for the next time I comment.
- Rudders & Steering
Custom kick-up rudders
Start here to spec your new rudder.

Leaves warehouse: 30 business days
- Copyright 1998-2024 SB Owners, LLC. All rights reserved.

- Policies | Contact Us
- Understanding boat rudders: Navigating the key component for smooth sailing
Navigating a boat requires a complex interplay of various components, and one of the most crucial elements is the rudder. In this comprehensive guide, we will delve into the world of boat rudders, exploring their functionality, importance, and role in steering a ship to smooth sailing.
What are boat rudders?
Boat rudders are an essential component of the vessel's steering system. They are hydrofoil-like structures located at the stern (rear) of the boat, underwater. The primary function of the rudder is to control the direction of the boat by redirecting the flow of water as the boat moves forward.
The role of boat rudders in steering
Boat rudders play a vital role in steering a ship. When the helmsman turns the wheel or tiller, the rudder changes its angle, redirecting the water flow on one side of the boat, creating more resistance on that side, and causing the boat to turn in the opposite direction.
Types of boat rudders
Spade rudders: Spade rudders are simple and streamlined rudders attached directly to the hull. They are commonly found in modern sailboats and provide excellent maneuverability and responsiveness.
Skeg rudders: Skeg rudders are partially submerged and supported by a skeg, a vertical extension of the hull. These rudders offer increased protection and are often used in larger motorboats and trawlers.
Balanced rudders: Balanced rudders have a portion of the rudder forward of the pivot point, which balances the force applied by the helmsman. This design reduces the effort required to steer the boat.
Barn door rudders: Barn door rudders are large, flat, and wide rudders resembling barn doors. They are commonly seen in traditional fishing vessels and provide excellent control in rough seas.
Spade hung rudders: Spade hung rudders are free-floating rudders attached to the boat only at the top, allowing them to swing freely. They are commonly used in high-performance sailing yachts.
Read our top notch articles on topics such as sailing, sailing tips and destinations in our Magazine .
Components and mechanics of boat rudders
A typical boat rudder consists of several key components:
Rudder blade: The rudder blade is the flat, vertical surface responsible for redirecting the water flow. It is the most critical part of the rudder and comes in various shapes and sizes.
Rudder stock: The rudder stock is a sturdy vertical shaft that connects the rudder blade to the steering mechanism. It provides the necessary support and stability for the rudder.
Tiller or wheel: The tiller or wheel is the steering control operated by the helmsman. When turned, it causes the rudder to change its angle and steer the boat.
Rudder bearings: Rudder bearings are the mechanisms that allow the rudder to pivot smoothly on the rudder stock. Properly lubricated and maintained bearings ensure easy steering.
Steering linkage: The steering linkage consists of rods or cables connecting the tiller or wheel to the rudder stock. It transmits the helmsman's steering inputs to the rudder.
Steering a ship: The interaction between rudder and helm
The process of steering a ship involves a coordinated effort between the rudder and the helm. When the helmsman turns the wheel or tiller, the rudder angle changes, causing a difference in water flow on either side of the boat. This creates a force imbalance, turning the boat in the desired direction.
The effectiveness of the steering system depends on various factors, such as the rudder's size, shape, and angle, the vessel's speed, and the water conditions. Proper coordination between the helmsman and the rudder is essential for precise maneuvering.
Maintaining and repairing boat rudders
Regular maintenance is crucial to ensure the optimal performance and longevity of boat rudders. Here are some maintenance tips:
Inspect for damage: Regularly inspect the rudder blade, stock, and bearings for any signs of wear, damage, or corrosion.
Lubrication: Ensure the rudder bearings are well-lubricated to prevent friction and allow smooth movement.
Antifouling: Apply antifouling paint to the rudder to prevent marine growth, which can negatively impact performance.
Check steering linkage: Inspect and adjust the steering linkage regularly to maintain precise control.
Address issues promptly: If any problems or abnormalities are detected, address them promptly to prevent further damage.
Rudder design innovations
Advancements in technology have led to innovative rudder designs aimed at improving performance and efficiency. Some notable innovations include:
Hydrodynamic profiles: Rudder blades are now designed with advanced hydrodynamic profiles to reduce drag and enhance maneuverability.
Rudder fins: Some rudders are equipped with additional fins or foils to improve stability and minimize yawing motion.
Retractable rudders: Certain sailboats feature retractable rudders, which can be raised when sailing in shallow waters, reducing the risk of grounding.
Steer-by-wire systems: Modern vessels are adopting steer-by-wire systems, replacing traditional mechanical linkages with electronic controls for smoother steering.
The influence of rudder size and shape on turning radius
The size and shape of the rudder directly impact the vessel's turning radius. Larger rudders with greater surface area provide more steering force and can turn the boat more quickly. However, larger rudders also create more drag, which can affect overall speed and fuel efficiency. The optimal rudder size depends on the boat's size, weight, and intended use.
Rudder efficiency and hydrodynamics
The hydrodynamics of the rudder significantly affect its efficiency. Smooth and streamlined rudder designs minimize drag and turbulence, resulting in improved performance and fuel economy. Advanced hydrodynamic analysis and simulation tools help optimize rudder shapes for various vessels and operating conditions.
Common rudder issues and troubleshooting
Like any mechanical component, boat rudders can experience issues over time. Some common problems and troubleshooting tips include:
Stiff steering: If the steering feels stiff or unresponsive, check for obstructions in the rudder bearings or linkage.
Vibrations: Vibrations during steering may indicate misaligned rudder blades or bent rudder stocks.
Leaking bearings: Leaking rudder bearings require immediate attention to prevent water ingress and corrosion.
Excessive play: Excessive play in the rudder could be due to worn steering linkage or loose connections.
Reduced maneuverability: Reduced maneuverability may result from a fouled or damaged rudder blade.
Rudder steering systems
Various steering systems are employed in conjunction with rudders, each offering unique advantages:
Tiller steering: Common in smaller boats, tiller steering directly connects the tiller to the rudder stock, providing direct and responsive control.
Wheel steering: Larger boats often use wheel steering, which utilizes a mechanical or hydraulic system to transfer steering inputs to the rudder.
Hydraulic steering: Hydraulic steering systems offer smooth and effortless steering, ideal for larger vessels.
Electric steering: Electric steering systems, also known as electro-hydraulic steering or electronic power steering (EPS), utilize electric motors to assist in steering the boat. These systems work in conjunction with hydraulic components, making steering more effortless and responsive for the boat operator.
So what are you waiting for? Take a look at our range of charter boats and head to some of our favourite sailing destinations .
FAQs about rudders
High-Performance Foils
Shaping better centerboards and rudders
From Issue July 2020
W hile it’s generally accepted that the right sails and sail trim will determine how close you can sail to the apparent wind, a sailboat’s progress to windward also depends on the lift and drag generated by the centerboard and rudder. How much difference does proper foil shape make over a simple rounded leading edge and tapered trailing edge, anyway? Foils operating in fluids, whether air or water, are a well-studied topic. C.A. Marchaj, in his book, Sailing Theory and Practice , discusses the theory and gives the results of actual tests of differences in foil planform (side view), cross-section shape, size, and aspect ratio (AR – length to width). Lacking other constraints, an ideal centerboard, daggerboard, or rudder blade should have a reasonably high AR (greater than 2) planform with a streamlined cross-section that has a parabolic leading edge and a thickness of somewhere near 10 percent of the chord width (the distance from leading edge to trailing edge). A thickness of 8 percent produces less drag but stalls sooner; 12 percent has a higher stall angle but produces more drag.
Exactly where the point of maximum thickness should be located is a matter of some debate. Marchaj suggests it should be at 50 percent of the chord width, halfway between the leading edge and trailing edge, but provides no data to back that up. Other sources suggest that the NACA (National Advisory Committee on Aeronautics) symmetric foil sections, originally developed during aircraft research, are actually a good fit for boat foils operating at low speeds in water. A NACA 0010 foil, for example, has a maximum thickness of 10 percent of the width of the foil, located at 30 percent from the leading edge.
Of course, there are many practical reasons why not all keels, centerboards, and rudders have high AR planforms, but the cross section for a foil of any planform should be streamlined. My personal experience of doing it wrong on one boat, and getting it right on another boat, has convinced me that the NACA sections and guidelines above provide good performance.
HORNPIPE, my first sail-and-oar boat, was an 18’ Kurylko Alaska with a standing-lug ketch rig, and sailed well enough to windward in flat water, but lost 10 to 15 degrees of pointing ability as soon as the water got choppy. I knew it wasn’t poor sail trim. Eventually I got looking at the daggerboard and analyzed it. It was only about 2.5 percent of the sail area and its thickness was only about 6 percent of the chord width, neither big enough or thick enough in my view, and in rough water it lost laminar flow and lift. When I designed my 18′ lug-yawl cruiser, FIRE-DRAKE, I gave it a thicker centerboard with a greater fraction of the sail area, about 4 percent. I also gave it a straight quarter chord line (think of the shape of the wing of a Spitfire aircraft) and a moderately high aspect ratio of about 3:1 for the planform area. To get the daggerboard foil shaped accurately and quickly I opted to have it cut on a computer numerical control (CNC) machine. All that was left for me to do was sand, seal and paint, and make an epoxy-lined hole for the pivot pin.
The results have been what I had hoped for. FIRE-DRAKE sails quite well to windward and maintains its performance in rough water. I sailed in the company of a similar boat—with the same length and beam, the same weight, and the same sail plan—along the south half of the Inside Passage, and that boat’s centerboard was shaped by eye. When sailing to windward, FIRE-DRAKE would consistently point higher and walk away in speed. My centerboard even let me continue sailing to windward when my partner gave up and took to the oars.
Although I had the daggerboard shaped with a CNC router, it is possible to shape a high aspect ratio, fully streamlined foil in the home shop. I’ll walk you through my second project, a kick-up rudder blade that I made at home to replace the original one I built for FIRE-DRAKE. I settled on a planform that is one-quarter of an ellipse with an elliptical leading edge and a straight trailing edge. (The shape would move the center of lateral resistance of the boat aft a few inches, and is intended to lighten the weather helm I’d experienced with the original rubber blade.) I drew the new blade with an aspect ratio of 2.5:1, with a length of 30″ (762 mm) and a maximum chord width of 12″ (305 mm), which would increase the lift and reduce the tip vortex drag.
To draw the planform shape of the quarter ellipse you can use an online graphing tool such as Desmos for a full ellipse. If you center the ellipse at zero, you can drag the two axes out until you get the aspect ratio you want. Since the graph has a grid in the background, you can then print out a screen capture of a quarter of the resulting ellipse and scale up the printed image to the actual dimensions required. If you are comfortable with computers, you can download and run Freeship (available for Windows only) which has a “keel and rudder wizard” that accurately generates several different planforms.

The new rudder blade for FIRE-DRAKE has a quarter-ellipse planform. The plywood’s glue lines show the contours that help with shaping the foil.
Obtaining the cross-section profile of a chord of a given width is best left to a computer. For any of the NACA foils, like the 0010 foil I mentioned above, Competition Composites Inc . (CCI) has a very simple and handy calculator . You need enter only the chord width and the maximum thickness and it will generate a table of X-Y coordinates that you can copy and print out. They’ll be your offsets for drawing a pattern for the foil cross-section. If you intend to sheathe your foil with ’glass and epoxy, for example, you can also enter the skin thickness and it will calculate the coordinates for the plywood core.
Now, here’s the tricky bit. If you have a rectangular foil planform, you only have one chord width and therefore one section profile for the entire length of the foil. However, if you have any other planform (e.g., half-ellipse, quarter-ellipse, trapezoidal, straight-chord-quarter-line, etc.), the thickness, which will be one-tenth of the chord width, changes along the length of the foil because the chord width changes.
I used the CCI calculator to generate profile coordinates for three different points along the length of the rudder blade: at the root, at about two-thirds of the way along and at about 90 percent of the way to the end. I chose those points because the chord width for my quarter ellipse planform doesn’t change much for the first half of its length, but it changes more quickly toward the tip. The idea is to shape the foil to these profiles at these points and then taper the foil evenly between them. You can lay out your foil plan directly on to the ply or you can use something thin, like doorskin, to make and fine-tune a template, which is what I did.
I made a blank for my rudder by gluing layers of marine ply with epoxy to the required 1″ thickness. I have found that the plywood, in spite of its cross-grain plies, has sufficient strength for the size of small-boat foils that I have built (though the cross-grain would weaken a long thin foil). Plywood does not warp and has the added advantage over solid wood in that the plies create a kind of contour map that give you graphic visual feedback as to the evenness of your surface once you start shaping the foil. You can make a foil with solid wood or even foam plus a ’glass-and-epoxy skin, but without the plywood laminates as guides, you would have to make more section profile templates to ensure a smooth and accurate shape.
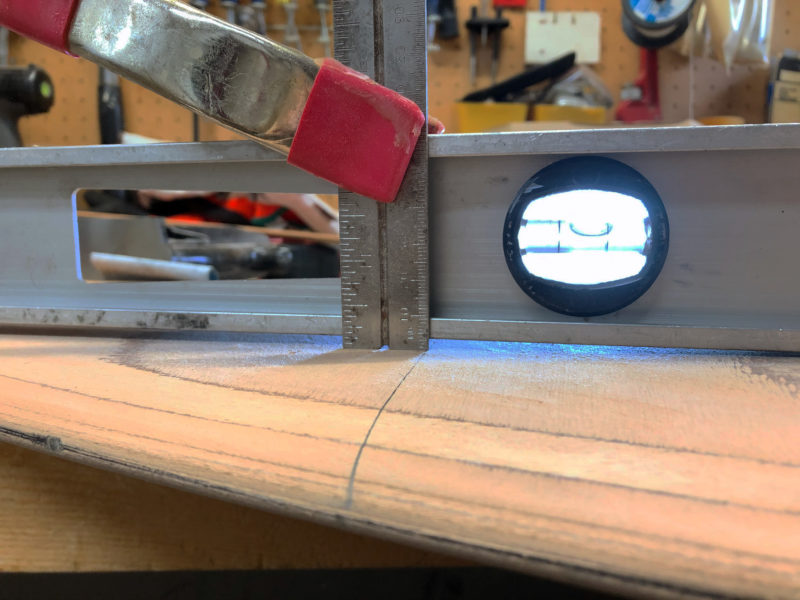
Clamping a 4′ level to the flat part of the rudder blade provides a reference line to gauge how much wood to remove to achieve the foil’s taper.
The next step is to taper the thickness of the laminated foil blank along its full length. Knowing the required thickness at your chosen points, you can draw a pattern for the curve of the taper and half the thickness of the blade stock and measure how much wood you have to remove at each point. I clamped my 4′ aluminum I-beam level to the flat part of the rudder blade above the shaped part, and used a ruler to measure the depth I had to cut to. To remove the wood for this part of the project, I used my #4 Stanley plane. While I have a power hand planer, I didn’t trust myself with it to not take too much off too quickly.
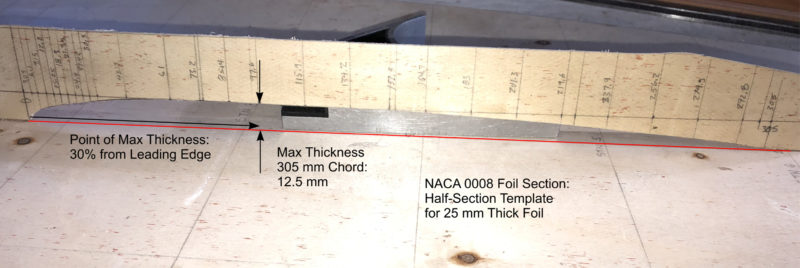
The female half-section template for a given chord for a foil gets its shape from the X-Y coordinates generated by a foil calculator.
I made three female half-section profile templates, one for each of the three points noted above, by plotting out the generated X-Y coordinates on pieces of doorskin and carefully cutting them out. One thing to note is that the CCI calculator generates a profile that has a trailing edge of zero thickness. Obviously, this is not practical to build in wood, and a knife edge is not that critical anyway. I adjusted the trailing edges so that the finished edge would end up about 1/3″ (4mm) thick.
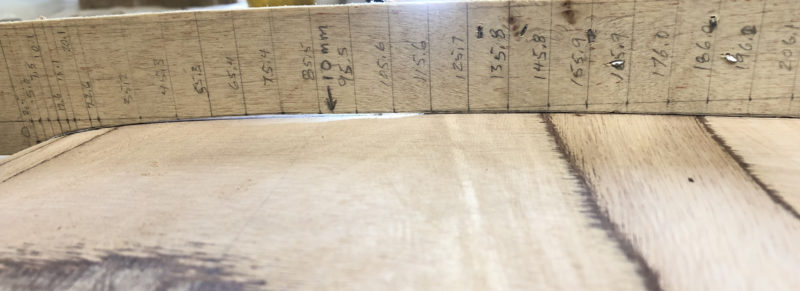
Applying the template to the foil in the works shows the high and low spots as the shaping continues.
Next, I used the profile templates to shape the foil at my three chosen points. I shaped the plywood with a Shinto rasp , regular rasps, and coarse sandpaper. It’s a process of taking some wood off, placing the template, and repeating until you get the section of wood shaped to the templates. Once that is done, I could go to work taking down the wood between the sections, using the ply layers as a guide. I used my block plane, Shinto rasp, and sandpaper for this task. I eyeballed a smooth transition around the tip from the leading edge to the trailing edge.
I sealed the surface of the shaped foil with a couple of coats of epoxy to provide a smooth, hard surface to accept a finish coat of marine epoxy enamel.
Alex Zimmerman is a semi-retired mechanical technologist and former executive. His first boat was an abandoned Chestnut canoe that he fixed up as a teenager and paddled on the waterways of eastern Manitoba and northwestern Ontario. He started his professional career as a maritime engineer in the Canadian Navy, and that triggered his interest in sailing. He didn’t get back into boatbuilding until he moved back to Vancouver Island in the ’90s, where he built a number of sea kayaks that he used to explore the coast. He built his first sail-and-oar boat in the early 2000s and completed his most recent one in 2016. He says he can stop building boats anytime. He is the author of the recently published book, Becoming Coastal .
For further reading on the pros and cons of the variables in foil design, Competition Composites (CCI) has a good discussion . For those of you who want to go into the math, Paul Zander has a good presentation from nearly 20 years ago, and also, for those inclined that way, an updated discussion with a lot more math.
You can share your tips and tricks of the trade with other Small Boats Magazine readers by sending us an email .
Share this article
Join The Conversation
We welcome your comments about this article. If you’d like to include a photo or a video with your comment, please email the file or link.
Comments (17)
Is there someone who can craft a good rudder for my boat? I have not the time or the skills to do such. Have a 15′ Delaware Ducker. Love the boat but the rudder is (I think) a disaster. Hardly brings the boat around and doesn’t help much to windward. Flat plywood barn door out of 3/8″ ply with no shape other than outline that barely gets 2″ – 3″ into the water. If it could be a kick-up so much the better. I do a lot of shallow, sand-bottom sailing. Thank you for any help.
I know about the ducker and a foil shaped rudder will help a lot. Some of the modern ones built in glass and cold molded have been fitted with modern dinghy rudders and foil shaped daggerboards. They tack more like a dinghy than like my traditional one where I have to sail it around like a larger boat.
Most any small boat builder in your area should be able to build you a rudder. Lines for a kick up would be a nuisance. I don’t bother with them on a larger boat, just use a pivot bolt with tension. Means I have to shove it down.
You might want to look at the system that Mike Storer has developed for his goat island skiff, a straight foil, easier to shape.
Alex has done a great idea showing us how to work these out using hand tools. We used to do it in my dinghy sailing days by drawing a 30 % line. Make a bunch of parabola templates and hack away. For really long narrow boards before the days of carbon we used to use 5/4 stair tread fir.
Interesting article. When I built my Oughtred JII Yawl eighteen years ago, I did some research on appropriate foil profiles for the centerboard and rudder. It’s a long time ago now, so I don’t remember the exact profiles I chose, but I do believe I picked NACA 0010 for the CB. I picked another profile for the rudder, one that had a steeper stall angle, on the theory that with typical weather helm the rudder meets the flow at a steeper angle than the CB. I really don’t know how valid my theory is. I have no experimental evidence to back it up. Any thoughts?
Andrew, that seems to make sense although I haven’t seen any research to back that up.
Hi Andrew, I remember seeing your beautiful JII; but did not ask about the foils! I wonder how NACA 0010 compares with my approximate foil shape, inspired mainly by guesswork. Are these profiles available? By the way, I do not like plywood foils; CBs break. Friends near here lost their fine old rebuilt Wayfarer; were in danger themselves, when they capsized and the plywood board broke. Too near a rugged lee shore. A class racing boat, by a particular builder – all their plywood centerboards broke.
Iain, I don’t know what your standard foil shape looks like, but a NACA 0010 has a maximum thickness of 10% of the chord distance, occurring at 30% of the distance back from the leading edge. Marchaj believes that the maximum thickness should occur at about 50% of the distance back from the leading edge. Other designers agree, I think. If I understand him correctly, John Welsford uses a foil section that is closer to 50% distance, but I am not sure what thickness of foils he favors or what the exact foil shape is. You can see the shape, and all the requisite numbers for extracting an X-Y plot to reproduce them, for a whole bunch of different foil types, on the Airfoil Tools site. As for plywood foils, I understand your concern. Half the plies are oriented in the wrong direction and don’t provide much in the way of resisting sideways bending moments. However, it has been my experience that this is not a major concern if the foil is thick enough and not too long. The centerboard foil on my latest boat, for example, is ply, but is nearly 2″ (50 mm) at maximum thickness. It’s got over 1,000 nautical miles in four years under the keel by now, including a couple of practice capsizes, with no issues so far.
I don’t know what a standard Wayfarer foil looks like. Is it long and thin?
Very interesting article. I am just in the process of building a Lillistone Flint and have no experience building or knowledge of foil design and performance. I calculated the various ratios and percentages. The AR as per the plans is 2.43, so that looks good. The thickness however is only 4% of chord width. Area of the dagger board is 3.5% of sail area, so probably OK there too. Lillistone does state in the plans that the board can be made thicker if preferred so I think I may do that as 4% is a pretty big departure from the 8 – 10% of the chord width suggested. Any comments? The Flint was featured in this mag a few issues ago.
David, both my experience and authorities who design for a living and/or who have tested these things would suggest that 4% is rather too thin for good lift. I suspect that you might find it works reasonably well in dead flat water but you would lose lift and pointing ability as the water gets more turbulent. If it was me, and I hadn’t yet built the foil and its case, I’d go for one that was at least 10% and maybe even 12%. The additional thickness would also be more robust should you need to stand on it to flip the boat over if you capsize.
Thanks so much for taking the time to reply, Alex. I have decided to use some salvaged King William (King Billy here in Tasmania) pine that was salvaged. I thicknessed it to clean it up a bit and reckon I will eventually get 20 – 22 mm out of it. I plan to laminate 10 pieces into a 304mm board. Hopefully I will get a good result.
Hi David, It highly depends where you sail and how you sail. I have one older (1975) 420er dinghy for fun and local competitions with foiled board and rudder. But then I have 21″ German Jollenkreuzer veteran from 1952 which has both from 1/4″ steel plate, and it works fine. I sail that for pleasure on lakes. It would definitely be more performant (and point better) with both foiled, but I’m surprised how well it performs in its nearly ’70s (comparing to modern GRP boats with foiled boards).
For your job, I would probably stick to the plans. The rudder in this case is more important and can be somehow easily modified (foil). The centerboard I would keep the same, not only to conform the centerboard box (which would need to be sized), but also the overall design. Finally the most important here is what is your building and designing experience, because the worst thing is when something is incorrectly designed and then improperly built (the simple rounded plywood then may work better).
Anyway, I’m also thankful for this article. It reminds me my childhood when I built airplane models and used exactly the same methods used here to create the wings (in much smaller scale).
Thanks for your thoughts. I am going for a thicker foil and risk it (see reply to Alex above). I am well aware of risks in departing from designer’s work but I don’t think I will go far wrong.
Do SUP fins follow the rules for centerboards?
I’m not a SUP guy myself, but my understanding is that the fins are there to assist in tracking. That is, they don’t need to provide lift the way a sailboat keel/CB going to windward does. The thing you would be aiming for in the case of SUP fins is having sufficient lateral area to provide that tracking ability, and then having it streamlined to reduce drag. I would imagine that thinner would be better, although you’d still want a streamlined foil section, as that would produce less drag than a flat plate. The leading edge of a flat plate tends to separate the flow from the sides of the plate, even if that edge is rounded, and separation produces turbulence and drag.
For twenty years, beginning in the early 1970’s, I raced a Lido 14. The boat was pre-owned, and had its original solid wood foils which were in pretty bad shape, and I decided to build new foils. After reading Marchaj’s book, and the Lido 14 Class Rules, I designed a new centerboard and rudder. The NACA-0009 section most closely fit the required class measurements, and I used that profile. I did alter the leading edge of the rudder, making it more rounded, to allow for the fact that the rudder angle of attack is variable, and is more likely to stall.
In fleet racing, and sailing close hauled, the results were astounding, with the boat seeming to sail slightly sideways, relative to other boats. I also began to pay particular attention to the condition of the foil surfaces, as Marchaj writes that the drag on underwater foils is many times greater than the drag on the hull surface. One time we were sailing in an area of submerged trees, and my centerboard lightly brushed a tree branch. I then noticed that the centerboard ‘hummed’ on port tack. Later, when I examined to board, there was a barely visible scratch.
I very much enjoyed the article on high-performance foils in the July 2020 issue of the Small Boat Magazine .
For twenty years, beginning in the early 1970’s, I raced a Lido 14. The boat was pre-owned, and had its original solid wood foils which were in pretty bad shape, and I decided to build new foils. After reading Marchaj’s book, and the Lido 14 Class Rules, I designed a new centerboard, and rudder. The NACA-0009 section most closely fit the required class measurements, and I used that profile. I did alter the leading edge of the rudder, making it more rounded, to allow for the fact that the rudder angle of attack is variable, and is more likely to stall.
In fleet racing, and sailing close hauled, the results were astounding, with the boat seeming to sail slightly sideways to windward, relative to other boats. The boat didn’t seem to point higher, when close hauled, it just didn’t make as much lee way. More benefit on the port tack, a little less on starboard. I did set the centerboard jibe angle to the maximum allowed by class rules. In all honesty, I was probably the only one in the fleet that had read Marchaj. It still took me five years to win the fleet championship. I also began to pay particular attention to the condition of the foil surfaces, as Marchaj writes that the drag on underwater foils is many times greater than the drag on the hull surface. One time we were sailing in an area of submerged trees, and my centerboard lightly brushed a tree branch. I then noticed that the centerboard ‘hummed’ on port tack. Later, when I examined to board, there was a barely visible scratch.
I am a new subscriber to Small Boat Magazine , and look forward to each issue. Keep up the good work.
Was just about to make the centerboard for my Oughted Caledonia Yawl. So I was happy to see this article. But was then disappointed when I calculated my centerboard area to be only 1.9 percent of my total sail area. I briefly thought gee I will make it a little bigger…but then realized the centerboard trunk is already complete and limits that. I don’t plan on racing, so it is what it is.
Mark, I’d be really interested in your results once you launch the boat and do some trials. Theory is one thing, but nothing beats data from real-world results.
Leave a Reply Cancel reply
Your email address will not be published. Required fields are marked *
Stay On Course
More From This Issue
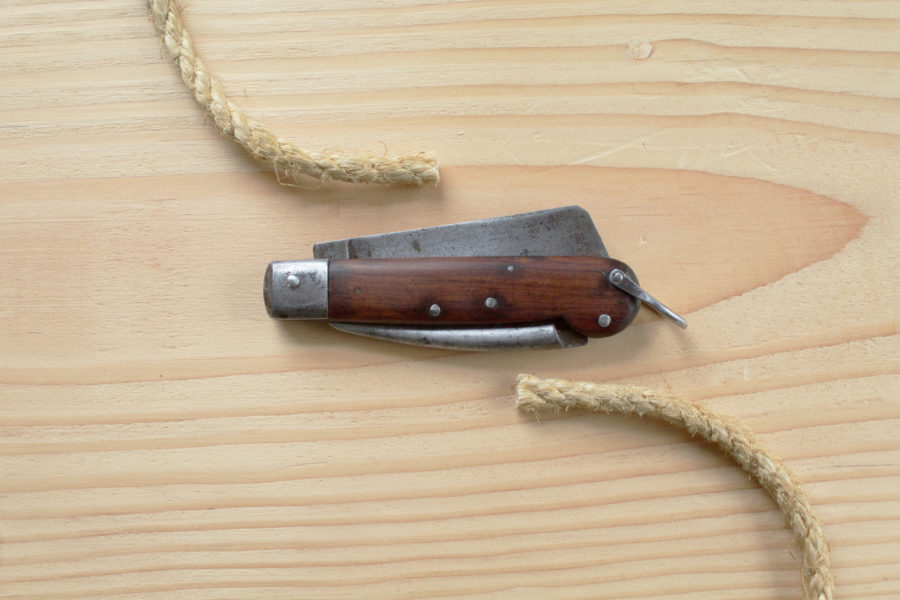
From The Editor
Lost and Found
I have a shelf in the corner of my shop where I pile my collection of tape measures. They frequently fall off the shelf, and this past week I got…
Boat Profile
Crawford’s Gunning Dory
Roger builds his boats one at a time. The Gunning Dory is hand-laid fiberglass starting with rolled-on gelcoat. The layup for the bottom includes biaxial fiberglass cloth, a 1/2″ foam…
Spira’s Hudson Skiff
I have a full-sized pickup truck, so trailering the lightweight skiff is not at all difficult. Launching at the ramp is similarly not a problem; Hudson floated right off the…
A Solar Solo
SOL CANADA had been performing fairly well, but about once an hour the motor would just stop. I could get it going again by putting the throttle neutral for a…
Antennas for VHF
VHF radios, like cell phones, are limited to line of sight. The Coast Guard sets its antennas up as high as possible, often in spots remote from their base, to…
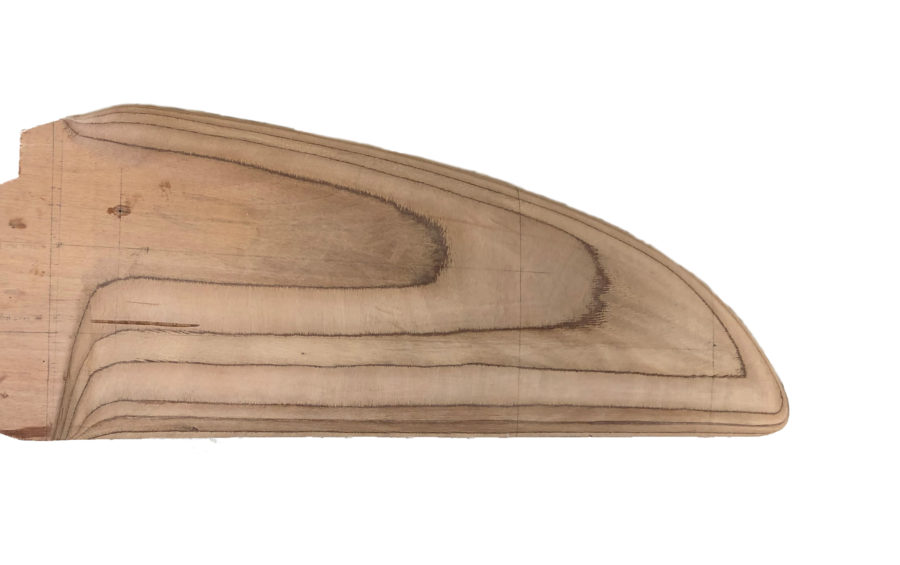
I made a blank for my rudder by gluing layers of marine ply with epoxy to the required 1″ thickness. I have found that the plywood, in spite of its…

Product Reviews
Impact Drivers
While the impact driver has lots of power, more than enough to shear screws, the variable-speed trigger provides the operator with very good control for the depth of the screw.…
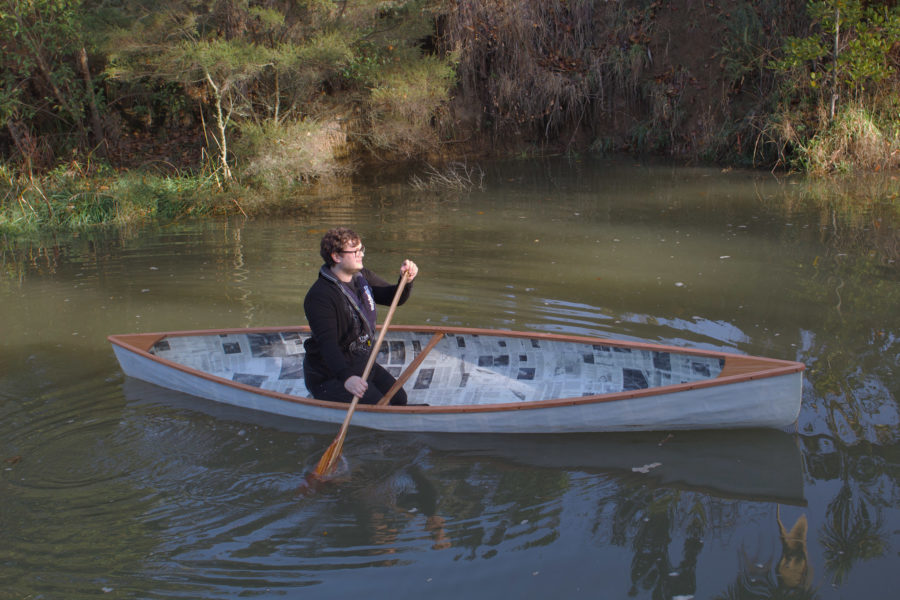
Reader Built Boats
Built by the Book
The lockdown in New Zealand began on March 23 and David stayed home to do his part in slowing the spread of COVID-19. He focused on his canoe projects and…
More Technique
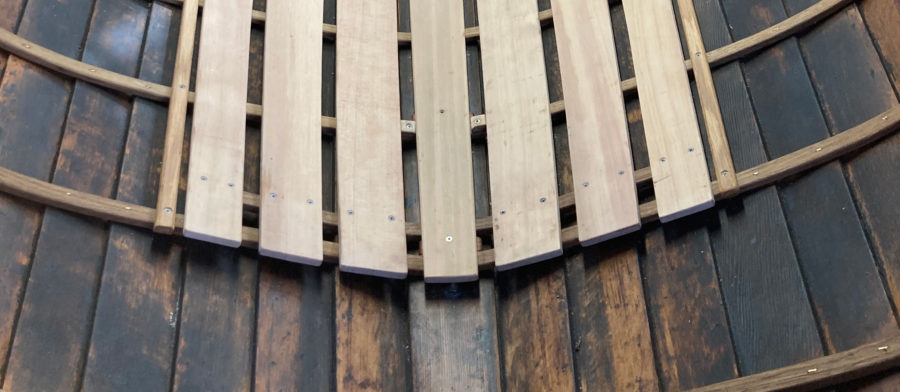
Removable Floorboards
While it may be common practice with plank-on-frame construction of this sort to fasten floorboards to the ribs, the floorboards are then a nuisance to remove, and repeated removal of…
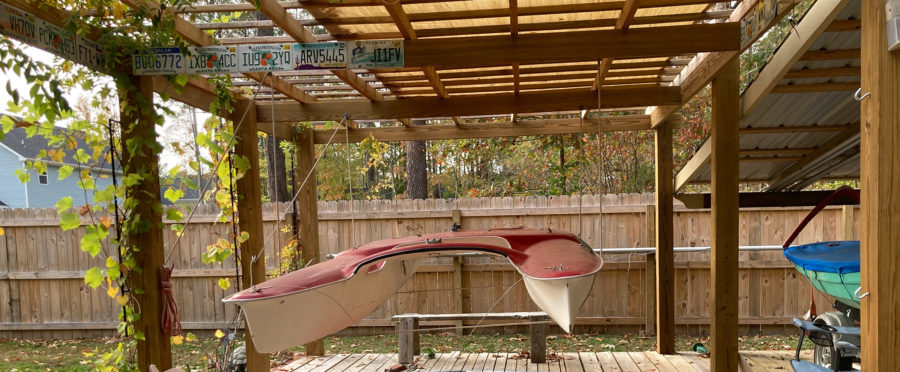
A Simple Sling Lift
To date we’ve used the lift to hoist boats up to 200 lbs, but it could lift heavier boats. We attached the hardware with marine-grade screws or bolts, because our…
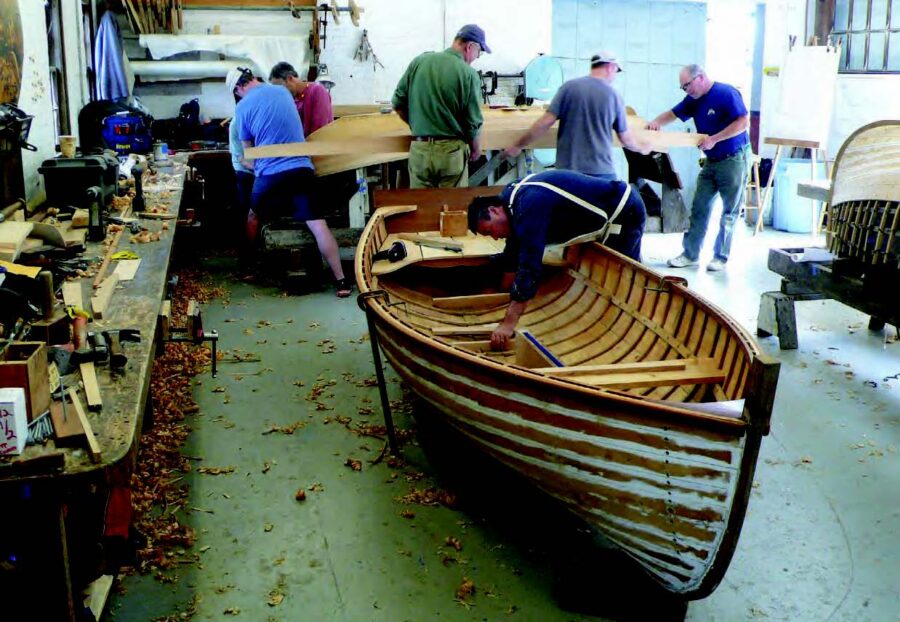
Six Ways to Build a Wooden Boat
There are about six common methods of building wooden boats today, with variations on each. No particular method can be proclaimed the best; each comes with its own suite of…

Planing Edges Square
When you give a plane a sharp edge and set it to make a fine cut, it’s easy to come neatly up to the pencil line you’re cutting to. It’s…
Subscribe Today!
Become a subscriber today and you’ll recieve a new issue every month plus unlimited access to our full archive of backlogged issues.
Already a subscriber? Sign In
Subscribe For Full Access
Flipbooks are available to paid subscribers only. Subscribe now or log in for access.
The Types of Sailboat Rudders
- Snowboarding
- Scuba Diving & Snorkeling
Full Keel Rudder
On a sailboat , as the rudder is moved to one side by means of the tiller or steering wheel, the force of the water striking one edge of the rudder turns the stern in the other direction to turn the boat. Different types of rudders have different advantages and disadvantages. The type of rudder is often related to the boat’s type of keel.
Rudder on Full-Keel Sailboat
As shown in this photo, the rudder of a full-keel boat is usually hinged to the aft edge of the keel, making a continuous surface. The engine’s propeller is usually positioned in an aperture between the keel and rudder.
Advantages of Full Keel Rudder
The primary benefit of this rudder configuration is the strength and protection provided to the rudder. It is hinged at top and bottom, well distributing the forces on the rudder. Rope (such as lobster pot warps) or debris in the water cannot snag on the rudder.
Disadvantage of Full Keel Rudder
Because the sideways force of the water on the rudder is entirely behind the rudder’s pivoting point at its leading edge, putting all the force on one side of the rudder, it takes more energy to move the rudder. This is one reason why larger boats seldom have tillers—because it can require much force to “push” the rudder out against the water streaming past the keel.
Spade Rudder
Most fin keel boats have a spade rudder, which extends straight down from the aft hull section. The rudder post comes down through the hull into the rudder itself, allowing the entire rudder to rotate to either side, pivoting around the post.
Advantages of Spade Rudder
The spade rudder is self-standing and does not require a full keel or skeg for its mounting. The rudder post inside the rudder can be moved aft from the leading edge (see next page on Balanced Rudder) so that the force of the water is not all on one side when the rudder is turned. This requires less energy to steer than with a keel- or skeg-mounted rudder.
Disadvantage of Spade Rudder
A spade rudder is more vulnerable to debris or objects in the water, which may strike the rudder and exert a force on the rudder post, the only structure supporting the whole rudder. Even the force of water when the boat “falls” off a wave can exert damaging stress on a spade rudder. If the rudder post is bent, the rudder may jam and become useless.
Balanced Spade Rudder
Note the clear air space at the top of the leading edge of this balanced spade rudder. The rudder post is several inches back from the front of the rudder. When the rudder is turned, the leading edge rotates to one side of the boat while the trailing edge rotates to the other side. While the turning action on the boat is the same, the forces on the helm are more nearly balanced, making it very easy to steer.
Skeg-Mounted Rudder
Some fin keel sailboats have a skeg-mounted rudder like the one shown. The skeg offers the same advantages as a keel mounted rudder: the rudder is protected from objects in the water and has more structural strength than a rudder mounted only on the rudder post.
It also has the same disadvantage: because it is not “balanced” as a spade rudder may be, with water forces distributed on both sides, it requires more force to turn the rudder.
Outboard Rudder
An outboard rudder is mounted outside the hull on the boat’s stern, such as shown in this photo, rather than below the hull using a rudder post or hinges to the keel or skeg. Most outboard rudders are turned with a tiller rather than a steering wheel since there is no rudder post to which to gear a wheel.
Advantages of Outboard Rudder
An outboard rudder does not require a hole through the hull for a rudder post and thus is less likely to cause trouble if damaged. The rudder can often be removed or serviced while the boat is still in the water. Hinges at the top and bottom of the rudder section may provide more strength than a single rudder post.
Disadvantages of Outboard Rudder
Like a spade rudder, an outboard rudder is vulnerable to being struck by or caught in objects or rope in the water. Unlike a spade rudder it cannot be balanced in the water flow, so the force of water is always on one side of the pivot point, requiring more energy for turning the rudder.
A rudder is often related to keel shape .
- Choosing an Inboard or Outboard Engine
- Choosing a Centerboard or Fixed Keel Sailboat
- How to Tow a Dinghy Behind a Sailboat
- The Sunfish: A Perfect Lake or Urban Sailboat
- Learn How to Sail a Small Sailboat – 1. The Parts of the Boat
- Using AIS on Your Sailboat
- How to Gybe a Sailboat
- How to Raise the Mainsail
- Best Sailing and Boating Apps
- How to Boat
- When to Adjust Sailboat Sails for Stronger Winds
- How to Tack a Sailboat
- How to Use a Sailboat's Outhaul
- How to Anchor a Sailboat
- How to Whip a Line End Using the Oldest and Best Method
- Control Your Tiller Without a Tiller-Tamer
What is a Sailboat Rudder?

Last Updated by
Daniel Wade
June 15, 2022
A sailboat rudder steers the boat. A rudder is a hinged fin or blade mounted on the stern of the vessel that turns side to side, and it's controlled by a tiller or a helm.
A rudder is one of the primary controls of a sailboat. When the boat moves forward through the water, the rudder causes friction on one side and changes the direction of the boat. Rudders are controlled by moving a tiller side to side or by a helm and a complex linkage system. Rudders are delicate and sometimes flush with and protected by the keel.
Table of contents
Identifying the Rudder
Rudders are connected to the sailboat using a hinge or a shaft. The rudder is always located in the water behind the boat, but some rudders have part of their structure exposed above the waterline. Rudders that aren't visible above the waterline are usually underneath the stern and controlled by a vertical shaft that descends through the bottom of the boat.
Rudder Design
Rudder design varies widely between boats. Some vessels have large, ornate rudders that are exposed above the waterline. Large rudders are common on catboats, canoe yawls, and other traditional designs.
Many modern boats use small, blade-like rudders that are hidden from view. The size of a rudder doesn't necessarily correlate with its effectiveness, but an improperly sized rudder can cause significant issues.
How Does a Sailboat Rudder Work?
Sailboat rudders are simple devices. Rudders are essentially deflectors, as they deflect water to port or starboard as the boat moves along. When the rudder is amidships or in the middle and aligned with the keel, the boat goes straight. Rudders also help keep the boat on a straight track as they increase the area of water moving down the length of the boat.
Rudders only work when the boat is moving. If there's no moving water to deflect, the rudder can do little to direct the vessel. Rudders also don't work when the boat is blown sideways. Maneuvering is only possible when the boat is moving forward.
Can a Sailboat Rudder Steer in Reverse?
But what about moving in reverse? Rudders can be used to steer the boat in reverse, but they're significantly less effective when pushed backward through the water. The distance required to make a turn in reverse is usually much higher than when moving forward, and steering input is less precise. In some cases, sailboat rudders can break off when moving too quickly in reverse.
Sailboat Steering Characteristics
Sailboats steer much differently than cars, and there aren't any brakes to slow down with. Sailboats tend to steer from the middle; picture a fan blade spinning slowly on a motor, and you'll get the picture. As a result, steering too aggressively in tight quarters can cause your bow or stern to hit something that's beside you.
Speed is generally helpful for steering, especially when you want to make precise movements quickly. However, speed is a double-edged sword, as slight rudder movement at speed can dramatically and rapidly alter the course of the boat. But remember, you can't steer without moving forward.
Tiller Steering
Sailboat rudders are often controlled by a tiller. Tillers are a long rod connected to the rudder. Sailors move the rod side to side from the cockpit to turn the rudder directly. Tillers are the simplest form or rudder control, and they're highly reliable. Tillers point in the opposite direction that the boat will travel.
Tiller steering is found most often on small boats. This is because the forces involved in steering boats of greater size can be too difficult to manage with a tiller. That said, there are some relatively large boats with cockpit configurations that allow for the use of a tiller. Sailboats with tillers range in size between 10 feet and 30 feet.
Benefits of a Tiller
Tillers have numerous benefits. Tillers offer precise control of the boat because they connect the rudder directly to the person steering the boat. Additionally, tillers are extremely simple and robust. Many blue water sailors prefer tiller steering, as it's difficult to break and easy to repair.
Over the years, sailors have developed many creative ways to make tillers more useful. Many boats feature tiller extensions that allow the sailor to steer from further away. Tillers also respond much faster than helms, which is great for racing and pushing the limits of the boat.
Tiller Self-Steering
Bluewater sailors developed an extremely useful way to multitask onboard a tiller-equipped sailboat. Self-steering is possible on vessels with a tiller, and no electronics or complex machines are necessary. Self-steering involves connecting the jib sheet to a series of pulleys and opposing bungee cord (or surgical tubing).
As the tension on the jib increases, it'll tighten the jib sheet and pull the tiller and change the course of the boat. The opposite is also true. This keeps the boat at the right angle to the wind and is useful for solo travel. GPS-guided self-steering equipment is also available for tiller-equipped sailboats, and it's relatively easy to install.
Helm Steering
A helm is essentially a large nautical steering wheel. Steering a boat with a helm is somewhat similar to driving a car, as the boat moves in the direction that you steer (unlike a tiller, which moves in the opposite direction). Sailboats equipped with tillers are usually larger. Some larger sailboats have two helms placed side-by-side in the cockpit.
The helm consists of a steering wheel and a pedestal which is mounted to the deck. Helm pedestals often feature a marine compass to make navigation possible from one location. Engine controls are often located nearby as well. Sailboat helms are often large in diameter, sometimes 30 inches or more. Large wheels make steering easy and precise.
Helm-equipped sailboats are generally 30-feet long and larger. Tillers are excellent for large boats, as they enable precise movement and require little effort to use. This is especially important at speed when the force of water rushing by a large rudder can be too difficult to overcome with a tiller.
The helm is connected to the rudder mechanically or hydraulically. Some high-end sailboats incorporate power steering, but this is unusual on most consumer vessels. Mechanical helm linkage typically utilizes a cable (or multiple cables and pulleys) that stretches from the helm to the rudder.
Hydraulic Rudder Control
Most sailboat helms are hydraulic. These helms use pressurized hydraulic fluid and small diameter lines to replicate the wheel movements at the rudder. Hydraulic systems often include a fluid reservoir and a pressure cylinder, along with mechanical parts to transfer the force at the wheel and the rudder.
Rudder Maintenance
Rudder maintenance is fairly simple and should be performed regularly. As with the hull, rudders are an ideal habitat for all kinds of unwelcome marine life. Within a year or less, your rudder can be completely encapsulated in barnacles, plants, and other organisms. Marine growth will negatively impact your speed and steering, so it must be scraped off regularly.
Maintaining the steering system is also essential. Tillers are relatively easy to maintain, as they use very few moving parts. Look for grease fittings, and make sure your tiller and rudder are fastened tightly. Helms are more complex, and the hydraulic system should be inspected, repaired, and topped off if necessary.
What to Do if the Rudder is Damaged
Rudder damage is a sailor's worst nightmare, and it's akin to a hole in the hull or losing a mast. So what should you do if your rudder gets damaged or breaks off? First, call for help! But if help isn't available, there are a few makeshift ways to steer the boat without the rudder.
If you have an outboard motor, use it to steer. If not, then a run-of-the-mill rowboat oar makes an excellent rudder substitute. Simply lash the oar to the back of the boat with the end in the water, and use it like a tiller. It's not ideal, but it worked for the Romans, and it should work for you. Some sailors have fashioned makeshift rudders from interior cabinet doors, hatches, scrap metal, and whatever else is on hand.
Losing a rudder is a worst-case-scenario, and it doesn't often happen when sailors keep up with maintenance and stay away from dangerous water. Preventative maintenance and proper navigation are the best ways to keep your rudder in good shape.
Related Articles
I've personally had thousands of questions about sailing and sailboats over the years. As I learn and experience sailing, and the community, I share the answers that work and make sense to me, here on Life of Sailing.
by this author
Sailboat Parts
Learn About Sailboats
Most Recent

What Does "Sailing By The Lee" Mean?
October 3, 2023

The Best Sailing Schools And Programs: Reviews & Ratings
September 26, 2023
Important Legal Info
Lifeofsailing.com is a participant in the Amazon Services LLC Associates Program, an affiliate advertising program designed to provide a means for sites to earn advertising fees by advertising and linking to Amazon. This site also participates in other affiliate programs and is compensated for referring traffic and business to these companies.
Similar Posts

Affordable Sailboats You Can Build at Home
September 13, 2023

Best Small Sailboat Ornaments
September 12, 2023

Discover the Magic of Hydrofoil Sailboats
December 11, 2023
Popular Posts

Best Liveaboard Catamaran Sailboats
December 28, 2023

Can a Novice Sail Around the World?
Elizabeth O'Malley

4 Best Electric Outboard Motors

How Long Did It Take The Vikings To Sail To England?

10 Best Sailboat Brands (And Why)
December 20, 2023

7 Best Places To Liveaboard A Sailboat
Get the best sailing content.
Top Rated Posts
Lifeofsailing.com is a participant in the Amazon Services LLC Associates Program, an affiliate advertising program designed to provide a means for sites to earn advertising fees by advertising and linking to Amazon. This site also participates in other affiliate programs and is compensated for referring traffic and business to these companies. (866) 342-SAIL
© 2024 Life of Sailing Email: [email protected] Address: 11816 Inwood Rd #3024 Dallas, TX 75244 Disclaimer Privacy Policy
- Types of Sailboats
- Parts of a Sailboat
- Cruising Boats
- Small Sailboats
- Design Basics
- Sailboats under 30'
- Sailboats 30'-35
- Sailboats 35'-40'
- Sailboats 40'-45'
- Sailboats 45'-50'
- Sailboats 50'-55'
- Sailboats over 55'
- Masts & Spars
- Knots, Bends & Hitches
- The 12v Energy Equation
- Electronics & Instrumentation
- Build Your Own Boat
- Buying a Used Boat
- Choosing Accessories
- Living on a Boat
- Cruising Offshore
- Sailing in the Caribbean
- Anchoring Skills
- Sailing Authors & Their Writings
- Mary's Journal
- Nautical Terms
- Cruising Sailboats for Sale
- List your Boat for Sale Here!
- Used Sailing Equipment for Sale
- Sell Your Unwanted Gear
- Sailing eBooks: Download them here!
- Your Sailboats
- Your Sailing Stories
- Your Fishing Stories
- Advertising
- What's New?
- Chartering a Sailboat
- Sailboat Rudders
Sailboat Rudders
The primary purpose of sailboat rudders is of course to give the helmsman the ability to steer the boat, but a well-designed one will also provide hydrodynamic lift to windward, in the same manner as does the keel.

Placing sailboat rudders into distinct categories is fairly straight forward - they're either:
- Outboard or inboard rudders, which can be
- Unbalanced, balanced or semi-balanced, and be
- Keel-hung, skeg-hung, transom-hung or spade rudders.
Take a stroll around any fair-sized boatyard during the lay-up season and you'll see examples of most of them...
Inboard & Outboard Sailboat Rudders
If the rudderstock passes through the underside of a boat's hull, it's an inboard rudder. Conversely, if it doesn't, it's an outboard rudder.
Most outboard rudders are turned by a tiller as there's no rudderstock to which a wheel-steering quadrant can be mounted.
The two rudders shown below are quite different examples of outboard rudders.
Fig 1 shows an example of a keel-hung outboard rudder that is seldom seen on today's cruising boats.
Outboard rudders like the one in Fig 2 can be easily removed for service or repair with the vessel afloat. You might struggle with trying to do that with the 'barn door' of a rudder in Fig 1 though!
Examples of inboard rudders can be seen in Figs 3, 4, 5, 6, 7 & 9.
Unbalanced Rudders
This unbalanced rudder is supported by a full-length skeg.
It is unbalanced because the entirety of the rudder is aft of its axis, the axis being on the centreline of the rudderstock.
When turned, the full force of the water flowing past the skeg acts on one side of the rudder - a fact that will be very much apparent to the helmsman, particularly on a tiller-steered boat.

| The rudder shown here is said to be balanced because part of it is forward of its axis. As the rudder is turned, the force exerted by the water flow acting on the forward part partially counteracts the force applied to the area of the rudder that is aft of the axis. This reduces the load on the tiller and makes life easier for the helmsman. |
| The rudder shown here is supported by a half-length skeg. The upper part of the rudder (aft of the skeg) is unbalanced. However, the section of the rudder below the skeg is balanced by the part of the rudder projecting forward of its axis. The helm loads will be lessened as a result. Hence this type of rudder is said to be semi-balanced. |
| Keel-hung rudders are often seen on heavy-displacement, long-keel boats of yesteryear. This one's on a Nicholson 32 from the 1960's. Whilst the propellor is well protected, the propwash from it acts on only a small area of the rudder which, combined with the massive displacement and full-length keel, makes close-quarters manoeuvring under power something of a hit-and-miss affair. |
|
|
| Transom-hung rudders are attached to the boat by hinging mechanisms known as Pintles and Gudgeons. Pintles always incorporate a pin, whereas Gudgeons always have a hole for a pin. Usually, Pintles are attached to the rudder and Gudgeons are attached to the transom - but not always. The example shown here (on a Sadler 25) is something of a hybrid, incorporating a full length skeg to provide additional security. |
| From a hydrodynamic point of view, the Spade Rudder is most efficient and is becoming the norm on modern sailboats. The smaller the gap between the rudder and the hull, the greater the end-plate effect provided by the hull. But being a cantilever with no support along its leading edge, unless it's properly designed and engineered, robustness may be an issue. |
Recent Articles
GENERIC KPI Template
Aug 25, 24 07:21 AM
Gulfstar Hirsch 45 Sailboat Specs & Key Performance Indicators
Aug 25, 24 07:19 AM
Nicholson 35 Sailboat Specs & Key Performance Indicators
Aug 24, 24 02:27 PM
Here's where to:
- Find Used Sailboats for Sale...
- Find Used Sailing Gear for Sale...
- List your Sailboat for Sale...
- List your Used Sailing Gear...
Our eBooks...

A few of our Most Popular Pages...

Copyright © 2024 Dick McClary Sailboat-Cruising.com
- New Sailboats
- Sailboats 21-30ft
- Sailboats 31-35ft
- Sailboats 36-40ft
- Sailboats Over 40ft
- Sailboats Under 21feet
- used_sailboats
- Apps and Computer Programs
- Communications
- Fishfinders
- Handheld Electronics
- Plotters MFDS Rradar
- Wind, Speed & Depth Instruments
- Anchoring Mooring
- Running Rigging
- Sails Canvas
- Standing Rigging
- Diesel Engines
- Off Grid Energy
- Cleaning Waxing
- DIY Projects
- Repair, Tools & Materials
- Spare Parts
- Tools & Gadgets
- Cabin Comfort
- Ventilation
- Footwear Apparel
- Foul Weather Gear
- Mailport & PS Advisor
- Inside Practical Sailor Blog
- Activate My Web Access
- Reset Password
- Customer Service

- Free Newsletter
Ericson 41 Used Boat Review

Mason 33 Used Boat Review

Beneteau 311, Catalina 310 and Hunter 326 Used Boat Comparison

Maine Cat 41 Used Boat Review

Tips From A First “Sail” on the ICW

Tillerpilot Tips and Safety Cautions

Best Crimpers and Strippers for Fixing Marine Electrical Connectors

Thinking Through a Solar Power Installation

Getting the Most Out of Older Sails

How (Not) to Tie Your Boat to a Dock

Stopping Mainsheet Twist

Working with High-Tech Ropes
Fuel Lift Pump: Easy DIY Diesel Fuel System Diagnostic and Repair

Ensuring Safe Shorepower

Sinking? Check Your Stuffing Box

The Rain Catcher’s Guide

Boat Repairs for the Technically Illiterate

Boat Maintenance for the Technically Illiterate: Part 1

Whats the Best Way to Restore Clear Plastic Windows?

Mastering Precision Drilling: How to Use Drill Guides

Giving Bugs the Big Goodbye

Galley Gadgets for the Cruising Sailor

Those Extras you Don’t Need But Love to Have

UV Clothing: Is It Worth the Hype?

Preparing Yourself for Solo Sailing

How to Select Crew for a Passage or Delivery

Preparing A Boat to Sail Solo

On Watch: This 60-Year-Old Hinckley Pilot 35 is Also a Working…

On Watch: America’s Cup

On Watch: All Eyes on Europe Sail Racing

Dear Readers

Chafe Protection for Dock Lines
- Boat Maintenance
Building a Faster Rudder
Boost performance with a bit of fairing and better balanced helm..

We’re cruisers not racers. We like sailing efficiently, but we’re more concerned with safety and good handling than squeezing out the last fraction of a knot. Heck, we’ve got a dinghy on davits, placemats under our dishes, and a print library on the shelf. So why worry about perfection below the waterline?
The reason is handling. A boat with poorly trimmed sails and a crudely finished rudder will miss tacks and roll like a drunkard downwind when the waves are up. On the other hand, a rudder that is properly tuned will agilely swing the boat through tacks even in rough weather, and provide secure steering that helps prevents broaching when things get rolly. The difference in maximum available turning force between a smooth, properly fitted rudder and the same rudder with a rough finish and poor fit can be as much as 50% in some circumstances, and those are circumstances when you need it the most. It’s not about speed, it’s about control.
It Must Be Smooth
Smooth is fast. That’s obvious. But it makes an even bigger difference with steering. Like sails, only half of rudder force comes from water deflected by the front side of the blade. The rest results from water being pulled around the backside as attached flow. How well that flow stays attached is related to the shape of the blade, which we can’t easily change, and to the surface finish of the blade, which we can.
Remember the school experiment, where you place a spoon in a stream of water and watched how the water would cling to the backside of the spoon? Now, try the experiment again as a grown-up, but with a different set of materials.
Try this with a piece of wood that is smooth and one that is very rough; the water will cling to the smooth surface at a greater angle than the rough surface. Try piece of smooth fiberglass or gelcoat; the water will cling even better because the surface is smoother. Try a silicone rubber spatula from the kitchen. Strangely, even though the surface is quite smooth, the water doesn’t cling well at all. We’ll come back to that.
Investigators have explored this in a practical way, dragging rudders through the water in long test tanks (US Navy) and behind powerboats.

If we are trying to climb to windward, it’s nice to get as much lift out of the rudder as practical, before drag becomes too great or before it begins to stall with normal steering adjustments. If the boat has an efficient keel and the leeway angle is only a few degrees, the rudder can beneficially operate at a 4-6 degree angle. The total angle of attack for the rudder will be less than 10 degrees, drag will be low, and pointing will benefit from the added lift. If the boat is a higher leeway design—shoal draft keels and cruising catamarans come to mind—then the rudder angle must stay relatively low to avoid the total angle (leeway + rudder angle) of the rudder from exceeding 10 degrees. That said, boats with truly inefficient keels but large rudders (catamarans have two—they both count if it is not a hull-flying design) can sometimes benefit from total angles slightly greater than 10 degrees—they need lift anywhere they can get it.
How can you monitor the rudder angle? If the boat is tiller steered, the tiller will be about 0.6 inches off center for every degree or rudder angle, for every 3 feet of tiller length. In other words, the 36-inch tiller should not be more than about 2 inches off the center line. If the boat is wheel steered, next time the boat is out of the water, measure the rudder angle with the wheel hard over. Count the number of turns of the wheel it takes to move the rudder from centered to rudder hard over, and measure the wheel diameter. Mark the top of the rim of the wheel when the boat is traveling straight, preferably coasting without current and no sails or engine to create leeway.
The rim of the wheel will move (diameter x 3.146 x number of turns)/(degrees rudder angle at hard over) for each degree of rudder angle. Keep this in the range of 2-6 degrees when hard on the wind, as appropriate to your boat. It will typically be on the order of 4-10 inches at the steering wheel rim. A ring of tape at 6 degrees can help.
How do we minimize rudder angle while maintaining a straight course? Trimming the jib in little tighter or letting the mainsheet or traveler out a little will reduce pressure on the rudder and reduce the angle. Some boats actually sail to weather faster and higher, and with better rudder angles, by lowering the traveler a few inches below the center line.
On the other hand, tightening the mainsheet and bringing the traveler up, even slightly above the center line on some boats, will increase the pressure and lift.
Much depends on the course, the sails set, the rig, the position of the keel, the wind, and the sea state. Ultimately, some combination of small adjustments should bring the rudder angle into the appropriate range. Too much rudder angle and you are just fighting yourself.

- Turn this rudder just 10 degrees and the end plate is lost, reducing the amount of lift generated.

- This rudder might as well be transom hung, the way that the end cap just disappears.

- Stern-hung rudders, and spade rudders with large gaps between the hull and the top of the rudder will lose their lift at the “tip” of the blade near the surface.
Surface roughness affects the lift from the rudder in two ways. A rougher surface has slightly lower lift through the entire range of angles, the result of a turbulent boundary layer instead of smooth flow over the entire surface. More dramatically, rougher blades stall at lower angles and stall more completely. The difference between a faired rudder with a polished finish and a rudder carrying a 10-year accumulation of rolled-on antifouling paint can be as much is 35 percent (see “Rudder Savvy to Boost Boat Performance,” above).
What can we do? If your rudder is a lift up type, don’t use bottom paint. Fair the blade within an inch of its life and lay on a gloss topside paint as smoothly as possible, sanding between coats. If you use a brush, stroke the brush parallel to the waterline, not along the length of the blade.
Which is faster, a gloss finish or one that has been dulled with 1000 grit sandpaper? Opinions go both ways, and we believe it may depend on the exact nature of the paint, which leads to the question, “Should we wax the blade?” The answer is a resounding, no.
Wax is a hydrophobic (readily beads water), like the silicone rubber spatula you tested, and as a result, water doesn’t always cling as well. Thus, whether the paint should be deglossed or not depends on the chemistry of the paint, but in all cases the final sanding should be 1000 grit or finer.
If the rudder stays in the water, antifouling paint is required. Sand the prior coat perfectly smooth. There should be no evidence of chips, runners, or any irregularity at all. Using a mohair roller, lay the paint on thin, and apply multiple coats to withstand the scrubbing you will give your rudder from time to time.
Even if you use soft paint on the rest of the boat, consider hard paint for the rudder. Sure, it will build up and you will have to sand it off periodically, but the rudder is small and no part of your boat is more critical to good handling. Take the time to maintain it as a perfect airfoil.
Close the Gap
Ever notice the little winglets on the tips of certain airplanes? As we know, those are intended to reduce losses off the tip of the wing. The alternatives are slightly longer wings or slightly lower efficiency. At the fuselage end of the wing, of course, there is no such loss because the fuselage serves as an end plate. The same is true with your rudder.
There’s not much you can do about losses from the tip; making the rudder longer will increase the chance of grounding and increase stress on the rudder, rudder shaft, and bearings. Designers have experimented with winglets, but they the catch weeds and the up-and-down motion of the transom makes them inefficient. However, we can improve the end plate effect of the hull by minimizing the gap between the hull and the rudder.
In principle it should be a close fit, but in practice the gap is most often wide enough to catch a rope. Just how much efficiency is lost by gap of a few inches? The answer is quite a lot. A gap of just an inch can reduce lift by as much as 10-20 percent, depending on the size and shape of the rudder and the speed. A gap of 1-2 mm is quite efficient, but normal flexing of the rudder shaft may lead to rubbing.
If the gap is tight, the slightest bend from impact with a submerged log can cause jamming and loss of steering, though in my experience once the impact is sufficient to bend the shaft, a small difference in clearance is unlikely to make much difference; the shaft will bend until the rudder strikes the hull. Just how tight is practical depends on the type of construction, fitting accuracy, and how conservative the designer was in their engineering.
Carbon shafts, tubular shafts, and rudders with skegs flex less, while solid shafts generally flex more, all things being equal. Normally a clearance of about 1/4-inch per foot of rudder cord is practical, and performance-oriented boats often aim for much less. If you can reach your fingers through, that’s way too much. Hopefully the hull is relatively flat above the rudder so that the gap does not increase too much with rudder angle.
Practical Sailor’s technical editor Drew Frye is the author of the books Keeping a Cruising Book for Peanuts and Rigging Modern Anchors. He blogs at his website, sail delmarva.blogspot.com .
RELATED ARTICLES MORE FROM AUTHOR
22 comments.
How happy to see good technical information about the science of boat speed and control. This information is valuable to everyone, but the “mainly just cruising” cohort usually doesn’t get enough in an easily understandable form. I always suggest some club level racing as the best way to learning how to sail, but many prospective racers have been put off from the sport or haven’t had good opportunities to join the fleets. Technical seminars are generally either too advanced for beginners to understand properly, and the beginner classes are frequently too basic to inspre those who would benefit from a deeper knowledge base in the science of sailing. Good on you, Practical Sailor, for your technical stories hitting the “sweet spot,” getting this information to those we’ll benefit most.
Great article. How about considering modifying a rudder to make it a hydrodynamically balanced rudder. I did it to my boat and the difference is outstanding. If I remember correctly 7% of the rudder area is forward of pivot center. It is a skeg hung rudder that now turns like it’s a spade rudder.
I’m “skeg hung” also. Would you be so kind as to posting a link or providing info as to you accomplished this feat. Thanks!
A very clear explanation of some quite complicated hydrodynamics – thank you! I am surprised by the US Navy results showing benefit of sanding further than 400 grit. Most other experimental data suggest there is negligible advantage in going beyond about 360 grit. Is the original reference publicly available? On Michael Cotton’s comment, a couple of points: Firstly, the amount of balance (i.e how far back you put the stock in the blade) has no impact on the hydrodynamic performance of a spade rudder. What it does do is change the feel of the rudder; a well balanced rudder will be easier to use, thereby probably allowing the steerer to sail the boat better. For a skeg rudder, the hydrodynamic impact of changing the balance depends very much on how the skeg/blade combination is configured. Secondly, 7% of rudder area forward of the stock is not enough for most rudders. The position of the centre of pressure is dependent on a lot of factors (aspect ratio, rudder angle etc.), but it is usually at least 15% back from the leading edge on a spade rudder, more often 20%. A balance somewhere between 10% and 15% is likely to give just enough feel without too much weight. However, rudder balance is still a bit of a black art, it really does depend on the rudder geometry.
the statement that one doesn’t want a silicone/silane coated ( super-smooth, hydrophobic: silicone-silane is just the example I am choosing, since it is now in use as a massively-speeding hull-coating, ttbomk ), as it *induces* flow-separation…
looks to me like conflating cavitation with flow-separation.
People have no problem teflon/ptfe-coating aviation-wings, as a means of *preventing* flow-separation.
the super-slick shape of a Cirrus’s composite wing, if made super-smooth/polished & super-slippery, “air-phobic”, as it were, *improves* its performance, not detracts from it….
Flow is always 1. laminar, then 2. turbulent, then 3. flow-separation.
unless the angle-of-attack ( AoA ) is small-enough to prevent separation.
The Gentry Tufts System, for *seeing* when a separation-bubble begins, on a sail, is brilliant ( Arvel Gentry was a fluid dynamicist, & realized that once one has a *series* of tufts, from luff on back, about 1/4 up the luff, one can *see* the beginning of a flow-separation-bubble, & tune the sail to keep it *just*-beginning, because *that* is MAX lift. Wayback Machine has his site archived, btw )
The aircraft designer Jan Roskam wrote of a DC-10 crashing because pebbled-ice as thick as the grit on 40-grit sandpaper had formed on the upper wings…
obviously, engineered to require laminar, there, but having turbulent, cost all those lives.
iirc, it was Arvel Gentry, or “Principles of Yacht Design”, that stated it takes a ridge of about 0.1mm, only, to trip the flow around a mast from laminar to turbulent…
Given how barnacles & such are generally 100x or more as thick as that, when removed from a hull, I think laminar-flow is something that exists only for the 1st day or so after launching!
I now want to see experiment showing polar curves for rudders coated normally, uncoated, & ailicone-silane coated, to see if it is the coating that induces separation-bubbles, or if it is AoA exceeding functional angle, for that surface & foil,, while the boundary-layer is in specifically turbulent flow, as opposed to the ideal laminar, as aviation’s results indicate…
just an amateur student of naval-architecture & aircraft-design ( Daniel P. Raymer’s “Conceptual Aircraft Design” is *brilliant*, btw ), who happens to study this stuff autistically, as that is the only way to make my designs become absolutely-competent, is all…
I got a pearson and the rudder broke. Can I just replace with a outboard rudder mount it off set for room for outboard need info.
You could but it will not work very well. How badly it would perform is difficult to say. It might be just poor or disastrous. Things really need to be balanced on sail boats.
Polished rudders stall at low angles of attack and ask any hobie cat racer.
Pi is NOT 3.146
3.1416 maybe
Yup, 3.1416. Typo.
Before 2005 , when I fully retired and went cruising 10 months per year, I changed auto pilots, the hydraulics of which reduced the maximum rudder angle. “Someday” had always been difficult to steer in marinas, so I added 30% more rudder area to the Gulfstar 41′ by deepening and following the existing angles. (the pivot was unchanged, as all added area was aft of that.) It increased rudder effort noticeably, but not excessively, improved motor maneauvering and allowed being able to hold a close line better. Noticeably, it caused a lot more stalling of the rudder whenever it was turned very much. A recent tangle with a Guatemala fish net damaged the extension, which I had intended to be sacrificial. I cleaned up the separation somewhat, but have not replaced the extension. The boat again now requires more steering correction when heading at all upwind, but the rudder does not stall as easily.
This is not a scientific study, just my personal non-scientific observations. The added rudder area was quite low, and the fairing quality was…well! modest.
I’ve seen data suggesting ~ 400 grit is best, and I’ve seen data suggesting polished is best. They were both smart, respected guys that I would not second guess. My conclusion is that other factors, such as the specific foil profile and the type of coating, are involved. Let’s just agree that many layers of rolled bottom paint with a few lumps and chips is sub-optimal! We’re talking about cruising boats.
Thanks for great article. I’m convinced enough to go sand my bottom paint off the lifting rudder of my Dragonfly Tri.
Absolutely! No lifting rudder should have bottom paint. My Farrier rudder was sanded fair and painted with gloss white.
Dagger boards and center boards that retract still need antifouling, since they do not lift clear of the water, but because they are in a confined space with little oxygen or water flow, fouling is very limited. Because the space is tight and paint build-up can cause jamming, sand well and limit the number of coats. For my center board I go with two coats on the leading edge (exposed even when lifted) and one coat on the rest.
I do remember a comment directed to cruisers a few years back suggesting that a faster cruiser would be more likely to get out of the way of dirty weather, especially with modern forecasting. I reckoned that this concept would gain traction, but I haven’t seen it. Can anyone weigh in on this opinion?
I would agree ONLY for coastal crusing when a safe harbor is always no more than a day away. OR ocean racing where speed matters and the boat is kept light. We all know weather reports past 24hours are a guide not a guarantee. Once a storm is bearing down NO boat even a fast one is going it out run a storm. Also we sail on boats that need wind and it’s always a balance between a course between high pressure systems (doldrums) and low pressure systems (high likelyhood of a storm) so because we seek wind sometimes we get more then we want. Try and avoid that and you risk venturing too far into the high pressure system and NO wind. So yes weather forecasts can give you a 1-2 day weather window and a fast boat that can get the hell out of dodge and put a few miles between itself and the oncoming weather could avoid a storm. BUT we are usually not talking about a world ocean race boat vs an old full keel tank. We are talking a faster but still rather slow loaded down cruising boat. It may be only the difference of 7knot average vs 9 knots average. Even a faster cruiser/racer is not a stripped down Volvo series racer. And even those super fast ocean racers pushing the edge of technology get caught in storms and frankly I would not want to use one of those boats as my floating home on the water. They are a thrilling ride but far from comfortable. And they STILL can’t sail fast enough to out run a storm and guarantee you you will never have to sail in big waves and high winds. There is not a cruising SAIL boat that is as fast as a center console fishing boat with 1200hp in outboards on the back and guess what when a squall is coming even they get caught and can’t out run it. And no it’s not a hurricane and it won’t last long but it’s enough when it hits you if your on a light boat over canvased because trying to outrun the oncoming squall it’s enough to get scary. And then there is comfort. Even when there is no storm near you the swell from a storm hundreds of miles away can make for a uncomfortable ride in a boat designed to go fast vs a heavy displacement boat that just pushes threw waves and Has the tonnage not to get knock around. So much of this article screams weekend coastal sailing as even a week on anchor all that work to smooth your rudder will be canceled out by bottom growth todays antifoul paints don’t work as good as the older but far more toxic formulas so even the most meticulously cleaned cruising boat picks up growth ya you can dive and clean it regularly but I often it’s like Sisyphus pushing that rock up the hill. And besides if your sailing on a fullkeel with a keel hung rudder most of this is mute. yes a clean smooth bottom makes a difference on any boat but it’s the full keel and its tendency to track straight the over all weight and momentom of the boat it’s not fast and never will be but they can maintain their hull speed and track a comfortable ride threw chop and be unaffected by the swell. I’ll take a old full keel boat with a protected rudder I know is very unlikely to ever hit something to bend it or loose my rudder ever over a spade rudder or even worse duel rudders both hung exposed with a long but thin bolted on keel that if you hit a coral head means a haul out to inspect it as it more then likely cause a lot of expensive damage. And if not fixed right could lead to a future disaster (Cheeki Rafiki).
As interesting as the article reads, I wonder how it helps a prospective buyer of a used boat. Pictures will not do, and neither will taking several boats out of the water to examine them; it’s too expensive. It would be more helpful to indicate which boat manufacturers have the type of rudder the author recommends. After all, the buyer usually cannot be expected to change a rudder prior to buying it; it is also expensive. By the way, these types of very sophisticated articles are seen when it comes to hulls, keels, or rigging but without identifying the boats that carry the wrong equipment. If a specific rudder or keel configuration is not the proper one for efficient sailing, the author ought to state which boats carry the proper ones so that the buyer will concentrate on the whole (the boat) rather than the part.
I was describing the opportunity to improve the existing rudder. As I think back, I have modified the rudder of every boat I have owned in order to improve efficiency. The first two got small changes in balance and improved trailing edge sharpness. On the third I tightened the the hull clearance and changed the section. On my current boat I adding an anti-ventilation fence to improve high speed handling. https://4.bp.blogspot.com/-2ZGPzKdj_tE/WyF9G2mHtLI/AAAAAAAAOwE/r6zgQEr4vkcDB4ciMLcgboFdazDAseDBgCLcBGAs/s1600/ian%2Brudder%2Bfence.jpg None of these tasks was overly difficult, and none was undertaken until I had sailed the boat for a season and learned what balance she liked and noted her habits.
For me, I buy a boat based on reputation, a test sail, and in most cases, a survey. As you imply, it is the whole boat you are buying. Does it have good bones? Do you feel happy at the helm? Then comes the fine tuning. I’ve been told that I sell a boat when I run out of things to tweak.
wow, so now case reports/medical reports/evidence don’t count as “evidence”, but certain remedies, even if they are cited in medical journals but do not work in the real world, count as evidence to you?? Maybe we need to redefine evidence based on your philosophies.Anyway, i’ve wasted enough time here. goodbye.
Weight 2.5 tonnes
Do you have any articles on the ideal cross section shape for an outboard rudder mounted 50mm from the transom vertically The yacht is a 26 ft trailer sailer weight 2.5 tonnes
The most common choice would be NACA 0012. http://airfoiltools.com/airfoil/details?airfoil=n0012-il
There are many ways to build a rudder, including laminated solid rot-resistant wood and fiber glass covered foam with a metal armature core. For the DIY, laminated wood is probably the most practical.
LEAVE A REPLY Cancel reply
Log in to leave a comment
Latest Videos

What’s the Best Sailboats for Beginners?

Why Does A Sailboat Keel Fall Off?

The Perfect Family Sailboat! Hunter 27-2 – Boat Review

Pettit EZ-Poxy – How to Paint a Boat
Latest sailboat review.

- Privacy Policy
- Do Not Sell My Personal Information
- Online Account Activation
- Privacy Manager
- Forums New posts Unanswered threads Register Top Posts Email
- What's new New posts New Posts (legacy) Latest activity New media
- Media New media New comments
- Boat Info Downloads Weekly Quiz Topic FAQ 10000boatnames.com
- Classifieds Sell Your Boat Used Gear for Sale
- Parts General Marine Parts Hunter Beneteau Catalina MacGregor Oday
- Help Terms of Use Monday Mail Subscribe Monday Mail Unsubscribe
Swing/Kick-up Rudder
- Thread starter weh5748
- Start date Jun 21, 2012
- Oday Owner Forums
- Ask An Oday Owner
I just bought a used O'Day 19 with the swing rudder. I'm not sure what the purpose is. I see that pulling on rope lowers rudder although it is very difficult. Not sure how you raise the rudder without leaning over back of boat and grabbing it which is not easy. Is it designed for making adjustments while under sail or just a docking/mooring adjustment. I have the boat at dock and am going over it. Haven't sailed it yet. Thanks for any insights.

The kick up rudder blade is designed to kick up if it gets grounded out or hits something submerged. You want to lock it all the way down when you sail. I keep my rudder blade in the up position when my boat is on the mooring or at anchor in shallow water. I added a hold up line to my blade years ago. It comes in handy when I launch my boat at the ramp. I mount my rudder on the transom and tie off the tiller so that the rudder is straight and raise the blade. It's a heck of a lot easier to launch or pull the boat out with the rudder attached. Joe
Trinkka said: The kick up rudder blade is designed to kick up if it gets grounded out or hits something submerged. You want to lock it all the way down when you sail. I keep my rudder blade in the up position when my boat is on the mooring or at anchor in shallow water. I added a hold up line to my blade years ago. It comes in handy when I launch my boat at the ramp. I mount my rudder on the transom and tie off the tiller so that the rudder is straight and raise the blade. It's a heck of a lot easier to launch or pull the boat out with the rudder attached. Joe Click to expand
weh5748 said: Thank you Joe. Thats very helpful. Only remaining question is ... how does it kick up if the line used to pull it down is cleated on underside of tiller. Perhaps my line is threaded wrong .. but it seems that once seated in the jam cleat it is restricted from kicking up. I hope I'm wrong because I love the idea that it will kick when required. Thanks again. Click to expand
That flip up clam cleat looks like a great solution. Very thorough instructions/info on that link you sent also, so thanks again. The situation where I have been anticipating problems is coming in to our dock, sailing directly toward shore west to east and doing a quick 180 deg turn around a bouy (to south of dock to pull boat away when docked) and catching dock posts on starboard side, where water is a little shallower than depth of keel fully down ... so I will be raising swing keel every time I come in to about half way down, but rudder will be touch and go. Since water depth can vary by at least 12 inches, depending on rain fall and waves from wind and other boats will impact effective water depth i could be scraping bottom with rudder just when I'm needing to make this sharp turn. So it would be nice to be able to adjust the rudder just a hair .. raise it 8-12" to ensure I don't bottom it hard as I'm making that turn. In that regard it sounds like you have rigged a way to raise your rudder when at dock. Could you explain how you do that. Can that be done while under sail? Thanks very much again for your time and very valuable insights. /Users/williamhunt/Desktop/IMG_5033.jpg (tried to drop in picture of set-up but guess I'm new at that also)
weh5748 said: That flip up clam cleat looks like a great solution. Very thorough instructions/info on that link you sent also, so thanks again. The situation where I have been anticipating problems is coming in to our dock, sailing directly toward shore west to east and doing a quick 180 deg turn around a bouy (to south of dock to pull boat away when docked) and catching dock posts on starboard side, where water is a little shallower than depth of keel fully down ... so I will be raising swing keel every time I come in to about half way down, but rudder will be touch and go. Since water depth can vary by at least 12 inches, depending on rain fall and waves from wind and other boats will impact effective water depth i could be scraping bottom with rudder just when I'm needing to make this sharp turn. So it would be nice to be able to adjust the rudder just a hair .. raise it 8-12" to ensure I don't bottom it hard as I'm making that turn. In that regard it sounds like you have rigged a way to raise your rudder when at dock. Could you explain how you do that. Can that be done while under sail? Thanks very much again for your time and very valuable insights. /Users/williamhunt/Desktop/IMG_5033.jpg (tried to drop in picture of set-up but guess I'm new at that also) Click to expand
Attachments

Great shots. A picture is worth a thousand words and those photos really tell the story. Looks like I need to get busy and make some modifications. Thanks for quick response. This will come in handy today, Bill
The tiller that came with my boat was thin and and narrow. It was made to fit in the rudder head between the metal plates. The tiller that I bought off Rudy is thick and wide and has metal plates mounted to it that can fit over my rudder head, but I was lacking the rudder head height above the transom for my tiller plates to bolt up to the existing hole for my new tiller. In the fourth pic over you can see that I moved my pintles down to the lower hole and drilled two new holes. This gave me the space needed to be able to connect my tiller to the rudder head. All I needed was to mount a couple of stops on the rudder head under these metal plates to keep the tiller from scraping the top of the boat's transom. I use a couple of Aluminum screen door parts that are "L" shaped which can be found in any hardware store. I needed to cushion the top of each of these stops with something soft so I drilled and tapped them for small machine screws and added a couple of small pieces of StarBoard that a friend gave me. I like the shape and size of these tillers because they provide enough wood thickness to add the hardware that you need. This pin on my tiller is used for my Autohelm ST 1000+ autopilot. I also use this pin to snub off my rudder blade pendant line with a half hitch to prevent my blade from creeping up while I'm sailing. This is probably one of the best mods I did to this boat and it's served me well for many years. I can get about two years out of the bungee cord but it's easy to replace.

Sunbird22358
Joe, the rudder on the O'DAY 19 should be similar to the one on your 222, not exactly that same design perhaps.....but, closer to your rudder than hte one on my 1979 DS II. I've attached a few pics of the 19 rudder. I am resonably familiar with the 19 (from photos?) but it seems that the rudder kicks up like the one on the 222.

anchorclanker
Dang it, now I have go up and pull the rudder off and inspect it. lol
Sunbird22358 said: Joe, the rudder on the O'DAY 19 should be similar to the one on your 222, not exactly that same design perhaps.....but, closer to your rudder than hte one on my 1979 DS II. I've attached a few pics of the 19 rudder. I am reasonably familiar with the 19 (from photos?) but it seems that the rudder kicks up like the one on the 222. Click to expand
anchorclanker said: Dang it, now I have go up and pull the rudder off and inspect it. lol Click to expand
This is all very helpful. Just want to make sure i understand .... sounds like one approach is to drill a small hole in top of rudder blade, maybe half way down and attach a cord or bungee for raising rudder when you need to? Or build a small hook to grab it. Maybe my rudder just needs some cleaning and "lube" where it moves within the metal plates so that it will 'float' up more easily. I got the message that I always want to sail with it all the way down.
weh5748 said: This is all very helpful. Just want to make sure i understand .... sounds like one approach is to drill a small hole in top of rudder blade, maybe half way down and attach a cord or bungee for raising rudder when you need to? Or build a small hook to grab it. Maybe my rudder just needs some cleaning and "lube" where it moves within the metal plates so that it will 'float' up more easily. I got the message that I always want to sail with it all the way down. Click to expand
Got it. Thank you again.
Joe - Your last photo that seems to show a line/rope coming thru transom into cockpit, is that the line you use to fully lower the rudder. I was out on Lake George yesterday afternoon with strong gusty winds and going fast enough that I never got the rudder all the way down. Didn't feel I could lean way over transom to push it down manually. So I re-looked at this thread and noticed that second line in your photo. I need to be able to push/pull rudder down under sail. Would appreciate any suggestions.
aps in annapolis md sells an jam cleat the will snap open then your rudder hits something. I used it on my precision 23.
weh5748 said: Joe - Your last photo that seems to show a line/rope coming thru transom into cockpit, is that the line you use to fully lower the rudder. I was out on Lake George yesterday afternoon with strong gusty winds and going fast enough that I never got the rudder all the way down. Didn't feel I could lean way over transom to push it down manually. So I re-looked at this thread and noticed that second line in your photo. I need to be able to push/pull rudder down under sail. Would appreciate any suggestions. Click to expand

I have the hold-down line that you describe but the way its threaded up thru the top metal part of the rudder behind the pins, then runs into cockpit above the transom I have too much friction and no pulling power. Thats why I thought maybe you pulled from lower on the rudder thru the transom. It appeared that hole in back of your transom was for that but as I look more closely I guess thats an electrical cable of some kind. I still don't see an easy way to fully lower rudder especially if you need to do it under sail.

- This site uses cookies to help personalise content, tailor your experience and to keep you logged in if you register. By continuing to use this site, you are consenting to our use of cookies. Accept Learn more…
- Search Please fill out this field.
- Newsletters
- Water Sports
How to Rig Your Small Sailboat and Prepare to Sail
In this lesson, you will learn how to rig a small sailboat to prepare for sailing. For reference purposes, a Hunter 140 daysailer was used for this learn-to sail tutorial. Before you begin, you can familiarize yourself with the different parts of a sailboat.
Install (or Check) the Rudder
Typically the rudder of a small sailboat like this one is removed after sailing to prevent wear and tear while the boat remains in the water. You need to reinstall it before sailing, or if it is already in place, check that that it is firmly attached (with optional safety lanyard securing it to the boat).
On most small boats, the top of the leading edge of the rudder has attached pins (called pintles) that are inserted downward into round rings (called gudgeons) attached to the stern. This is rather like the familiar “Insert tab A into slot B.” While the exact configuration may vary among different boat models, it’s usually obvious how the rudder mounts to the stern when you hold the rudder beside the stern.
The rudder may or may not already have a tiller mounted on it. The next page shows how to attach the tiller on this boat.
Attach (or Check) the Tiller
The tiller is a long, thin steering “arm” mounted to the rudder. If the tiller is already attached to the top of the rudder on your boat, check that it is secure.
On this Hunter 140, the tiller arm is inserted in a slot at the top of the rudder, as shown here. A pin is then inserted from above to lock it in position. The pin should be tied to the boat with a lanyard (short light line) to prevent being dropped.
Note that this tiller also includes a tiller extension, which allows the sailor to still control the tiller even when sitting far out to the side or forward.
With the rudder and tiller in place, we’ll now move on to the sails.
Attach the Jib Halyard
Because sunlight and weather age and weaken sailcloth, the sails should always be removed after sailing (or covered or bagged on a larger boat). Before you get started, you have to put them back on (called “bending on” the sails).
The halyards are used to raise both the jib and mainsail. At the sail’s end of a halyard is a shackle that attaches the grommet at the head of the sail to the halyard.
First, spread out the sail and identify each of its corners. The “head” is the top of the sail, where the triangle is the most narrow. Attach the jib halyard shackle to this corner, making sure the shackle is closed and secure.
Then follow the front edge of the sail (called the “luff”) down to the next corner. The luff of the jib of a small sailboat can be identified by the hanks every foot or so that attach this edge to the forestay. The bottom corner of the luff is called the sail’s “tack.” Attach the grommet in the tack to the fitting at the bottom of the forestay -- usually with a shackle or pin. Next, we’ll hank on the sail.
Hank the Jib on the Forestay
Hanking on the jib is a simple process, but it can feel unwieldy if the wind is blowing the sail in your face.
First, find the other end of the jib halyard (on the port, or left, side of the mast as you face the bow of the boat) and keep a good grip on it with one hand. You will be slowly pulling it in to raise the sail as you hank it on.
Beginning with the hank nearest the head of the jib, open it to clip the hank onto the forestay. It will be obvious how to open the hanks, which are usually spring-loaded to close automatically when released.
Then raise the sail a little by pulling on the halyard. Making sure there isn’t any twist in the sail, attach the second hank. Raise the sail a little more and move on to the third hank. Keep working your way down the luff, raising the sail a little at a time to make sure it isn’t twisted and the hanks are all in order.
When all the hanks are attached, lower the jib back down to the deck while you route the jib sheets in the next step.
Run the Jibsheets
The jib sail is positioned while sailing by using the jibsheets. The jib sheets are two lines that come back to the cockpit, one on each side of the boat, from the aft lower corner of the sail (the “clew”).
In most small sailboats, the jib sheets are left tied to the sail’s clew and stay with the sail. On your boat, however, the jibsheets may remain on the boat and need to be tied or shackled to the clew at this stage. Unless there is a shackle on the sheets, use a bowline to tie each to the clew.
Then run each sheet back past the mast to the cockpit. Depending on the specific boat and the size of the jib, the sheets may run inside or outside the shrouds -- the tensile lines that run from the deck to the mast, holding in place. On the Hunter 140 shown here, which uses a relatively small jib, the jibsheets pass from the sail’s clew inside the shrouds to a cam cleat, on each side, as shown here. The starboard (right side as you face the bow)) jibsheet cleat (with the red top) is mounted on the deck just to the starboard of this sailor’s right knee. This cleat secures the jibsheet in the desired position while sailing.
With the jib now rigged, let's move on to the mainsail.
Attach Mainsail to Halyard
Now we’ll attach the mainsail halyard shackle to the head of the mainsail, a process very similar to attaching the jib halyard. First spread the mainsail out to identify its three corners as you did with the jib. The head of the sail, again, is the most narrow angle of the triangle.
On many small sailboats, the main halyard does double duty as a topping lift -- the line that holds up the aft end of the boom when it is not being held up by the sail. As shown here, when the halyard is removed from the boom, the boom drops down into the cockpit.
Here, this sailor is shackling the halyard to the head of the mainsail. Then he can go on to secure the sail’s tack in the next step.
Secure the Mainsail’s Tack
The forward lower corner of the mainsail, like that of the jib, is called the tack. The grommet of the tack is installed at the bow end, usually by a removable pin inserted through the grommet and secured on the boom.
Now the luff (leading edge) of the mainsail is secured at both the head and the tack.
The next step is to secure the clew (aft lower corner) and foot (bottom edge) of the sail to the boom.
Secure the Mainsail Clew to the Outhaul
The clew (aft lower corner) of the mainsail is secured to the aft end of the boom, usually using a line called the outhaul that can be adjusted to tension the foot of the sail.
The sail’s foot (the bottom edge) itself may or may not be secured directly to the boom. On some boats, a rope sewn into the foot (called the boltrope) slides into a groove in the boom. The clew enters the groove first, forward by the mast, and is pulled back in the groove until the whole sail’s foot is held to the boom in this groove.
The boat shown here uses a “loose-footed” mainsail. This means the sail is not inserted into the boom groove. But the clew is held at the end of the boom in the same way by the outhaul. Thus both ends of the sail’s foot are firmly attached to the sail and drawn tight -- making the sail work the same as if the whole foot was also in the groove.
A loose-footed mainsail allows for more sail shaping, but the sail cannot be flattened quite as much.
With the clew secured and outhaul tightened, the mainsail luff can now be secured to the mast and the sail raised to go sailing.
Insert the Mainsail Slugs in the Mast
The mainsail’s luff (forward edge) is attached to the mast, as the jib’s luff is to the forestay – but with a different mechanism.
On the aft side of the mast is a groove for the mainsail. Some sails have a boltrope on the luff that slides upward in this groove, while others have sail “slugs” mounted every foot or so on the luff. The sail slugs, as you can see in this photo just forward of the sailor’s right hand, are small plastic slides inserted into the mast groove where it widens out into a sort of gate.
Again, first inspect the whole sail to make sure it’s not twisted anywhere. Hold the main halyard in one hand during this process – you will be gradually raising the mainsail as you insert the slugs into the mast groove.
Begin with the sail slug at the head. Insert it into the groove, pull the halyard to raise the sail a little, and then insert the next slug.
Before completing this process, be sure you’re ready to go sailing soon after the mainsail is up.
Continue Raising the Mainsail
Continue raising the mainsail with the halyard as you insert one slug after another into the groove.
Note that this sail already has its battens in place. A batten is a long, thin, flexible strip of wood or fiberglass that helps the sail keep its proper shape. They are positioned in pockets sewn into the sail in a generally horizontal direction. In this photo, you can see a batten near the top of the blue section of the mainsail over the sailor’s head.
If the battens were removed from the sail, you would insert them back into their pockets either before beginning to rig the boat or now, as you raise the mainsail in stages.
Cleat the Main Halyard
When the mainsail is all the way up, pull hard on the halyard to tension the luff. Then tie the halyard to the cleat on the mast, using a cleat hitch.
Notice that the mainsail when fully raised holds the boom up.
Now you’re almost ready to go sailing. This is a good time to lower the centerboard down into the water if you haven’t done so already. Note that not all small sailboats have centerboards. Others have keels that are fixed in place. Both serve similar purposes: to prevent the boat from skating sideways in the wind and to stabilize the boat. Larger keels also help lift the boat to windward
Now you should raise the jib. Simply pull down on the jib halyard and cleat it on the other side of the mast.
Start Moving
With both sails raised, you’re ready to start sailing . One of the first steps to getting underway will be to tighten the mainsheet and one jibsheet to adjust the sails so you can get moving forward.
You may also need to turn the boat so that the wind fills the sails from one side. A boat on a mooring, such as shown here, will naturally be blown back such that the bow faces directly into the wind – the one direction you can’t sail! Being stalled facing the wind is called being "in irons."
To turn the boat out of irons, simply push the boom out to one side. This pushes the back of the mainsail into the wind (called "backing" the sail) -- and the wind pushing against the sail will start the boat rotating. Just be sure you’re ready to take off!
Related Articles
More related articles.
Professional BoatBuilder Magazine
The rudimentaries of rudders.
By Steve D'Antonio , Jul 12, 2018

Even stoutly constructed rudders are vulnerable to deterioration over time, especially when mild steel or high-carbon-stainless steel is buried in composite foil sections, which inevitably become saturated with seawater.
Like other systems and gear aboard cruising and commercial vessels, rudders have terms to identify their parts and functions. When measuring a rudder, the span and chord are the vertical height and fore-and-aft width, respectively, while the top of portion closest to the hull is referred to as the root , and the bottom is called the tip . Another term frequently used when discussing rudder design, particularly for sailing vessels, is aspect ratio —simply the square of the rudder’s span divided by the rudder’s area. As a rule of thumb, longer, narrower rudders are more efficient than short, wide rudders, and the aspect ratio describes precisely this relationship. Thus, rudders on high-performance sailing vessels are said to have a high-aspect ratio. Walking around a boatyard one day and measuring a few cruising sailboat rudders, I came up with aspect ratios of between 1.7 and 2.1, while one high-performance sailing vessel’s rudder came in at 3.5. The 20-knot semi-displacement lobster yacht’s rudder I measured yielded an even 2.0 aspect ratio, which is considered respectable for this application.
More identifiable rudder components include the stock ; web or armature ; rudderport or log ; stuffing box or compression tube ; bearing ; gudgeon ; and pintle . Not every rudder has all these components.
Rudderstocks
The rudderstock is essentially a shaft or tube that protrudes from the top and sometimes the bottom, depending upon type, of many rudder designs. Because this component provides the primary connection between the rudder’s blade (the flat section that imparts the steering force) and the vessel’s steering system, its design, construction, and material are consequential.
Most stocks are made of stainless steel, bronze, or aluminum, while some are carbon fiber, and they may be solid or hollow. Stainless steel is by far the most common, but it has a penchant for crevice corrosion when exposed to oxygen-depleted water. Insidiously, corrosion nearly always occurs in places where it cannot easily be seen—such as inside many composite (fiberglass and core material) rudder blades and beneath flax-type stuffing-box packing (the problem is exacerbated when the vessel is used infrequently).
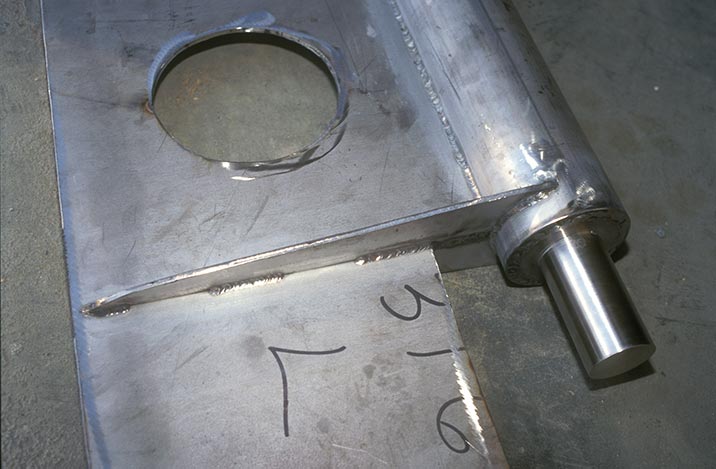
This all-stainless rudderstock and webbing is well crafted and ready to be covered with its composite shell.
Of the stainless steel alloys, some resist this corrosion better than others. Stainless-steel rudderstocks should be manufactured with strong, highly corrosion-resistant proprietary shafting alloys such as A22. The next best choice is 316L stainless steel, which also resists crevice corrosion well. Critically important is the L suffix, meaning “low carbon,” a requirement if it is to be welded, as nearly every rudderstock must be, to the support within composite rudders, or to all-metallic plate-steel rudders. Failure to source low-carbon stainless steel for the stock or the web leads to weld decay, sometimes referred to as carbide precipitation, where the region around the weld loses its resistance to corrosion and rusts when exposed to water.
Aluminum rudderstocks are nearly always tubular. Common on aluminum vessels to reduce the likelihood of galvanic corrosion, aluminum stocks are also relatively common on fiber reinforced plastic (FRP) vessels, particularly large ones. Rudder blades, particularly on aluminum vessels, are often fabricated from aluminum. Of the various aluminum alloys, only a few possess the necessary corrosion-resistance and strength necessary for use as rudderstocks. Of these, the 6000 series, and 6082 in particular—an alloy of aluminum, manganese, and silicon—are popular for this application.
Because aluminum, like stainless steel, suffers from corrosion, it should not be used as stock or web material in composite rudders. Referred to as poultice corrosion, it occurs when aluminum is exposed to oxygen-depleted water. Because oxygen is what allows aluminum to form its tough, corrosion-resistant oxide coating, the metal should never be allowed to remain wet and starved of air as it would be inside a composite rudder blade after water makes its way in around the stock and pintle.
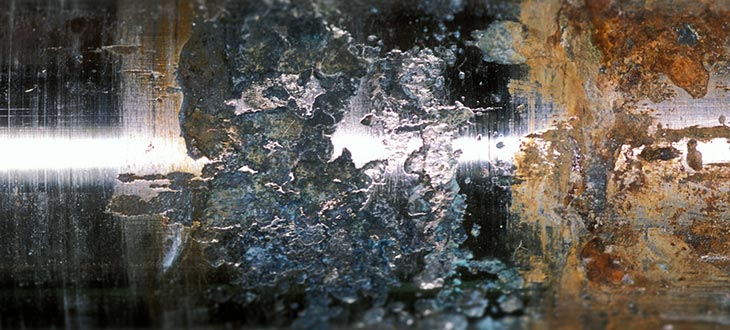
Rudderstock material can corrode in way of the oxygen-starved environment around the packing in a stuffing box.
Bronze, a once popular rudderstock material, is no longer common in today’s production vessels. Although strong and exceptionally corrosion resistant (immune to crevice corrosion), bronze is not easily welded to attach to a rudder’s internal structural webbing, and has thus been supplanted by stainless alloys. Bronze rudderstocks, particularly those that have seen many sea miles, are also known for wearing, or hourglassing, within stuffing boxes, where the flax rides against the stock. If a bronze stock rudder is chronically leaky, disassemble the stuffing box and check for excessive wear. The same is true for stainless and aluminum stocks: chronic leakage is often an indication of corrosion at the packing. Finally, because of their galvanic incompatibility, neither bronze nor copper alloys should be used aboard aluminum vessels for rudderstocks or any other rudder or stuffing box components.
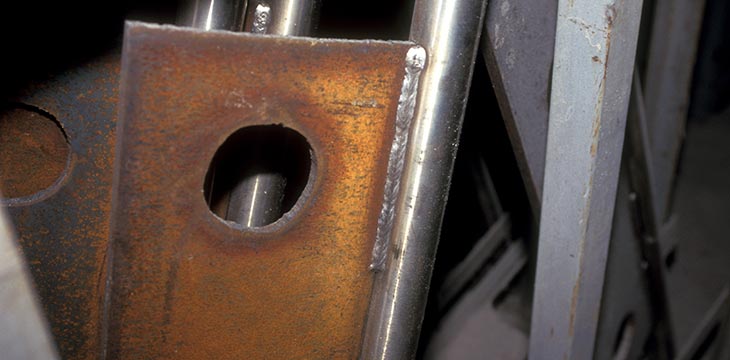
Mild-steel webbing welded to a stainless-steel rudderstock is a recipe for eventual corrosion and failure.
The webbing, or internal metallic support system, in most composite rudders must be strong enough to carry the loads of service and be made of the appropriate material. At one time, many rudders were built using stainless-steel stocks and ordinary, rust-prone mild or carbon-steel webbing. Inadvisably, some still are. The union between a stainless stock and FRP rudder blade is tenuous at best (the two materials expand and contract at different rates) and stainless steel’s slippery surface makes adhesion to the laminate resin a short-lived affair. Once water enters the gap between these two materials, it will reach the webbing and associated welds. Thus, all the materials within this structure must be as corrosion- and water-resistant as possible, and the core material must be closed-cell—often foam—and nonhygroscopic.

This destroyed foam-core and stainless-steel rudder reveals the conventional construction of such appendages.
Additionally, where possible, the stock should consist of a single section of solid or tubular material; i.e., it should not be sleeved, reduced, or otherwise modified or welded unless done so in an exceptionally robust manner. The webbing must be welded to the stock, but the structure of the stock should not rely on a weld that would experience cyclical, torsional loading.
The webbing in the form of a plate or grid should be welded to the stock with ample horizontal gussets (small wedges welded where the stock and webbing interface), which will reinforce welds 90° to the primary web attachment.
Whether the rudder is spade (supported only at the top) or skeg hung (supported at the top and the bottom), the stock must pass through and be supported by the hull. This is usually accomplished by a component known as a rudder log, or port. In its simplest form it’s a tube or pipe through which the stock passes. Nearly all logs incorporate two other components—a bearing and a stuffing box. The bearing may be as simple as a bronze or nonmetallic bushing or tube inside of which the stock turns; or it may be as complex as a self-aligning roller-bearing carrier that absorbs rudder deflection and prevents binding.
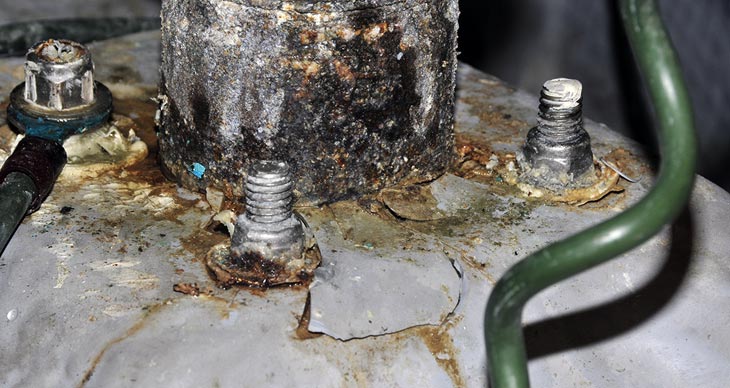
This rudder log is leaking, corroded, and poorly supported, with washers compressing into the backing plate and gelcoat cracking off.
The log transfers tremendous loads and must be exceptionally strong and well bonded to the hull. Fiberglass vessels should rely on a well-tabbed-in purpose-made tube (its filaments are wound and crisscrossed and thus quite strong) that is supported with a series of vertical gussets that distribute the load to the hull’s surrounding structure. On some spade rudder installations, particularly where the log is not, or could not, be long enough, an additional bearing is used at the top of the stock, above the quadrant, where it is supported by the vessel’s deck.
On metal boats the design is similar but with a metal tube welded in place, supported by substantial gussets. For vessels with skeg-hung rudders, the strength of the rudder log is still important. However, because the loads are not imparted by a cantilevered structure, logs used in these applications may be less substantially supported.
Stuffing Box
Unless the rudder log’s upper terminus is well above the waterline or on the weather deck, it is typically equipped with a stuffing box similar to those used for propeller shafts. But unlike a shaft stuffing box, the rudder’s stuffing box shouldn’t leak much, if any, seawater. Because the rudder turns slowly, friction and heat are not a problem. Packing (i.e., waxed-flax packing like that in traditional stuffing boxes) can typically be tight enough to stem all leakage, and lubricating it with heavy water-resistant grease will reduce friction and leakage.
Stuffing boxes that are above the waterline while the vessel is at rest, such as those on many sailboats, are often the most chronically leaky, because the packing tends to dry out and contract. To avoid this, liberally apply grease to the packing material itself; this requires partial disassembly of the stuffing box. Alternatively, a galvanically compatible (316 stainless or Monel for bronze stuffing boxes) grease fitting may be installed and periodically pumped with grease to keep the packing lubricated.
Rudder Bearings

Well-engineered rudder bearings support and lubricate the rudderstock.
Rudder bearings range from the basic rudderstock turning inside a bronze log, to the sophisticated aluminum, stainless, or nonmetallic roller bearings installed in a self-aligning carrier. For most cruising vessels, the choice of bearing is not as important as knowing which type of bearing is in use and its strengths, weaknesses, and maintenance needs. The simple shaft that turns inside a bronze log is durable and reliable but more friction-prone than roller bearings. If lubrication access or a grease fitting is available, it should be pumped with grease periodically, although most rudders rely solely on seawater for lubrication, which is perfectly acceptable.
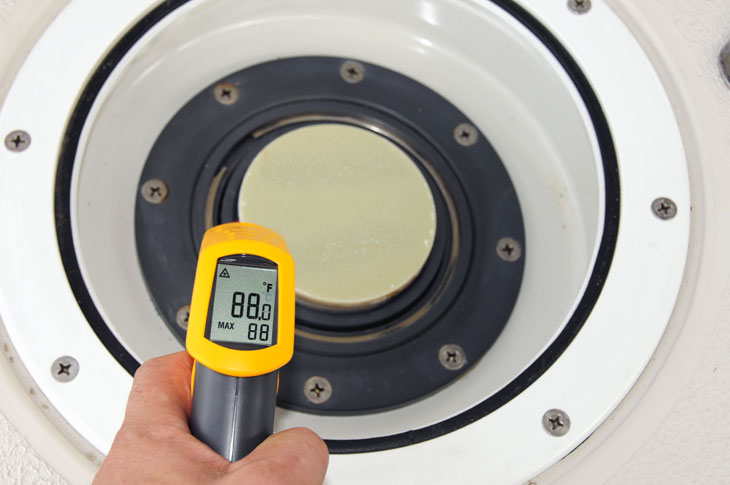
This synthetic upper bearing worked fine in cool temperatures, but when it heated up in the sun, the material expanded and caused binding in system.
Nonmetallic sleeve and roller bearings, often made of ultra high molecular weight polyethylene (UHMWPE), require no maintenance, are extremely slippery, and will not absorb water, an essential attribute for nonmetallic bearings. Delrin and nylon, for instance, will absorb water, expand, and lead to rudder binding. On several high-performance sailing vessels, I’ve had to replace nylon or similar bearings with UHMWPE to restore the steering to its proper specification and effort level.
Propeller Removal
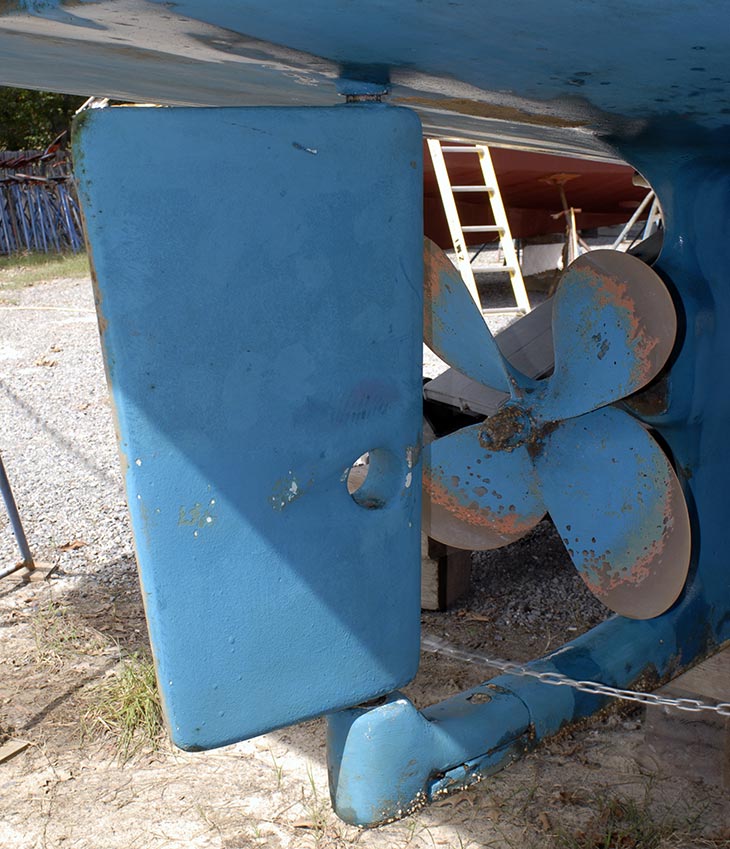
Shaft removal should be possible with the rudder in place. This conventional skeg-hung rudder has a hole to facilitate shaft removal when the rudder is swung hard to port or starboard.
Whether a rudder is a spade or skeg-hung design, it’s important to determine how it will affect the removal of the propeller or the propeller shaft. Is there enough clearance between the shaft’s trailing end and the leading edge of the rudder to allow the propeller to be removed or to use a propeller removal tool? Can the shaft be slid out without removing the rudder? Some rudders are equipped with shaft-removal holes, while others are installed slightly offset from the centerline; or the rudder’s leading edge has an indentation to allow the shaft to be removed. The propeller should be removable without having to unship the rudder. The dimensional rule of thumb calls for clearance of at least the prop’s hub length between the aft end of the shaft and the leading edge of the rudder.
Rudder Stops
The rudder’s movement should be unimpeded as it swings approximately 35° in either direction, making no contact with hull or propeller. Just as important as the rudder travel is how its movement is checked. Other than for the smallest runabouts with jacketed cables, all inboard rudders should rely on hydraulic cylinders to check rudder travel (provided they are designed to do so, and most are) or be equipped with robust stops. Stops must be integral to the hull, supported by substantial tabbing or a welded and through-bolted structure for fiberglass vessels, or by welded angle and shelves for metallic hulls.
About the Author: For many years a full-service yard manager, Steve now works with boatbuilders and owners and others in the industry as Steve D’Antonio Marine Consulting. He is an ABYC-certified Master Technician, and sits on that organization’s Hull and Piping Project Technical Committee. He’s also the technical editor of Professional BoatBuilder .
Read more Repair articles
Quick Custom Molds
Making one-off composite parts in the shop.
Repairing Bent Props with TrueProp Software
With all the advances in automation and electrification of boat propulsion systems, propellers remain critical to the task of converting power into propulsion. Made of bronze, nickel, aluminum, stainless steel,… Read more »

VacPuc Checks Your Vacuum Bags
It’s possible to monitor houses, cars, cats, and boats by smartphone, so why not check vacuum bags during resin infusion? Now composite technicians have this option with VacPuc, a new… Read more »

Recent Posts
- AIRMAR Achieves World’s First OneNet Product Certification
- Infusing a Workboat Hull with Elium
- Counting Carbon with LCA
- From Langan Design Partners, a Classic Cutter
- Isobel Combines Classic Looks and Modern Tech
- Companies (91)
- Construction (115)
- Design (168)
- Drawing Board (11)
- Education (29)
- Environment (18)
- Events (22)
- Materials (55)
- Obituary (18)
- People/Profiles (49)
- Products (18)
- Propulsion Systems (35)
- Racing (17)
- Repair (37)
- Rovings (326)
- Short Cuts (3)
- Sponsored Partner News (19)
- Systems (80)
- Task Sheet (1)
- Uncategorized (28)
- Wood to Glass (8)
ProBoat.com Archives
SmallBoatBigBass.com

The Perfect Small Boat Rudder to Keep You From Spinning Like a Top
Before I bought my Pelican Bass Raider 10e I spent countless hours online researching all the accessories and modifications that people made to their small boats.
Probably the most common complaint I saw online was the lack of a rudder, which caused the boat to constantly spin in the wind and be harder to control overall.
I wrote those complaints off for the most part until I got out on the water a few times.
Talk about FRUSTRATING!!
I was constantly battling my boat making tiny adjustments while trying to fish. It doesn’t take much wind either, maybe about 10 mph.
I knew I had seen all kinds of posts online about making a rudder out of wood, plastic, and even broken trolling motor parts.
I considered trying some of these methods but I’m not the most handy guy around and I figured my rudder would fall off and end up at the bottom of the lake.
So I continued searching for a pre-made rudder I could purchase that was designed specifically for small boats.
The Bullnose Rudder
The Bullnose Rudder is a heavy duty plastic rudder that clamps onto your trolling motor shaft.
All it takes is 4 screws (included) and you’re good to go.
It’s also designed to be a universal fit for electric trolling motors with 24 – 55 lbs of thrust.
Depending on your trolling motor you may have to mount it upside down, in front of, or behind the shaft.
No matter which way you mount it, it will still do the job.
I installed this on my Minn Kota Endura C2 in about 3 minutes and tried it out on the water.

Here’s What I Noticed
Before installing the Bullnose Rudder I would position my boat right where I wanted it but the wind or current would spin or move me pretty quickly.
I’d take my hand off my reel to kick the trolling motor on and make a tiny adjustment, then make another cast. Before getting my bait back to the boat I’d have to adjust the boat again because now I had spun a little too far in the other direction.
And I’d repeat this 956 times over the next 3 hours…

The Bullnose Rudder significantly reduces the boat spinning. I still have to adjust my position due to the wind but not nearly as much as before.
I also notice that if I’m trolling through an area and making casts the boat will generally stay moving in a straight line.
This is a HUGE improvement over not having a rudder at all.
Will the best small boat rudder work on your boat?
I am currently not using the bullnose rudder on my boat because I switched to the MotorGuide Bulldog 40 trolling motor which is mounted on the bow and foot controlled.
Try not to laugh, but I wanted to see what would happen if I mounted the rudder on this setup. Just in case anyone else was thinking of trying it… it doesn’t work.
The rudder makes the motor incredibly hard to turn due to the extra resistance and when it does turn it will swing all the way to one side and stop.
If you’ve got a setup similar to this you’ll need to add a fixed rudder to the back of the boat or go without one. I’ve found I don’t need one based on the control that I get from my particular trolling motor.
The vast majority of small plastic boats I’ve seen run a traditional, hand-controlled trolling motor on the stern and the simplest way to improve control is to add a Bullnose Rudder to your motor.
One thought on “The Perfect Small Boat Rudder to Keep You From Spinning Like a Top”
Need to know how to reattach the top half to the bottom half. I have it apart and all staples are out and clean. What should I use to put it back together? Thank you.
Leave a Reply Cancel reply
Your email address will not be published. Required fields are marked *
Save my name, email, and website in this browser for the next time I comment.
Reviews, Modifications, & Accessories
JavaScript seems to be disabled in your browser. For the best experience on our site, be sure to turn on Javascript in your browser.
We Ship Worldwide.
- Testimonial
- Create an Account
Boat Rudders and Tillers
Get your bow pointed in the right direction with boat rudders and marine tillers from Great Lakes Skipper's huge inventory of discount new and replacement boat parts. Check out our dozens of rudders, boat ski fins, rudder stuffing boxes, and tillers from Cruisers Yachts, Honda, MasterCraft, Teleflex, Centurion, Larson, Malibu, Volvo, Sea Ray, Tracker, and other top boat companies. Check back frequently - if we don't have what you need today, we might have it tomorrow. Thanks for stopping by!
Shop Products
Items 1 - 12 of 53
- You're currently reading page 1

- Privacy Policy
- Terms of Use
IMAGES
COMMENTS
Modern sailboats use many different types of rudders. ... Best Small Sailboat Ornaments. Daniel Wade. September 12, 2023. Discover the Magic of Hydrofoil Sailboats. Daniel Wade. December 11, 2023. Popular Posts. Best Liveaboard Catamaran Sailboats. Daniel Wade. December 28, 2023.
These are standard marine hardware items very simple in nature. FIG. 6-11 - This special factory-made kick-up rudder fitting incorporates the rudder gudgeons and pintles. The fitting mounts to the transom of the boat but allows the rudder to be removed. This fitting is normally used on small boats only.
Glass one side of the rudder, let cure. Cut off excess edge stuff and rough sand/grind. Glass other side of rudder, let cure. Cut off excess, sand until flush. Glass edges based upon which were generally 'up' when clamped in a mostly horizontal way (images 4 and 5). Glass the remaining edges.
Flatten the trailing edge to 1/16 or 1/8 of an inch on small boards, and closer to 1/4 of an inch on larger boards. Any board, no matter how stiff, will deflect. To prevent the axle hole that the centerboard pivots on from binding when deflection occurs, make the hole somewhat larger than the pin diameter.
Dynamic/Seitech Dollies Compatible Parts. Type 1: Boats up to 250 lbs Dollies. Type 2: Laser, Byte & Invitation Dollies. Type 3: Curled Gunwale Boats Dollies. Type 4.1: Small/Med Bowsprit Boats Dollies. Type 4.2: Heavier Sprit Boats Dollies.
By the same token, if the CG is forward of the pivot point, the blade will remain in a partial kick-up position. Needless to say, your rudder blade must have a specific gravity greater than 1, otherwise it will float up and won't drop down at all. Solid aluminum has a specific gravity of 2.64; roughly 2.5 times the density of water.
Obviously, the rudder is a pretty important part of a sailboat. Without it, the boat cannot counter the forces put into the sails and cannot steer in a straight line. It also cannot control its direction, even under power. A rudder failure of any kind is a serious emergency at sea.
This design of sailboat rudder is something of a compromise between the spade rudder and the full skeg rudder. Supported at its mid-point by a half-depth skeg, it benefits by the area forward of the stock, below the skeg. This applies a balancing force as the rudder is turned making the steering lighter than it would otherwise be.
A sailboat rudder comprises several components, each with a unique function that contributes to the rudder's overall effectiveness. The stock is the main vertical shaft that connects the rudder blade to the boat's helm. ... Small cracks or damage can often be repaired, but if the damage is extensive, it may be necessary to replace the ...
At Rudder Craft we build every sailboat rudder with the singular focus of improving your sailboat's steering performance. In order to accomplish this our sailboat rudders incorporate a hydrofoil design, as a matter of course. Sailboats ranging from the West Wight Potter 15, all the way up to the MacGregor 36 and Catalina 42, will find a more ...
After hull integrity, rudder integrity is the most vital component of a seaworthy vessel, yet most sailors pay more attention to LED lighting or smartphone apps than they do to their boat's rudder. Before you shrug off rudder failure as a remote concern, consider that the incidence of mid-ocean rudder failures is close to 1 percent.
Make sure to sand the wood down until it is smooth and even. Shaping the rudder for a boat involves cutting and sanding the rudder blank to the desired shape. This involves using a jigsaw, a sander, and a file to achieve the desired shape. The rudder should be sanded smooth and free from any sharp edges.
The Kick-Up rudder design includes a 316 stainless steel nitrogen charged gas strut (patent-pending) which keeps the rudder blade in the ideal position for top performance. These rudders shrug off obstacles and groundings, returning to position automatically, predictably, every time. The rudders can be raised 180 degrees for easy and safe ...
Components and mechanics of boat rudders. A typical boat rudder consists of several key components: Rudder blade: The rudder blade is the flat, vertical surface responsible for redirecting the water flow. It is the most critical part of the rudder and comes in various shapes and sizes. Rudder stock: The rudder stock is a sturdy vertical shaft ...
Most small sailboats under 20 feet in this list are time-tested, easy to rig, simple to sail, extremely fun, and perfect either for solo sailing or for sailing with friends and family. ... This is a lightweight design that brings forth modern fin keel and spade rudder, which makes it agile, stable, and faster. The Paine 14 is built using cold ...
I made a blank for my rudder by gluing layers of marine ply with epoxy to the required 1″ thickness. I have found that the plywood, in spite of its cross-grain plies, has sufficient strength for the size of small-boat foils that I have built (though the cross-grain would weaken a long thin foil). Plywood does not warp and has the added advantage over solid wood in that the plies create a ...
On a sailboat, as the rudder is moved to one side by means of the tiller or steering wheel, the force of the water striking one edge of the rudder turns the stern in the other direction to turn the boat. Different types of rudders have different advantages and disadvantages. The type of rudder is often related to the boat's type of keel ...
A sailboat rudder steers the boat. A rudder is a hinged fin or blade mounted on the stern of the vessel that turns side to side, and it's controlled by a tiller or a helm. A rudder is one of the primary controls of a sailboat. When the boat moves forward through the water, the rudder causes friction on one side and changes the direction of the ...
Small Sailboats; Design Basics; Pics, Data & KPIs. Sailboats under 30' Sailboats 30'-35; Sailboats 35'-40' Sailboats 40'-45' Sailboats 45'-50' Sailboats 50'-55' Sailboats over 55' ... The primary purpose of sailboat rudders is of course to give the helmsman the ability to steer the boat, but a well-designed one will also provide hydrodynamic ...
Let us help. 206-632-4462. Secure your rudder! Fisheries Supply offers top-quality pintles & gudgeons for sailboat rudders. Find rudder pintles, rudder gudgeons, & sailboat tillers!
Ultimately, some combination of small adjustments should bring the rudder angle into the appropriate range. Too much rudder angle and you are just fighting yourself. Turn this rudder just 10 degrees and the end plate is lost, reducing the amount of lift generated. This rudder might as well be transom hung, the way that the end cap just disappears.
Jun 22, 2012. #2. The kick up rudder blade is designed to kick up if it gets grounded out or hits something submerged. You want to lock it all the way down when you sail. I keep my rudder blade in the up position when my boat is on the mooring or at anchor in shallow water. I added a hold up line to my blade years ago.
First, spread out the sail and identify each of its corners. The "head" is the top of the sail, where the triangle is the most narrow. Attach the jib halyard shackle to this corner, making sure the shackle is closed and secure. Then follow the front edge of the sail (called the "luff") down to the next corner.
Walking around a boatyard one day and measuring a few cruising sailboat rudders, I came up with aspect ratios of between 1.7 and 2.1, while one high-performance sailing vessel's rudder came in at 3.5. ... The webbing in the form of a plate or grid should be welded to the stock with ample horizontal gussets (small wedges welded where the stock ...
The Bullnose Rudder. The Bullnose Rudder is a heavy duty plastic rudder that clamps onto your trolling motor shaft. All it takes is 4 screws (included) and you're good to go. It's also designed to be a universal fit for electric trolling motors with 24 - 55 lbs of thrust. Depending on your trolling motor you may have to mount it upside ...
Boat Rudders and Tillers. Get your bow pointed in the right direction with boat rudders and marine tillers from Great Lakes Skipper's huge inventory of discount new and replacement boat parts. Check out our dozens of rudders, boat ski fins, rudder stuffing boxes, and tillers from Cruisers Yachts, Honda, MasterCraft, Teleflex, Centurion, Larson ...