Refastening a Wooden Hull - Season 4, Episode 1 Now Available!

Planking: An Introduction to Methods & Techniques

The most important skills in boatbuilding. It distinguishes the carpenter from the boatbuilder. It’s one thing to glue two boards together for a table top or to nail siding on a house; it’s quite another to keep water out of a seam. This is not to say that boatbuilding involves superior skill; it’s just that a different set of skills is needed, along with the intention of keeping water out.
I work as a boatbuilding instructor at the Carpenter’s Boat Shop in Pemaquid, Maine, and have the pleasure of teaching apprentices some of the vernacular and many of the techniques that go into wooden boat building. Among them, none is more gratifying than the planking process.
In this article, we’ll explore commonly used planking types and examine the strengths and drawbacks of each one. You’ll also learn the rudiments involved in “getting out” (creating and installing) a boat’s planking. It is my hope that this article will help you grow in knowledge and confidence so that you too can try your hand at planking.
Integral to both carvel and lapstrake planking styles, lining off is dividing the hull surface into appropriately sized planks and locations, and then making sure that they look even and fair. By fair, I mean gradual curves that are “eyesweet”: no sharp bends, knuckles, or hitches. Looks matter, and lining off helps to ensure fair plank lines that are proportional to one another and blend well with the overall hull shape. More important, it gives the crew information on how wide to make the planks and what shape they will be.

Many sets of plans for small and simple boats already include lining-off marks, so these need only to be carried from plan patterns to molds and then checked for fairness with a batten. However, if you hope to take on a more advanced project down the road, lining off planking is a skill that you’ll need to add to your repertoire. You can read more on this in WoodenBoat No. 101.

Carvel planking is a common method found on a great variety of traditional wooden boats, from large schooners to classic racing yachts and tiny dinghies. A carvel hull is less fussy to line off than lapstrake because if plank lines aren’t perfect, paint will cover the discrepancies. While it does present challenges to those with limited experience, we’ve found that our apprentices, most of whom have only a few months of boatbuilding experience under their belts, do a fine job of building carvel-planked Catspaw dinghies. Don’t allow a lack of experience to hold you back. In his book The Boatbuilder’s Apprentice, boatbuilder Greg Rössel draws upon the example of a wooden barrel. Barrel staves, analogous to our planks, are laid tightly alongside one another, and taper at the ends. A wooden boat hull is similar, but with a few extra curves thrown in.
Once the hull setup is lined off (or marks from the plan patterns are transferred and faired), planking can begin. Each plank is individually shaped, or “spiled,” then meticulously fitted for tightness on both edges. We will discuss the process of spiling in greater detail later on. When the planks are tight along their edges, a slight bevel is planed along one outer edge to accept cotton fibers that, when driven to a proper depth, will provide watertight integrity. The hull is then faired (planed and sanded eye-sweet), caulked, and painted.
Carvel planking has a great many benefits that justify its popularity. It is effective at keeping water out, is adaptable to a variety of hull shapes, and it is easily repairable when compared to many other planking types. Because carvel planks can be butted end-to-end, shorter lengths can be used.
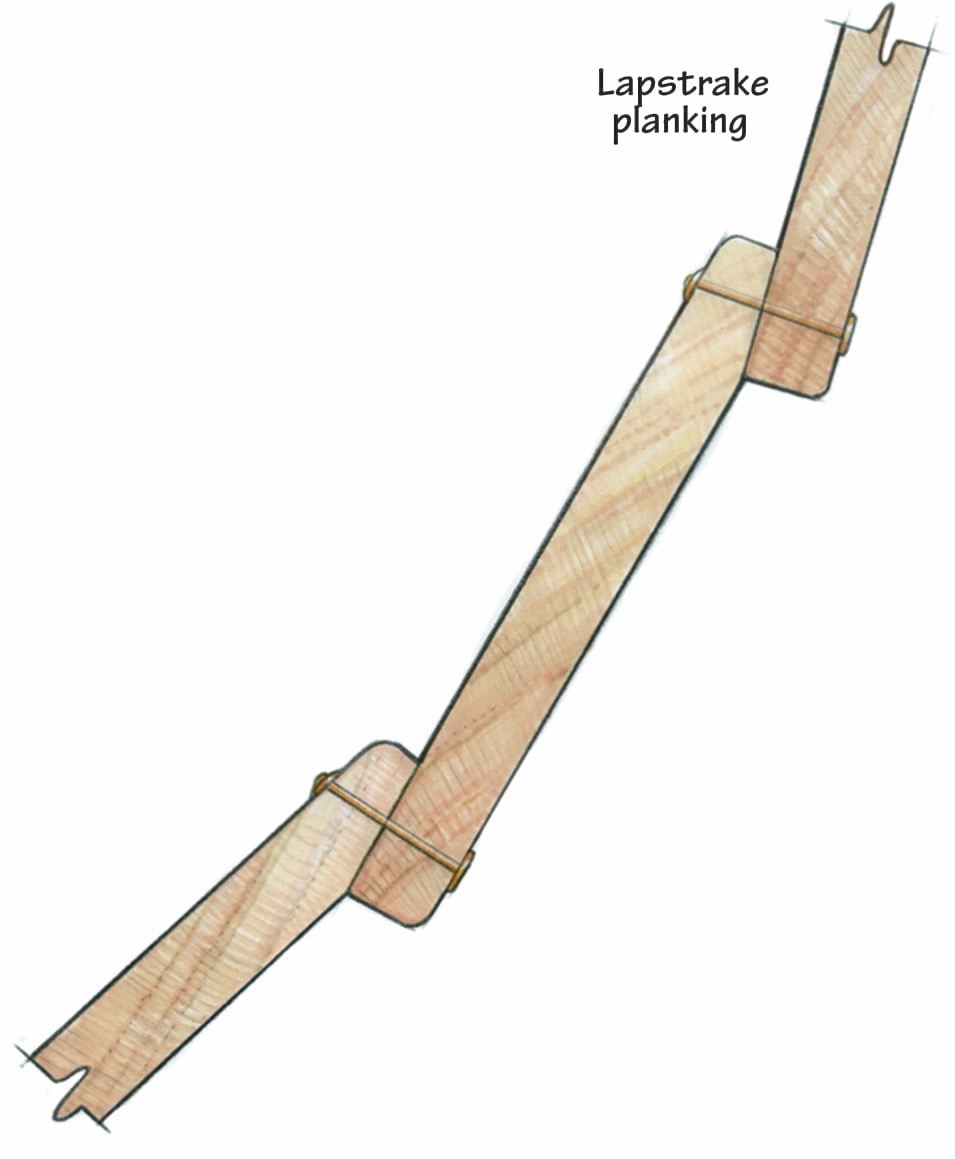
Lapstrake, or clinker, planking is what many of us have in mind when we think of a small, classic wooden boat. Each plank is beveled where it overlaps the adjacent plank, somewhat like clapboards on a house, adding longitudinal strength and assisting the ribs in holding the hull shape and reducing flex. What’s more, those planks are then fastened to one another as well as to the frames. This interconnectedness allows fewer frames and thinner planking than in a carvel planked boat of comparable size.
Lapstrake planking is especially appropriate for smaller boats where reduced weight is important. This planking method has some peculiarities to contend with that you won’t find in other planking types, one being the “gains” that have to be fashioned along the ends of each plank as it approaches the bow and sometimes the stern, overlapping the plank below. Without these gains, you’d have a sawtooth appearance where the planks join the stem. We’ll discuss how to cut gains later on.
Once clear of the gains, which run 6″ or so aft of the stem, lapstrake plank edges protrude, so no amount of paint will cover a poor job of lining off. Although the plans often have the lining-off already marked on the station mold patterns, you’ll still need to look at the boat and learn to trust your eye in assuring that the plank lines are fair and in good proportion. Lapstrake repair is also a bit more involved than that of its carvel counterpart.
Honestly, though, all planks are a little tricky to repair. Lapstrake-planked boats are a favorite of first-time builders, and for good reason, I think. First, the building jig can be very simple—some lapstrake boats are even built over a single mold. Second, fitting the planks needn’t be as precise as it is for carvel. In fact, in some cases, a plank lap width can be off by almost a quarter of an inch and still be acceptable. Third, there is no need to fair the hull after planking.
Once the planks are fitted, give them a thorough sanding before fastening them in place, and that’s the last time you’ll have to touch them until it’s time for paint. Finally, when lapstrake boats dry out, their seams don’t stand wide open as they do with carvel. This means they require significantly less time to “make up” (swell up in water), if any. This is good news for us trailer-sailors.
Stitch-And-Glue
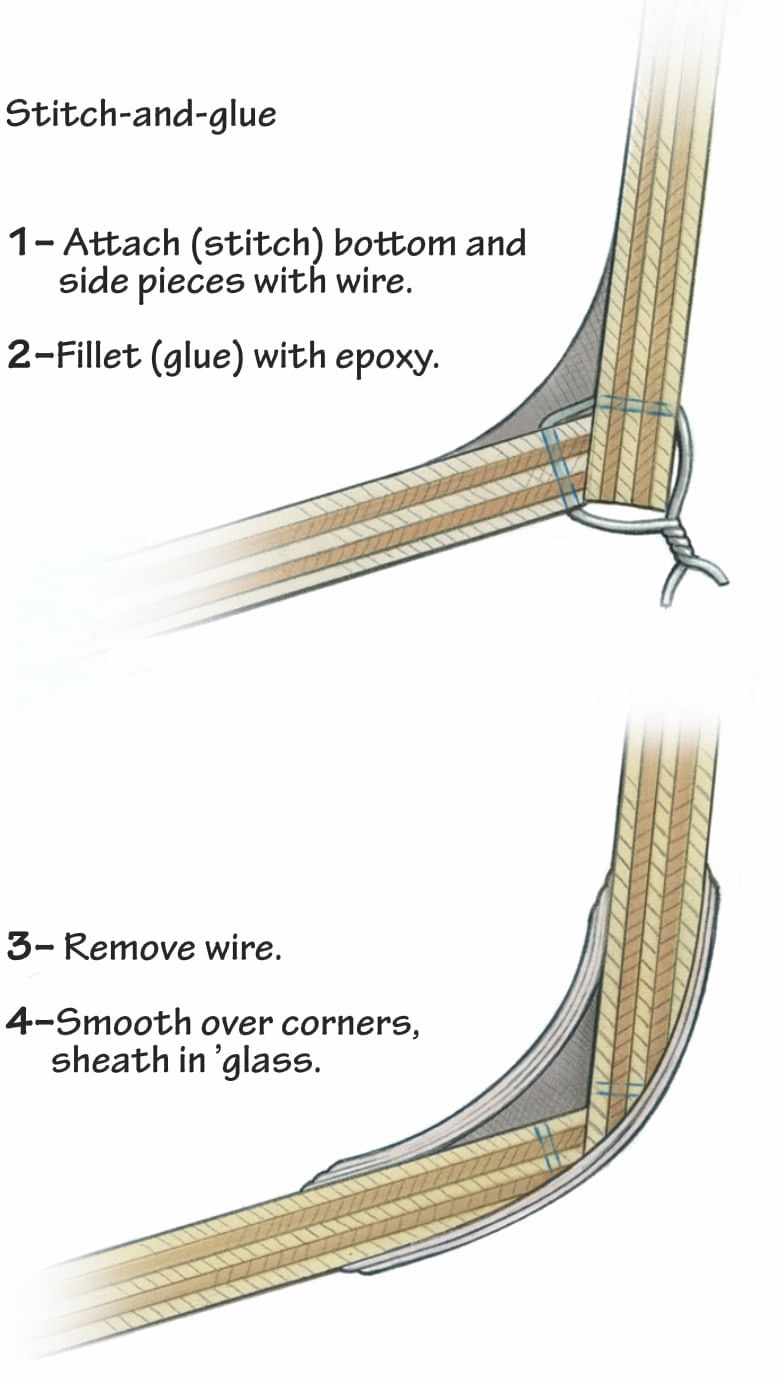
Stitch-and-glue has gained in popularity lately, as it is such a straightforward process. Kits are widely available, but if you aren’t interested in a kit it is easy enough to buy the necessary plywood, epoxy, and copper wire, and proceed on your own. Predominantly, stitch-and-glue is used to build small boats like kayaks and lightweight rowboats. It consists of cut-to-shape side and bottom panels that are drilled and then wired at intervals in a sort of stitched style. Epoxy is then used to fillet the joints. The wires can be taken out after the glue is cured. Stitch-and-glue is fast and almost as easy as putting a sandwich together. It’s great for a weekend project when you want to get out on the water fast.
Strip Planking

Strip-planking has become a sweetheart of the do-it-yourself boatbuilding crowd, its chief advantage being that all of the “planks” can be the same dimension (usually about 1″ 1″). Planks are nailed to one another edge-to-edge and the strips are alternately fastened to ribs as building progresses. This makes for a strong hull, but can be difficult to repair.
Strip Building

Strip-building, a variant of strip-planking, is also an excellent choice for the first-time builder, often used to build kayaks, canoes, and other small boats. One by one, strips are glued next to one another on the building jig and then temporarily stapled to the molds. Often, these strips have bead and cove edges for a better fit and a stronger seam. As strip after strip is laid down, the hull grows. Then, the whole thing gets a coat of fiberglass and epoxy, inside and out. While this procedure renders a beautiful, strong, and long lasting boat, some of the disadvantages are that the ’glassing is messy work, and if a repair is needed later on, it can become a major undertaking as there is no single “plank” to replace.
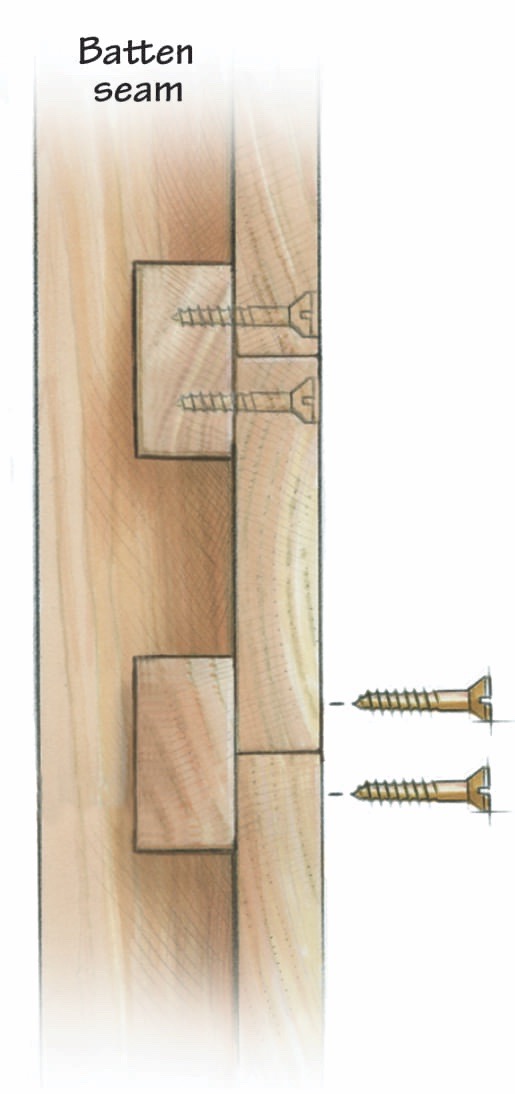
Batten Seam
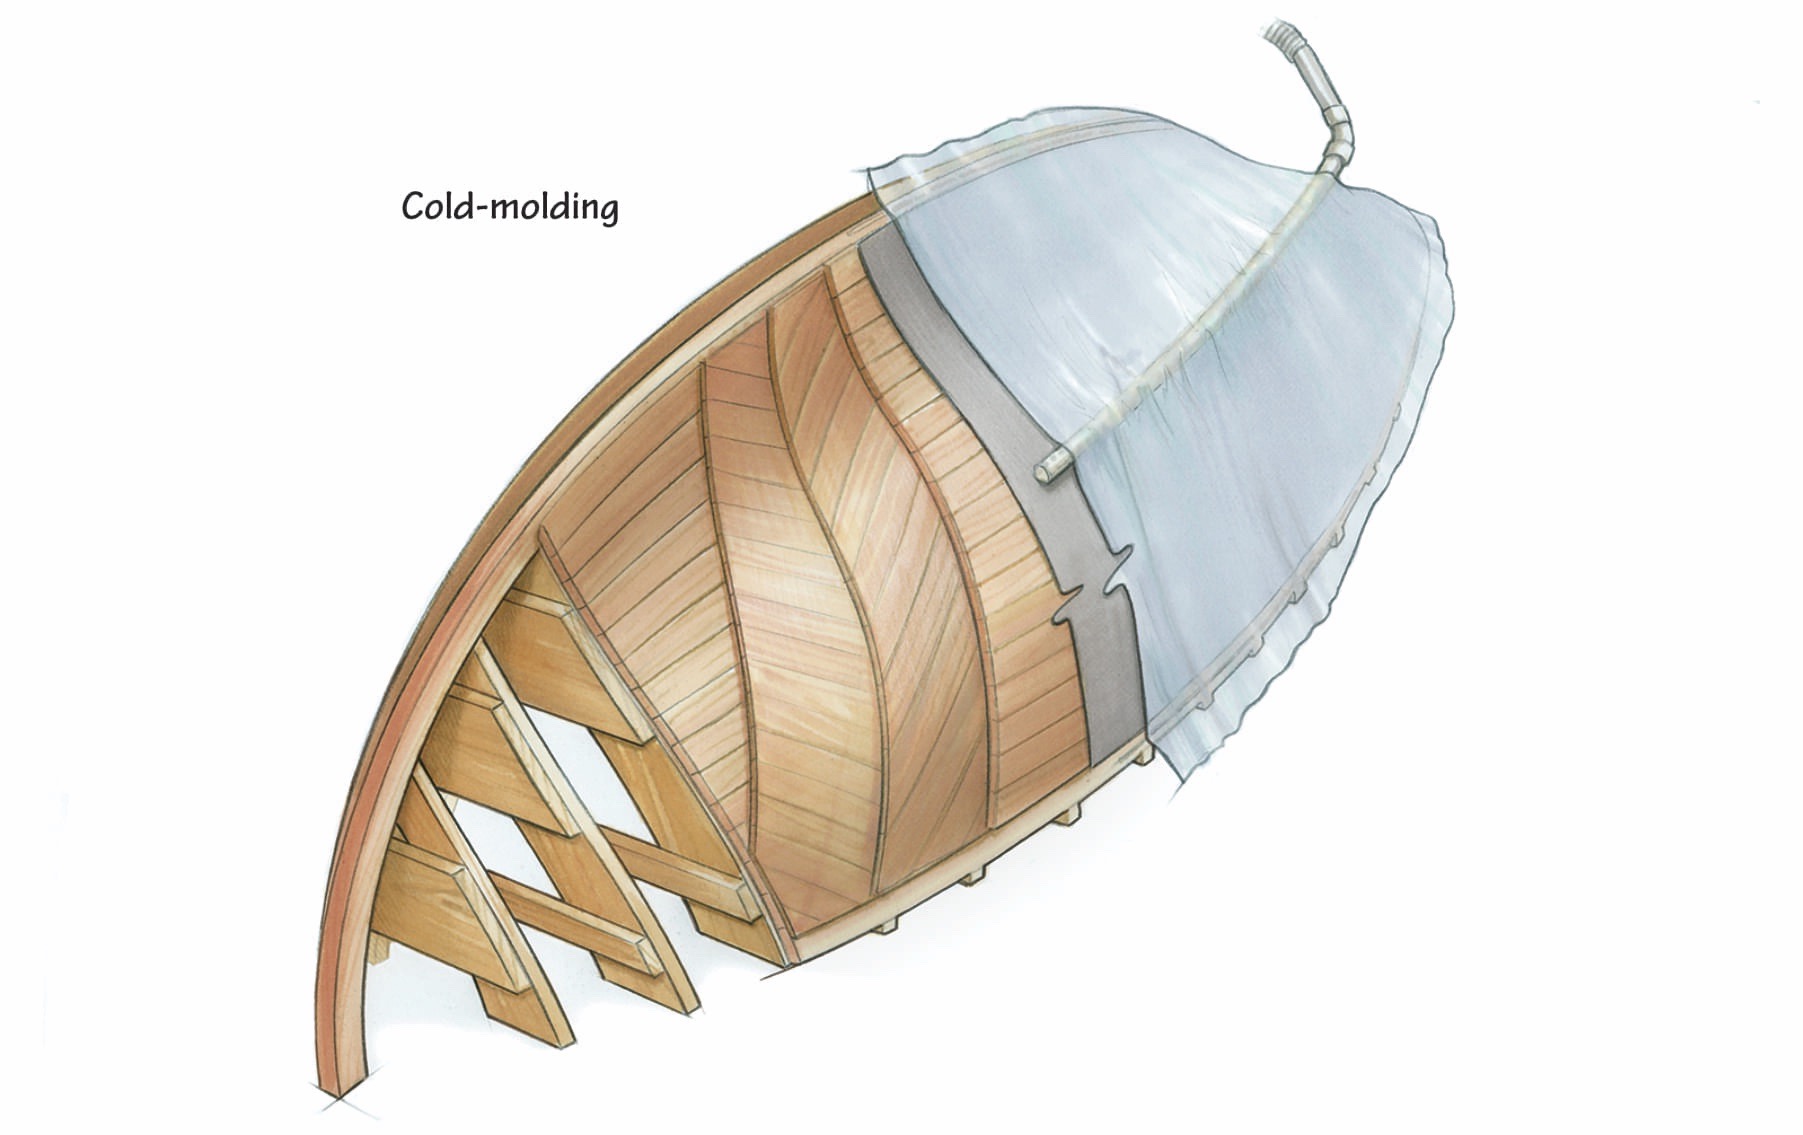
Cold-Molding
Cold-molding is a process of creating a hull by layering. Epoxied (glued) veneers are generally laid up over a strip-planked, jig supported first layer to create a boat hull. This sandwiching of layers is somewhat related to making plywood but, of course, renders a far more complex shape. It is common to use straight-grained Douglas-fir, red cedar, or mahogany for the veneers—or a combination of these woods, chosen for their tensile strength and resistance to rot. Veneers are generally about 1⁄8″ thick and from 4″ to 10″ wide. For efficiency and best contact between layers, this process requires vacuum-bagging, where a piece of plastic becomes a giant clamp that conforms to the hull’s contours. A large piece of plastic is laid over the wet veneers that have been fitted and stapled into place.
Next, the plastic is sealed along the perimeter of the area to be squeezed. Finally, a vacuum pump removes the air underneath the plastic and atmospheric pressure forces it down tight on the veneers. The pump is left running (there’s always a little leakage) until the epoxy kicks (sets up). While experienced people can “bag” several layers at once, generally it’s done one layer at a time, on each side of the hull, alternating sides, with each layer running diagonally to the previous one.
The process, though lengthy, can employ workers with less skill than some other types of wooden boat construction. To be sure, this is a messy and complex way to create a hull—but the results are worth it. Cold-molded hulls are very strong and easy to maintain.
Getting Out a Plank
Now that we have touched upon the most common types of planking, it’s time to address how to make the planks themselves. Some methods, like carvel and lapstrake, require a builder to learn how to spile a plank. Spiling is translating those three-dimensional curves and tucks of the hull to something that we can cut out of flat plank stock. You will soon discover that all of those sweet lines marked on a nicely lined-off building jig no longer look the same when picked off and placed on the stock on your bench.
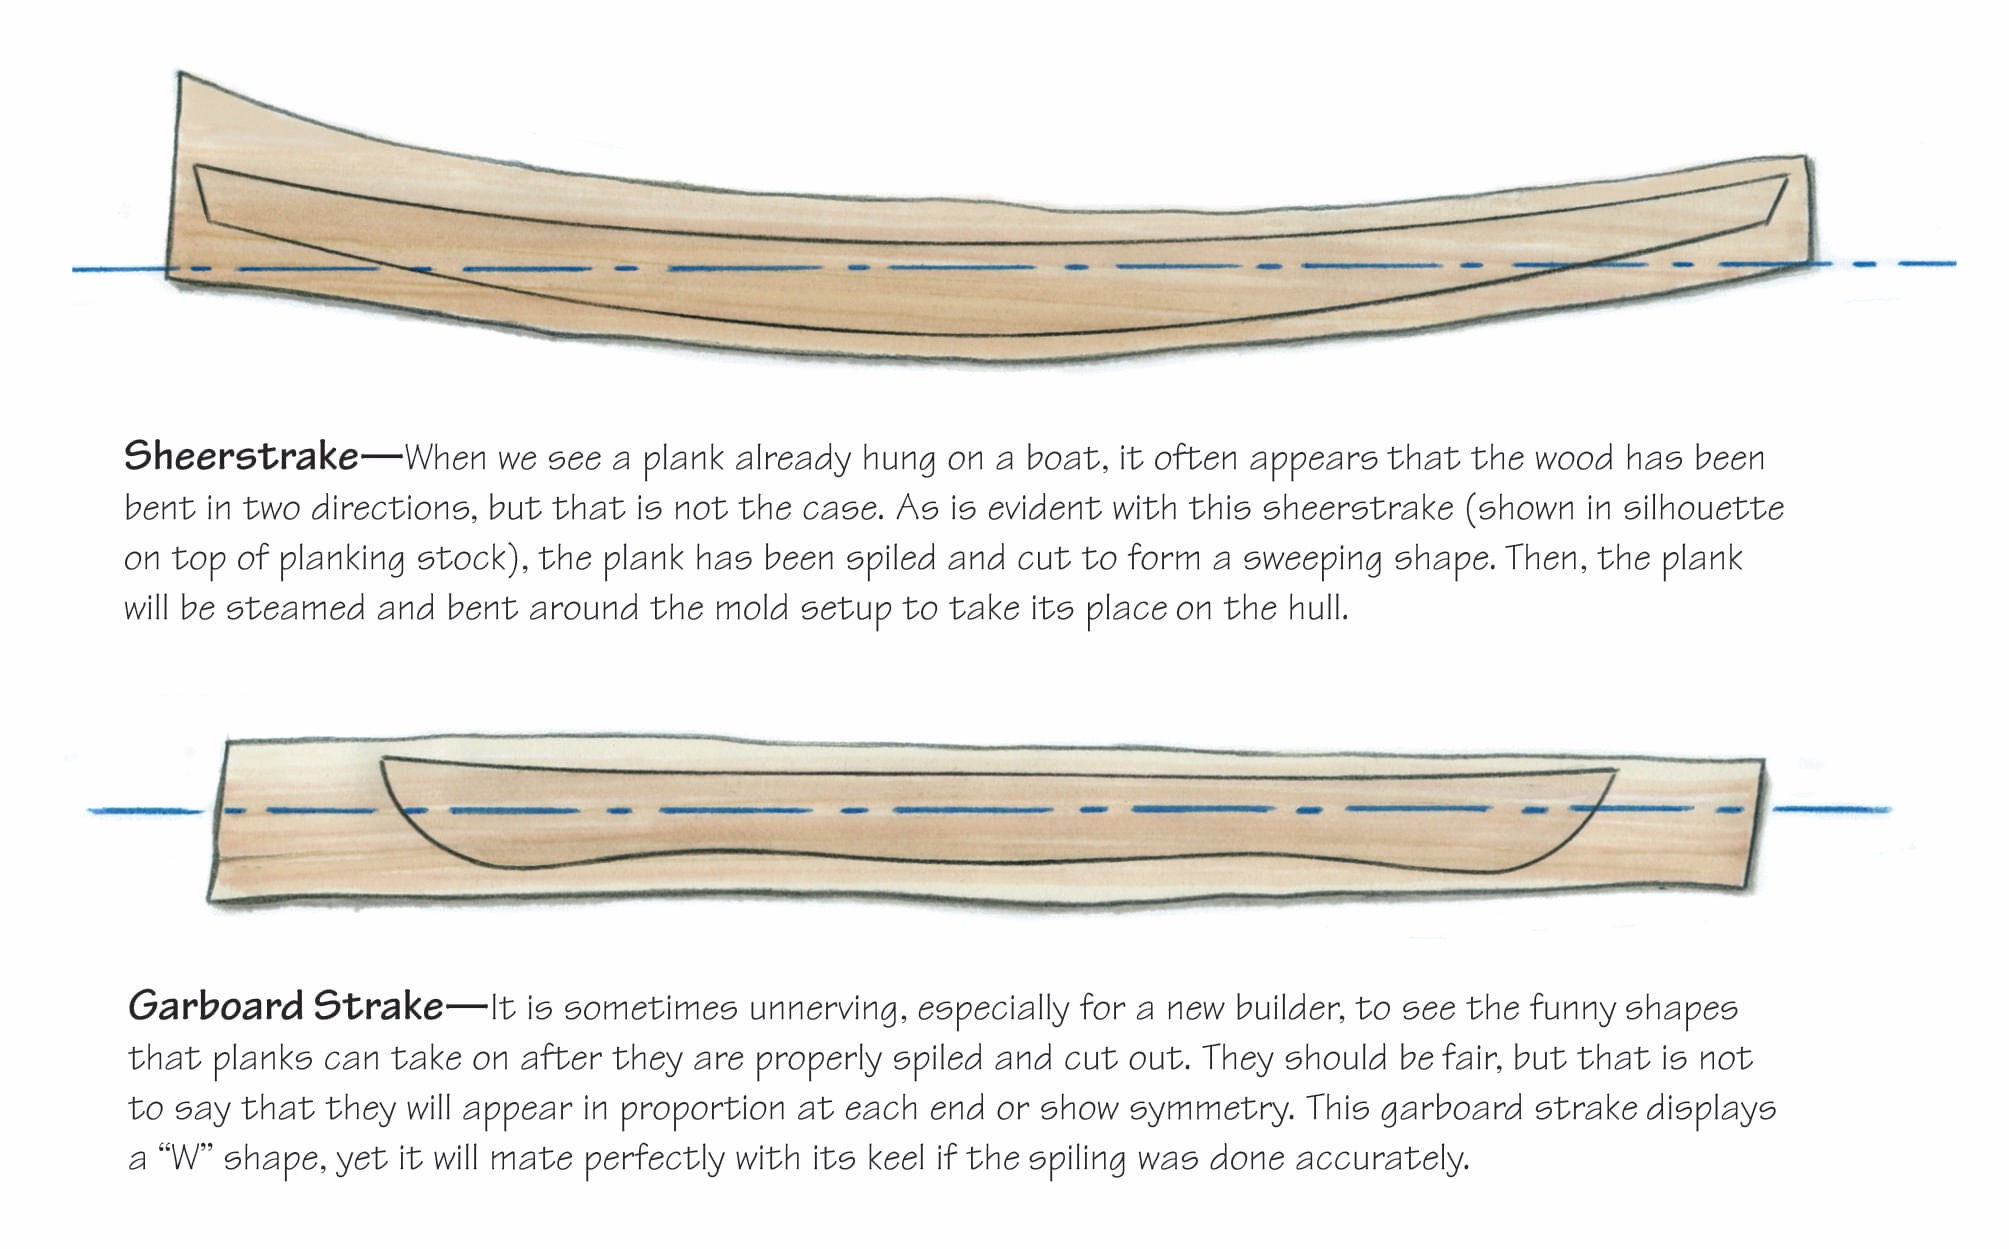
When we see planks on the hull, what we perceive as lines running parallel with the sheer are actually shallow Ws, Ss, and other shapes that look like crescent moons or bananas when laid out in two dimensions (see illustrations above). This isn’t true of all hulls, though; depending on the size and type of the boat, you may find that a few of the planks are straight. Spiling entails nailing a batten onto the hull where you want the plank to go and recording on it the information about its shape. For spiling battens, I usually staple a few strips of lauan plywood together, attached with a scab or butt strap. Once the batten is placed, the marking can begin.
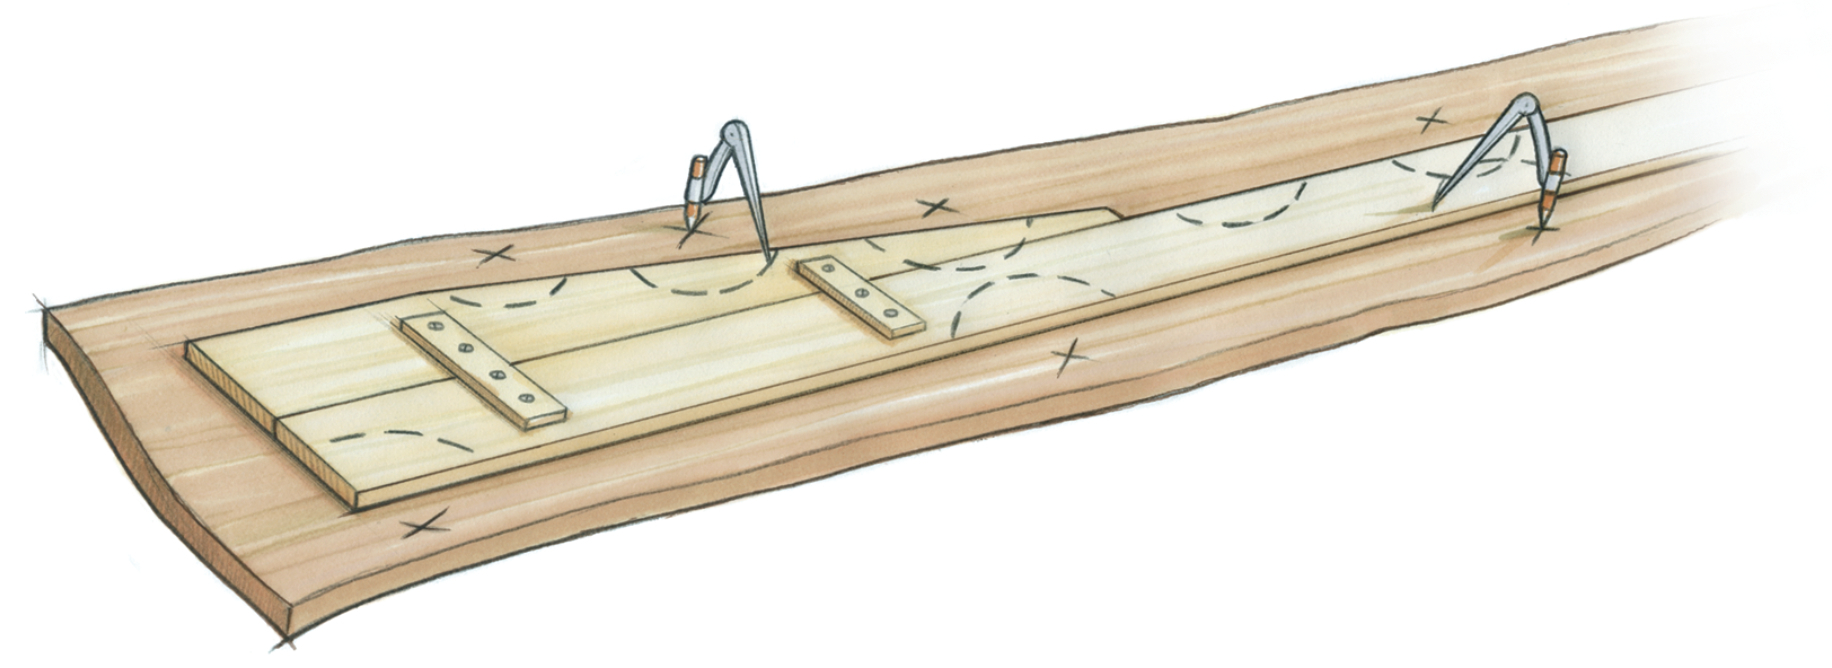
Some use a compass, some a joggle stick, while others prefer a length of a carpenter’s folding rule. Whatever means you choose, it is important to be consistent and meticulous. Any slop or movement will result in an inaccurate spiling. To use a compass as shown in our example on the facing page, start with a setting that has the appropriate reach for the entire length of the plank. Once that is established, set the compass and make a “sacred” circle somewhere—on the boat, the bench, or another board—but not on the batten, as this may be confused with spiling marks in that location. If you ruin your setting, you can quickly restore it using the sacred circle.
With one leg of the compass on the reference point, use the other, the pencil end, to draw an arc (a quarter circle or so) on the spiling batten. Continue to make these marks until you have picked up points along the top and bottom edges of the plank space. Next, remove the spiling batten and secure it to your planking stock which is lying flat on the bench. Then, with the compass setting still intact (check it on your sacred circle), transfer the points you picked up from the boat to the planking stock.
Picking Up Points

Note the “smiles” and “frowns” that the arcs make on the batten. The smiles indicate the endpoint, frame areas, and a few extra defining points along the boat’s bottom. The frowns indicate the only three available spots to pick up points from the lined off setup in this area (dotted lines indicate where battens have defined plank lines in the lining off process). The three points are the endmost point on the transom, the aftmost point on the aftmost frame, and the aftmost point on the aftmost mid-frame. Once forward, pick up the forward-most point on each frame and inner stem. These points define the shape of the plank.
Transferring Points to the Planking Stock
Used in lapstrake planking, gains are the areas at the bow, and often the stern, where the plank thickness at the overlap is reduced so that each plank gradually fairs into its adjacent partner by the time it reaches the stem (and the transom, if a smooth outline is desired). This is accomplished by planing a wedge- shaped rabbet at the end(s) of the plank. It sounds more complicated than it is; once you’ve done one, you can do a thousand. I hope this introduction to planking types and techniques will help you to make a more informed choice as you consider building your next boat.
We have only begun to scratch the surface here. The best way to learn more is to get out there and try it. Once you wrap your mind around the planking process, you’ll never look at woodworking the same way. For me, understanding the planking process opened up the world of boatbuilding. I hope it does the same for you.
Darin Carlucci and his wife, Serafina, live in Pemaquid, Maine.
Related Articles
Ten things that can hurt your wooden boat, bung removal with the rotabroach sheet-metal hole cutter, a smooth and level painted finish, one-off wood-and-canvas construction, related videos, the abcs of wooden spar construction, setting up the construction jig, greg rössel, steam bending, related book chapters, building the house, tools and devices, subscribe for full access.
Flipbooks are available to paid subscribers only. Subscribe now or log in for access.
⛵Boat Mavens
Boating Lifestyle | Boats | Boat Shop

The Ultimate Guide to Planning and Building Your Own Boat
Welcome to the ultimate guide to planning and building your own boat . Whether you’re a seasoned boat builder or a beginner with a passion for the open water, this comprehensive guide will provide you with all the knowledge and insights you need to embark on your DIY boat building journey.
From the initial design phase to the final construction steps, we’ll walk you through the entire process, offering step-by-step instructions and expert tips along the way. With our guidance, you’ll be equipped to create your dream vessel and experience the satisfaction of cruising the waves in a boat you built with your own two hands.
Are you ready to dive into the exciting world of boat planning and building ? Let’s get started on this nautical adventure together!
Table of Contents
Key Takeaways:
- Planning and building your own boat is an achievable DIY project.
- This guide covers the entire boat building process , from initial design to final construction.
- Expert tips and insights will help you avoid common pitfalls and achieve professional-level results.
- Choosing the right materials is crucial for the success and longevity of your boat.
- Whether you’re a beginner or an experienced builder, this guide has something for everyone.
The Pleasures and Perils of Plywood
When it comes to boat building, plywood is a popular choice due to its versatility and affordability. Many boat builders opt for plywood boat construction as it offers a range of benefits. However, it’s essential to understand the potential drawbacks as well. In this section, we’ll explore the joys and challenges of building a boat with plywood.
The Advantages of Plywood Boat Building
Plywood boat construction comes with several advantages that make it an attractive option for boat builders. These include:
- Cost-effectiveness: Plywood is generally more affordable compared to other boat building materials such as fiberglass or aluminum, making it an excellent choice for those on a budget.
- Easy to work with: Plywood is lightweight and easy to handle, making it suitable for both professional and DIY boat builders.
- Versatile design options: Plywood can be easily cut and shaped, allowing for a wide variety of boat designs and customization options.
- Strength and durability: While plywood may not be as strong as some alternative materials, it still offers sufficient strength and durability when used correctly.
Tips for Successful Plywood Boat Construction
While plywood boat building offers numerous benefits, it’s essential to be aware of certain factors to ensure successful construction. Here are a few tips from experienced boat builders:
- Choose the right type of plywood: Marine-grade plywood is specifically designed for boat building, offering superior resistance to water and weather.
- Properly seal and protect the plywood: Applying a high-quality sealant and protective coatings is crucial to prevent water damage and increase the lifespan of the boat.
- Follow proper construction techniques: Plywood boats require specific construction techniques, such as edge sealing, scarf joints, and proper fastening, to ensure structural integrity.
- Regular maintenance is key: Like any boat, plywood boats require regular maintenance to prevent rot, delamination, and other issues caused by moisture exposure.
To better understand the benefits and challenges of plywood boat construction , let’s take a closer look at a comparison between plywood and other common boat building materials :
| Plywood | Fiberglass | Aluminum | Composites | |
|---|---|---|---|---|
| Cost | Affordable | Expensive | Expensive | Varies |
| Weight | Lightweight | Lightweight | Lightweight | Varies |
| Customization | High | Medium | Medium | High |
| Strength | Good | Very strong | Very strong | Varies |
| Maintenance | Regular | Minimal | Minimal | Varies |
This comparison highlights the unique attributes of plywood compared to other materials commonly used in boat construction. While each material has its advantages and disadvantages, plywood offers an appealing balance of affordability, versatility, and ease of use.
In the next section, we’ll delve into the process of designing your own boat , offering guidance and inspiration for those seeking a more custom approach to boat building.
Building Your Own Design

If you have a specific vision for your boat and want to embark on the exciting journey of custom boat building , this section is designed to provide you with valuable guidance. Whether you dream of a sleek and fast motorboat or a sturdy sailboat, designing your own boat allows you to bring your unique ideas and personal style to life.
Boat Design Process
The boat design process is a creative and analytical endeavor that involves translating your ideas into detailed plans. It begins with the conceptualization stage, where you brainstorm and sketch your boat’s layout, size, and overall design. From there, you’ll refine your ideas, taking into consideration factors such as functionality, aesthetics, and safety.
During the design process, it’s important to consider how you intend to use the boat. Factors such as the type of waters you’ll navigate, the number of passengers, and the purpose of the boat (fishing, cruising, racing, etc.) will influence the design. This section offers valuable insights from experienced boat designers and builders who share their expertise on boat design considerations .
Key Considerations in Boat Design
When designing your own boat , there are several key considerations to keep in mind. These include:
- Intended use and purpose: Determine the primary use of your boat and the specific features required to support that use.
- Size and layout: Consider the desired size and layout to accommodate passengers, storage, and any special equipment needs.
- Materials and construction methods: Choose the appropriate materials and construction methods that align with your design goals and skill level.
- Aesthetics and style: Define the overall visual appeal and style of your boat to reflect your personal taste and preferences.
- Performance and stability: Strive for a design that delivers optimal performance, speed, and stability on the water.
- Safety and regulations: Ensure your design complies with safety standards and local regulations to guarantee a safe boating experience.
Designing your own boat is a rewarding and fulfilling endeavor that allows you to create a vessel perfectly tailored to your needs. By considering these key factors and drawing inspiration from experienced designers and builders, you’ll be well-equipped to embark on this exciting custom boat building journey.
| Key Benefits of Designing Your Own Boat | Challenges and Considerations |
|---|---|
Choosing the Right Materials
The choice of materials is crucial in boat building. The materials you select will determine the durability, performance, and overall quality of your boat. In this section, we will explore the different types of boat building materials and help you choose the best options for your project.
Wood has long been a popular choice for boat construction due to its aesthetic appeal and ease of working with. However, it requires regular maintenance and may be prone to rot and decay if not properly treated. Some common types of wood used in boat building include mahogany, teak, and cedar.
Fiberglass is a composite material made of a plastic resin reinforced with glass fibers. It is known for its strength, durability, and resistance to water. Fiberglass boats are low maintenance and can withstand harsh marine environments. They are also relatively lightweight, making them suitable for speed and performance.
Aluminum is a lightweight and corrosion-resistant material commonly used in boat construction. It offers excellent strength-to-weight ratio and requires minimal maintenance. Aluminum boats are durable and can handle rough conditions, making them popular for fishing and recreational purposes.
Composites, such as carbon fiber and Kevlar, are gaining popularity in boat building. These materials offer exceptional strength and stiffness while being lightweight. Composites are often used in high-performance boats, yachts, and racing vessels.
When choosing the right materials for your boat, consider factors such as the intended use of the boat, the desired lifespan, and your budget. It’s important to balance performance, durability, and cost to ensure the success of your boat building project.
| Material | Pros | Cons |
|---|---|---|
| Wood | Aesthetic appeal, ease of working with | Requires regular maintenance, prone to rot and decay |
| Fiberglass | Strength, durability, resistance to water | Relatively heavy, may require professional repairs |
| Aluminum | Lightweight, corrosion-resistant | Less aesthetic appeal, higher initial cost |
| Composites | Exceptional strength, stiffness, lightweight | Higher cost, specialized construction techniques |
By considering the advantages and disadvantages of each material, you can make an informed decision and choose the best materials for your boat construction project.
The Boat Building Process

Building a boat requires a systematic approach that involves several essential steps. Whether you’re embarking on a DIY boat construction project or assembling a pre-made kit, understanding the boat building process is crucial for ensuring a successful outcome. In this section, we’ll guide you through each step, from setting up the backbone to the final assembly of your boat.
1. Setting up the Backbone and Framing
The first step in boat construction is setting up the backbone, which includes installing the keel, stem, and sternpost. These components create the structural framework of the boat. Once the backbone is in place, you’ll proceed to frame the boat, adding the ribs or frames that provide shape and support. This stage requires accuracy and attention to detail to ensure a properly aligned and sturdy frame.
2. Planking
After the framing is complete, it’s time to attach the planks to the boat’s frame. Planking can be done using various methods, such as using plywood or traditional wooden planks. Each plank is carefully fitted and fastened to the frame, creating the outer skin of the boat. This process requires precision to achieve watertight seams and a smooth finish.
3. Fiberglassing
To strengthen and protect the hull, many boat builders choose to fiberglass the boat’s exterior. Fiberglass provides additional durability, water resistance, and improves the overall structural integrity of the boat. This step involves applying layers of fiberglass cloth and resin to the hull, followed by sanding and finishing to create a smooth surface.
4. Interior and Exterior Finishing
Once the hull is complete, attention turns to the interior and exterior finishing of the boat. This includes installing bulkheads, cabinetry, flooring, and other interior components. On the exterior, you’ll apply paint or varnish to protect the boat from the elements and enhance its appearance. Finishing touches such as adding hardware, windows, and electrical systems complete the boat assembly process.
| Step | Description |
|---|---|
| 1 | Setting up the Backbone and Framing |
| 2 | Planking |
| 3 | Fiberglassing |
| 4 | Interior and Exterior Finishing |
As you progress through each step of the boat building process , it’s important to follow best practices and consult reliable resources for guidance. Experienced boat builders can provide valuable insights and advice based on their years of experience. By executing each step with care and precision, you’ll be one step closer to completing your very own boat.
Tips and Techniques
Enhance your boat building skills with these valuable tips and techniques. Whether you’re a beginner or an experienced boat builder, these insights from professional boat builders will help you improve your craftsmanship and achieve professional-level results in your DIY boat construction project.
Tool Maintenance
Proper tool maintenance is essential for efficient and precise boat building. Keep your tools clean, sharp, and properly stored to ensure optimal performance. Regularly inspect and replace any worn-out or damaged tools to avoid compromising the quality of your construction.
Paint Finishes
Choosing the right paint and applying it correctly is crucial for a beautiful and durable finish on your boat. Consider factors such as durability, UV resistance, and compatibility with the boat’s material. Follow proper surface preparation techniques, including sanding and priming, to achieve a smooth and flawless paint finish.
Scarphing Plywood
Scarphing plywood is a technique used to join two pieces of plywood together to create longer panels without compromising strength. Properly scarphed joints are crucial in boat building to ensure structural integrity. Learn the correct angle and length ratios for scarphing plywood and practice the technique to achieve strong and seamless connections.
Fiberglassing
Fiberglassing is a common technique used to reinforce and protect boat structures. Learn the proper techniques for applying fiberglass cloth and epoxy resin, including wetting out, rolling out air bubbles, and achieving a smooth finish. Understanding the fiberglassing process will help you create strong and durable components for your boat.
You may also like: Hobie Itrek 9 Ultralight Review
Recommended Boat Building Techniques
| Technique | Description |
|---|---|
| Plywood Scarphing | A technique for joining plywood sheets to create longer panels without compromising strength. |
| Fairing | The process of shaping and smoothing a boat’s hull to achieve optimal hydrodynamics. |
| Epoxy Filleting | Using thickened epoxy to create structural fillets for bonding joints and reinforcing corners. |
| Steam Bending | A technique used to bend wood using steam to make complex shapes for boat components. |
| Vacuum Bagging | A method of applying pressure to composite laminates for improved bonding and consolidation. |
| Wire Splicing | A technique for connecting and securing wires in a boat’s electrical system. |
By implementing these boat building tips and techniques into your project, you’ll enhance your skills and ensure the successful completion of your DIY boat construction . Remember to always prioritize safety, attention to detail, and the use of high-quality materials to create a boat that is both structurally sound and visually impressive.
In conclusion, this ultimate guide to planning and building your own boat provides a comprehensive resource for anyone interested in DIY boat construction. The guide covers the entire process, from initial design considerations to final construction techniques, offering valuable insights and recommendations from experienced boat builders.
Whether you’re a novice exploring the world of boat building or an experienced builder looking to enhance your skills, this guide equips you with the knowledge and confidence to embark on your own boat building journey. By following the step-by-step instructions and incorporating the expert tips shared in this guide, you’ll be well on your way to bringing your dream boat to life.
Throughout the guide, we have touched on important topics such as the pleasures and perils of using plywood, the benefits of designing your own boat, the selection of the right materials, and the various stages involved in the boat building process. With this comprehensive coverage, you’ll be empowered to make informed decisions and tackle each step of the construction with confidence.
Whether you’re interested in building a small rowboat for calm lake excursions or a larger cruising yacht for adventurous voyages, this guide serves as a valuable resource for all types of boat building projects. We hope that the information presented here has inspired you to embark on your own boat building journey and that you find great joy and satisfaction in the process.
Boat Reviews
- Boats Specs
- Marine Pros
- Boat Insurance
- Boat Warranties
- Boat Transport
- Boat Towing
- Marine Forecasts
Your Ultimate Boating Resource
DIY Boat Building: 8 Tips and Tricks for Building Your Own Vessel

Do you dream of your custom-built boat, but the exorbitant expenses of skilled workmanship make you feel like a fish out of water? Don’t throw in the anchor just yet! Dive into the realm of DIY boat construction and surf the waves of creativity. You may sail away on a sailboat as unique as you are with a dash of carpentry abilities, a treasure trove of tools, and a sprinkling of patience. We’ve compiled a list of must-know boat-building tips and tactics to help you succeed. Prepare to make waves and convert your dream boat into a thrilling reality!
1. Choose Your Boat Type and Design Carefully
The first step in any DIY boat-building project is deciding what vessel you want to construct. There are many different types of boats to choose from, including sailboats, powerboats, canoes, kayaks, and rowboats. Consider your budget, building space, and intended use when narrowing your options.
Next, find a suitable design for your chosen boat type. There are numerous online resources, such as forums and blogs, where DIY boat builders share their experiences and advice on specific designs. You can also purchase boat plans or check out books from the library. Remember, a simple design is essential for a successful build, especially if you have limited experience.
2. Learn the Terminology and Construction Techniques
Before diving into your project, take the time to familiarize yourself with the common terms and techniques used in boat building. Many great resources are available, ranging from books and articles to online forums and videos. Understanding the terminology will make it easier to interpret plans and follow instructions.
3. Invest in Quality Tools and Materials
You must invest in high-quality tools and materials to build a sturdy, long-lasting boat. While it can be tempting to save money by purchasing cheaper alternatives, these products may compromise the structural integrity of your vessel.
Additionally, if you don’t already own them, consider investing in some essential boat-building tools, such as:
Epoxy and Fiberglass
4. Create a Suitable Working Space
Devote an area in your home or garage to your boat-building project. Make sure the space is large enough for your boat, plus additional room for tools, materials, and mobility. This dedicated workspace allows you to keep your materials organized and reduces the risk of accidents due to clutter.
5. Develop a Project Timeline
Before beginning construction on your boat, create a project timeline that outlines each phase of the building process. This timeline should include tasks such as gathering materials, cutting and assembling parts, and applying finishes. It will help you stay on track and can provide a visual reference for what needs to be done and when.
6. Take Safety Precautions
Safety should always be a top priority when working with tools and hazardous materials like epoxy and fiberglass. To ensure your safety, be sure to:
Wear safety glasses, gloves, and dust masks when necessary
Ventilate your work area to help minimize the risk of inhaling toxic substances
Keep all tools and chemicals out of children’s reach
Store flammable materials in a safe container and away from heat sources
7. Start with a Solid Foundation
A well-built boat starts with a sturdy foundation – the boat’s backbone. Be sure to mill your timbers, beams, and ribs correctly and double-check that they align accurately. If necessary, use molds, jigs, or temporary frames to ensure the boat remains symmetrical during the assembly process.
8. Don’t Be Afraid to Ask for Help
Boat building can be a complex and challenging endeavor, but don’t be afraid to reach out for help if you’re feeling overwhelmed. Online forums, local boat clubs, and fellow DIY enthusiasts can be great sources of advice and support throughout your project. Few things are more satisfying than the sense of community and camaraderie formed with fellow boatbuilders.
Create That Beautiful Vessel
DIY boat building can be an incredibly rewarding experience, providing you with a beautiful, custom-made vessel and a sense of accomplishment once completed. By taking the time to do thorough research, plan your project carefully, invest in quality tools and materials, and adhere to safety precautions, you’ll be well on your way to building the boat of your dreams. Happy boat building!
RELATED ARTICLES
Outboard motor maintenance: tips for keeping your engine in top shape, the essential boat tool kit: tools every boater needs, the art of miniature maritime craftsmanship: ship in a bottle, antifouling paints: a guide to keeping your boat shipshape, gelcoat repair guide: everything boat owners need to know, latest posts, overview of the 2024 sea-doo rxp-x 325, overview of the 2024 parker offshore 2900 cc, what your boat’s beam is and why it matters, power cats of 2024: ultimate guide to the top power catamarans this year, don't miss, our newsletter.
Get the latest boating tips, fishing resources and featured products in your email from BoatingWorld.com!
Navigating the Heat: 10 Safety Tips for a Safe Boat Ride in the Summer Heat
What type of wood is used for pier pilings, what is the difference between a dock and a floating pier, what is the proper technique for pulling a beginner wakeboarder, what does ‘no wake’ mean on a lake, what is the difference between wash and wake, highs, lows, and tidal know-how: a deep dive into ocean currents, 10 essential tips for fishing near private property, the benefits of using a drift sock: guidance for anglers, lure fishing: secrets for imitating live bait and attracting fish, explore the untapped depths of america’s best bass fishing spots, beginner’s guide to standup paddle boarding: tips and techniques, boating for fitness: how to stay active on the water, kayak safety: how to stay safe on the water, anchoring in a kayak or canoe: how to secure your small boat, overview of the 2024 yamaha 252sd, overview of the 2024 tiara yachts 48 le, overview of the 2024 bass cat jaguar sts, 2024 pursuit os 445: an overview, 2024 aquila 47 molokai review, 2024 sea-doo switch 13 sport review, gear reviews, megabass oneten max lbo jerkbait review, fortress anchors fx-7 anchoring system review, fortress anchors fx-11 anchoring system review, fortress anchors commando anchor kit review, fortress anchors aluminum anchors review, stay in touch.
To be updated with all the latest news, offers and special announcements.
- Privacy Policy
Service Locator
- Angler Endorsement
- Boat Towing Coverage
- Mechanical Breakdown
- Insurance Requirements in Mexico
- Agreed Hull Value
- Actual Cash Value
- Liability Only
- Insurance Payment Options
- Claims Information
- Towing Service Agreement
- Membership Plans
- Boat Show Tickets
- BoatUS Boats For Sale
- Membership Payment Options
- Consumer Affairs
- Boat Documentation Requirements
- Installation Instructions
- Shipping & Handling Information
- Contact Boat Lettering
- End User Agreement
- Frequently Asked Questions
- Vessel Documentation
- BoatUS Foundation
- Government Affairs
- Powercruisers
- Buying & Selling Advice
- Maintenance
- Tow Vehicles
- Make & Create
- Makeovers & Refitting
- Accessories
- Electronics
- Skills, Tips, Tools
- Spring Preparation
- Winterization
- Boaters’ Rights
- Environment & Clean Water
- Boat Safety
- Navigational Hazards
- Personal Safety
- Batteries & Onboard Power
- Motors, Engines, Propulsion
- Books & Movies
- Cockpit Confessions
- Communication & Etiquette
- Contests & Sweepstakes
- Colleges & Tech Schools
- Food, Drink, Entertainment
- New To Boating
- Travel & Destinations
- Watersports
- Anchors & Anchoring
- Boat Handling
- ← Technology
How Boats Are Built
Advertisement
BoatUS explores the ways modern, large-scale boatbuilders harness the newest technology and successfully balance innovation with the tried-and-true.

Robots! These five-axis routers (above) are accurate to 1/8000th of an inch. In this cutting booth, the robots cut the hole for the sterndrive — a place where accuracy and alignment are critical. (Photo: Sea Ray)
— Published: February/March 2016
When we think of the word "technology," most of us think of complex innovation that changes our lives. But when it comes to boatbuilding, while we may appreciate novelty and innovation, what we require as a first priority is reliability and good value. Many of the largest boat manufacturers in the United States have been successfully embracing cutting-edge technologies in their building operations while creating a new generation of boats more modern, stronger, and efficient than their forbears. BoatUS decided it was time to pull back the curtain and see how modern, large-scale production plants build boats these days, using everything from 3D designs, space-age materials, and even robots. There were several top American boatbuilders we could have selected to study today's cutting-edge building innovations. But to make our choice clear-cut, we chose to visit America's largest builder to learn how modern innovation marries with tried-and-true techniques that have been honed over more than seven decades of composite boatbuilding.
An Inside Look at One Large-Scale Builder
Sea Ray describes itself as "the world's largest manufacturer" of pleasure boats. Founded in 1959 by Cornelius Ray, Sea Ray was an early pioneer in fiberglass-reinforced plastic (FRP) boat construction. In 1986, the Brunswick Corporation acquired Sea Ray; last year, Brunswick reported $3.8 billion in sales, of which $1.14 billion came from its boat group, including Bayliner, Meridian, Boston Whaler, and builders of aluminum and pontoon boats.

Computer-aided manufacturing (CAM) provides a seamless connection from precise 3D designs to fully formed parts. In today's Sea Rays, the technology is in the details — designed social spaces forward, joystick controls, and lighter structures. (Photos: Sea Ray)
Today, Sea Ray builds 40 models, ranging from 19 to 65 feet, at two plants: small boats near Tellico Lake, Tennessee, and large boats in Palm Coast, Florida. Brunswick also owns the engine manufacturer Mercury Marine, which generates half of the company's sales and provides technical support to Sea Ray's designers.
The Design Process
Sea Ray does most of its design work at its Product Development & Engineering plant at Sykes Creek, on Merritt Island, Florida — also where all tooling is created. Many large-scale builders, such as Brunswick, Beneteau, and others, design boats with software in 3D so they see problems, find solutions, and build repeatability and accuracy into the construction process, even before the tooling is created. This has been a game changer.
Rapid prototyping with CAD, CFD, and FEA software
"Twenty years ago," said Ron Berman, vice president of Sea Ray's product portfolio, "designers usually started with sketches on paper." All the early conceptual designs for a new model were 2D hand-drawn sketches. "Designers still sketch," he said. "You're not going to replace the interaction of the hand with a cursor or pencil or pen. But now they do it on a tablet, and it's all in the computer."

Sea Ray's designers, with support from Mercury Marine, create a hull form using CAD, CFD, and FEA digital tools. Once the hull form is designed, five-axis milling machines cut the exact shape from polystyrene or polyurethane foam. (Photo: Sea Ray)
From initial concept to working plans, today's high-volume designers work with three computer design tools: computer-aided design (CAD), computational fluid dynamics (CFD), and finite element analysis (FEA). Sometimes these tools are used by the builder's in-house designers; sometimes this function is contracted out to firms specializing in design, analysis, and the creation of "kits" from which boats are built. The CAD software creates detailed 3D layering from initial hull form to interior layout to systems installations. The finely tuned level of detail can be astonishing; in Sea Ray's case, the design conveys accurate colors and even textures of each model's different furniture and upholstery options. For the production staff, the design conveys the precise runs for mechanical and domestic systems such as wiring harnesses, network cabling, ducting, and plumbing. For the boat's owner, the consistency and record of such runs in the owner's manual makes tracing them later easier.
CFD and FEA software has been used since the 1960s and '70s by government space agencies, as well as aeronautics, automotive, and biomedical companies. But production boatbuilding is a comparatively minuscule industry and with a few exceptions for high-performance custom work, the cost of these tools kept them out of the reach of boatbuilders until more recently. Today's Sea Ray designers are able to share CFD and FEA horsepower with their Brunswick colleagues at Mercury Marine. (See our sidebar for a look at how Beneteau and Volvo married their innovative hull design with modern propulsion technology.) Fluid-dynamics programs represent the movement of water and air around different shapes at different speeds; FEA programs analyze loads on structures as they interact with the forces of those fluids. What all this expensive computing power means is that — through digital modeling, instead of drawing, and then building physical prototypes by hand — modern designers can try many different structures in markedly shorter time cycles. A jump in, say, propulsion technology opens new possibilities in hull design.
Production Integrates the New with the Tried-And-True
Once designers create the basic drawings for a new boat, CAD/CAM programs are used. CAM stands for computer-aided manufacturing. At its heart is a five-axis computer-numerical controlled (CNC) milling machine that can create virtually any complex shape. Sea Ray's Sykes Creek plant runs three of these machines, which automatically mill the masters from which all tooling is produced.
Five-Axis CNC Milling
A master (plug) is the male shape (in this case, easily workable polystyrene or polyurethane foam) from which the female tooling (mold) is taken. The tooling is where individual FRP parts are laid up. The "parts" are the actual hulls, decks, hard tops, swim platforms, and hatch covers that, when assembled, constitute each boat. Using this process, if the parts don't work or fit well together, or there's some unexpected glitch, it's relatively quick and simple to retool it on the computer to make it right.

One of three five-axis milling machines at Sykes Creek precisely creates the form that will become the "master." Once faired by hand, the master is the male shape from which the tooling is created. All new hulls are laid up inside that tooling. (Photo: Sea Ray)
"Twenty years ago," said Berman, "we'd mill hulls and decks and big parts but build smaller parts by hand. Today, we mill everything. The mill's precision gives us an ability to get far more mature designs in fiberglass." Berman estimates that Sea Ray probably has a quarter of the tooling mill capacity for the marine industry in North America. Builders whose scale doesn't justify the investment in CNC milling machines can contract with companies that specialize in tooling: Marine Concepts, Symmetrix, Janicki, and others. Composites expert JP Mouligné is a senior account manager at Gurit, which supplies materials and services to composites builders in several industries, including boatbuilding. "As a tendency," Mouligné said, "we're seeing fewer companies doing their own tooling."

Using CAD programs, designers achieve astonishing detail: colors and textures of upholstery and furniture, precise hose and wire runs, detailed systems installation. These instructions are sent directly to CNC routers to create the parts from which the final boat is assembled. (Photos: Sea Ray)
If you've ever owned or worked on a boat whose port and starboard sides aren't symmetrical, you can appreciate the precision of a CNC-milled master, which creates drawers and hatches that fit well, propulsion drive gear that aligns, and doors that open and close without sticking. The same work flow applies to a boat's furniture. A designer creates a cabinet for a refrigeration unit, including particular veneers, thicknesses, and fastener methods. Plumbing and electrical designers come in next to lay out hose and wire runs. When the model is finished, it gets turned into digital CNC files that are sent to the milling machine. "And then," said Sea Ray's Berman, "the first set of parts can be cut precisely with a router instead of a tape measure and saws," eliminating the "Friday Boat" risk of mismatched parts that might have been assembled by someone having a bad day.
Hand-Laid Fiberglass-Reinforced Plastic
Composite boatbuilding is 75-year-old technology. Glass fiber made its first appearance in 1931. DuPont created polyester resin in 1936. In 1941, the first modern composite boat was built. FRP building methods became standard on an ever-larger scale through the 1960s. Certain basic materials and practices constituted technology in which builders have developed confidence. These include glass fibers and polyester resins, laid up by hand in an open mold. But progressive builders have introduced added innovations in technique and new materials.
Vinylester, PVC Foam Cores, Carbon Fiber
Here's an example where, for modern builders, slightly newer materials and techniques are edging out older ones. Sea Ray has moved to vinylester resin — a 1980s technology, and more expensive than 1940s-era polyester resin — for the outer layers in its hulls because it better resists osmotic blistering. In today's Sea Rays, PVC foam core (an early 1970s technology) replaces balsa core (a late 1950s technology) because foam core resists water migration and delamination better than balsa. Sea Ray recently introduced carbon fiber in the laminate for some of its larger hard tops, making a structure so stiff that the builder is able to eliminate stainless-steel supports, saving weight up high. This gives its boats a lower center of gravity, and therefore a more comfortable ride. In 1994, Hinckley, in Maine, began using Kevlar in its first Picnic Boat hulls; the decade-old Talaria line incorporates carbon fiber — for more strength, and less weight, hence better performance. High-end builders, such as Scout, in South Carolina, and MJM (Boston Boatworks), in Massachusetts, and premium custom shops build with epoxy, a resin whose properties are better still than vinylester in terms of strength, weight, color-retention, and resistance to water intrusion.
Resin Infusion and Resin Transfer
The vast majority of composite boats on the water today were built with hand-layup techniques. This method presented builders with two challenges: it releases toxic compounds into the air, and the parts may have too much or too little resin. Too much makes it heavier than necessary for needed strength; too little makes it too weak. But hand layup can be done relatively quickly, which is important for builders who turn out many boats a day. Today's newer "closed molding" technologies, however, though initially more time-consuming and expensive, minimize the amount of resin in the laminate and more thoroughly and evenly distribute the resin throughout the laminate, thereby making a lighter, stronger hull. According to JP Mouligné, Tillotson-Pearson Inc., in Rhode Island, infused the first hull in the early '90s, a Sundeer 56 sailboat. Among powerboat builders, Viking Yachts, in New Jersey, has been infusing hulls this way for several years and now uses the technique for just about all its models. Intrepid, in Florida, which has infused smaller parts for years, recently launched an ad campaign touting its first infused hull, a 327.
With resin infusion, all the fibers and core are stacked dry, then sealed with an airtight plastic cover. Manifolds and tubing must be run to injection points all over the hull or deck, taking prep time. Then, vacuum pressure draws the resin evenly through the structure. Believe it or not, once the taps are turned on over at Viking, for instance, the vacuum pumps can infuse a 92-foot hull in just 90 minutes.
As an added benefit, in cored structures, the vacuum pressure draws resin into the scored cutouts in the foam, eliminating air gaps. Sea Ray infused its first hull, a 510 Fly, in late 2015, just after our visit, and estimated the process would save 2,500 pounds in the hull alone, which will directly improve the boat's performance and fuel efficiency.
Resin-transfer molding, or RTM, is another closed-molding technique. European boatbuilders, driven by strict emissions limits, were early adopters of this technology. "Beneteau has been a fascinating company from a technology point of view," said Richard Downs-Honey, head of business development at Gurit. "They moved past the simple single-bag infusion a long time ago into double molds for their decks, so they come out glossy inside and out."
This technology is a closed-molding process. Unlike infusion, it requires two molds, top and bottom. The fibers are stacked, the molds are fitted together, and resin is forced into the laminate under positive pressure. Building two molds makes this method expensive. But in addition to the environmental upsides, it creates an advantage: an FRP part with two gelcoat-finished sides. Sea Ray has recently begun using RTM to build some of its parts, but not yet hulls or decks.
Robotics and Modern Management
Perhaps it is here, in innovative new ways that improve the actual step-by-step building of the boats, that modern technology has introduced one of its most impressive changes.
Enter the Robots!
Sea Ray builds its smaller boats at its Tellico campus in Tennessee. "We have robots that do many different things," said Matt Guilford, Sea Ray's VP of marketing. At the initial layup stage, robots spray gelcoat into the tooling. They're fast and accurate, spraying the same designed thickness every time.

At the assembly phase, technicians work to accurate designs provided on digital monitors on the shop floor and tablets at work stations. All upholstery is cut and created from the CAD designs. (Photos: Sea Ray)
With pinpoint accuracy, robots in the cutting booth work with tolerances of 1/8,000ths of an inch. More traditional practice would be for boatbuilders to cut holes and drill and tap by hand, or use jigs or templates, as opposed to a computer-controlled five-axis router that can cut a perfect transom hole for a sterndrive, eliminating concerns about alignment or leaky mismatches.
Production Management
Today's most-successful large boatbuilders have adopted modern management systems used in other industries. Sea Ray, for instance, has adapted the "Lean Six Sigma" and "Line Balancing" methods to methodically eliminate waste, better manage workers and their jobs, and efficiently correlate work and material when changes are needed.
Digital monitors are used throughout the building process, displaying lists of every action a construction team needs to complete, plus installation guides and instruction videos. Tablets carry the same information directly to the work space. One "pass/fail" example we observed at Sea Ray showed two side-by-side photos of installations. In the "pass" image, a hose was installed so that it self-drained; in the "fail" image, fluid would have collected in an unwanted loop. Line workers see the difference in real time as they assemble systems; managers catch faulty installations before the boat moves down the line.
Upward of 10,000 discrete tasks go into building a 65-foot Sea Ray. "We build as much as we can outside the boat in modular fashion so it's easier for the assembly line to pick the component up and fit it in," said Dan Robinson, Sea Ray's director of manufacturing operations. "They drop them in like Legos."
Finally, quality checks are conducted at stations all along the line with one person's name validating each item. When Sea Rays leave the assembly space, they're submitted to an on-the-water test of several hours, and finally the "hurricane test": 2,700 gallons of water flooding down on the boat in an hour. Two leaks were identified — and immediately fixed — on a boat we watched being tested.
Boats for Today
So much for process and production. Now let's look at new technology in the boats themselves, starting with propulsion. Typically, larger pleasure boats 20 years ago were powered by inboard engines or sterndrives. Outboard engines were gas-guzzling two-strokes, and the biggest outboards available were less than 200 horsepower.

At Sea Ray's Palm Coast campus, a 650 Fly is going through its final assembly phase — a process that includes some 10,000 discrete tasks. (Photo: Sea Ray)
"Probably the biggest thing that's happened in 20 years is outboard technology," said Sea Ray's Ron Berman, particularly with four-stroke engines, which bring state-of-the-art technology in digital shifting and joystick docking. And most significantly for coastal boaters, they avoid the corrosion problems of a lower end left in saltwater.
Then there are the bells and whistles in the boats of today — integrated chartplotters, Zeus pods, joystick docking and automatic station-keeping for diesel-powered boats, Wi-Fi networks, lighter retractable hardtops, and so on. These fun and helpful developments, joined with all the design and building refinements in play at state-of-the-art builders, have created well-built innovative boats designed to perform better, accommodate people more comfortably, and deliver better integrated features, all at a more competitive price than was dreamed possible decades ago.
Innovation At Beneteau
Groupe Beneteau has been building boats for 30 years in America and 130 years in France, and last year generated $1.06 billion in sales. Since 2010, Beneteau's production and sales have shifted dramatically from sailboats to powerboats.
"In America," said Beneteau USA president Laurent Fabre, "we only started selling powerboats five years ago, and already it's 50 percent of our production." In August 2014, Beneteau acquired Michigan-based Rec Boat Holdings (Four Winns, Glastron, Wellcraft, Scarab). The company has built Beneteau-brand trawlers at its South Carolina plant and plans to increase powerboat production there. Meanwhile, the company has invested heavily in new technology in both its products and its processes. It emerged from the 2008–09 financial crisis with the innovative Sense line of sailboats, and the Dock & Go joystick control of the engines.
The company's approach to hull form illustrates how its in-house designers worked with partners outside the company to create its patented Air Step underbody — particularly engineer Rémi Laval-Jeantet, whose fluid-dynamics résumé includes windmills, ballistic missiles, and silent submarine propellers, and with a partner school of naval architecture in Nantes, France, which provides tank testing. In the Air Step design, chines are inverted from their traditional orientations to direct air under the boat, down the center line, while keeping the wet surfaces along the side of the boat, which includes two skegs. The result? "When you make a turn," said Fabre, "the boat cannot roll out. You have fine control. The air gives strong lift to the boat." The advantages are lower fuel consumption, faster acceleration, and higher top speed.
Almost simultaneously, Volvo brought out its innovative IPS propulsion leg. "From the beginning," said Fabre, "we worked closely with Volvo to make sure our Air Step worked with their IPS." Their initial concerns were whether air under the boat would introduce turbulence and negate the advantages of the IPS system; and whether the mix of air and water would accelerate corrosion on the IPS leg. To prove the system, Beneteau built a complete prototype of its GT 46 and tested it with Volvo for 400 hours over six months. "The two systems are fully compatible," said Fabre. See our magazine's cover this month for an artist's rendition of how the Air Step works with the boat's propulsion system to add lift.
Introducing Mister Green
A byproduct of boatbuilding is the release of Volatile Organic Compounds, better known as VOCs. These organic compounds easily evaporate into the air (hence they're "volatile") and are regulated at many bureaucratic levels, including federal air-quality standards and indoor air standards. If you grew up using oil-based paints in your house and remember when water-based latex paints began to be used, you were witnessing a move away from solvents and the VOCs they contained. There are many sources of VOCs in industrial applications, but you're probably very familiar with the resins used to make fiberglass boats and the paint and finishes used on boats. Bottom paint in particular is going through a revolution right now, with the introduction of water-based paints.
Solving The Solvent Issue
Chances are you remember, with some distaste, the last time you painted your boat's bottom. It's a messy, uncomfortable process for many of us, but with new, water-based anti-fouling paints, such as Hydrocoat from Pettit and Micron Optima from Interlux, you've gone from a paint that could eat through a roller to ones that clean up with soap and water. These low-odor paints feature dramatically lower VOCs, often a reduction of more than 50 percent, compared with paints with traditional solvents, so you can even paint indoors in some circumstances. It should be noted these are still multi-season ablative paints. Once dried, they are no different than traditional paints. In fact, you can apply them right over your old paint.

Notice the absence of respirators on this Viking work crew? The modern vacuum-bagging (sealed) process means no harsh compounds escape into the air. Note, too, the red arteries of resin flowing directly to dozens of entry points in the hull. (Photo: Viking Yachts)
By switching to using water as a solvent, instead of harsher (and regulated) solvents, bottom-paint manufacturers are preserving your ability to continue to paint your own hull.
Closed Molding Is The New Black
In the not-so-distant future, closed-molding techniques, like vacuum bagging, will be the standard across the boatbuilding industry, at least for builders of any significant volume. Some VOCs cause smog and other serious problems. Therefore they are regulated at the federal level. But poor air quality isn't equally distributed across the country. If you live in the Northeast, your air is already subject to strict scrutiny. Ditto California, or in parts of Texas. But eventually, the gradual tightening of regulations regarding toxins will impact the whole country.
"There will come a day where every drop of resin a builder brings into the plant will need to be accounted for, whether it goes into a boat or is spilled on the floor," says Peter Frederiksen of Viking Yachts. The New Jersey-based builder of sportfish yachts vacuum-bags just about every hull already, even their 92-footer (left). And while the prep for vacuum bagging — the time required to lay up the materials that will go into the hull, seal the mold under plastic, run the hoses, hook up the manifolds, and attach vacuum pumps — seems quite involved, there are a lot of benefits. First, the plant has less odor and harmful chemicals in the air. Second, the precise metering of resin means the right amount is always used throughout. Not too much, which adds unnecessary weight, nor too little, which can make the hull brittle. And the vacuum pressure virtually eliminates voids, those hidden places where no resin flows into the fiberglass. These things mean a better boat. Plus, of course, allowing the resin to set under seal prevents those VOCs from escaping.
— Michael Vatalaro
BoatUS Members save at Boat Shows
Make sure to mark your calendars for two exciting events! BoatUS Members save 25% with code BOAT24US.
Related Articles
The truth about ceramic coatings for boats.
Our editor investigates the marketing claims of consumer-grade ceramic coatings.
Fine-Tune Your Side Scan Fishfinder
Take your side-scanning fishfinder off auto mode, and you’ll be spotting your prey from afar in no time
DIY Boat Foam Decking
Closed-cell foam flooring helps make boating more comfortable. Here’s how to install it on your vessel
Click to explore related articles
Contributing Editor, BoatUS Magazine
BoatUS Contributing Editor Tim Murphy is the author of "Adventurous Use of the Sea" (Seapoint Books, Nov 2022). He sails Billy Pilgrim, a 1988 Passport 40, on the U.S. East Coast. He develops marine trades curriculum for the American Boat & Yacht Council.
BoatUS Magazine Is A Benefit Of BoatUS Membership
Membership Benefits Include:
Subscription to the print version of BoatUS Magazine
4% back on purchases from West Marine stores or online at WestMarine.com
Discounts on fuel, transient slips, repairs and more at over 1,200 businesses
Deals on cruises, charters, car rentals, hotel stays and more…
All for only $25/year!
We use cookies to enhance your visit to our website and to improve your experience. By continuing to use our website, you’re agreeing to our cookie policy.
Six Ways to Build a Wooden Boat
A guide to common construction methods
From Issue Small Boats Annual 2015
Popular Small Boat Construction Methods
S mall boats are not small undertakings, not if we are contemplating their creation in our own garages from piles of wood. If we’re amateur builders, particularly first-timers, the prospect is daunting, maybe even frightening. We don’t know how to do this. We don’t know if we can do it. We’re about to commit epic blocks of time, money, and emotional capital to a project with no guarantees, except that—trust this formula!—it will cost twice the estimated budget and four times the projected hours to complete it. But if we stick it out, we will have not only refined our problem solving and tool skills, but also burnished our character. And we will have a boat to be proud of.

One way to gain an understanding of various methods of construction is to take a class. At WoodenBoat School in Brooklin, Maine, for example, students in a two-week Fundamentals of Boatbuilding class learn several styles of traditional hull construction. In the foreground, a students fits a floor timber to a carvel-built boat, while in the background students fit a lapstrake plank.
The question of how to build this boat is a basic one that has to be parsed at the outset, while we’re sorting through designs and deciding which to build. There are about six ways of building wooden boats today, with variations on each. Our choices have proliferated just since 1950, thanks to the innovations of plywood, epoxy, and synthetic fabrics. No particular method can be proclaimed the best; each comes with its own suite of advantages and drawbacks. The type of boat and its intended use figure in. Even more does the level of skill and mindset of the prospective builder. A powerful determinant of whether we’ll end up with a real boat is perseverance, which is most sustainable when we find joy in the work. Some people will love the painstaking process of carvel planking, inserting themselves into a continuum of craft that has hardly changed in 500 years. Others will find this ancient discipline ludicrous, and will really groove on epoxy’s magic. For obvious reasons, it’s wise to contemplate all this before making the commitment.
There are serious passions and partisans afloat in these waters, so I expect challenges and complaints. I will try to stay objective and keep my own prejudices in the locker. I’ve built strip-planked and stitch-and-glue boats, and currently am engaged in a glued-lapstrake daysailer, so I’ve had experience with three of these six methods. I’ve also been hanging out at the Northwest School of Wooden Boatbuilding, observing several boats being built with other methods, and I’ve been pumping the instructors for information (see WoodenBoat magazine No. 241 ). They’ve been generous in sharing both knowledge and opinions.
If you are a serial boatbuilder, you’ll find that your craftsmanship and problem-solving skills rapidly improve from one boat to the next. This is particularly true if you stick with one method. It’s like visiting France again and again—you feel more secure navigating; you begin to understand the nuances of the culture. But there’s also a powerful argument for exploring the new and unfamiliar. As the Zen teacher Shunryu Suzuki proclaimed: “In the beginner’s mind there are many possibilities, but in the expert’s there are few.” Who’d have predicted, back in the 1950s when the future of pleasure boats appeared to be a sea of white plastic, that the 21st century would offer so many new ways to begin a wooden boat?
Here are the six common ways to build a wooden boat:

Carvel-planked small boats are typically built upside-down over a building jig. First, the backbone is installed and frames bent into place, then the planking starts. At right, students use a “spiling batten” to determine the necessary curvature of the next plank.
1. Carvel Planking
This, one of the classic methods of wooden boat construction, is what made Columbus and Magellan possible. Since a carvel-planked boat derives most of its structural strength from its frames—the rib cage, in effect—its size is not limited by the length of the available timber. A shiplength strake can be made from several shorter, butt-joined planks. Hence the astonishing 262′ WILLIAM D. LAWRENCE, a carvel-planked square-rigger launched in Nova Scotia in 1874. The largest wooden ship ever built in the United States, just short of 330′ on deck, was the six-masted schooner WYOMING, launched at Bath, Maine, in 1909.
But for our purposes here, we’re talking about small boats. Until the mid-20th century, many rowboats and sailing dinghies of 10′ to 20′ long were also built with carvel planking. They were probably better suited to that time than today, because boat owners tended to leave their small boats in the water all season, which allowed the planks to swell with water, closing up the seams. A carvel-planked boat left in the driveway on the trailer will dry out in the summer sun; as the wood dried, the planks shrink, allowing its seams to open, and only a few days in the water will close them up again. That’s not an ideal scenario for impulsive trailer-sailing.

Carvel planking requires close fits; here, a student working on the final plank, called the “shutter,” uses inside calipers to determine the exact width at a frame.
But carvel planking still has its adamant and loyal partisans. Jeff Hammond, who has taught traditional for 30 years, believes it’s still the best medium to teach craftsmanship. “It’s complicated,” he says. “Every step requires you to stop and think about what comes next. A lot of care has to go into each piece.”
And here’s the clincher, for Hammond: “It’s a relatively pleasant experience, as opposed to covering yourself in goop all day long.”
But the word “complicated” remains embedded in any discussion of carvel planking. It’s hard to describe the whole process in a digestible paragraph, but at terrible risk of oversimplifying, here goes: Set up a regiment of molds (cross-sections of the hull form at regular intervals, typically one foot apart) over which the boat will be built upside-down. Connect them with temporary stringers called ribbands. Steam or laminate the frames, which are the structural ribs, to precisely fit outside the ribbands. Sculpt the planking around the frames to form the skin of the hull, precisely beveling each plank edge to mate with its neighbor, leaving a slight gap on the outside as a caulking bevel. Screw or rivet the planks to the frames, bung the fastening holes, caulk the seams, and assiduously fair the outside surfaces to eliminate any unevenness.

Planks fit tightly together on the side of the hull but are given a deliberate bevel—a “caulking bevel”—so the seams can be caulked with cotton, followed by primer paint and then seam compound.
The most difficult part of the operation is likely to be the rolling bevels on the planks. The builder will cultivate the patience for many trial fittings and excursions back to the workbench—with each one of the 16 or 20 planks typical on a small boat. Sometimes planks have to be steam-bent. Sometimes they crack during the final fitting and you start all over. If one is meticulous about fitting and caulking, however, the leakiness that plagues some carvel-planked boats may be spectacularly absent: They can be built so tightly that they don’t ship a drop.
Pros and Cons to Carvel Planking
- Teaches the builder to cultivate excellent craftsmanship
- Many classic designs available
- Damaged planks can be replaced with relative ease
- Heaviest method of construction
- Complex and difficult to master
- Happiest living in the water, not on a trailer or in seasonal storage
- Suitable materials may be difficult to find

Lapstrake construction sometimes involves building right-side up— and in the case of traditional Scandinavian practices, without any cross-sectional molds. Few frames are required, and along with floor timbers and other interior structure, they are fitted as the planking proceeds or after it is all finished.
2. Traditional Lapstrake
Lapstrake planking is cool for several reasons, but the most obvious is aesthetic: Small boats constructed of shapely overlapping planks are inherently attractive. The parallel flow of sweeping lines with their tiny shadows creates a rhythmic vitality and makes the hull form seem more like an organic creation. We are naturally attracted to repetition in lines and forms; it’s an aesthetic principle that seems rooted as deeply in boatbuilding as it is in art, architecture, music, and even the written word. Perhaps it makes complex things more understandable by breaking them into their component forms.
How complex are lapstrake boats? Lining off the individual planks, warns boatbuilding author Greg Rössel, is “more art than science.” Individual planks, off the boat and on the workbench, may assume unbelievable, bizarre shapes—some will be fingernail-clip crescents, others vague, squashed-snake S-curves. If these planks aren’t lined off with care and precision, the boat will take on a misshapen, bloated appearance. It will, however, still function as a boat: lapstrake forgives small imperfections more graciously than carvel. Some designers have begun making full-sized Mylar patterns available for cutting the planks, which greatly enhances the amateur builder’s chances for accuracy. After the planks are shaped, they must also be beveled or rabbeted on their edges so they mate tightly with their neighbors, and beveled again at the forward ends so the strakes become almost a flat, carvel-like surface as they flow into the stem. These can perplex like the very Devil’s bevels.
The tradition of lapstrake construction reaches even farther back in history than carvel. The Norse Nydam boat, excavated in present-day Denmark, has been dendrochronologically dated to A.D. 310–320. The modern builder echoes its manner of construction closely, even down to the rivets or clench nails used to fasten the planks to each other at the laps. Why not epoxy the plank overlaps together? Because the solid wood planks used in traditional lapstrake (today, typically cedar or sapele) will swell and shrink, so the fastenings need to allow for slight movement. The unyielding hold of epoxy, which can cause planks to crack, must be reserved for use with another contemporary material, which enables the lapstrake variant we’ll discuss next.

To secure one plank to another, copper rivets are driven from the outside through holes bored in the two planks and also through a washer-like “rove.” Once the fit is tight, the rivet is nipped off short and peened over the rove.
Enthusiasts like to point out the uniquely pleasant sound, a little sonatina of chuckling, that a lapstrake-built craft makes as it parts the water. The hull efficiency is a matter of debate. The ridges of a lapstrake hull present more resistance to the water than does a smooth hull. But its light weight may let it float higher in the water, reducing the wetted surface area. Even if it’s less efficient, for some of us the simple beauty and immersion in a millennia-old tradition well compensates for reaching the day’s destination a few minutes later.
Pros and Cons to Traditional Lapstrake
- Grace and beauty, including the possibility of a bright-finished (varnished) hull
- Comparatively light weight
- Complex, exacting craftsmanship needed in lining off and beveling the planks
- As with carvel construction, suitable materials may be difficult to find

Using plywood, glued-lapstrake relies on epoxy instead of mechanical fastenings to secure the plank overlaps, making a very strong hull and an exceptionally clean interior, with widely spaced frames.
3. Glued Lapstrake
This is becoming an increasingly popular construction method for small sailing dinghies, rowing boats, and even canoes. In this modern variation of lapstrake construction, marine plywood is used for the planking, and epoxy is used to glue the pieces together and seal them against water intrusion. Many designers in North America and Europe these days are deploying an even newer technology, pre-cutting pieces using CNC (computer numerically controlled) routers to achieve machine-perfect tolerances and thus supply the amateur builder with a kit for the hull. For do-it-the-hard-way purists who may disdain the idea of a “kit,” be assured that there will still be plenty of fabrication to do, such as the interior fitout, various hardwood pieces, and spars if it’s a sailboat. And many, many bevels.
Because the rigidly glued overlaps essentially function as longitudinal stringers, these hulls need little in the way of interior framing; they are more or less monocoque structures where the stressed skin of the hull creates its own structural integrity. They are wonderfully light and stiff. There is a lot of epoxy work—goop—involved, however, and it demands careful attention. If any exposed edge grain of plywood—any—isn’t thoroughly sealed, it will wick in water, inviting delamination and rot.

With glue spread on the overlapping part of both planks, a batten is temporarily screwed in place to clamp the seam together until the glue sets.
Some small-boat builders take a further step into composite construction by sheathing the garboards (the planks adjacent to the keel) with fiberglass cloth set in epoxy for better abrasion resistance in places vulnerable to damage when a boat is dragged onto a beach. A deep scrape by a rock or barnacle could allow water intrusion into plywood. At the Northwest School, instructor Bruce Blatchley recently oversaw the construction of a 22′ “glued-lap” Drascombe Longboat in which each plank on the entire boat was individually sheathed this way, sidestepping the impossibility of making the cloth stairstep over the plank laps. Purists may howl, but the result was one extremely tough, rigid, and lightweight hull.
Pros and Cons to Glued Lapstrake
- Light weight
- The grace and beauty of lapstrake
- Rigidity and excellent sealing against water and weather
- Except for the smallest boats (under 10′ ), the plywood must be scarfed; bright finishing is impractical
- Major repairs will be difficult

Strip-planking can be used for boats large or small, but it is especially practical for canoes and kayaks because of its very light weight. Woods of various colors can be used to accentuate the hull, often with great beauty.
4. Strip-Planking
Maybe you’ve seen a strip-planked kayak on a beach somewhere—kayaks and canoes are the most common products of strip-planked construction today—and after recovering from the shock of its sheer ravishing beauty, you worked up the nerve to ask what it cost. The answer, if a professional built it, will likely be in the range of $8,000 to $12,000.
If an amateur built it, however, it might consist of as little as $500 worth of materials, including wood, fiberglass cloth, and epoxy. The disparity, of course, represents the labor, of which there is a lot. Strip-planking is conceptually simple, but it takes a lot of time and care to execute it well.
You’ll first cut a series of molds from plywood or MDF that look like cross-sections of the boat, much as in traditional carvel construction. Mount them on a strongback (a stiff wooden rail) so the hull can be built upside-down, and line their edges with plastic to keep stray glue from adhering to them. Then you’ll prepare a flock of identical strips, which for a kayak could be as thin as 3⁄16″ and ¾” wide—and a little longer than the boat. Strips for larger boats could be significantly thicker and wider, but they should be able to bend to all the boat’s designed curves without steaming. The most elegant way to nest them on the hull is to cut a cove and bead into the opposite edges of each plank, which is easy if you have a table-mounted router.

After the first half of the hull is completed, excess strip length is carefully cut away at the centerline. Staples hold the planks to the molds until all the planking is done and the glue sets.
The fun comes in bending, twisting, and nesting the strips into place around the molds, and the beamier the boat, the more interesting the problems. A wide beam will require some very odd shapes for fillers. This isn’t a terrible problem if the boat will be painted, but everyone begins a strip-planked boat with visions of a lovely varnished hull.
After the hull is glued up, you’ll remove the molds, spend several days cleaning up excess glue and fairing the surfaces, then sheathe it with fiberglass cloth set in epoxy.
Strip-planking isn’t limited to kayaks and canoes. A student at the Boat Building Academy in Lyme Regis, England, used fir strip-planking for an adaptation of Joel White’s famed Haven 12 1⁄2 daysailer , originally designed for carvel planking. The Northwest School recently completed a 62′ strip-planked daysailer designed by Bob Perry— though with a beam of just 9’10”, the boat, named SLIVER, resembled a gigantic canoe, or a cedar moon rocket.
Pros and Cons to Strip-Planking
- Relatively inexpensive woods (cedar, fir, sapele) can be used and will yield a beautiful bright-finished hull
- Labor intensive

Diagonal planks are shaped and stapled in place. Plastic prevents inadvertently gluing planks to the temporary building jig.
5. Cold-Molding
If this treatise were a series of car commercials for TV, this is the episode that might be f lagged “Professional Driver—Do Not Attempt.” It’s best suited, frankly, to professional shops and to producing multiple hulls from a single mold. Still, amateurs with the right mixture of patience, courage, and willingness to deal with large acreages of glue can successfully build in this way. Unlike driving a car sideways on a city street, cold-molding won’t kill anyone—but you must properly protect your skin and lungs from the toxic effects of epoxy.
When you build a cold-molded boat, in effect you’re fabricating a very large, exotically curvaceous sheet of plywood in the shape of a hull. First you create a form that consists either of a strip-planked inner hull or a mold with a great many stringers. Then you’ll bend diagonal strips of veneer, typically 1⁄16″ to 1⁄8″ thick, over this mold and laminate several thicknesses together with epoxy. It’s vital to apply even, consistent pressure to these skin layers to avoid air pockets between them. A professional shop will use a vacuum bag; home builders are likely to resort to staples—hundreds or thou-sands of them. After the epoxy cures and the staples are removed, the hull is faired and the exterior often sheathed in still more epoxy, this time with fiberglass cloth.

The second layer of planking is spiled for the opposite diagonal. For even pressure, such hulls are often vacuum-bagged in a single gluing operation.
Pros and Cons to Cold-Molding
- Strong, lightweight, watertight hull
- Adaptable to nearly any hull form
- Very labor-intensive and messy
- Critics complain that the hulls look “too perfect,” like production fiberglass boats

Stitch-and-glue is similar to glued lapstrake in that it relies on epoxy to secure joints; however, in this case planks are butted together at the seams and secured by epoxy fillets.
6. Stitch-and-Glue
This technique may have originated with the Mirror dinghy, concocted as a promotion by the London Daily Mirror in 1963. It was an extremely simple racing and recreational sailing dinghy that amateurs with little or no woodworking experience could build in around a hundred hours, and it was so successful that the Mirror now estimates that about 70,000 have been built around the world.
There is no simpler way to build a wooden hull. Cut five panels from plywood sheets—two sides, two bottom pieces, and a transom—drill pairs of holes a half inch inboard of the seams-to-be, and stitch the panels together with wire twists. The wires function as temporary clamps to hold the panels together. Then fill the gaps and fuse the joints with thickened epoxy, remove the stitches, and reinforce the seams with layers of fiberglass tape set in more epoxy. Most stitch-and-glue boats are then sheathed on the outside with fiberglass cloth set in epoxy, and the inside, too, is sealed with epoxy.
The medium is more versatile than the ubiquitous Mirror dinghies and kayak kits suggest. Sam Devlin, who designs and builds boats in Tumwater, Washington, has built stitch-and-glue motor cruisers up to 48′ and displacing 32,000 lbs. Since plywood thicker than 1⁄2″ is nearly impossible to bend into boat-like shapes, stitch-and-glue hulls longer than 25′ can be built up to the appropriate thickness by cold-molding additional plywood sheets onto the original hull form. This is possibly where stitch-and-glue construction’s easy-building appeal to the amateur begins to ebb, with the big boats best left to the pros.

Short lengths of copper wire make good “stitches” because if necessary they can be cut flush, and since the bits of wire left in the joint won’t rust, they’ll do no harm.
How easy, honestly, is stitch-and-glue? The basic technique is extremely simple; even if you’re a jigsaw goofus you can cut the panels safely wide of the line, then trim with a block plane and sanding block. Stitch-and-glue’s particular devil, however, is in the sheathing. There is a learning curve with fiberglassing a hull, and first-time builders may be doing a lot of tedious sanding to achieve a smooth and fair hull form. And stitch-and-glue boats more complicated than a Mirror dinghy will require the same kinds of appendages and furniture that any boat does.
One of the appealing qualities of a stitch-and-glue boat is its remarkable rigidity. All the interior components such as bulkheads, berth flats, and even cockpit seats become part of an eggcrate-like structure within a monocoque skin, so you don’t hear any groaning or creaking from pieces flexing and moving against each other. This also means good trailering durability. If you appreciate groaning and creaking as part of the intrinsic romance of wooden watercraft, you probably didn’t get past the word “plywood” in the second paragraph, anyway.
Pros and Cons to Stitch-and-Glue
- Relatively easy and rapid hull construction
- Strong, lightweight, abrasion-resistant and (nearly) rot-proof hull
- Some designs (certainly not all) look relatively clunky; hard chines are inevitable
- Since the entire hull and interior structures are essentially fused into one unit, some repairs and modifications are difficult
We launched this discussion some pages back with the admonition that “small boats are not small undertakings,” and the shower of phrases such as “labor intensive” and “exacting craftsmanship” that followed surely underscores the point. Do not be discouraged. Thousands of amateurs have successfully built their own wooden boats, some to extremely high standards and prodigiously ambitious plans. (A man on the Puget Sound island adjacent to the one where I live built a 43′ schooner as his first boat. However, it took him 33 years.)
If you’re in love with a particular design but not its intended method of construction, there is often room to maneuver. Designs of traditional carvel-planked boats can almost always be adapted for strip-plank or cold-molded construction with no external change in their hull shapes. Traditional lapstrake boats, which employ solid wood planks, can usually be executed in glued-lapstrake construction using marine plywood.
All Wooden Boat Construction Projects Start With a Plan
Whichever building method you decide on, you will discover one constant: You’ll begin with a vision of perfect beauty in your head, and if you’re an ordinary mortal, limits of time, money, and skill will inevitably force compromises along the way. Rather than plunge into a funk, the smart builder will set priorities: There are certain things that must be done right, those involving structural integrity or seaworthiness, while certain other details relating to aesthetics and the builder’s ego can be let go. Creating this rational hierarchy of values helps you keep momentum through the long process, and helps you feel good about yourself, even at the high tide of imperfection.
Here are some more techniques to help you build a wooden boat:
- Build a DIY Drop-Center Sawhorse to better support your boat hull
- Use External Frames for Strip-Building
- Assemble DIY Gantry Cranes to lift and roll a heavy hull
Share this article
Join The Conversation
We welcome your comments about this article. If you’d like to include a photo or a video with your comment, please email the file or link.
Comments (3)
Excellent summation. A pleasure to read as an amateur boat builder conversant with stitch-and-glue and glued-lapstrake construction.
Skin-on-frame might be worth a mention.
I just launched my Arch Davis Penobscot 17, following Arch’s variation on Glued Lapstrake design using permanent 3/4” stringers to guide the placement of each strake. This provides rigidity and strength with easy to work 1/4” plywood. Great fun in the shop, but 2X the budget and 4X the estimated time commitment is not far off.
Leave a Reply Cancel reply
Your email address will not be published. Required fields are marked *
Stay On Course
More From This Issue
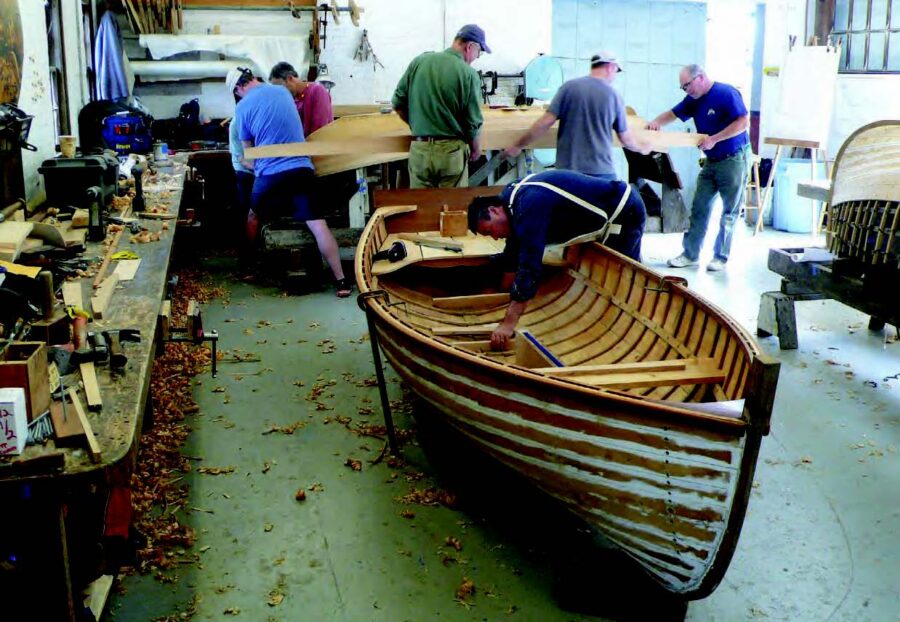
There are about six common methods of building wooden boats today, with variations on each. No particular method can be proclaimed the best; each comes with its own suite of…
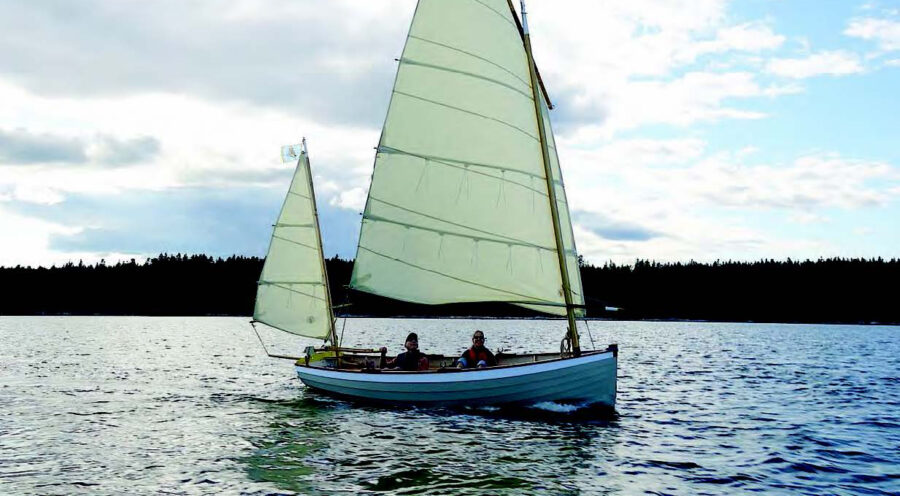
John Hartmann’s Ilur
AXWING, John Hartmann’s newly launched Ilur design from the drawing board of Fran-çois Vivier, caught my attention in Maine last summer when I spotted her at anchor off a Muscongus...
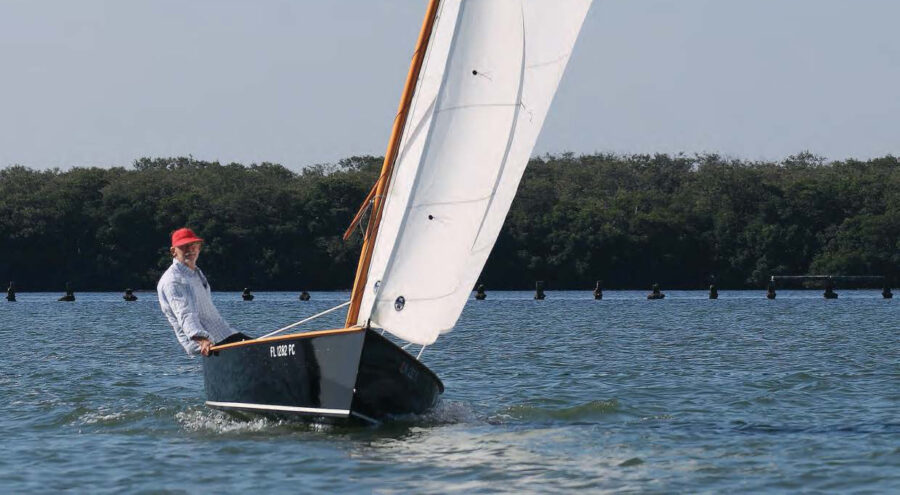
“Jones began sketching an evolution of the Windmill, a boat that would be less demanding and more practical for daysailing.”
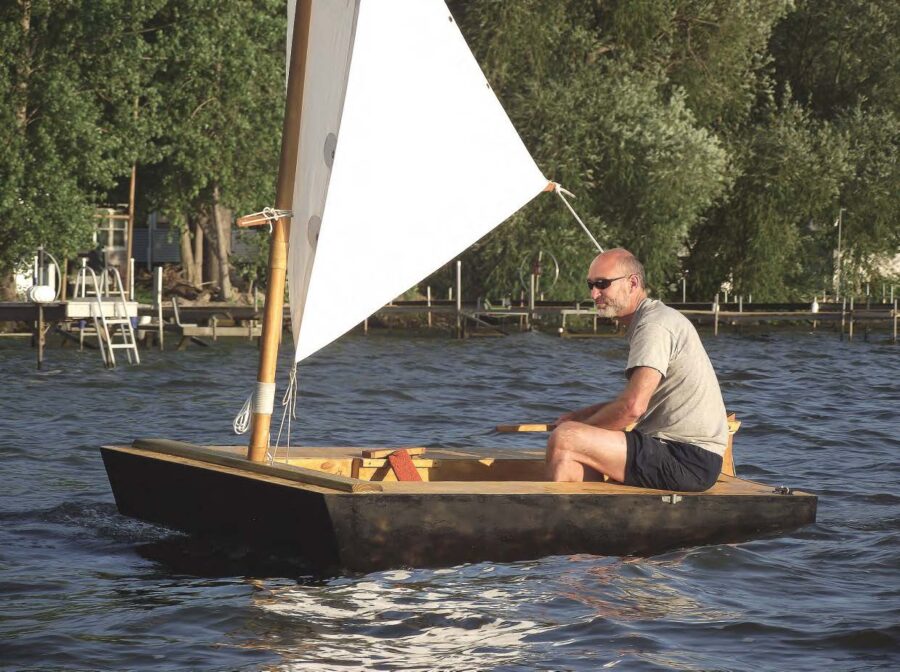
Puddle Duck Racer
“...anyone would look at it and think, ‘Yeah, I could probably build something like that.’”
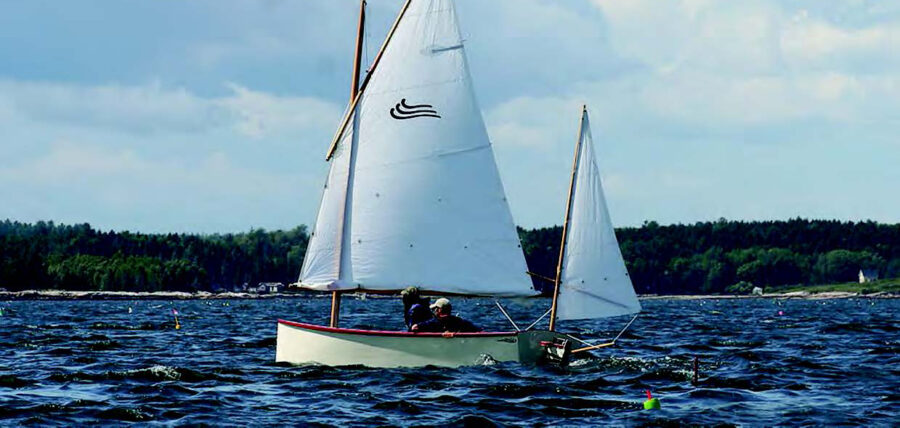
Goat Island Skiff
Paul and Cristophe are experienced sailors who were looking for an inexpensive, yet sophisticated, boat to satisfy their skill levels.
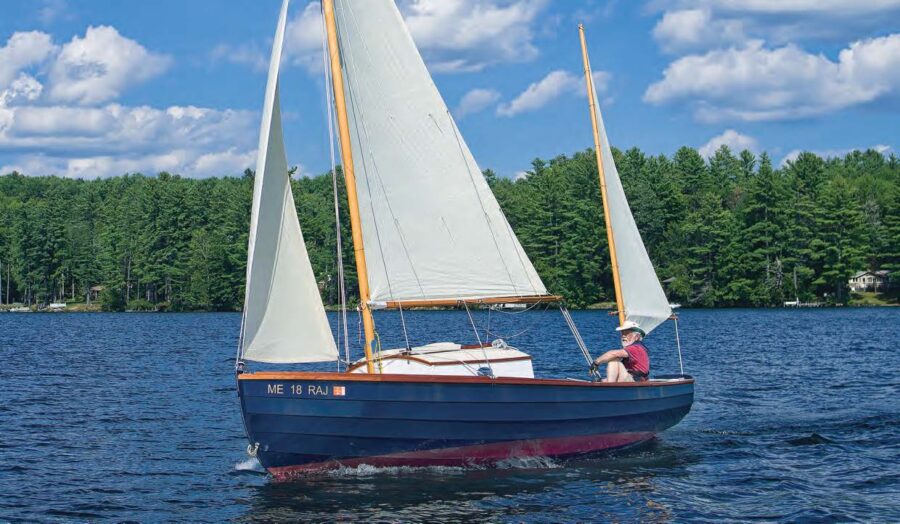
Small-boat cruisers have a long list of things they look for in a boat, and I can’t think of any criterion that this design fails to meet. And it meets…
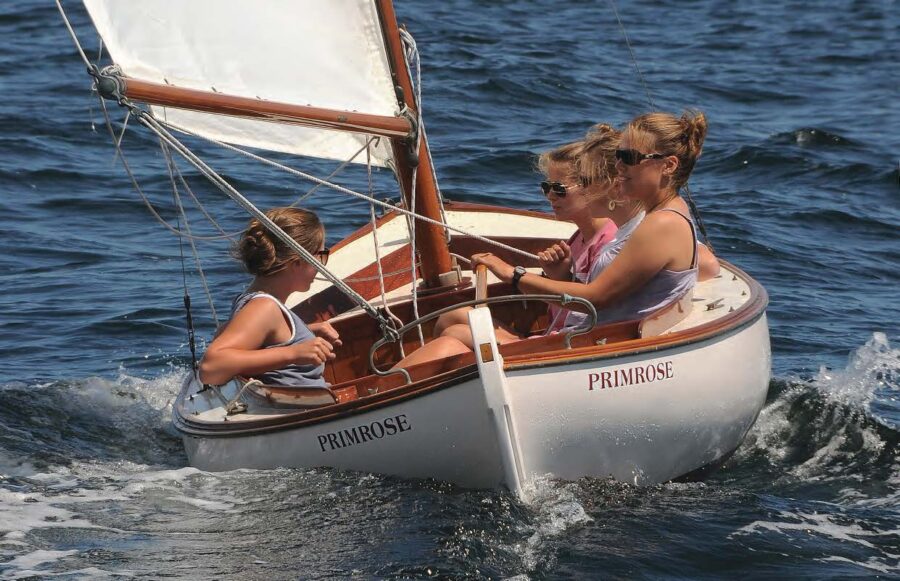
PRIMROSE stands as proof that Nielsen put as much of himself into his small boats as his large ones, and she is as timeless as any of them.
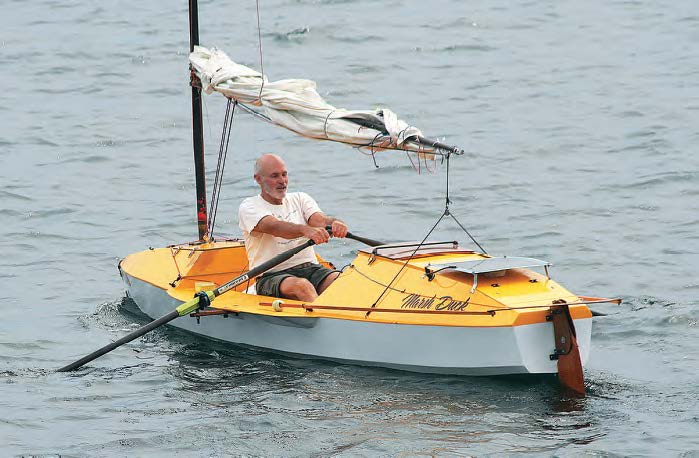
Boat Profile
Tough enough to drag across a rocky beach yet light enough to tow behind a bicycle.

The Morley Guide Canoe
In the early 1970s, Greg Morley, left, decided to leave a career in forestry and park management to make a living building cedar-strip canoes. More than 40 years later, his…
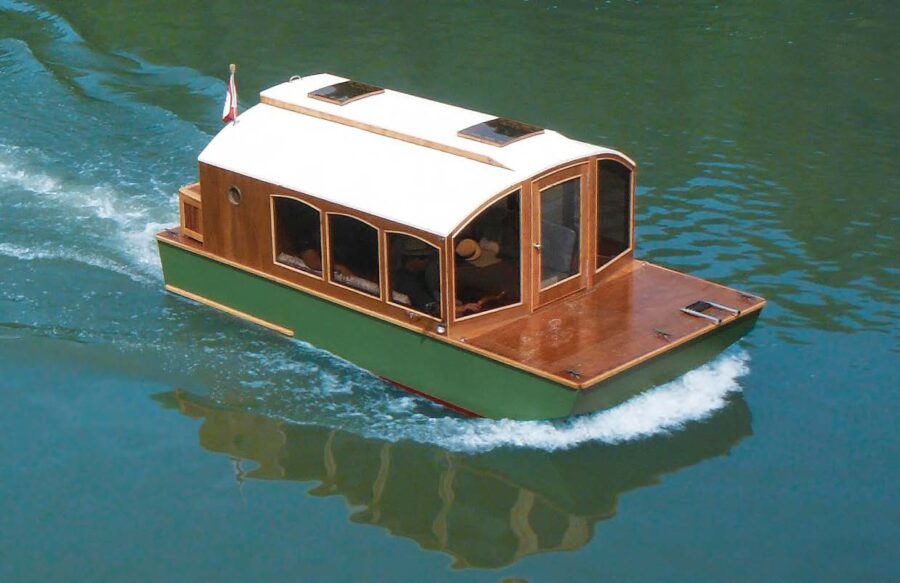
DIANNE’S ROSE
After Dianne Schreyer told her husband she’d spend more time on the water if they had a more stable boat, Roy built DIANNE’S ROSE. The couple are on the water…

A sweeping sheerline, together with ample “rocker,” or bottom curvature, give the McKenzie drift boats the ability to deftly run whitewater such as Marten’s Rapids on the namesake river in…
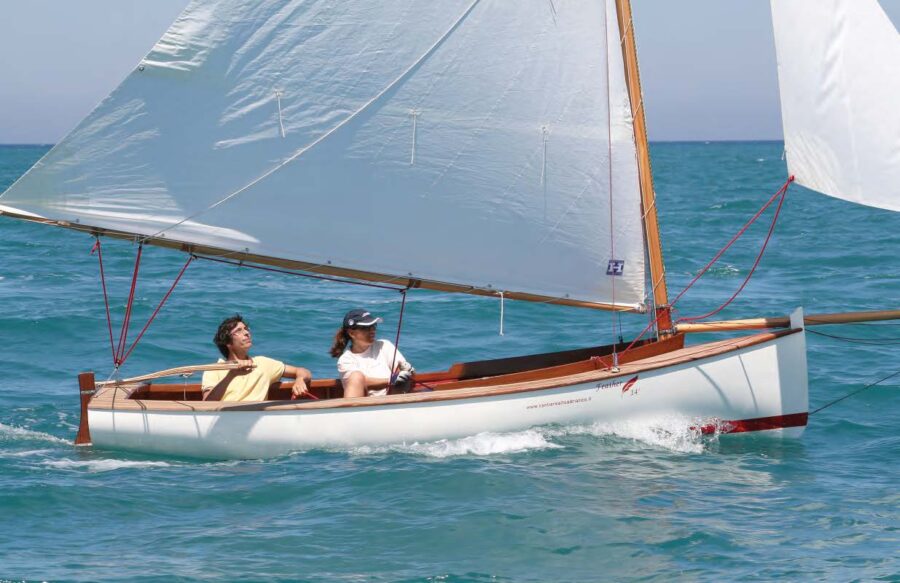
Drawing on a wide variety of influences, among them American racing sandbaggers and local traditional raceboats, Federico Lenardon developed a fast daysailer for the waters of Trieste, Italy.

BUNDUKI is a sport boat built to Australian John Georgalas’s Deep V 16′design. Initially, the design was to be a one-off for an American friend, but the drawings have since…

Bevin’s Skiff
Joe Youcha wants to build boats. A lot of boats. Not only does he want to build boats, but he wants you to build one as well. Back in the…
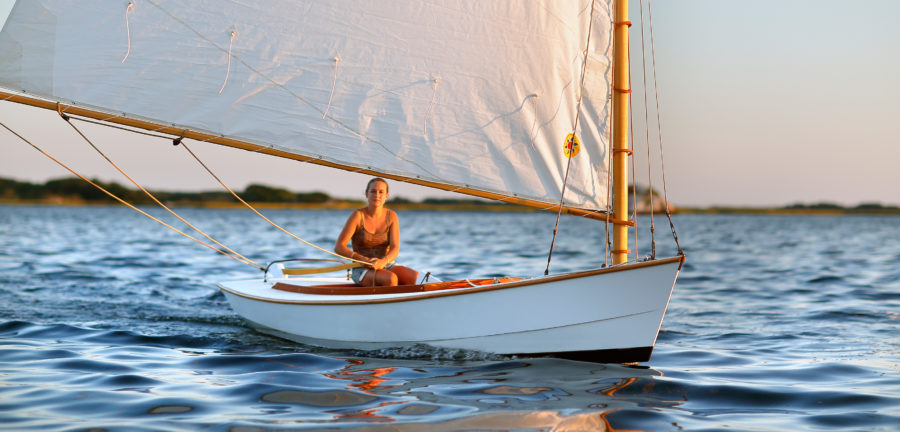
The Friendship Catboat
In boating circles, the word "friendship" brings to mind the classic Maine-built sloop from which pre-internal-combustion lobstermen tended their traps. For Richard Armstrong, however, the word conjures up a different…
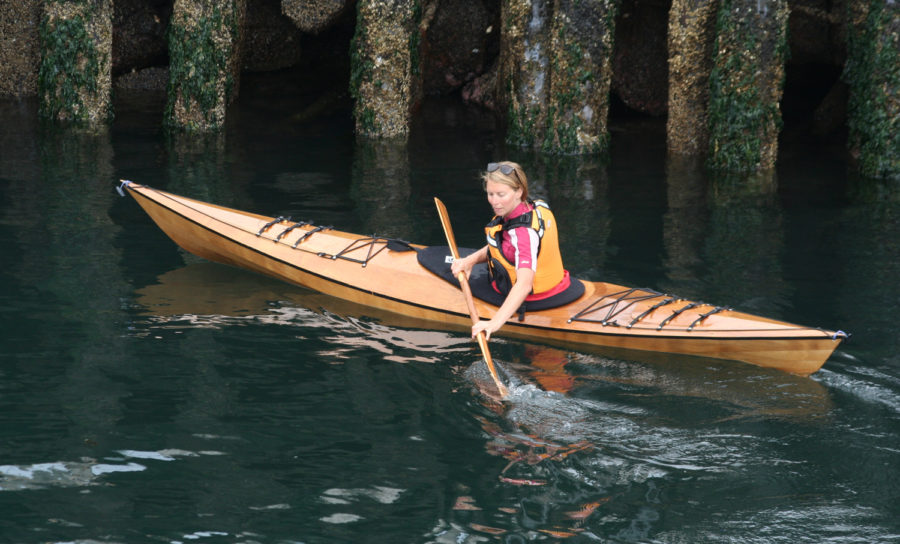
Pinguino 145 and 145 4PD
The Pinguino 145 is a stitch-and-glue plywood sea kayak that comes as a kit from Pygmy Boats in Port Townsend, Washington. An alternate version, the 145 4PD (it has a…
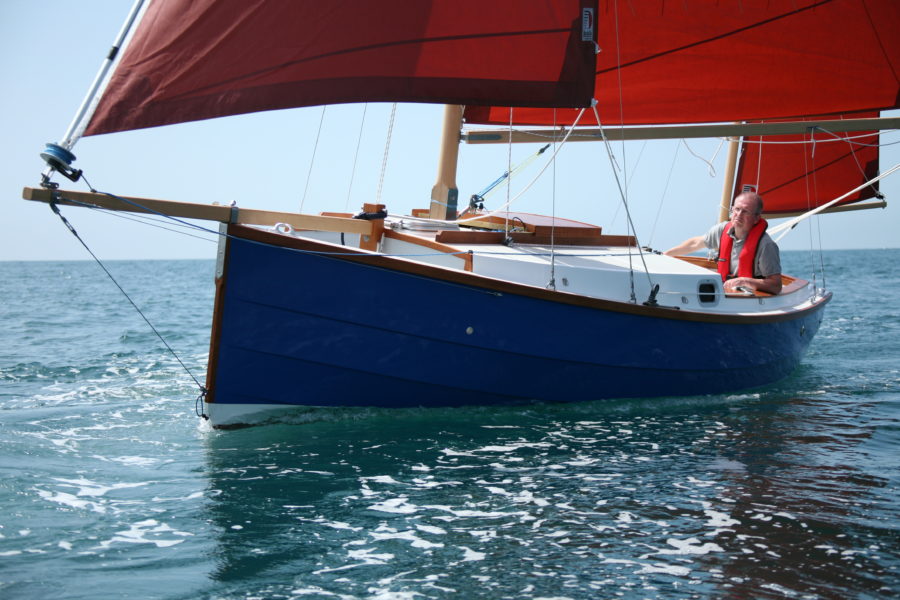
The Golant Ketch
The Golant Ketch is a 20′ hard-chined camp-cruiser designed by Roger Dongray. Dongray is perhaps best known for his Cornish Shrimper, which he designed in 1976 with the intention of…
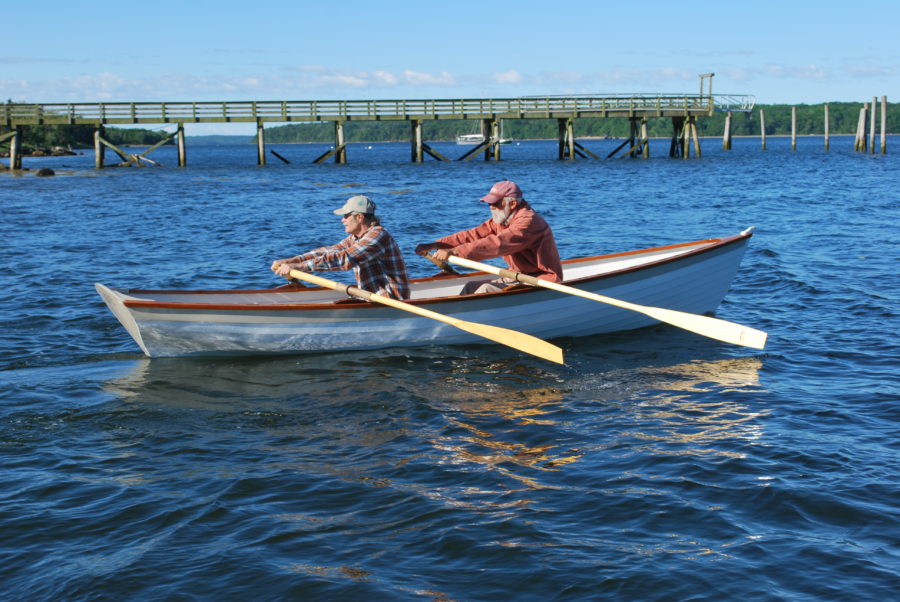
The Penobscot Wherry
The Penobscot Wherry from Cottrell Boatbuilding of Searsport, Maine, is based on the Lincolnville salmon wherry, a beamy high-volume boat used to remove salmon from weirs in the days when…

Outrigger Junior
Long before Europeans ventured to the new world, sailing dugout canoes fitted with outriggers sailed the waters in Southeast Asia and were used for migration throughout the Pacific region. The…

Sam Crocker’s Small Outboard Skiff
Here’s a boat type one doesn’t see too often these days. It’s a modest-sized outboard designed not as a center-console but instead with a small cabin that will accommodate the…
More Technique

Eton Oar Stands
One shot offered a glimpse of what appears to be the leg of a second stand. I guessed that was supporting the oar handle. The oar blade was cantilevered beyond…

A Canvas Bunk
rCuising under sail and oars can be an odd combination of casual relaxation and nonstop intensity. It means uninterrupted time on the water, to be sure—and intimacy with nature and…
Fillet Brazing for Custom Boat Hardware
By using a brazing alloy that would build up in fillets at the intersections, the resulting radiused transitions would have the appearance of custom-cast fittings. After some experimentation with different…
Waxed Canvas
DuraWax comes in two grades: light, which is treated with paraffin wax, and heavy, treated with beeswax. Both have the same underlying 12-oz cotton-duck fabric and, in both, the added…
Subscribe Today!
Become a subscriber today and you’ll recieve a new issue every month plus unlimited access to our full archive of backlogged issues.
Already a subscriber? Sign In
Subscribe For Full Access
Flipbooks are available to paid subscribers only. Subscribe now or log in for access.
407-556-3823

Boat Building Methods: A Comprehensive Guide for Boat Enthusiasts
Welcome to our comprehensive guide on the top boat building methods! If you're interested in building your boat or want to learn more about the various techniques used in boat construction, you've come to the right place. This guide will explore some of the most popular and widely used methods for building boats, including traditional wooden boatbuilding techniques and modern composite construction.
Wooden Boat Building: Timeless Craftsmanship and Beauty
Wooden boat building has stood the test of time as one of the oldest and most traditional boat construction methods. With centuries of history behind them, wooden boats are renowned for their durability, strength, and classic aesthetics. Different types of wood, such as oak, pine, cedar, and mahogany, each contribute unique qualities to a boat's structure and appearance.
The process of wooden boat building involves shaping the wood into planks, frames, and other structural components. These pieces are skillfully assembled using traditional techniques like mortise and tenon joints or lapstrake construction (overlapping planks). Finally, a waterproof coating, typically epoxy resin, is applied to seal the wood.
One of the main advantages of wooden boat building is its ease of repair and boat maintenance . Minor damages can be easily fixed with simple tools and materials, ensuring the boat remains in excellent condition for years. Wooden boats also exude a timeless charm that appeals to boaters who appreciate the craftsmanship and historical significance they represent.
Modern Composite Construction: Strength and Innovation
In recent years, composite materials have gained popularity in boat building due to their exceptional strength and durability. Lightweight yet robust, materials like carbon fiber, kevlar, and fiberglass are ideal for high-performance boats.
Composite construction involves layering these materials with resin to create a strong and rigid structure. This technique allows for more intricate designs and shapes compared to traditional methods. Moreover, composite boats require less maintenance as they do not rot or warp like wood.
However, it's important to note that composite construction can be costlier than traditional methods and requires specialized skills and equipment. Furthermore, it's crucial to dispose of these non-biodegradable materials to minimize environmental impact responsibly.
In conclusion, wooden boat building and modern composite construction offer unique advantages and disadvantages. While wooden boats provide a traditional and visually appealing option, composite boats offer exceptional durability and design possibilities. Ultimately, the choice between these two methods depends on personal preferences, budget considerations, and the boat's intended use. It's crucial to carefully evaluate all factors before making a decision.
If you want to learn more from our experts, contact CV Composites . Our team specializes in composite boat building and can provide the best advice and services to bring your dream boat to life. Trust us to make your boat-building journey a success.
Why You Should Consider Boat Gel Coat Repair

Everything You Need to Know About Boat Painting Services

Common Problems with Marine Electrical Systems: Troubleshooting and Solutions

Essential Boat Maintenance: Understanding the Best Practices and Techniques

Everything You Need to Know About Boat Gel Coat Repair: Tips and Steps

5 Advantages of Composite Boat Stringers

5 Top Common Marine Electrical Challenges and How to Fix Them

Boat Carpet Replacement: A Comprehensive DIY Guide

How to Do Fiberglass Repair Like A Pro

A Step-by-Step Guide to Boat Carpet Replacement and Its Importance

"Keeping you afloat with reliable boat repairs and maintenance"
For expert boat repairs and friendly service, choose us.
Request A Free Quote Today!
Request free quote.
Thanks for contacting us!
We'll get right back to you.
Tel: 407-556-3823
1404 Hamlin Ave, St Cloud, FL 34771, United States of America
2023 Copyright © CV Composites Boat Repair | All Rights Reserved • Privacy Policy
Powered By: Triple A SEO P
- Building Boats: Crafting Your Own Seafaring Adventure
Imagine gliding gracefully across the shimmering waters, the wind in your hair, and the sense of freedom that comes from steering your very own boat. Building boats isn't just a hobby; it's a journey that combines craftsmanship, passion, and a connection to the sea. Whether you're dreaming of a small sailing boat or a grand yacht, the process of building a boat is an exciting endeavor that brings your nautical fantasies to life.
Introduction: Embarking on a Boat-Building Adventure
The allure of the open sea has captured human imagination for centuries. Building your own boat allows you to immerse yourself in this seafaring romance and become the captain of your destiny. Whether you're a seasoned craftsman or just beginning your woodworking journey, building a boat offers a unique blend of challenge and satisfaction.
The Joy of Crafting: Building Your Dream Boat
There's a certain magic in creating something with your own hands, and boat building encapsulates this experience perfectly. From meticulously shaping the hull to fitting the finest details, every step of the process is an opportunity to pour your passion into your project.
From Dream to Reality: Steps to Construct a Wooden Boat
Choosing the right boat building kit.
Embarking on your boat-building journey starts with selecting the right kit. These kits come in various sizes and styles, catering to both beginners and experienced builders. The right kit will provide you with clear instructions and pre-cut materials, simplifying the construction process.
Tools and Materials You'll Need
Before diving in, ensure you have the necessary tools and materials. Basic woodworking tools, adhesives, and marine-grade materials are essential. Safety gear is also a must to protect yourself during construction.
Laying the Foundation: Building the Hull
The hull is the backbone of your boat, determining its stability and buoyancy. Constructing the hull involves assembling the ribs, keel, and other structural elements. Paying attention to measurements and alignment is crucial for a smooth build.
Navigating the Challenges: Assembling the Frame
The frame adds shape and structure to your boat. Connecting the ribs to the keel and other framing components requires precision. Challenges may arise, but each obstacle is a chance to learn and refine your skills.
Sailing Skiffs: A Unique Approach to Boat Building
Sailing skiffs offer an alternative to traditional boat designs. With a focus on simplicity and performance, these boats prioritize maneuverability and speed. Exploring skiff designs can open up new avenues for creativity.
Sailing in Style: Finishing Touches and Personalization
The art of paint and polish.
Once the construction is complete, it's time to bring your boat to life with paint and finishes. Not only do these elements enhance the aesthetics, but they also protect the wood from the elements. Choose colors and finishes that resonate with your nautical vision.
Installing the Deck and Cabin
The deck and cabin provide comfort and functionality to your boat. Installing these components requires careful planning to ensure they align with the overall design. Consider factors like seating arrangements, storage, and visibility.
Wiring, Plumbing, and Essential Systems
Modern boats often come equipped with electrical, plumbing, and navigation systems. Integrating these systems seamlessly into your boat requires technical know-how. Collaborating with experts can ensure a safe and functional vessel.
Nautical DIY: Building Your Own Boat Kit
Building your own boat from scratch offers the ultimate freedom in design and construction. While it demands more skill and time, the satisfaction of bringing a unique vision to life is unparalleled.
Read our top notch articles on topics such as sailing , sailing tips and destinations in our Magazine .
Benefits of plywood boat building.
Plywood boat building is a popular choice due to its accessibility and affordability. Plywood's flexibility and durability make it an excellent material for constructing small sailboats. Its ease of use opens the door for aspiring boat builders.
Step-by-Step Guide to Building a Plywood Boat
- Designing the Boat: Sketch out your boat's design, considering size and style.
- Gathering Materials: Acquire marine-grade plywood, epoxy, and fiberglass.
- Cutting and Assembling: Cut plywood pieces according to your design and assemble the hull.
- Fiberglassing and Sealing: Apply fiberglass and epoxy to reinforce the hull and make it watertight.
- Finishing Touches: Install seats, decking, and other features to complete the boat.
Charting Your Course: Following Sailboat Plans
Understanding yacht plans and sailboat kits.
Yacht plans and sailboat kits provide blueprints for building vessels of various sizes. These plans guide you through every step, from framing to finishing. Choosing a plan that aligns with your skills and aspirations is crucial.
Customizing Designs to Suit Your Vision
While sailboat plans offer a foundation, there's room for personalization. You can modify elements like cabin layout, deck arrangement, and interior amenities to match your preferences.
Floating Dreams: Embarking on Your Maiden Voyage
Sea trials and safety checks.
Before setting sail, conduct sea trials to ensure your boat performs as expected. Test its stability, speed, and maneuverability in controlled conditions. Additionally, perform safety checks on essential systems to guarantee a smooth journey.
Navigating Challenges and Celebrating Successes
Boat building is a journey of challenges and triumphs. Embrace setbacks as learning opportunities, and celebrate every milestone, from laying the keel to hoisting the sails for the first time.
FAQs About Boat Building
Can i build a boat if i have no prior woodworking experience.
Absolutely! Many beginners have successfully built boats by following detailed plans and utilizing available resources.
How much time does it usually take to build a small wooden boat?
The time required varies depending on factors like the complexity of the design, your experience level, and the amount of time you can dedicate. It could take a few weeks to several months.
Are boat building kits suitable for beginners?
Yes, boat building kits are designed to cater to all skill levels. They provide step-by-step instructions and pre-cut materials, making the process easier for beginners.
What safety precautions should I consider during boat construction?
Wearing appropriate safety gear, working in a well-ventilated area, and following instructions carefully are essential safety practices during boat construction.
Can I build a boat without expensive tools and equipment?
Yes, basic woodworking tools are sufficient for many boat-building projects. As you gain experience, you might invest in more specialized tools.
Read our top notch articles on topics such as sailing, sailing tips and destinations in our Magazine .
Check out our latest sailing content:
The Magic of Plywood: Crafting Small Wooden Sailboats
So what are you waiting for? Take a look at our range of charter boats and head to some of our favourite sailing destinations.
FAQs: Boat Building: Your Questions Answered
I am ready to help you with booking a boat for your dream vacation. contact me..

Denisa Nguyenová
This Is the Easiest DIY Boat-Building Method We’ve Ever Seen
And the guy who discovered it is sharing all of his secrets.

In the summer of 1974, Sam Devlin was working on a tugboat in Alaska when he read the first issue of Wooden Boat Magazine . He was immediately entranced. “I couldn’t shake the image of that wooden boat from my head,” Devlin says. “I can even see it today, almost five decades later.” Devlin had loved boats from a young age and had worked on fiberglass boats in the past, but the process lacked creativity, he says, and didn’t challenge him. This wooden boat, though, was something different.
A natural craftsman, Devlin believed wooden boatbuilding was a career he could be proud of. He leaned into the idea of making vessels that were both beautiful and functional—something that would last. Physical labor suited his strong, tall frame. And as a child of the ’60s, someone who came of age post-Vietnam, he felt the freedom to draw his own roadmap and forgo a traditional career.

However, the wooden boat revival had just begun, and very few builders were sharing their processes. Devlin had to come up with his own from scratch. Starting in 1977 with hand drawings and small, to-scale models, Devlin created hull shapes that looked viable for small sail and motorboats. But one part stumped him: how to fuse the panels together.
Nevertheless, he forged ahead. “My dad agreed to buy the materials if I would build him a boat,” he says. Cutting the hull panels was the easy part. But they needed a method to attach them together. “We looked around the shop and saw baling wire and pliers, and two hours later we had the boat stitched together and looking like the shape we wanted. That was the eureka moment,” Devlin says. He had stumbled upon the stitch-and-glue method.
The stitch-and-glue method is a simple boat building technique popularized in the 1960s that creates a solid, one-piece hull, unlike most other wooden boats, which start with frames and bulkheads and build the hull on top. Using marine plywood panels stitched together with electric fence wire and sealed with epoxy resin, the process eliminates the need for frames or ribs, making it a simpler, faster construction. Stitch-and-glue doesn’t require expensive molds like fiberglass, and can be maintained over the long term, perfect for DIY builders.

Devlin and his father continued to tinker with the shape and construction of their boat. A few days later they had a functional skiff. It wasn’t perfect, but it showed the stitch-and-glue process was more than viable—it had clear advantages over other boatbuilding methods.
Stitch and glue, generally speaking, has a remarkable ability to adapt. Without high tooling costs like most other boatbuilding mediums, it’s more accessible to more builders, which makes for rapid idea evolution and pervasion about the method. “With low barriers to entry from an experience side, we learned a lot quickly,” Devlin says. They learned that if they cheated on the grade of plywood, they would be sacrificing the integrity of the whole boat. They learned to use epoxy resins because they would seal stronger than more popular polyester resins. And moreover, they learned the process, the best order of operations, and how unique it was to quickly go from an idea to an actual, working boat.
Less than a year after finishing his first boat, Devlin embraced boatbuilding as a full-fledged career. Research led him to builders making small boats in England and New Zealand that used a method similar to the one he had devised with his dad, but not at the same scale or complexity he envisioned.
From there, he focused on improving the process. “We needed to nurture the method, testing the parameters and not constraining it with patents,” Devlin says. “My goal from the beginning was to proliferate the knowledge as much as possible and keep persisting and developing my own skills as a designer and builder.

“Most people didn’t see the potential for boats over 15 or 20 feet with stitch-and-glue, but I didn’t believe in that limitation. I hung my boatbuilding shingle on the door of my shop at the time in Eugene, Oregon, and I got my business started in 1978 with 25- and 30-foot boats.” Devlin’s business has grown since then, adding members to his team, expanding his shop, and refining his process. Today he works on a variety of wooden boats, and currently is putting the finishing touches on a 40-foot ocean-going catamaran.
The biggest advancement in the stitch-and-glue method in the past decades has been computers replacing hand drawings. Using 3D modeling and CNC machines to cut out shapes, the panels of the boat are more accurate and easier to work with during assembly. This also allows boat designers like Devlin to ship kits to home builders with precut panels to assemble using their own tools.
In 2012 Devlin received the Lifetime Achievement in Boatbuilding and Design award by the Wooden Boat Foundation and Wooden Boat Magazine , after designing and building over 400 boats (ranging from 7 to 65 feet) with the stitch and glue method, which he helped improve and bring to the mainstream. To this day Devlin is still building boats, from his facility in Olympia, Washington. Here are his tips for making your own.

25 Steps to Building Your Own Stitch-and-Glue Boat

1. | Procure a set of plans, or scaled drawings of what you’re going to create. Devlin creates plans for hundreds of DIYers, detailing the peel shapes and all the materials you’ll need.
2 | If your boat is longer than 8 feet, edge-join the marine plywood panels end to end (called scarfing). If using a kit, the kit manufacturer will provide wave-to-keyhole type indexing to the ends of the panels that will help allow them to be joined.
3 | If you have a CNC router, use it to cut the panels to size (there are usually 5 to 8 for a small, simple boat). Skip to step 14.
4 | If you don’t have access to a CNC router, draw lines across the width of the panel at right angles to the long edge of the plywood, 1 foot apart.

5 | Make marks at the bisects at each line, as shown on the plans, then hammer small brad-type nails (“fence posts”) partially into the plywood at each of those intersections.
6 | Draw smooth curves between these fence posts using a flexible wooden batten to span smoothly between each of the fence posts. When complete, remove the nails.
7 | Saw the panels out, leaving about 1/8 inch extra plywood overhang so you can see the line you drew.

8 | Take both pieces and use a block plane to even them out so they’re symmetrical, smoothing the cutting lines out to the pencil line marks made previously.
9 | Do this for all of the panels of the boat, which together will make up the entire hull.

10 | Use a block plane to knock 45-degree bevels on half the thickness of the panel, on the inside surfaces (where it will mate with another panel).
11 | Scribe a stitch line, usually the thickness of the plywood plus 1/8 inch, and pre-drill small holes as marked on the designs. This works well on the bottom panels.
12 | For larger boats (those above 15 feet long), stitch upside down—it eliminates having to roll the boat over another time. A small boat can be stitched right-side up, because rolling one of these is much easier.
13 | For larger boats, set up the bulkheads, or athwartships (sideways) and longitudinal (lengthwise) structures that add structural strength and help define the architectural space of the boat. For small boats, use spreaders, which are small battens that open the top of the boat to the designed width, to stretch out the shear of the boat.

14 | Start with the two bottom panels laid one over the other (like a closed book) at the bow end and stitch the first two panels together at their keel edges. This process is similar to sewing two pieces of fabric together, but instead of a needle, you can feed the wire through the holes with your hands. It should be tight enough to keep the peels sealed together.
15 | Open the two halves of the bottom panels like opening the pages of a book and fit them over the bulkheads upside down. For small boats, use spreaders to maintain the correct shape.
16 | Repeat this process with each panel, stitching one side and then the other, from bow to stern. When all the panels are in place and the stitches are clamping the panels together into a boat shape, stitch the transom to the ends of the panels. For small boats, add spreaders to open up the top of the boat to the planned size.

17 | Start epoxy tabbing, which is like tack welding, putting epoxy and fiberglass tabs between the wire sutures, on the interior of the hull.
18 | Once the tabs have cured solid, at least 24 hours but maybe more in humid climates, you can pull out all the wire stitches and lightly sand over the tabs to smooth things out.

19 | Finish fiberglassing the interior seams of the boat. Set several layers of fiberglass tape in epoxy resin over the top. Then fiberglass the exterior plywood panel seams.
20 | Once the hull is to the designed thickness and all seams between the panels are taped with epoxy and fiberglass cloth layers, sheath the entire exterior of the boat with epoxy and fiberglass cloth. Some builders use a final layer of peel ply to control the resin-to-cloth ratio and eliminate air bubbles.
21 | Finish fiberglassing the seams of the interior of the boat, starting with narrow tapes up to the final width of the plans designated.
22 | Sand the boat inside and out to help smooth the edges and overlaps of the fiberglassing. Reseal with epoxy resin rolled and brushed over the hull as smoothly as possible.
23 | Sand and seal one final time and roll the boat over.
24 | Install the interior, such as seats, hardware, and the engine.

25 | Paint the entire boat, inside and out. Opaque paint offers the best UV protection, which is important to shield the boat from the sun’s reflection off the water.

.css-cuqpxl:before{padding-right:0.3125rem;content:'//';display:inline;} Pop Mech Pro .css-xtujxj:before{padding-left:0.3125rem;content:'//';display:inline;}

The Day Russia's Supersonic Jet Fell From the Sky
 Christening Ceremony")
Sub USS Idaho Joins a Slow-Growing Naval Fleet

Russian Flaunts Nuclear-Tipped Air-to-Air Missile

Chinese Missile Tech Finally Caught Up To The U.S.

China's H-6 Bomber To Play Vital Role in Air Force

The Space Force is Calling for “Fires” in Space

Did This Man Solve the Amelia Earhart Mystery?

DNA Finally Solves the 'Enigma of Kaspar Hauser'

It’s Hot Bomber Summer in Alaska

Fourth-Dimensional Aliens Could Be Spying On Us

Two Long-Lost Euripedes Works Found in Egypt
- No products in the cart.
Boat Building Construction Methods and Materials
Building in plywood.
Build Your Own Boat using Construction Methods and plans from Hartley Boat Plans.
Plywood is the most popular method of amateur boat construction. For the double layer plywood construction method of round bilge boats, see the Westhaven 32 sailboat.
Material costs are moderate except for some of the hard woods. Modern plywoods using epoxy glued laminates and the use of epoxy sealer systems has extended the life of plywood craft well beyond GRP/FRP. Hartley plywood designs with our easy construction methods and full size frame patterns, enable a professional styled craft to be finished to professional standards by amateurs. Small or large boats, they are all the same, only the time and cost factor varies. Construction must be undertaken under cover.
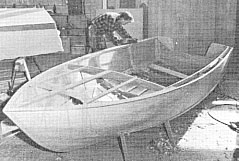
Hartley boats are built in six basic stages. 1/ make the strongback (building frame), as the base for building the boat on. 2/ make the frames, stem and rim pieces using the full size frame patterns. 3/set all up on the building frame as shown and attach stringers, sheer etc. 4/attach the plywood sheeting. 5/ finish and attach further fittings etc (any deck and cabin tops in the same manner with beams made using full size patterns provided). 6/ fit out, prepare and paint.
Plywood is easy for the amateur to repair when damaged.
Building In Wood
For amateur construction a wooden framework when combined with plywood sheet or strip covering is a relativel simple process….however wood planking a hull is not within the realms of the average amateur.
The process is difficult without tuition or previous experience and mistakes can be costly. Material costs are high as well as the almost impossible task of finding suitable cured material.
The traditional materials required for this traditional method of construction, are in general terms almost unobtainable.

Building In Ferro-cement
Often referred to as ‘concrete’, which is a misnomer, in reality it is steel reinforced plaster (SRP). Introduced more than 200 years ago for boatbuilding (there are still surviving craft almost that age). The cheapest and easiest form of construction for boats over 25′. No previous experience is required. Can be built outside without cover.
The world renowned Hartley web-frame construction method superior for strength and ease of fitting out (is copied by many). Mistakes and damage are easily repaired. Lowest level of on-going maintenance. No specialist tools required.
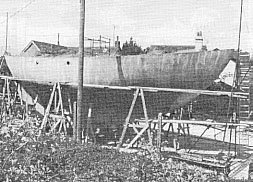
Apart from strip plank construction it is the only viable method for building large round-bilge boats economicaly within amateur capability.
It is estimated that more than 80% of all amateur owner built monohull boats that have made extended ocean voyages, are of ferro-cement construction.
Check out our site at www.ferroboats.com for in-depth information pictures, how-to, and the world of ferroboats.
Building In Steel
If you can already weld, building a Hartley boat in steel is easy.
All steel boats, or ply suggested as suitable for steel in our catalogue can be built with either 140 amp home stick welder or equivalent gas, mig or tig welders.
No specialised rolling or forming equipment is required. With modern paints and preparations rusting can be cut back considerably.
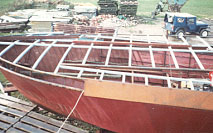
Building In Aluminium
A good construction medium for building light craft. Method of construction is the same as for building in steel. Skill and experience of working with aluminium is a necessity.
Material costs vary considerably from country to country, but usually fit somewhere between plywood and G.R.P.(generally the highest). Extreme care is needed with the application of protective etching primers and paints, in order to prolong the life of aluminium craft. Construction under cover is an important consideration. Most Hartley plywood or steel designs can be built in aluminium.
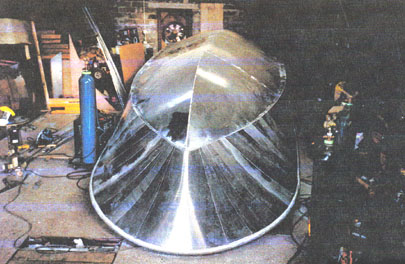
Building In Fibreglass – grp/frp
Glass or fibre re-inforced plastic, often referred to as ‘glass fibre construction’, is the method preferred by most professionals. Once a mould has been made, it is relatively easy to form hulls from it time and time again. Unfortunately this is not the scenario for the amateur building his ‘one-off’. Material costs in many countries are high and mistakes can be costly. Very difficult for the amateur to repair (sometimes impossible). A temperature and humidity controlled building is often a necessity.
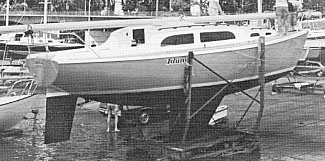
Building In Wood Strip-plank
A good method for amateur construction of round bilge hulls in wood. Our ferro-cement designs can easily be adapted to strip-plank construction. The hull is formed by using thin strips of approx 1″ thickness, which are then glued and edge nailed to each other to skin the hull. Material costs are not prohibitive, although hardwood is used it can be machined from short or off-cut lengths. The framework of the hull can either be made of wood, laminated plywood, or fabricated from steel or aluminium, of either angle or strip. The latter known as composite strip-plank construction.

Stitch and Glue Method of Boat Construction
The stitch and glue method was introduced for twofold reasons:
(a) So that designs could be simpler and drawn without the need of a background of either basic boatbuilding or drafting skills.
(b) To save time on building, and eliminate some of the care needed in making wood joints, as well as remove the necessity for some of the metal fastenings. The process was however found to be only suitable short term for very small craft.
The introduction of epoxy glue with it’s ease of use ‘stronger than wood’ and gap-filling properties has generally made stitch & glue redundant.
|
| |||
| |
|
|
|
| |
|
|
|
| - materials are easily available but require controlled conditions for curing etc. Fairly unpleasant to work with. Requires a lot of tooling (ie. the construction of a 'female' plug from which a 'male' mould tool is taken - therefore not suitable for "one-offs" and is usually used for mass or batch production. Not too difficult to repair.
| |
| - uses a much rougher/cheaper building jig (no need for expensive mould tools) but still a lot of grinding etc to do and care has to be taken to make sure that the bond between the inner foam core and grp outer skins is good. Not so easy to attach fittings too (the foam needs to be replaced with plywood where fittings are attached which means a lot of pre planning is required. More difficult to repair than single skin. | |
|
| |||
|
|
| ||
| - there are many more methods of wood boat construction - Ashcroft, French Carvel etc - but they are not popular amongst home builders often due to their complexity - for information on these methods read books like Boatbuilding by Howard I. Chapelle etc. | |||
|
|
|
|
|
| |||
Yachting World
- Digital Edition

How (and why) wood is making a comeback in yacht building
- Rupert Holmes
- May 30, 2023
Rupert Holmes reports on latest developments in wooden yacht construction, and why this ancient material is being used for hi-tech contemporary design
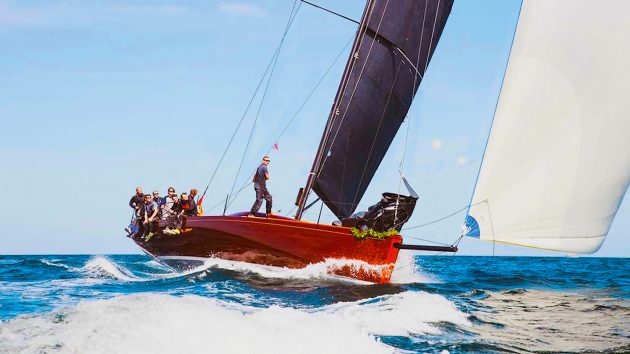
Why would a naval architect and structural engineer used to working with cutting edge materials for America’s Cup teams, including INEOS Britannia , and companies like Airbus, be excited about working with wood?
“It’s quite simple for me,” says French designer Thomas Tison, “Modernity does not neglect where we all come from – on the contrary it makes the best of it. In a way a boat is a heritage, so to ignore wood would be to ignore the essence of yacht design and building.
“Carbon fibre is only an evolution from this heritage and reinstating wood as a modern material increases the number of options a naval architect has for creation and performance.”
Tison designed the stunning, contemporary 48ft offshore racer Elida which launched last year, and currently has a timber/epoxy 40ft high-end daysailer on the drawing board. To optimise Elida ’s weight and stiffness Tison tested three different timber and glue laminates at an Airbus facility. “What we found was very interesting,” he told me. “The existing data was 20 years old, but now we can carefully select the glue and timber, so the figures for our laminates were stiffer than predicted, with the sitka spruce an order of magnitude better than expected.”
Elida is built of diagonally planked sitka spruce covered with a 3mm mahogany veneer. Additional internal stiffening is provided by local layers of 200g carbon fibre. The result is a very stiff structure – projected forestay loads match those used on TP52s, yet the total weight of the 48ft hull shell is only 1,000kg.
Tison’s next project is a very high end 40ft daysailer. Construction will be an evolution of Elida ’s, giving a strong and stiff structure that meets Category A requirements, yet total displacement is only 3,700kg. He also has a concept under way for a 45m superyacht built in a similar manner.
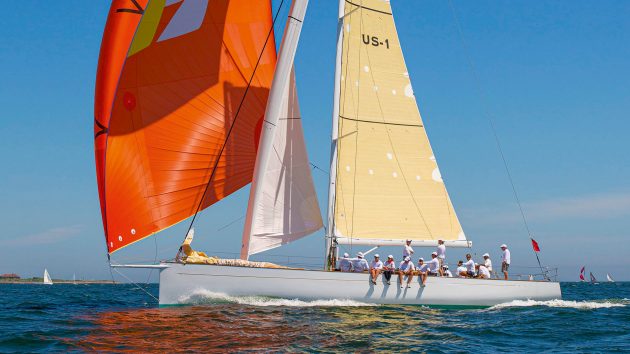
Outlier is a cold-molded custom 55-footer designed by Botin. Photo: Billy Black
Traditional skillset
The enthusiasm naval architects young and old have for wood/epoxy composite construction is striking. Many of today’s stand-out new designs on both sides of the Atlantic are built this way and it’s often the best option for one off builds and short production runs. Key advantages include stunning aesthetics, stiff, lightweight structures and excellent longevity.
Today British yard Spirit Yachts is perhaps the most well-known specialist in this form of construction and their wood-as-art concept is well documented, including the sculptural approach taken with the Spirit 111 Geist . However, examples of other yachts abound, including Rob Humphreys’ Tempus 90 superyacht. This was built in Turkey, which unlike many countries never lost its wooden-boat building industry. As a result plenty of yards today are familiar with working with epoxy/timber composites. And many other top-notch recent wooden yachts have been built there, ranging right up to superyacht size, including Andre Hoek’s PC Yacht range and a number of his Truly Classic designs.
Britain has its own strong tradition of wooden-built designs: the Elephant Boatyard on the River Hamble has a long history of building, and maintaining, timber/epoxy yachts, including the Barracuda 45 built for Bob Fisher in the late 1980s.
Wood was the medium successful IRC raceboat designer John Corby made his name with in the 1990s and 2000s. And it was the choice of one of the UK’s most successful yacht designers, Stephen Jones, for his own 46ft one-off Meteor , launched in 2006. She was built in Grimsby by Farrow and Chambers, which also built two cedar epoxy yachts for former Yachting World editor Andrew Bray.
On the other side of the Atlantic, several New England yards are active in building new custom and semi-custom yachts in wood/epoxy. Notable recent examples include the Lyman-Morse 46, Brooklin Boat Yard’s Jim Taylor-designed 44ft Equipoise , and the Botin custom 55-footer Outlier . A long list of other notable recent launches include Anna , a 65ft Stephens Waring design built by Lyman-Morse and launched in 2020.
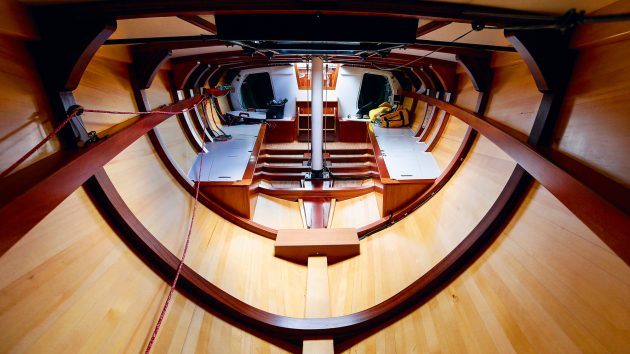
The beauty of wood inside a hand-crafted Spirit. Photo: Paul Wyeth
Build techniques
UK-based designer Rob Humphreys has a long association with this build method, having designed his first vessel in wood in the late 1970s, followed by a string of others, from 22-footers to superyachts, over the following decades. Humphreys remains keen to design more: “The only thing that’s holding us back really is an issue of market education,” he told me.
The medium is often poorly understood, with few people realising the benefits and many assuming it has the same drawbacks as traditional timber construction, or that the technology hasn’t moved on since cold-moulded wooden boats of the 1960s. These were built with resorcinol glues that were originally developed in the early 1940s, but required considerable clamping pressure to create a reliable bond and couldn’t be used as a coating to protect timber.
The epoxy revolution, driven enthusiastically by brothers Meade, Joel, and Jan Gougeon in Michigan in the early 1970s, marked a turning point for boatbuilding. “They got chemists to reconfigure epoxy to be runny enough to saturate the wood rather like a varnish,” explains Stephen Jones.
Even though epoxy doesn’t penetrate deep below the surface of timber, it sticks so well that, unlike paint and varnish, it forms a genuine barrier that keeps water out of the timber in the long term. As a result these boats have potential to last as long as any fibreglass structure.
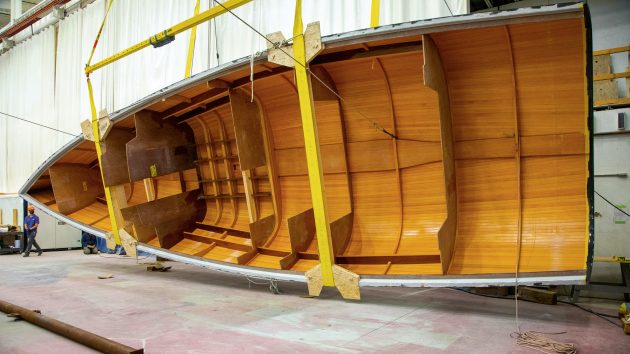
Lyman-Morse 46 hull completed and being turned outside the boat shed. Photo: Alison Langley/Lyman-Morse
There was another key advantage. “It could also be thickened as required for glueing and, most importantly, gap filling,” adds Jones. This significantly speeds up the build process. These vessels are generally inherently stiffer and lighter than conventionally built fibreglass yachts and it was a preferred build method for performance yachts before cored composites became reliable.
Meade Gougeon’s 35ft trimaran Adagio , launched in 1970, was the first large all epoxy bonded and sealed wooden boat built without the use of mechanical fasteners (and is still sailing on the Great Lakes over 40 years on). Three years later the brothers built the Ron Holland-designed 41ft IOR Two Tonner Golden Dazy , ahead of a slew of further designs including a 60ft trimaran for Phil Weld’s 1980 OSTAR single-handed transatlantic race , before race organisers imposed an upper size limit. Weld subsequently had the 50ft timber/epoxy tri Moxie built by Walter Greene, in which he won the OSTAR.
Over the years precise construction methods have varied, although all but a handful of boats are built with several layers of timber with the grain running in different directions to create a stiff structure. Some have a purely cold moulded construction, with larger boats often employing four or more layers laid at around 90° to each other. This creates a lightweight and stiff structure that can be protected from impact damage with epoxy and glass cloth. The Lyman-Morse 46, for instance, is built of four layers of vacuum glued Douglas fir and western red cedar.
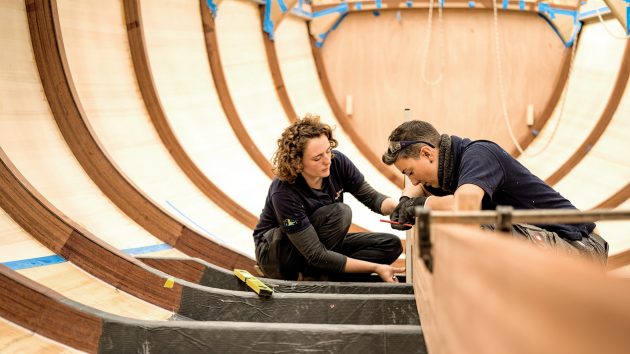
Hand-built expertise at the Spirit yard in Suffolk. Photo: Spirit Yachts
Others start with a layer of narrow planks, termed strip planking. This had been a construction method long before the use of epoxy, but it became much more popular thanks to the development of the Speed Strip technique by Sunderland timber merchant Joseph Thompson & Co (now renamed NYTimber) with help from Farrow and Chambers. The planks have a loose tongue and groove profile, allowing them to neatly conform to the hull shape and giving space for thickened epoxy glue.
Speed Strip also eliminated the need for scarfs to be cut where planks are joined and reduced the number of mechanical fasteners needed. This reduced planking time by a quarter, and clean up and fairing time by 70%. An additional advantage, Jones says, is the “predominance of fore and aft timber strips/planks increases global hull stiffness – the ability of the hull to resist rig loads.”
Around the same time Humphreys was also working on ways to reduce build times. The hull of his H22 sportsboat, which was available as a flat-pack kit with CNC cut components, could be assembled from scratch in a few hours by one person. I know of 40ft offshore racing yachts that were planked up in a week.
Strip planked boats can be built over laminated frames that become part of the final structure, and don’t require a mould that is subsequently discarded. These frames are surprisingly quick and easy to create – at Spirit Yachts, for instance, they’re assembled on full-size print outs of the boat’s plans laid over a plywood floor. This allows each piece of timber to be bent by hand into exactly the right shape and held in place using spikes driven into the floor. They’re then clamped together in situ while the epoxy cures.
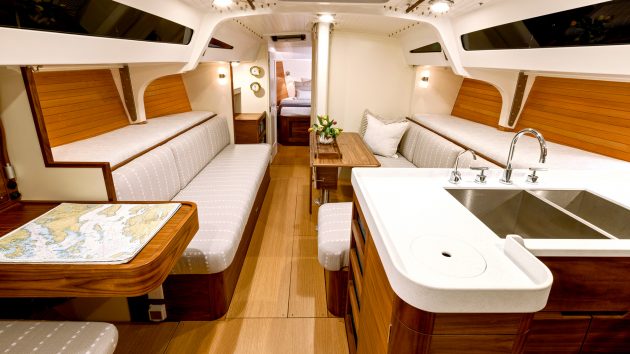
The Lyman-Morse 46 interior shows off its timber construction, with plenty of white painted surfaces for an airy feel. Photo: Alison Langley/Lyman-Morse
Originally cedar was used for Speed Strip planks as it’s lightweight yet very resistant to rot, although other species with similar properties, including Douglas fir and sitka spruce, are also suitable. Typically two thinner outer layers of double-diagonal planking are added outside the strip planking.
In the case of Zest , our 36ft Rob Humphreys design built by Farrow and Chambers in 1992, this forms a 20mm-thick tri-axial construction with the grain of the timber oriented in three different directions. Larger yachts may have four or more layers outside the strip planking and a few boats have an additional transverse skin to help strengthen the area around the keel.
Impact protection
In all cases the whole lot is glued together and sealed from water ingress with epoxy. Therefore no more maintenance is needed than for a fibreglass hull and it will never succumb to osmosis.
Jim Taylor, designer of the 44ft Equipoise and 50ft Rascal , both recently built by Brooklin Boat Yard in Maine, says that in North America this construction is likely to be referred to as cold moulded, with the term referring to the outer layers, rather than the inner skin of strip planks.
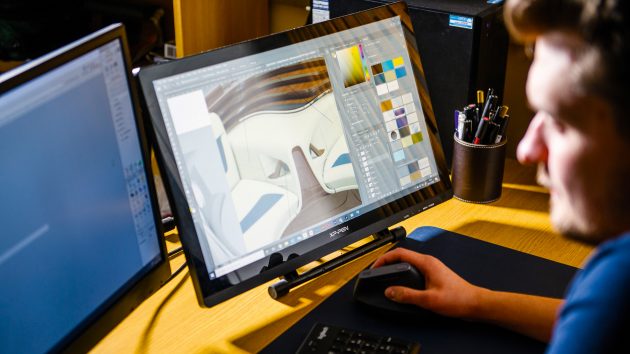
Modern wooden builds created using latest CAD at Spirit Yachts. Photo: Spirit Yachts
Equipoise was built with a first layer of fore-and-aft tongue and groove larch planking which is epoxy bonded to the laminated keel, keel floors, bulkheads and ring frames. Outside of that two layers of diagonal 3/16in (5mm) paulonia were vacuum bagged at +/-45° to the initial planking. Then a further layer of tongue and groove larch was laminated over the paulonia, again in a fore and aft orientation. Outside that is a protective layer of epoxy/glass. Displacement is little more than six tonnes, despite an unusually large 44% ballast ratio, allowing a large rig without the drawbacks of excessive draught.
“There is a whole lot to like about this type of construction,” Taylor says. “The approach is cost effective and the result is extremely attractive on many levels. The boats are light, strong, tough, quiet and well insulated thermally. A bright finished inside skin can be integrated into an especially elegant interior, the construction materials are environmentally sustainable, and there’s not a lot of waste. They’re not as light as carbon skins over lightweight core, but they are much more liveable and not nearly as fragile or as expensive.”
The outer glass/epoxy sheathing can vary from light cloth for impact protection, through to heavier laminates that add structural strength in high load areas such as around the keel. A few boats have glass only outside, rather than additional layers of timber, but these heavier laminates need more work and filler to create a fair surface.
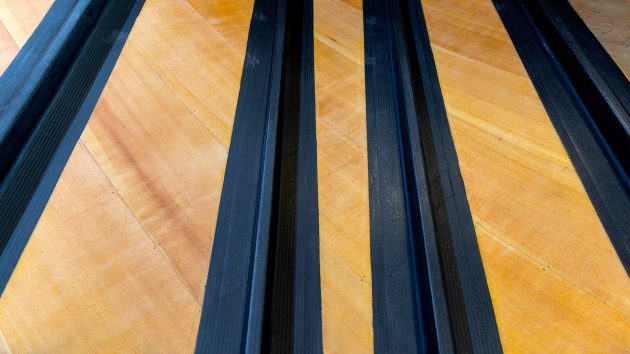
Carbon stiffening for Elida. Photo: Emeric Jezequel
Of course, if the outer sheathing is punctured, then it will need to be repaired quickly, but a quick application of epoxy filler is all that’s needed until a neat long-term repair can be made.
Developments and refinements over time include vacuum bagging the various layers of timber together, along with the external protective layers of glass cloth. At the high end carbon reinforcement is increasingly used strategically to add further stiffness where necessary, without a significant weight penalty.
Elida ’s varnished topsides look stunning, while those of the 1987 Humphreys-designed Apriori and 1988-built Old Mother Gun of 1988 still look great. There’s therefore a huge temptation for anyone building a wooden yacht to opt for similar finishes. However, it’s important to note in these cases the epoxy needs a more traditional varnish for UV protection and that can require a lot of maintenance. On the other hand, today’s polyurethane paints can last up to a decade in dark colours and Meteor ’s original white paint from 2006 still looks almost new.
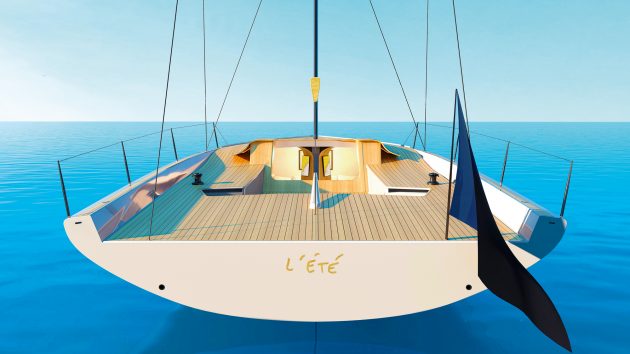
L’Été is a new 40ft daysailer design by Thomas Tison.
Modern look
On the other hand, varnished bright work on deck and coachroof sides are subject to less wear and tear than topsides. Jones says these are easy to prep for varnishing if designed with simple surfaces without fiddly detail. The cleaner style of modern classic deck structures also reduces water retention, so surfaces dry quickly. “It can still look the part but becomes less onerous to keep,” says Jones.
Below decks it’s easy to fall into a trap of showing off so much natural timber that the interior becomes dark; a strategic mix of white painted panels and clear timber finishes gives a much brighter result. The Spirit 72 , for instance, has satin painted panels and a carefully planned LED lighting system to enhance the warmth of the natural timber.
The Spirit 111 has a sculptural cockpit and interior. Photo: Spirit Yachts
Hull windows are possible and, even if maintaining a classic external appearance is a priority, it’s possible to allow a lot of light in from the deck. Spirit Yachts’ trademark fantail window is an excellent example of this.
Alternatively, interiors can be absolutely contemporary in style, as seen in RM Yachts’ 29-43ft range of plywood/epoxy performance cruisers. Plywood also offers excellent stiffness in relation to weight and is an ideal medium for today’s chined hull shapes. At RM all the pieces for an entire boat are delivered on pallets, ready for immediate assembly. Hulls are built over frames of substantial chipboard set up on jigs. Assembling a hull is therefore a straightforward process that doesn’t require a full mould.
The Ace 30 scow bow short-handed IRC raceboat also employs plywood/epoxy construction. It’s an approach the builder says considerably reduces the carbon footprint of building each boat.
Matt Newland of Swallow Yachts tells me their Whisper 300 retro-style planing motor cruiser has demonstrated that at sizes above 30ft an epoxy/timber construction can compete directly on labour hours with conventional fibreglass boatbuilding. The company’s next model, the Bay Cruiser 32, will be a traditionally styled, but very lightweight and quick, 32ft trailerable weekender made of clinker-style plywood and epoxy.
Other forthcoming projects include a range of 45-70ft modern classics by Stephen Jones and illustrator/designer Jonty Sherwill that will be built by the Elephant Boatyard.
These boats will also be more sustainable than their contemporaries built using conventional glass fibre or more advanced composites. The quantity of epoxy used for the build is small and bio-sourced resins can be used without the requirement for a full size mould. The result is that the carbon footprint associated with building the Ace 30, for instance is 1.9 tonnes, but would be more than three times that value for a boat of conventional construction, even before accounting for building the moulds.
If you enjoyed this….
Yachting World is the world’s leading magazine for bluewater cruisers and offshore sailors. Every month we have inspirational adventures and practical features to help you realise your sailing dreams. Build your knowledge with a subscription delivered to your door. See our latest offers and save at least 30% off the cover price.

How one man is keeping traditional methods of boat building alive in a digital high tech world
More news videos.
Series 9 • All the latest news from the ITV Evening News team
Series 11 • BAFTA-nominated breakfast show covering the latest news, sport & weather
Series 9 • The latest news from ITV News at Ten
1h • Prince Harry, Hugh Grant & others open up about the hacking scandal
Series 10 • ITV News' Robert Peston presents his lively political interview programme
Series 25, 26, 26 • Compelling current affairs stories that get to the heart of what matters
1h • Seven politicians go head to head in ITV's General Election debate
1h • Martin hosts a summer special packed with financial 'need to knows'
50m • Join the party leaders for in-depth interviews
1h 10m • The leaders go head to head in the first TV General Election debate
1h 20m • Witness the inside story of Theresa May's tumultuous premiership
40m • Travels across the UK to celebrate the Jewish festival of Passover
40m • Shehab Khan follows the holy month of Ramadan and sees how it's observed
1h • The former gymnasts & their powerful fight for justice
1h • Journalist Robert Moore lifts the lid on Donald Trump's latest comeback
1h 5m • Timely documentary about the history of a controversial NHS unit
Series 1 • Starmer's victory speech, the rise of Reform and more
From excitement to agony - here are the must-watch moments
30m • How a groundbreaking covert police operation caught a killer
Watch key moments as Reform UK secure several seats
The Labour leader vows to 'rebuild Britain'
Sir Ed Davey hails the Liberal Democrats' 'historic result'
Rishi Sunak speaks outside No 10
Starmer speaks minutes after Labour wins General Election
Catch up on the results as big names are booted out
30m • The ITV News archives reveal the real-life stories behind 'Mr Bates vs The Post Office'.
1h • Compelling story of the children taken to Russia after war broke out
Using MoSCoW in Agile to Prioritize Better
One of the key ideas in Agile is prioritization – a team needs to understand which features must be done and which can be left behind in order to produce the best result. However, the concept can be quite difficult to grasp when moving from a different project management approach. A prioritization technique called MoSCoW brings great help and clarity in such cases.
First used with Dynamic Systems Development Method, MoSCoW is a technique developed by Dai Clegg . The sole purpose of this prioritization approach is to help understand the importance that the stakeholders put on each of the features and requirements they pose. Thus being able to focus on the exact most important ones first and tacking on the rest only if the team has time left.
The technique requires to divide all of the features into four categories – Must, Should, Could and Won’t. Thus forming the MSCW acronym from which the name MoSCoW appears. In order to know which of the features are crucial, the team has to categorize them into the four groups.
Must have features are absolutely crucial to the project. Should have features are important to the project, but less urgent. Could have features are not as important as they are desirable and should only be completed if there is left over time. And lastly Won’t have features are either not important or not possible at the time and thus are not completed at all.
Once the team prioritizes the features, they create a clear action plan to move forward. First, they have to complete all of the Must have features. Once that is done they can move onto the Should haves. And only after all of the Should haves are done, the team can consider the Could haves. This way the focus is on the most important tasks right away.
What does this have to do with Agile ? It will help teams transition, prioritize and plan better.
Running a first Sprint or a first iteration can and most likely will be tough on any team. You don’t know what you are doing, you are still questioning the process and on top of that now you have to decide with which of the many tasks you will start first. Adding the MoSCoW technique in such cases will bring the team clarity and provide the ability to move forward.
Depending on the process, the team could even divide the backlog into 4 columns based on the four importance groups. This way being able to add the new features straight into the appropriate columns and compare them against each other to get a better sense of their priorities.
While more advanced teams will often see no point of such prioritization and be content with the traditional story point or priority column approach, this can be a great help for new Agile practitioners.
One thing to note though, is that while the MoSCoW technique is usually used only once or a couple of times during the project, for Agile teams this will be different. To accommodate the changing circumstances and planning the right work for each iteration, the technique should be used whenever the priorities switch. Since that could become quite burdensome, the teams should make a note of reviewing their priority columns every time they plan a new iteration.
Would you consider MoSCoW as part of your Agile routine?
Related Posts
7 tips for managing remote teams, iatf compliance for automotive industry, planning your project tasks: should you use scrum, kanban, or scrumban, seele – eylean customer story.
Type above and press Enter to search. Press Esc to cancel.
The Musings of a Hopeless Wanderer
Engaging in the eternal search for the meaning of life...or a good time.
- Netherlands
Monday, September 3, 2018
Tackling moscow by train and boat.
Our first full day in Moscow started fairly late since we were still catching up on sleep. Around 1, we finally were able to get our act together and get out the door.
We stopped by a cafe to get some breakfast and headed over to the Red Square. Since the festival is going on, we had to go through metal detectors. Once we cleared security, we reached the State Historical Museum which provided an entrance to the Red Square.

We walked the length of the Red Square, passing by the Kazan cathedral.

Under normal conditions, the Red Square is a large walking area with the State Historical Museum on one end and St. Basil's on the other end. On the sides is the Kremlin wall on one side and then the GUM shopping mall and the Kazan cathedral on the other side. Presently, the walking area has been considerably narrowed and the fesitval grounds occupying a large space between the Kremlin and the mall.
We even asked a stranger to take our picture!

After walking around the Red Square, we had to leave to meet up with our Metro Tour.
Moscow has famously pretty metro stations so metro tours are quite popular. We booked a relatively inexpensive tour through a tour group which met outside of the Red Square.
On our way, we passed by the Kremlin gardens and the tomb to the unknown soldier and the eternal flame.

We soon met up with our group which, fortunately, was only 5 people. Our guide told us that we were going to visit 8 stations during the 1.5 hour tour.
Honestly, a lot of the stations blended in to me so I won't be able to give you a detailed description of all of them. However, I did learn that there are 222 metro stations and the trains come every 2-3 minutes reliably. For that reason, Moscow > DC.
One of the first metro stations we visited had bronze statues all over of various depictions. Many of the statues had superstitions tied to them. For example, for a statue of the dog, it's held that if you rub the nose of the dog, you'll have good luck. Consequently, most of the statue is tarnished - except for the nose. I joked to Tomas that they probably rotate the "good luck" portion of the statue to ensure the entire statue gets polished.
However, I do remember some of the stations.
Novoslobodskaya is a station adorned with stained glass on the walls.

There was also Belarusskaya, which paid tribute to Belarus.

Another station which name I cannot remember but had pretty mosaics in the ceilings.

My favorite station was Komsomolskaya. It's the busiest station and a hub for other connecting trains. It was built during Statlin times and he wanted the station to embody beauty to set a good first impression to Russia.
I'd seen pictures of it beforehand since it's the most famous but it's so much more impressive in person.
Look at these ceilings!

Overall it was a very interesting tour. Not sure of any other city which could offer a metro tour. DC certainly can't...
After the tour, we headed back of the hotel to rest for a bit. We had purchased tickets to a tour hour boat down the Moscow river. The tickets were good for any time on any day and the boats left every 20min. We decided to knock the tour out that day and headed over to the pier.
We arrived at the pier and saw a boat by the company we had purchased from boarding. We approached and they shook their head and said it wasn't the right boat.
So we waited for another boat.
Another boat came along by the same company we had purchased from so weapproached them. Again - we were told it wasn't the right boat and the boat we were looking for was coming.
A third boat came along which was NOT by the company we had purchased from. By this point, it had been longer than 20min waiting and I was starting to suspect that the correct boat was actually one of the ones which turned us away. We approached the 3rd boat to ask if they knew which boat we should be on. However, when we approached, they waved us aboard without scanning our tickets.
So, we boarded the 3rd boat....which was definitely not ours.
We settled into an upper deck, open air table to take in the views.
We passed by pretty buildings.

The somewhat impressive cathedral of Christ the Savior.

This random statue.

After about hour on the cruise, Tomas remarked that it had been about an hour so we should be turning around soon. I reminded him that we actually had no idea how long this cruise was or where we would be dropped off. Since we were on the wrong boat.
Fortunately, it did turn around and took us back to the pier.
For dinner, we decided to go to this burger place, Black Star Burger, which our guide told us about. Tomas really liked his - I thought mine was OK. It was a decent size patty with a mountain of Cole slaw on top. We've realized that apparently Russians dislike getting their hands dirty while eating so some restaurants will give out gloves to use. This particular restaurant gave out black gloves.
Tomas modeling our dinner.

Since little mum has been asking about pictures which show my feet, I assume she wanted to see my new shoes. I recently bought Allbirds which are suppose to be super comfortable walking shoes which you wear without socks and can be washed. I didn't wear them too extensively beforehand, so that was probably my first error. I also didn't bring another pair of good walking shoes, which was likely my second error. The Allbirds were great the first two days without socks. Midway through the third day, my right foot was quite unhappy. Left foot was a trooper. So, now I have a bandaid on the heel of my right foot and wear socks.
No comments:
Post a comment.
IMAGES
COMMENTS
Transferring Points to the Planking Stock. Remove the spiling batten from the boat setup and place it on the planking stock. Again, be careful not to twist it as you tack or clamp it to the board. Place the compass point (the non-pencil end) on a batten arc near its end and draw a new arc on the planking stock.
Planning and building your own boat is an achievable DIY project. This guide covers the entire boat building process, from initial design to final construction. Expert tips and insights will help you avoid common pitfalls and achieve professional-level results. Choosing the right materials is crucial for the success and longevity of your boat.
Prior to the development of fiberglass construction techniques, boats were built of wood, steel, and other materials, by assembling pieces and parts into a structure which was then sheathed with a hull. With fiberglass boat building, however, the major components of the boat - the hull, deck, liner, and large parts like consoles—are molded ...
1. Choose Your Boat Type and Design Carefully. The first step in any DIY boat-building project is deciding what vessel you want to construct. There are many different types of boats to choose from, including sailboats, powerboats, canoes, kayaks, and rowboats. Consider your budget, building space, and intended use when narrowing your options.
In 1941, the first modern composite boat was built. FRP building methods became standard on an ever-larger scale through the 1960s. Certain basic materials and practices constituted technology in which builders have developed confidence. These include glass fibers and polyester resins, laid up by hand in an open mold. ...
Damaged boat mid-reconstruction; carvel planking partially removed Caulking irons and oakum Caulking a wooden boat A sheet plywood sailboat during construction Brady 45' strip-built catamaran under construction Construction of the Naga Pelangi in 2004, a Malaysian pinas, using traditional edge-dowelled techniques.Note the protruding dowels on the upper edges of the planks and the fiber ...
First, the backbone is installed and frames bent into place, then the planking starts. At right, students use a "spiling batten" to determine the necessary curvature of the next plank. 1. Carvel Planking. This, one of the classic methods of wooden boat construction, is what made Columbus and Magellan possible.
Wooden Boat Building: Timeless Craftsmanship and Beauty. Wooden boat building has stood the test of time as one of the oldest and most traditional boat construction methods. With centuries of history behind them, wooden boats are renowned for their durability, strength, and classic aesthetics. Different types of wood, such as oak, pine, cedar ...
Explore the art of boat building, from small sailboats to luxurious yachts. Learn step-by-step methods, tips, and sail into a rewarding DIY journey. +49 211 54 69 22 23. FormResult. Yacht Charter; Luxury yachts . Houseboat rental. Destinations; Magazine. EUR. EUR. Czech Koruna CZK. Euro EUR.
The Art of Boat Building is a video series about the creation and construction of wooden boats. Using a combination of traditional and modern methods, this hands on approach will focus on the ...
Fig. 1 - Plywood panels are wired or "stitched" together intermittently to form basic hull shape. Fig. 2 - Interior joints are bonded together with epoxy filler shaped into a concave fillet made from epoxy and fillers we sell. Fig. 3 - Wires are removed and bonded seams covered with woven fiberglass tapes inside and out.
The stitch-and-glue method is a simple boat building technique popularized in the 1960s that creates a solid, one-piece hull, unlike most other wooden boats, which start with frames and bulkheads ...
Construction must be undertaken under cover. Hartley boats are built in six basic stages. 1/ make the strongback (building frame), as the base for building the boat on. 2/ make the frames, stem and rim pieces using the full size frame patterns. 3/set all up on the building frame as shown and attach stringers, sheer etc. 4/attach the plywood ...
There are many methods of construction available to the home boat builder - on this page l will discuss the most popular methods used and compare them so that the new builder can make a good choice for his/her boat building project. The method used will depend on the materials chosen or available, the skills and the tools available.
This is the most traditional method of building a wood boat. The principle is simple, though the details are complex. The fundamental structure of a plank-on-frame vessel is defined by a keel, which is the horizontal backbone of the hull; a more vertical stem, which forms the bow; and a vertical sternpost (plus, in the case of many yachts with ...
Wood was the medium successful IRC raceboat designer John Corby made his name with in the 1990s and 2000s. And it was the choice of one of the UK's most successful yacht designers, Stephen Jones ...
Traditional yacht building methods. Gleaming wooden blocks and spars with bronze fittings are synonymous with classic yachts and are crafted using age-old skills. While the current technological climate delivers rapid advances in boatbuilding, sailmaking and rigging, both in terms of design and materials, is there a risk of losing the skills ...
Hello everyone, welcome back to X-Machines channel. In this video, we'll explore amazingly efficient and modern boat manufacturing methods. Since ancient...
Bayesian was a flybridge sloop designed by Ron Holland [2] and built by Perini Navi with a 56 m (184 ft) long aluminium hull and superstructure and a single-masted cutter rig.The mast of 72 m (237 ft), as measured from the design waterline (DWL), was at the time of construction the world's tallest yacht mast and continues to be the world's tallest aluminium one.
Watch the latest from ITV News - Coracles have been used in the UK for more than 2,000 years for fishing and are still used to this day on the Rivers Towy and Teifi in West Wales
Leap into an exciting career on the ocean as a trade qualified shipwright or boat builder. Learn the skills you need to build and design marine craft using both traditional methods of manufacture as well as new and emerging technologies.
Abstract. In this article relevance of design and the background of yacht-clubs emergence and development are viewed. The historical description of the fi rst world and russian yacht-clubs in ...
A prioritization technique called MoSCoW brings great help and clarity in such cases. First used with Dynamic Systems Development Method, MoSCoW is a technique developed by Dai Clegg. The sole purpose of this prioritization approach is to help understand the importance that the stakeholders put on each of the features and requirements they pose.
994.MoSCoW Prioritisation1 IntroductionIn an Atern project where time has been fixed, understanding the relative importance of things is vital to. making progress and keeping to deadlines. Prioritisation can be applied to requirements, tasks, products, use cases, us. r stories, acceptance criteria and tests. MoSCoW is a techn.
This eBook contains unique suggestions you won't find anywhere else. Each expert shares how they use prompts and walk you through the favorite prompt - inclusive of the why and how they do it. It's high time to try new patterns and practices of building good prompts. The output is refined and improved support, summarization, creation ...
Tackling Moscow by Train and Boat Our first full day in Moscow started fairly late since we were still catching up on sleep. Around 1, we finally were able to get our act together and get out the door. We stopped by a cafe to get some breakfast and headed over to the Red Square. Since the festival is going on, we had to go through metal detectors.