

Artfully Designed and Crafted Boats since 1978
Plans and kits.
Start with our precision CNC-cut hull kits and build out from there. For the adventurous woodsmith, we have plans available to guide you through a build you can truly call your own.
Devlin Custom Built Boats
Sam and his team of top-notch craftsmen can design and build the boat of your dreams. Literally. Dream it up, and they can deliver it in every detail.
Devlin Designing Boatbuilders
2424 Gravelly Beach Loop NW Olympia, WA 98502 360-866-0164
Downloaded Plans Purchasers! Read this first.

Tuffy – 25 Ft Devlin Black Crown
For sale at a great price. She’s an Alaskan veteran yet is small enough to trailer to adventures anywhere, Tuffy is a 25 foot Black Crown located here in Washington State.

Prize – Surf Scoter 26
Prize is ready for your next cruise today! Checkout the many photos of this 26 foot Surf Scoter. 2023 brought her new power with a 200 HP Yamaha outboard and an 8 HP Yamaha kicker motor. She comes with a trailer and full electronics package.

Hideaway debuts at the Port Townsend Woodenboat Festival: Sept 6-8 2024!!
Chelcie Liu discussed with Sam what boat he wanted next in his decades long boating passion. The result is the 22 foot Hideaway – a cruising home on the water with a front and back porch, solar panels covering the roof, and an electric outboard. See her in just a few weeks at the 2024 Port Townsend Wooden Boat Fesitval – Sept 6-8 !!!

All Downloadable Construction Plans – 25% Off -SALE ENDING SOON!
All downloadable construction plans at a 25% discount. Sale ending soon!

Linach 15 Downloadable Construction Plans Updated, Expanded!
Take Advantage of the current downloadable plans sale to get the newly expanded and updated Linach 15 plans. As of today those ordering the Linach 15 downloadable construction plans will receive the new version.

Banjo 20 & Small Boats Magazine for January 2024
If you’re considering a 20 foot outboard cruiser for your next boat take a look at the Banjo 20 in this month’s online magazine Small Boats Monthly. The construction plans for the Banjo 20 just became available last October and still are being offered at an amazing savings on our introductory price. Click on the photo above for more information.
Featured Design
Candlefish 16
The Candlefish 16 is a burdensome fishing skiff. Deep and seaworthy, it is wonderfully suited to life in our changeable weather and strong tides.
Getting started, the polliwog is a great entry into wooden boat building with the polliwog, we offer the amateur builder the opportunity to build a lightweight and strong dinghy or tender., power cruisers.

Download over 500 Boat Plans. Click on the link below.
-->click here<--.
Table of Contents
Overview of Stitch and Glue Boat Plans & Blueprints
Stitch and glue boat building is a popular and accessible method of constructing boats , offering a unique alternative to traditional boat building techniques. This approach combines the use of thin, flexible plywood panels that are stitched together and then reinforced with epoxy resin, creating a strong and durable boat structure. The stitch and glue method has gained significant popularity among both experienced and novice boat builders due to its simplicity, cost-effectiveness, and the ability to produce a wide range of boat designs. One of the primary advantages of the stitch and glue method is its accessibility. Unlike traditional boat building , which often requires specialized tools , extensive woodworking skills, and a significant investment of time and resources, the stitch and glue approach is relatively straightforward and can be mastered by individuals with varying levels of experience. This makes it an attractive option for hobbyists, DIY enthusiasts, and those looking to build their own boats without the need for extensive training or a professional workshop. Furthermore, the stitch and glue method offers several advantages over traditional boat building techniques. The use of thin plywood panels and epoxy resin results in a lightweight yet strong boat structure, which can be particularly beneficial for small to medium-sized vessels. Additionally, the flexibility of the plywood allows for the creation of complex and unique boat designs, enabling builders to explore a wide range of shapes and configurations that may not be feasible with more rigid construction methods.
Key Takeaways
- Stitch and glue boat building is a popular method for constructing small boats .
- Understanding the basics of stitch and glue construction is essential before choosing plans.
- Choosing the right stitch and glue boat plans is crucial for a successful build.
- Preparing your workspace and following a step-by-step guide are important for assembling your boat.
- Finishing touches, troubleshooting common issues, and proper maintenance are key to launching and enjoying your stitch and glue boat.
Understanding the Basics of Stitch and Glue Construction
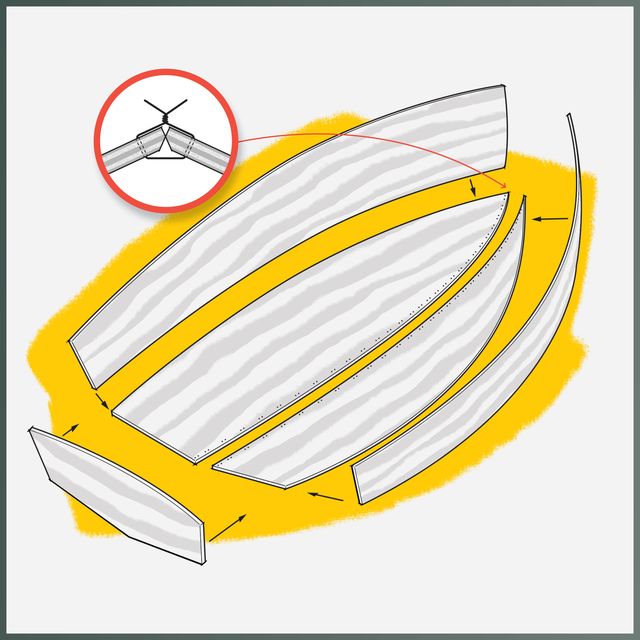
The stitch and glue construction process involves the assembly of thin plywood panels that are stitched together using wire or synthetic thread and then reinforced with epoxy resin. This process begins with the careful cutting and preparation of the boat panels, which are typically made from marine-grade plywood or other suitable materials . The panels are then stitched together using a series of small holes drilled along the edges, creating a temporary framework that holds the boat’s shape. Once the panels are stitched, the next step is to apply the epoxy resin. This resin acts as a strong adhesive, bonding the panels together and creating a durable, water-resistant structure. The epoxy resin is typically applied in multiple layers, with each layer allowed to fully cure before the next is applied. This process ensures a strong and long-lasting bond between the panels, resulting in a boat that is both sturdy and lightweight. The key components and materials used in stitch and glue boat building include marine-grade plywood, epoxy resin, fiberglass cloth or tape, and various tools such as saws, drills, clamps, and stitching materials. The selection of these materials is crucial, as they directly impact the overall strength, durability, and performance of the finished boat. Builders must carefully consider the quality and compatibility of the materials they choose to ensure a successful and satisfying boat-building experience.
Choosing the Right Stitch and Glue Boat Plans
When embarking on a stitch and glue boat-building project, the selection of the right boat plans is a critical decision. There are a variety of factors to consider when choosing the appropriate stitch and glue boat plans, including the intended use of the boat, the builder’s skill level, and the available workspace and resources. One of the primary considerations when selecting stitch and glue boat plans is the complexity of the design. Some plans may feature relatively simple and straightforward boat designs, while others may be more intricate and challenging. Builders must carefully evaluate their own skills and experience to ensure that they choose a design that aligns with their abilities and is within their comfort level. Selecting a plan that is too complex for the builder’s skill level can lead to frustration, delays, and potentially even structural issues with the finished boat. Another important factor to consider is the intended use of the boat. Different boat designs are better suited for specific purposes, such as recreational sailing, fishing, or even racing . Builders should carefully consider the activities they plan to engage in with the boat and choose a design that is optimized for those activities. This may involve factors such as the boat’s size, stability, speed, and maneuverability. Ultimately, the selection of the right stitch and glue boat plans is a crucial step in the boat-building process. By carefully evaluating the complexity, skill level, and intended use of the boat, builders can ensure that they choose a design that is well-suited to their abilities and goals, leading to a successful and rewarding boat-building experience.
Preparing Your Workspace for Stitch and Glue Boat Building
Preparing a suitable workspace is a crucial step in the stitch and glue boat-building process. The workspace should be large enough to accommodate the boat’s dimensions, provide ample space for maneuvering, and offer a clean and organized environment for the construction process. One of the key considerations when setting up a workspace for stitch and glue boat building is the availability of a flat, level surface. This surface, often referred to as a “building jig,” serves as the foundation for the boat’s construction. It is essential that the building jig is level and sturdy, as any irregularities or instability can negatively impact the alignment and structural integrity of the finished boat. In addition to the building jig, the workspace should also be equipped with the necessary tools and equipment for the construction process. This may include saws for cutting the plywood panels, drills for creating the stitching holes, clamps for holding the panels in place, and a variety of other tools and accessories. Builders should ensure that they have all the required tools and materials readily available, as this can help streamline the construction process and minimize delays. Another important consideration when preparing the workspace is the availability of adequate lighting and ventilation. Proper lighting is essential for ensuring accurate measurements, precise cutting, and effective gluing and stitching. Adequate ventilation is also crucial, particularly when working with epoxy resin, as the fumes can be hazardous if not properly managed. By carefully planning and setting up a suitable workspace, stitch and glue boat builders can create an environment that is conducive to a successful and enjoyable boat-building experience. This preparation can help ensure that the construction process runs smoothly, with minimal interruptions or setbacks.
Step-by-Step Guide to Assembling Your Stitch and Glue Boat
| Plan Name | Price | Difficulty Level | Number of Sheets | Estimated Build Time |
|---|---|---|---|---|
| Stitch and Glue Plans | 29.99 | Intermediate | 8 | 60 hours |
| Stitch and Glue Plans | 39.99 | Advanced | 12 | 80 hours |
| Stitch and Glue Plans | 49.99 | Expert | 16 | 100 hours |
The assembly of a stitch and glue boat involves a series of carefully executed steps, each of which plays a crucial role in the overall success of the project. The process begins with the cutting and preparation of the boat panels, followed by the stitching and gluing of the components together. The first step in the assembly process is to carefully cut the plywood panels according to the boat plans. This requires precise measurements and the use of appropriate cutting tools, such as a circular saw or a jigsaw. Builders must ensure that the panels are cut accurately, as any irregularities or discrepancies can affect the final shape and structural integrity of the boat. Once the panels are cut, the next step is to begin the stitching process. This involves drilling small holes along the edges of the panels and using wire or synthetic thread to temporarily stitch them together. The stitching serves to hold the panels in place while the epoxy resin is applied, creating a temporary framework that maintains the boat’s shape. With the panels stitched together, the next step is to apply the epoxy resin. This is a critical stage, as the resin acts as the primary adhesive, bonding the panels together and creating a strong, water-resistant structure. The resin is typically applied in multiple layers, with each layer allowed to fully cure before the next is added. Builders must carefully follow the manufacturer’s instructions and take appropriate safety precautions when working with epoxy resin. Throughout the assembly process, it is essential to ensure proper alignment and structural integrity. This may involve the use of clamps, jigs, or other tools to maintain the desired shape and prevent warping or distortion of the boat’s structure. Builders must also be vigilant in monitoring the curing process and addressing any issues that may arise, such as air bubbles or uneven resin application. By following a step-by-step guide and paying close attention to the details of the assembly process, stitch and glue boat builders can create a strong, durable, and well-crafted boat that meets their expectations and provides a rewarding and enjoyable boating experience.
Mastering the Art of Stitching and Gluing
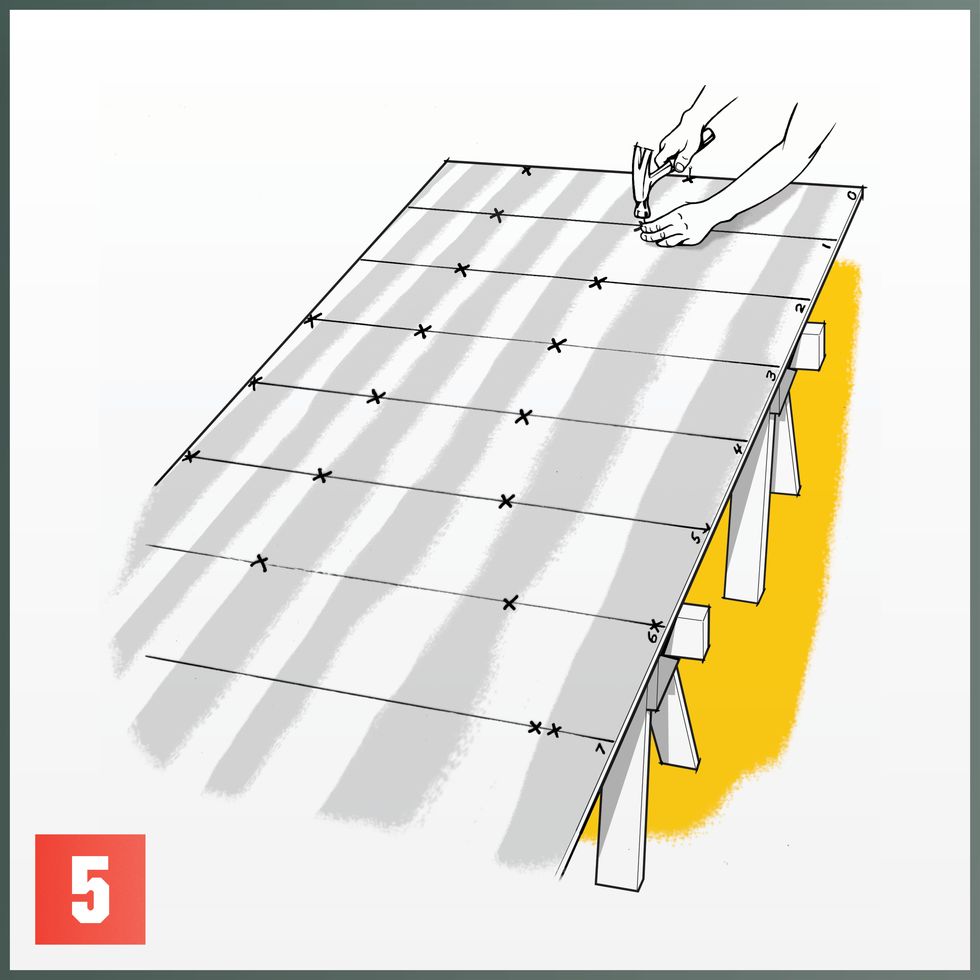
The success of a stitch and glue boat-building project is heavily dependent on the mastery of the stitching and gluing techniques. These techniques are the foundation of the construction process, and a thorough understanding of them can make the difference between a well-crafted boat and one that may struggle with structural integrity or performance issues. Effective stitching is crucial for maintaining the boat’s shape and alignment during the construction process. Builders must carefully plan the placement and spacing of the stitching holes, ensuring that they are evenly distributed and provide adequate support for the boat’s structure. The stitching material, whether it be wire or synthetic thread, must be strong and durable enough to withstand the tension and stress of the construction process. In addition to the stitching, the gluing process is equally important. The epoxy resin used in stitch and glue boat building must be applied with precision and care, ensuring that it fully penetrates the joints and creates a strong, water-resistant bond between the panels. Builders must be mindful of the resin’s curing time and work efficiently to avoid any issues with uneven or incomplete coverage. To master the art of stitching and gluing, builders can benefit from a variety of techniques and tips. For example, using a stitching jig or template can help ensure consistent and accurate hole placement, while the use of specialized tools, such as epoxy mixing cups and applicators, can improve the efficiency and quality of the gluing process. Furthermore, builders should be prepared to troubleshoot and address any issues that may arise during the stitching and gluing stages. This may involve identifying and addressing problems such as air bubbles, uneven resin application, or structural weaknesses. By developing a keen eye for detail and a problem-solving mindset, builders can overcome these challenges and produce a high-quality, durable boat. Mastering the art of stitching and gluing is a crucial step in the stitch and glue boat-building process. By honing these skills and techniques, builders can create boats that not only look great but also perform exceptionally well on the water.
Finishing Touches: Painting, Varnishing, and Outfitting Your Stitch and Glue Boat
The final stages of a stitch and glue boat-building project involve the finishing touches, which include painting, varnishing, and outfitting the boat. These steps are essential for enhancing the boat’s appearance, protecting its surfaces, and adding the necessary accessories and features to make it fully functional. Preparing the boat’s surface for painting and varnishing is a crucial first step. This may involve sanding the epoxy resin to create a smooth, even surface, and ensuring that the boat is free from any imperfections or irregularities. Builders must also carefully clean the surface to remove any dust or debris that could interfere with the application of the paint or varnish. When it comes to selecting the appropriate paints and varnishes, builders have a wide range of options to choose from. Marine-grade paints and varnishes are specifically formulated to withstand the harsh conditions of the aquatic environment, providing long-lasting protection and a beautiful finish. Builders should carefully consider factors such as the desired color, sheen, and level of UV protection when making their selections. In addition to the paint and varnish, the outfitting of the boat is an important aspect of the finishing process. This may involve the installation of accessories such as oarlocks, cleats, and other hardware, as well as the addition of features like seating, storage compartments, and even electronics or navigation equipment. Builders must carefully plan and execute these installations to ensure that the boat is both functional and aesthetically pleasing. Throughout the finishing process, attention to detail is paramount. Builders must take the time to carefully apply the paint and varnish, ensuring even coverage and a smooth, professional-looking finish. They must also ensure that the installation of accessories and features is done with precision, maintaining the boat’s structural integrity and overall appearance. By meticulously completing the finishing touches, stitch and glue boat builders can transform their creation into a truly remarkable and personalized vessel, ready to be launched and enjoyed on the water.
Troubleshooting Common Issues in Stitch and Glue Boat Building
Despite the relative simplicity of the stitch and glue boat-building method, builders may encounter various challenges and issues during the construction process. Identifying and addressing these problems in a timely and effective manner is crucial for ensuring the success of the project. One of the most common issues that stitch and glue boat builders may face is the occurrence of air bubbles in the epoxy resin. These air bubbles can compromise the structural integrity of the boat and lead to potential leaks or other problems. Builders can address this issue by carefully mixing the resin, applying it in thin, even layers, and using techniques such as vacuum bagging or rolling to remove any trapped air. Another common problem is the warping or distortion of the boat’s panels during the construction process. This can be caused by a variety of factors, including improper stitching, uneven clamping, or the use of subpar materials. Builders can mitigate this issue by ensuring that the building jig is level and stable, using clamps and jigs to maintain the desired shape, and carefully monitoring the curing process. In some cases, builders may encounter difficulties with the adhesion of the epoxy resin, leading to delamination or separation of the boat’s components. This can be caused by a variety of factors, such as improper surface preparation, contamination, or the use of incompatible materials. Builders can address this issue by thoroughly cleaning and preparing the surfaces, following the manufacturer’s instructions for the epoxy resin, and potentially seeking the advice of experienced builders or experts. Regardless of the specific issue, the key to successful troubleshooting in stitch and glue boat building is a combination of patience, attention to detail, and a willingness to experiment and learn from mistakes. Builders should be prepared to document their experiences, seek out resources and guidance from experienced builders, and continuously refine their techniques to overcome any challenges that may arise. By addressing common issues in a timely and effective manner, stitch and glue boat builders can ensure the successful completion of their projects and the creation of a high-quality, durable, and enjoyable boat.
Launching and Maintaining Your Stitch and Glue Boat
The final step in the stitch and glue boat-building process is the launch and ongoing maintenance of the completed vessel. Proper preparation and care are essential to ensure the longevity and performance of the boat, as well as the safety of the operator and any passengers. When it comes to launching the stitch and glue boat, builders must carefully consider the logistics and safety aspects. This may involve the use of a trailer or other transportation method to move the boat to the launch site, as well as the selection of a suitable launch ramp or beach. Builders should also be mindful of the boat’s weight and stability, ensuring that it is properly balanced and secured during the launch process. Once the boat is in the water, the focus shifts to proper maintenance and care. This includes regular inspections of the boat’s structure, checking for any signs of wear or damage, and addressing any issues in a timely manner. Builders should also be diligent in cleaning and protecting the boat’s surfaces, using appropriate cleaning products and applying protective coatings as needed. Another important aspect of maintaining a stitch and glue boat is the proper storage and transportation of the vessel. When not in use, the boat should be stored in a dry, protected environment, such as a garage or boat shed, to prevent exposure to the elements and minimize the risk of damage. When transporting the boat, builders must ensure that it is securely fastened to the trailer or other transport method, and that the weight and balance are properly distributed. By following best practices for launching, operating, and maintaining their stitch and glue boat, builders can ensure that their creation continues to provide a safe, enjoyable, and long-lasting boating experience. This commitment to proper care and maintenance is essential for preserving the investment of time, effort, and resources that went into the boat-building process.
Conclusion – Stitch and Glue Boat Plans & Blueprints
In conclusion, stitch and glue boat plans & blueprints offer a practical and accessible approach to boat building, making it an attractive option for both beginners and experienced builders. The key takeaways emphasize the simplicity, speed, affordability, strength, and lightness associated with this construction method.
The comprehensive nature of stitch and glue boat plans, detailing dimensions, hole placements, stitching sequences, epoxy resin applications, and finishing steps, provides builders with a roadmap to create a strong and lightweight hull . The versatility of these plans, available in various formats and from different sources, accommodates a wide range of preferences and budgets.
The benefits of stitch and glue construction, including the minimal tools required, fast building process, and economic use of materials, make it a feasible choice for DIY boat builders. The affordability of standard materials, coupled with the durability of the resulting boats, underscores the practicality of this method.
The historical roots of stitch and glue design, dating back to ancient civilizations but evolving with modern materials in the mid-20th century, highlight its enduring appeal and adaptability. The varied types of stitch and glue boats , each suited to specific water conditions and purposes, further showcase the versatility of this construction technique.
Before embarking on a stitch and glue boat project, careful consideration of factors such as boat type, plan quality, safety measures, and personal skills is crucial. The conclusion reinforces the idea that, with the right plans, a stitch and glue boat can be a rewarding and fulfilling project, connecting modern enthusiasts with a rich maritime tradition.
FAQs – Stitch and Glue Boat Plans & Blueprints
What are stitch and glue boat plans & blueprints.
Stitch and Glue Boat Plans & Blueprints are a type of boat building method that involves stitching panels of plywood together with wire, and then gluing them together with epoxy resin. The plans and blueprints provide detailed instructions on how to build a boat using this method.
What types of boats can be built using Stitch and Glue Boat Plans & Blueprints?
Stitch and Glue Boat Plans & Blueprints can be used to build a variety of boats, including kayaks , canoes , dinghies , and small sailboats. The method is particularly well-suited for building small, lightweight boats.
What materials are needed to build a boat using Stitch and Glue Boat Plans & Blueprints?
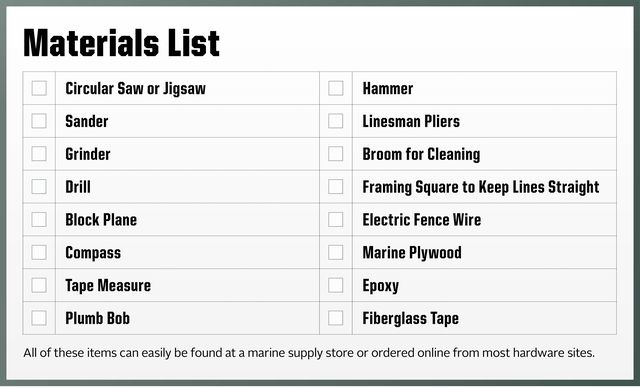
To build a boat using Stitch and Glue Boat Plans & Blueprints, you will need marine-grade plywood, epoxy resin, fiberglass cloth, wire, and various tools such as a jigsaw, drill, and sandpaper. The plans and blueprints will provide a detailed list of materials and tools needed.
Are Stitch and Glue Boat Plans & Blueprints suitable for beginners?
Stitch and Glue Boat Plans & Blueprints can be suitable for beginners, as long as they have some basic woodworking skills and are willing to follow the instructions carefully. However, it is important to note that building a boat using this method can be time-consuming and requires a significant amount of patience and attention to detail.
Can Stitch and Glue Boat Plans & Blueprints be customized?
Yes, Stitch and Glue Boat Plans & Blueprints can be customized to suit your specific needs and preferences. For example, you can adjust the size and shape of the boat, add or remove features such as hatches or seats, and choose different types of wood or finishes. However, it is important to ensure that any modifications you make do not compromise the structural integrity of the boat.
Written by DIY Boat Building Plans

How To Build a Utility Boat

How to Build a Dinghy
Stitch and Glue Boat Construction

Introduction: Stitch and Glue Boat Construction
Step 1: Tools and Materials

- Epoxy brush
- Sharp scissors
- Latex gloves
- Plastic scraper
- Epoxy resin (marine-grade)
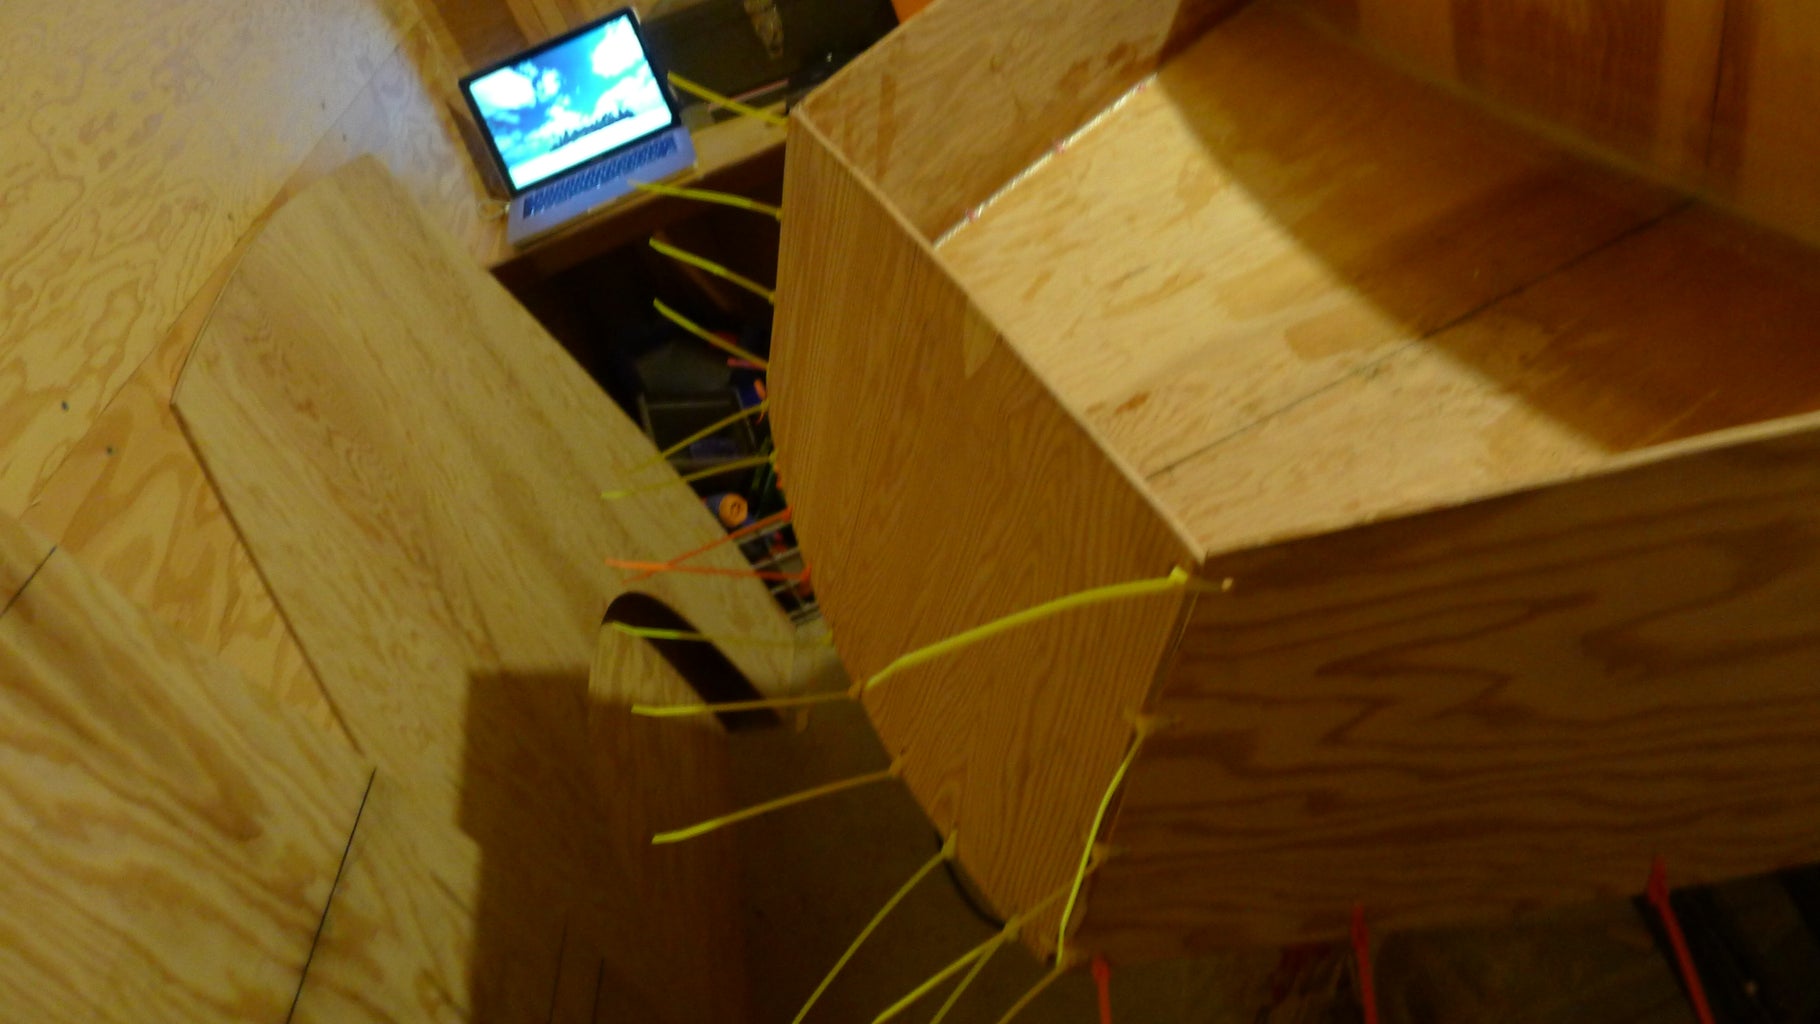
- Zip/cable/wire-ties
- Fiberglass tape (11.1 Oz best for structural, bi-directional not necessary)
Step 2: Cut It Out

Step 3: Drill Some Holes
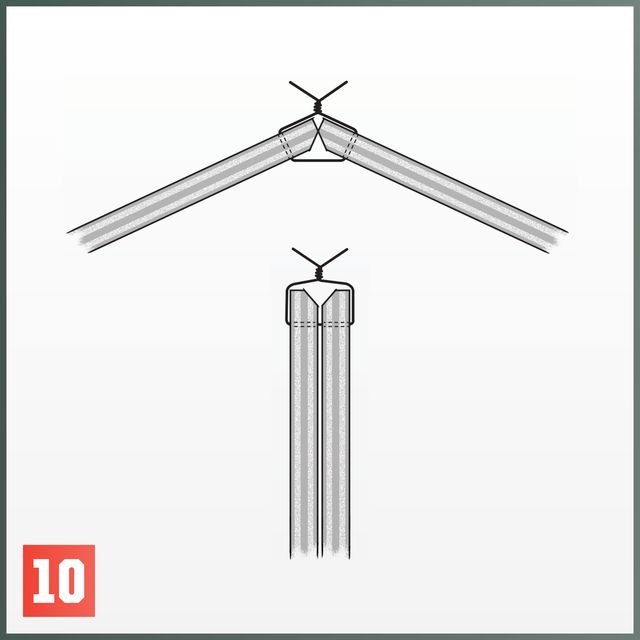
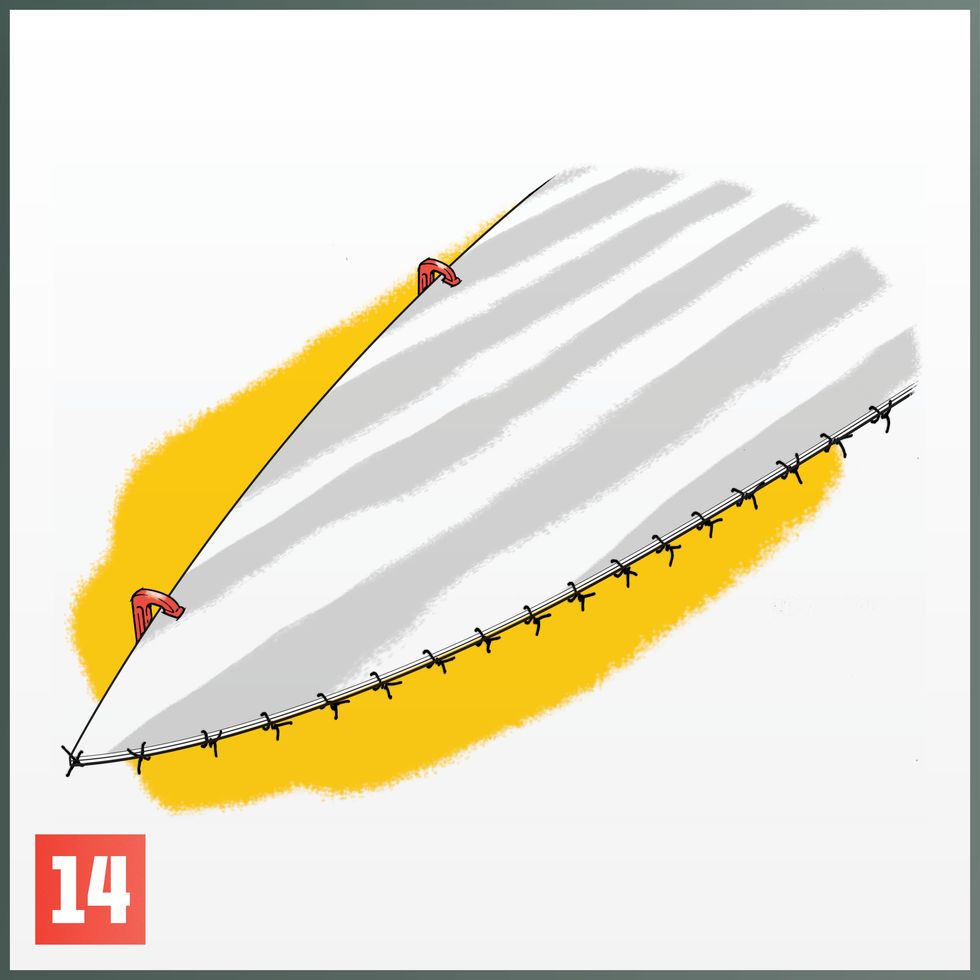
Step 4: Tie It Up

Step 5: Joint Specific Instructions

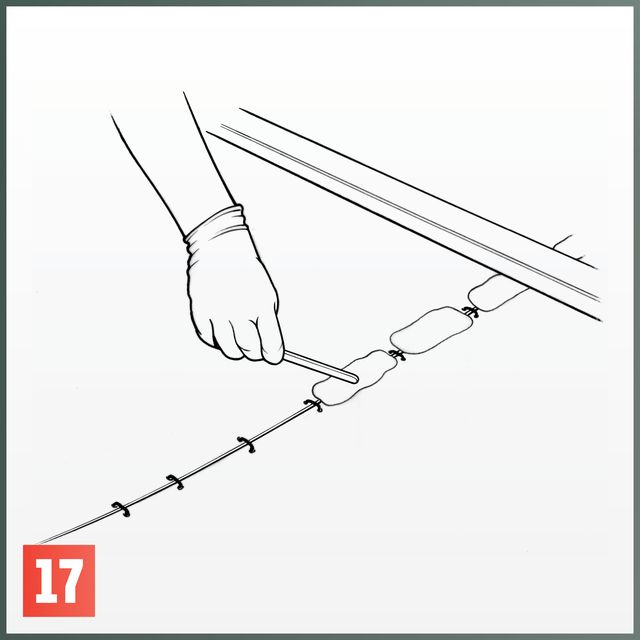
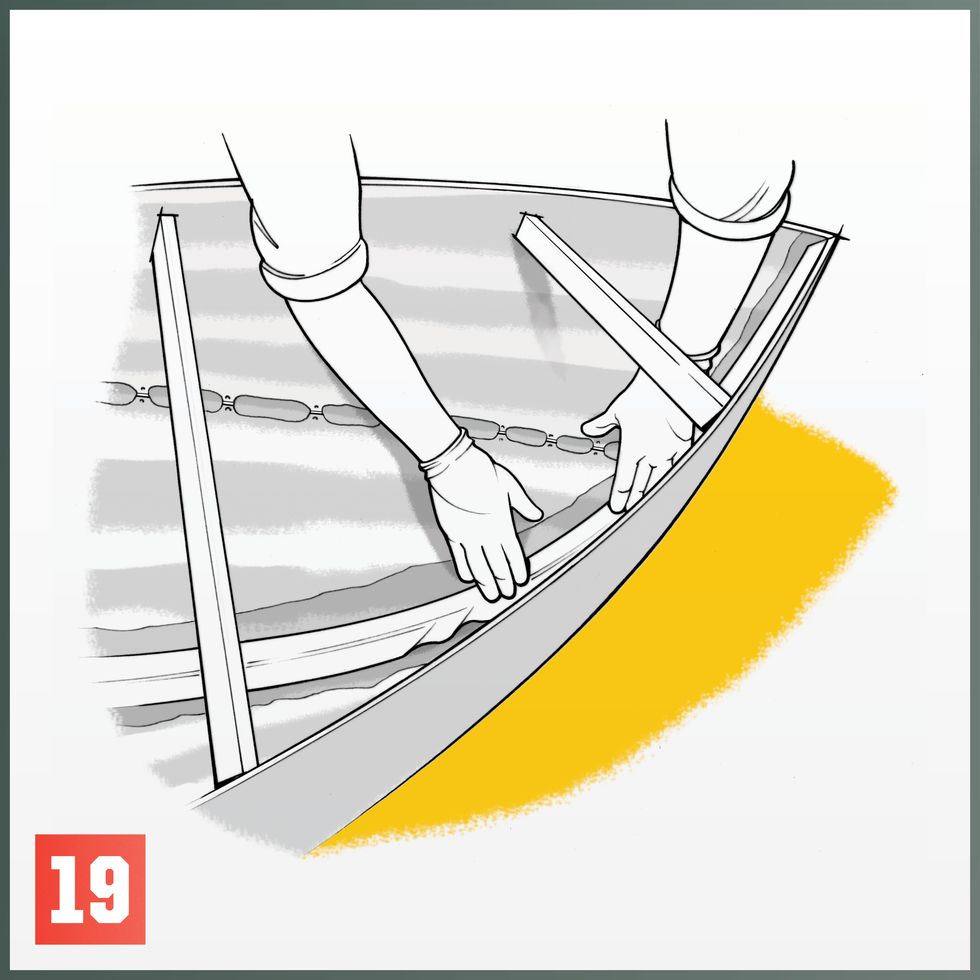
Step 6: Start Taping

Step 7: Drying and Finishing

Step 8: Epilogue: Mini-Cup Mods and Suggestions

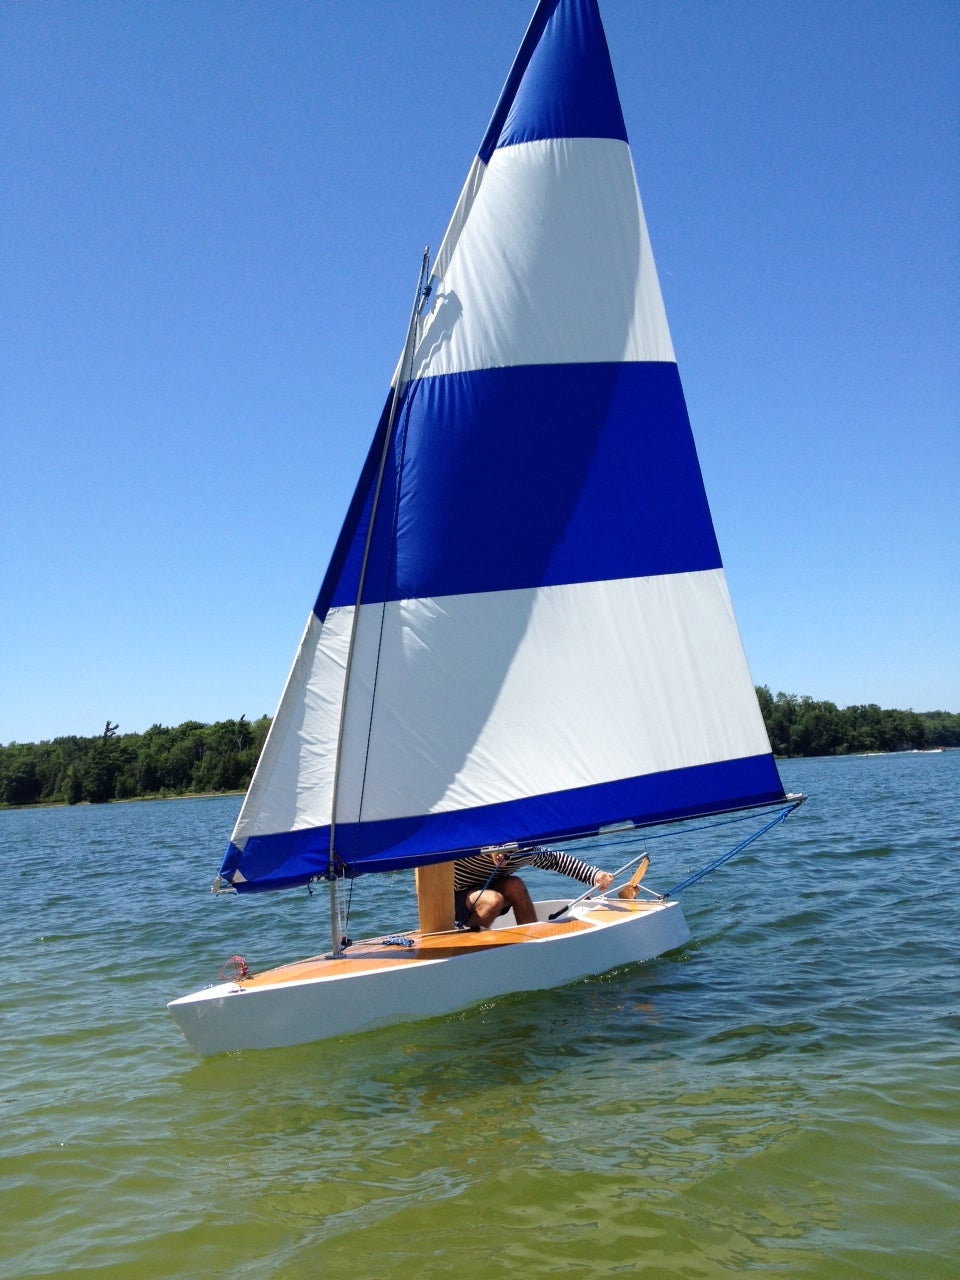
I made a few modifications to the original plans. For one, Instead of having stringers and screws fastening each piece of plywood, I use the stitch-and-glue method outlined here. I also rotated the original cockpit dimensions so that the rounded end was towards the stern. Additionally, I placed deckplates in the cockpit for access to the five watertight compartments. In the two foreward compartments I added two non-watertight bulkheads at the fore end of the daggerboard box to stop any cargo in those compartments from sliding around too much. I also added an additional support beam at the top of the stern between the rear bulkhead and transom. I coated the entire hull, inside and out, in epoxy for longevity. In terms of the rigging, I kept the general rig dimensions, but added outhaul, downhaul, and traveller lines feeding into clam cleats at the cockpit. The spars are 1.25 in aluminum T6 tubing and the mast is a 2.25 in alumunim T6 pipe. I made the sail with a sail-making neighbor of mine, and it is based of off the given dimensions with the shape "eyeballed". The The mainsheet goes through a swiveling fairlead and cam cleat located directly aft the daggerboard, with an accompanying block directly above on the boom. I may try and make a higher performance sloop rig; I'm not sure the lateen rig does it justice. On deck, I added a cleat and set of chocks at the bow and an additional cleat as a handle on the daggerboard. I put an adjustable hiking strap in the center of the cockpit at the floor, which certainly sees use. The hull's nearly flat-bottomed design means that in the water, the Mini-Cup likes to be sailed flat, and tends to turn into the wind with even small angles of heel.
Attachments


Boat Plans, Patterns and Supplies For the Amateur Boat Builder!
- Boat Plans Catalog – 300 Boats You Can Build!
- Boatbuilding Supplies & Epoxy
- Inboard Hardware
- Electrical Design Plans
- Books, DVD’s & Audio
- Boat Trailer Plans
- Raptor® Fastenings & Tools
- Glen-L RV Plans
- Gift Certificates
- Boatbuilder Blogs
- Boatbuilder Galleries
- Newsletter Archives
- Customer Photos Archives
- Where Do I Start…
- About Our Plans & Kits
- Boatbuilder Forum
- Boatbuilder Gatherings
- Boatbuilding Methods
- Featured Design on TV’s NCIS
- Our Boats in Action
Stitch and Glue Kits
Stitch and Glue Kits are a must for building our Stitch and Glue boats . These kits include screws and boat nail fasteners (if required), silica and microspheres fillers, fiberglass tape for inside laminates, plus POXY-SHIELD epoxy resin for gluing, making fillets, encapsulating the interior, and applying interior laminates. Each kit is specifically intended for the Stitch and Glue boat you are building. NOTE: We no longer provide copper wire in the kits as many builders prefer using plastic zip ties which are readily available at your local home store.
For many designs there are two kits available: A and B. The A Kit is the less expensive. This kit includes the materials described above and is meant to be used in conjunction with the Fiberglass Covering Kit. Kit B is used when you do not intend to fiberglass the outside. In addition to the material in the A Kit, tape and resin is supplied to tape the outside seams. Note: It is always necessary to have fiberglass on both the inside and outside of planking junctions. Since most boats are fiberglassed, the Fiberglass Kit frequently supplies the only outside lamination. If you do not fiberglass the outside, you must use the B Stitch-N-Glue Kit if there are A and B options.
For a complete project, order both the Stitch and Glue Kit and the Fiberglass Covering Kit that contain materials for the inside and outside of the boat plus enough resin and hardener to encapsulate the boat. Stitch and Glue Kits do not include plans and patterns.
Visit our Online Catalog for information on the Stitch and Glue designs available.
Comments are closed.

Connect with us:
Customer builds.
Useful Information
- Cost & Time To Build
- Links & Suppliers
- Online Glossary
- Support Knowledge Base
- Teleseminars
- Wood & Plywood
Building Links
- How Fast Does It Go?
- Install A Jet Ski Motor
- Modifying The Motorwell
- Sailboat Hardware Notes
Glen L Marine Design
- About Glen L
- How To Place an Order
- Privacy Policy
Copyright Info.
Copyright 2006-2022 by Glen L Marine Designs. All rights reserved.
Mailing Address: 826 East Park Ave. Port Townsend, WA 98368
Web design by Big Guns Marketing , LLC.

- Skerry from plans
- How to decide what to build
- Tender plans Some Free
Free Plans for Stitch and Glue Boatbuilding
Some free boatbuilding plans are very good, others are worth exactly what you pay for them. If you choose to use free boat plans, do your homework, and try to find others who have built from the plans. There are many Yahoo and Facebook groups out there. It's worth it to do a search. It's a good idea to check the measurements and to build a model from the free plans just to make sure you understand the process.
Here is my page on stitch and glue boatbuilding
Stitch and glue plans are good wooden boat plans for beginners.
Making a model will pay back later and save you time when you build because you will have figured out how the boat goes together.
Your model will also help you decide if you like the look of the boat BEFORE you spend a lot of time and money building a wooden boat from scratch.
In a more complex boat, free is not always less expensive because the designer of bought plans will usually have taken the time to give you better instructions, material layouts, and is often available to answer questions.

I built the green pram using the stitch and glue method of boatbuilding. The plans were free. Follow my day to day diary building Gavin Atkin's Apple Pie dinghy.
Free Stitch and Glue Boat Plans in no Particular Order.
Email me if a link is broken. I try to update everything often but the internet is a fast paced place. (and I'm not so quick)
I've included some plans that are free but not strictly pure stitch and glue. Some are combination methods and some are build with little support pieces, chine logs, that are used to screw onto or glue on. They are easy techniques.
I have not built most of these boats and cannot endorse them. It's up to you to figure out if they are suitable for you.
- Apple Pie Pram I built this and found it to be a lovely usable tender.
- Clown 450 Free sailboat plans and instructions IN FRENCH but nicely illustrated. Have a look.
- Micro Folding Dinghy Free Plans. Since the seams are glued but not rigid, it is not really Stitch and glue but interesting to look at.
- Thai Inspired Longtail Boat
- Free Stitch and glue plan for a Simple to Build Cruising Kayak from Spira International
- Free plans for Doris the Dory from In the Boatshed. Combination building methods.
- Herring Skiff Free Stitch and Glue Boat Plans 12 Ft Motor Skiff
- 4. Metre Dayboat by Radoslaw Werszko. Can be use with outboard. Nice contruction photos.
- Several free plans also by Radoslaw Werszko.
- Very simple Sailing Dinghy Designed to be built very quickly. Simplicity boats. Not strictly stitch and glue but simple. There is even a song!
- Free Guillemot Kayak Plans from Guillemot Kayaks.
- Guillemot Kayaks offsets for Ganymede Kayak PDF. Also instructions on Instructable
- Mini Sharpie is a one sheet boat from Simplicity Boats.
- Ella Rowboat Free online plans. Stitch and Glue Assembly.
- Cinderella Rowboat Also from in the boatshed
- Blondie Sail trainer and yacht tender designed by John Bell, pdf file
- How to build Cheap Boats Sailing Canoe. Includes sailing rig. Not very detailed but interesting as a historical document.
- Elf designed by Steven Lewis and available from Duckworks Magazine. Offsets and diagrams. 12 ft long sailing and rowing boat.
- Mouse Boats on Yahoo groups. Plans from Duckworks also. Lots of fun in a tiny boat. Good project and very popular, for children or adult to use in quiet water. Stitch and Glue.
- Free plans for a Bernarda 10 Well not quite free, you have to send the designer a photocopy of your money!! This is a great funny web page.
- Free Pirogue boat plans from Morten Olesen, Naval Architect. You need to email for the plans but it's free. Also other plans for sale.
- Gavin Atkin's "In the boatshed" has several free boat plans . A mother lode of nice designs. Lots of easy to build stitch and glue plans
- Free 3 sheet dory Instructions and photographs. Hannu's Boatyard, he has several models. Can easily be built stitch and glue along with the frames.
- Bateaux Bois Free and paid Plans for some respectable boats. Look under 1- Plans Bois. In many languages. Get Mr. Google to translate but it's well worth having a look.
- Free Stitch and Glue plans for single and double kayaks from Kayakyak. These have been built and tested. Nice looking boats. The Plans are actual plans not offsets.
- Portable Boat Plans has several designs for free. Many other of his plans are very inexpensive. Ken Simpson designs inexpensive easily built boats.
- Duck Punters Free Plan Fairly tender sailing canoe type. Wander around the website some. Designed for chine logs but can be converted.
- Plans for U , Almost free ($3) Expired copyright plans. Norwegian pram looks promising. Not much detail but documentation of how the boat was built in the past. 10 plans for 3 dollars.
- Puddle Duck Racer , the little boat that could. Very simple 8ft boat. Free plans. Usually built with chine logs but could be adapted to stitch and glue as long as you glass tape the seams.
- Mike Waller Design has Pippie8 Tender Exceptionally well laid out and documented free plans
- Bateau.com has 3 free designs A 7.5 ft sailing dinghy, a folding kayak and a canoe.
- Free rowing flat bottom boat from Mark Wallace. Table of offsets. Can be sailed.
- Mike Gill mini Tugboat free plans. Cute boat.
- Free rowing skiff from In the Boatshed
- Flo-Mo Amazing collections of plans. Some great experiments from a meticulous craftsman. 1-2-and 3 sheet designs. Great fun.
- Free Optimist Sailing dinghy plans are in Italian! Get Mr Google to help you translate. Proven design. If you plan to race make sure dimensions are exact so you're class legal.
- Free Optimist Sailing dinghy Original optimist plans
- Wooden Boat Magazine free plans for a Motor Holly Point Skiff.
- Many free plans from the Toledo Community Boat House Some Stitch and glue and some other methods. Great resource.
- Plywood stitch and glue Kayak Instuctables are a greatre source. Go to the website and do some searching. Changes all the time.
- Useful Boatbuilding Books My page on boatbuilding books, most of which I have in my library. Some good information.
- Rodent, Sailing Dinghy for a youngster Could be built as stitch and glue. Shown as chine log construction. Email for plans.
Many people offer free plans from old publications such as Popular Mechanics. Since epoxy was not available then, they are not stitch and glue. They could be adapted however. It is usually possible to replace chine logs (strips of wood that connect bottom and side with screw and glue) with an epoxy fillet and fiberglass cloth. It is important to strengthen the seams, inside and out, with fiberglass strips if you remove the chine log.
More Free Plans hiding in Books.
A very good way of getting free plans is by purchasing designer's books. For 20 or so dollars you can get plans for several boats AND detailed instructions on how to build them.
Many designers offer plans at very small cost. It's often a better bet to purchase these than some of the free plans. Check out Duckworks plan pages There are many good designers here and a few free plans as well.
If you are looking for wooden boat plans for beginners it's hard to beat stitch and glue.
- Carbon Fiber Characteristics
- Boat,Oar & Paddle Plans
I try to be accurate and check my information, but mistakes happen. A good set of plans can save you lots of time and if you've paid for them you can actually often contact the designer and get help.
The ads on my pages connect to Amazon. If you buy something from a link on my page, I get a referral fee that pays the web page expenses (not my time, that's for sure.)
Free boat, paddle & oar plans
Boat, Paddle and Oar Plans
Boatbuilding and sailing articles.

Small Print
This information is for general knowledge. Before you start, do your homework. Make sure you understand the plans before you start and work safely. I don't endorse any of these designers or plans. After you've decided to build, enjoy yourself.










IMAGES
VIDEO
COMMENTS
Our standard boat plans are on 24" x 36" paper; parts that fit within those dimensions are shown full size. Other components are scaled and dimensioned. Shearwaters, Shearwater Hybrids, Wood Ducks, Sea Island Sport, Matunuck, and all of our strip-planked kayaks feature full-size plans sets that show all parts at their full size. Stitch-and-glue ...
Learn how to build a wooden boat with the Devlin Stitch and Glue method, a superior way to create a strong, simple and fast boat. Find out the benefits, the steps, the materials and the tools for this innovative technique.
Learn how to build a boat with stitch and glue plywood panels from full-size patterns. Glen-L offers various designs, instructions, and materials for this quick and easy boatbuilding method.
Devlin Boat Builders offers plans and kits for wooden boats of various types and sizes, as well as custom built boats to your specifications. Learn about the Stitch-and-Glue technique, the Devlin Boat Building Manual, and the latest projects and events from Sam Devlin and his team.
Find over 500 boat plans for stitch and glue boats of various sizes, shapes and designs. Learn how to build your own boat with stitch and glue method and elevate your craftsmanship.
Stitch-and-glue boat plans for the home builder We believe anyone can build a great boat at home. Madeira Mar Boat Building School was founded in 2018 to offer stitch-and-glue boatbuilding cources, live and online. We have designed sailboats, rowboats and powerboats for amateur construction. And we have built our share of boats, from small ...
Learn how to build a plywood boat using the stitch and glue method, with step-by-step instructions and pictures. Find out what tools and materials you need, how to cut, drill, tie, tape, and epoxy the parts.
Learn how to build a small boat with plywood panels and fiberglass tape using the stitch and glue method. Follow the step-by-step instructions and pictures for the FL12 model, a version of the popular FL11 design.
Find boat plans for easy and low-cost stitch-and-glue boatbuilding with readily available materials. Learn from online courses and articles on stitch-and-glue boatbuilding, new designs and polytarp sails.
Types: open sailboat, rowboat, sailboat. Right Canoe Plans will be sold through Duckworks Boatbuilder's Supply! The Right Canoe blends classic looks with ease of construction, offering great sailing qualities in an affordable package. The Right Canoe is a 13-feet-long with a balanced lug rig. It tacks well, sails very well upwind, and is ...
How to Stitch and Glue the Boat. The spacing for our holes is about 8″ at the transom, and as we work our way forward into the compound curvature, we'll go back to 2-3″ spacing. We used 2 or 3 pieces of PVC at the back just like we did at the front to help our wood. At the end, we'll grab our front zip tie without drilling any holes in ...
Stitch and Glue Kits are a must for building our Stitch and Glue boats. These kits include screws and boat nail fasteners (if required), silica and microspheres fillers, fiberglass tape for inside laminates, plus POXY-SHIELD epoxy resin for gluing, making fillets, encapsulating the interior, and applying interior laminates. Each kit is specifically intended for the […]
Stanley SmallCraft has plans and kits for Stitch and Glue Canoes, Dinghies as well as Kits. Located in the UK. Dynamite Payson's plans are available. His book Instant Boatbuilding with Dynamite Payson: 15 Instant Boats for Power, Sail, Oar, and Paddle is well worth reading too.
Find free plans for building plywood boats using the stitch and glue method or variations. Browse a variety of designs, from dinghies to kayaks, with instructions, photos and links.
Stitch-and-glue boat plans for the amateur builder: sailboats, powerboats and rowboats - designs that are easy to build, affordable and sail very well! Learn...
PLYBOAT. [email protected]. PLYBOAT offers small boat plans for amateur boat builders. All boats are designed to be built from plywood using the popular stitch and glue method. No special tools or skills required. If you can use a saw and drill you can build a boat. Our boat plans come with detailed and illustrated work instructions.
The stitch-and-glue method is a simple boat building technique popularized in the 1960s that creates a solid, one-piece hull, unlike most other wooden boats, which start with frames and bulkheads ...
The classic is my version of the smaller McKenzie river dory in stitch and glue construction. The hull itself is very simple with a 48" bottom and just under 16' sides. It will hold three but two are just right. I have plans for a 12' and 15' boat and if you want to stretch it to 16' you'll have to add an extra foot of side panel.
These plans use plywood panels and fiberglass tape for construction. Stitch and glue boat building is a popular method among DIY boat builders due to its simplicity and cost-effectiveness. By utilizing plywood panels and epoxy resin to stitch pieces together, boat enthusiasts can create sturdy vessels without the need for intricate woodworking ...
Build a light, compact and stable solo skiff to access shallow water with paddle, trolling motor or outboard. These stitch and glue boat plans include detailed drawings, templates, videos and materials list for less than $1000.
Factory Sale. Stitch-and-glue construction, along with the development of epoxy and modern mahogany marine plywood, has revolutionized and revitalized wooden boat building. This method of building is not only stronger, lighter, and faster than traditional wooden boat building, but it also takes far less skill.
Learn how to build a small boat with stitch-and-glue method using 2 sheets of plywood. The Dolphin 2.1 is a versatile dinghy that can sail, row or motor, and is easy to carry and launch.
Tango Skiff offers plans for six sizes of lightweight, low-power planing skiffs built from marine plywood using the stitch and glue method. See photos, specifications and testimonials of these easy to build and versatile boats.