
Affordable Sailboats You Can Build at Home

Last Updated by
Daniel Wade
September 13, 2023
Key Takeaways
- There are many sailboats that anyone can build from home depending on tastes
- Budget will be the biggest deciding factor on a majority of the process
- Consider kits that come with most of what you need or choose ones that are all-inclusive
- Design complexities and new materials may make the building time process longer
- Plan the best you can ahead of time to save money and your working hours
Buying a sailboat can be expensive, but building your own can save you money. So what are sailboats you can build from home?
Sailboats that you can build from home will likely be a small boat under 20 feet. These could be from many different boat suppliers such as B&B Yachts, Brooks Boat Designs, and Chase Small Craft. Boat plans will vary based on your budget and how much time you have on your hands.
Based on my previous experience, building your own boat will take much longer than if a professional were to do it. You also have to be able to study plans, consider various sailboat designs, and have tons of supplies such as fiberglass tape or fiberglass cloth. On top of that, you will also have to be good with your hands.
Table of contents

Top 10 Affordable Sailboats Anyone Can Build at Home
Building your own pocket cruiser or other styles from boat plans is an impressive feat, as this will need dedicated time and money to assure your boat sails safely. Boat building takes a lot of patience as well, especially since this will not be completed in a fast manner.
Finding boat plans and materials that fit your budget will be key to being able to complete the project. The time it takes to complete these projects will vary on your overall experience and needs. Below are 10 of the most affordable sailboats that you can build in the comfort of your home.
B&B Yachts

B&B Yachts have 14 different boat plans you can choose from to find the boat of your desires. Their shop is located along the Bay River in North Carolina where they construct all of the kits and have a 100 foot dock to show off your project once you complete it.
One popular model to check out is their Core Sound 15, as it is the perfect size for those wanting to build a modest size boat for a handful of people on board. Their website features some videos of completed projects and the plans or kits for purchase.
- 14 different models to choose from plus some dinghies
- Various monohull and multihull options
- Friendly customer service with attractive prices
- Might be too many options for some that are indecisive
- Not ideal for those wanting to have a motor sailer
Brooks Boat Designs

Brooks Boat Designs has a handful of options to consider for your next sailboat building project. They are located in Brookline, Maine and give the option to buy the kits or have them build one from scratch for you. They have plenty of knowledge, so do not be shy to ask about modifications or custom features you are looking for.
Depending on your specifics, they can attempt to accommodate some of their plans to help fit your desired outcome. By checking out their site, you can see many examples of their construction in progress and what the boats will look like when completed.
- Offers a variety of kits
- Plans vary around $50 and up, while materials will obviously add more costs
- Some plans can be rowing boats that can convert to sailboats
- Might take a while to hear back from them, as their contact section is a little outdated
- Their plans may not accommodate a ton of extras for your taste
Chase Small Craft

Chase Small Craft offers a simple process for building boats. Their kits are equipped with everything you need and will help save you time than just buying the materials outright and other parts you could need. This is arguably one of the best bang for buck instances if you want to save time and money searching for pieces to your boat.
They are located in Saco, Maine and will ship everything to your home from there. All the necessary materials are included and all you need are the proper tools and working space.
- All-inclusive kits with what you need
- Tons of knowledge on their site for boat building
- Easy process to order and customize
- Complete kits can range over $20,000 for larger boats
- Kits may take up to eight weeks to ship out
Chesapeake Light Craft

You can expect high-quality boat kits from Chesapeake Light Craft . They feature 18 different sailboat kits that vary from eight to 20 feet in length. This should be more than enough to find one for you if you are newer to boat building.
They also have a wide variety of other kits in addition to the sailboat, in the event that you wanted to order a small kayak or paddleboard in addition to your sailboat. The prices vary considerably when considering a small or larger boat, so check the complete list of options to in order to potentially fit your needs.
- Plenty of sailboat offerings to choose from
- Different beautiful hull form options to consider
- Easy to build and perfect for sailing
- Only has basic materials needed for kit, so you may need to purchase other items
- Has epoxy shipping fee no matter if you pick up item
Dudley Dix Yacht Design
Dudley Dix Yacht Design has an extensive list of plywood and single skin sailing boat options. They have plenty of sail plans and kits to consider depending on your goals. These follow a classic look for sailboats, which are aesthetically pleasing.
If you are wanting one to accommodate a small family, they have more than plenty to look through. The cost is not as bad compared to others, but keep in mind that you may need to throw in your own supplies or specific tools to get the job done.
- Plans start at $30 and range up to $7,500 or more for kits
- More than enough of options to consider
- Affordable variety of sailboat offerings
- Might be too many options for those new to sailing
- Most are wood without the use of aluminum or steel
Farrier Marine

If you are in search of a multihull to build, then Farrier Marine is what you need. They offer a unique folding catamaran that is trailerable and give you the option to build it yourself. This not only makes it an appealing option, but anyone can take this multihull boat wherever they want with ease.
It features a thorough construction guide once you receive all of the materials. These also come with stainless steel fasteners and an aluminum mast for high-quality materials. Pricing will vary since you must request which model type you are considering.
- Ability to build a unique catamaran
- In-depth construction guide to help
- Easily handled and trailerable
- Price may be too high
- Limited offerings since only a few multihull options
Glen-L Marine Designs

Building a boat from Glen-L Marine Designs can save you time and money. They feature an easy system to order and receive the kits, as well as an in-depth guide to building them. This is an appealing option compared to most boat kit sellers.
The beauty about Glen-L is that anyone can build these from scratch, so you do not have to be the best boat builder in the world to get it done. They offer guides and helpful insights from their team to point you in the right direction. Plans vary around $15, while kits can range well over $1,000 depending on boat size.
- Nearly 50 designs to choose from
- Complete guide to help anyone build it
- Plenty of price points depending on size
- Might be overwhelming with the amount of options
- Could take a while to get parts since they are popular
John Welsford Boat Designs

John Welsford Boat Designs invites new and veteran boat builders that want a taste of quality small wooden boats. The boat plans are designed to meet your specifications and are catered to your desires.
There are seven sailboat designs to choose from so you do not feel overwhelmed in the process. However, they do not sell kits all the time, so you would need to have the materials or be on the lookout for the best prices when they are available.
- Seven sailboat plans with different sizes
- Quality boat builder and supporting community
- In-depth knowledge provided to you when you order
- Might be too small of boat size
- Kits are not always available
Iain Oughtred
There are plenty of options on the wooden boat store, but you should narrow down your search for Iain Oughtred’s line of sailboat kits and plans. There are 25 different plans to choose from, which should accommodate most everyone looking to build their own boat.
While they do offer some kits, they do not routinely offer sailboat kits. You would need to purchase all of the materials if you are considering one of their sail plans. Keep this in mind if you are considering, as you would need to hunt down the parts yourself.
- 25 different sailboat plans to look through
- Various sizes to contemplate for you sailing needs
- Prices will vary but are not bad compared to market
- No sailboat kits, only plans
- Newer boat builders might find too many options unappealing
Paul Gartside Boat Builder and Designer
Gartside Boats is a boat builder company based in Long Island, New York that showcases a variety of boats from traditional and newer methods of boat building. Within that variety, they have boat plans meant for six to 50 feet in length.
With an abundance of options, you will need to contact them regarding prices and any customizable options. Kits may vary as well, as they typically design in-house and build for you.
- Experienced boat designer that can accommodate with custom plans
- Many options are trailerable
- Can have plans for up to a 50 foot boat
- You will need to contact them for prices
- Customized options may make process more complicated for new boat builders
How Much Does it Cost to Build a Sailboat at Home?
As you have likely already done so, the math between building your own boat and buying one may be a huge difference. Likewise, you may even enjoy the challenge of taking an older boat that is gutted and restoring with parts from a kit to build one new again.
But how much does it cost exactly to build a boat from the comfort of your own garage or workshop? The prices are going to vary dramatically depending on your situation and material needed to get the job done. In addition, the time that it takes to complete this will also vary.
Sail plans are rather inexpensive if you are aiming to build a small boat. These plans allow you to see the workings of the boat design and what you need to build the boat.
Without these plans, you will not know the exact details of the design and it can cause major issues with the boat’s hull or other areas of the boat. Think of these as the backbone or instructions of the boat’s infancy before being built.
Price Per Square Foot
You should assume to pay anywhere between $300 to $600 per square foot if you are interested in building a boat. Buying a kit outright can be a good way to save time, but oftentimes these do not come with everything you need.
Instead, you should try to source as much of the materials at the best price as possible. Thinking ahead is part of the process and you might be able to score a deal at a lumber yard or hardware store for parts.
Boat Designs Matter
The design of the boat will be much different from one boat to the next, regardless if they are the same size in length. If you are pondering boats that range anywhere between 16 and 20 feet, you should factor in the shape of the hull, any rigging, and various appendages.
Prices tend to increase when there are more complexities within the designs. If you are considering a kit with more details than others, you will also have to pay more for the designs on that as well.
Kits Can Differ
It is important to understand that all kits are not going to be the same. As you gander at sailboat kits online to stitch together, you need to thoroughly look over to see if you have everything you need before buying.
It would also be at your advantage to ask the seller if any additional parts or supplies are needed. This may change your dynamic on the kit buying process and you may pass up one for another if it has everything you need. An all-inclusive kit may cost several hundred, if not thousands, of dollars more to have the convenience of everything in the bundle.
Construction Approaches
Some boat plans may require you to have certain tools to get the job done. This means special saws or planers, which the average person simply does not have.
Purchasing specialty tools might be expensive upfront and hard to find depending on what it is. Your best bet would be to check locally for others trying to sell their tools or consider a boat plan that does not require extensive tools to finish the job.
How Long Does it Take to Build a Sailboat?
An easy to build sailboat could take a while to build from scratch. Many different variances come into play that are difficult to pinpoint for everyone. But how long is that exactly and how will your experience play into this?
A fun project to sail in the wind could take you several months to well over a year depending on the boat plan and how big your boat is going to be. In addition, the materials all need to be accounted for prior to starting in the event a hardware store does not have them in stock.
Time Varies
The time that passes for simple boat designs on small sailing vessels can be done in a few weeks. This is assuming you have everything you need and work non-stop around the clock.
Certain complex situations may make the process long, such as the difficulty of working with some materials. If you are a skilled laborer, it may take you half the time compared to a novice. The amount of time it can take will vary on your availability and skill level.
Planning ahead will undoubtedly offer the most time-saving features. It also helps if you can tackle parts of the project at your own pace.
Complexity of Design
The design of the boat may make the construction process longer. For example, it may take you longer to build a catamaran compared to a similar lengthed monohull.
More complex designs might require more materials, therefore making the process a bit longer to complete. Furthermore, you will also need more experience working with difficult designs and that will affect you more as a newbie.
Be sure to manage your expectations well and do not allow yourself to become too stressed over this fun project. If you can, seek expert boat building advice from a local builder or the company you purchased sail plans through.
Quality Materials
The quality of the materials will matter significantly when building a boat and will greatly affect the time it takes to construct it. Handling fiberglass or carbon fiber might require specialty tools, while wood also demands a certain level of craftsmanship.
If you are not skilled at working with the material at hand, it might affect the quality of the build and you may have to go back to fix mistakes. This will definitely add more time to your project, because mistakes are bound to happen with your first project.
To save time, consider adding the tools and materials throughout the year or as often as your budget allows. You may want to try testing your skills on fiberglass or other materials to get a feel for how to work with it.
Related Articles
I've personally had thousands of questions about sailing and sailboats over the years. As I learn and experience sailing, and the community, I share the answers that work and make sense to me, here on Life of Sailing.
by this author
Best Sailboats
Learn About Sailboats
Most Recent

Best Small Sailboat Ornaments
September 12, 2023

Best Small Sailboats With Standing Headroom
December 28, 2023
Important Legal Info
Lifeofsailing.com is a participant in the Amazon Services LLC Associates Program, an affiliate advertising program designed to provide a means for sites to earn advertising fees by advertising and linking to Amazon. This site also participates in other affiliate programs and is compensated for referring traffic and business to these companies.
Similar Posts

Discover the Magic of Hydrofoil Sailboats
December 11, 2023

Best Bluewater Sailboats Under $50K

Hunter Sailboats: Are They Built for Bluewater Cruising?
August 29, 2023
Popular Posts

Best Liveaboard Catamaran Sailboats

Can a Novice Sail Around the World?
Elizabeth O'Malley
June 15, 2022

4 Best Electric Outboard Motors

How Long Did It Take The Vikings To Sail To England?

10 Best Sailboat Brands (And Why)
December 20, 2023

7 Best Places To Liveaboard A Sailboat
Get the best sailing content.
Top Rated Posts
Lifeofsailing.com is a participant in the Amazon Services LLC Associates Program, an affiliate advertising program designed to provide a means for sites to earn advertising fees by advertising and linking to Amazon. This site also participates in other affiliate programs and is compensated for referring traffic and business to these companies. (866) 342-SAIL
© 2024 Life of Sailing Email: [email protected] Address: 11816 Inwood Rd #3024 Dallas, TX 75244 Disclaimer Privacy Policy
- For Sale/Wanted
- Readers Tips
- Your Yarns.
- Restoration
- Miscellaneous
- DIY Boat Yards
- Boat Building
- Cabin Cruisers
- Free Boat Plans
- Begin Boating
- Boating Terms
- Ropes and Rigs
- Just for Fun
- Celestial Navigation
- Passage Planning
- VHF Marine Radio
- Diagonal Scale
Sailboat Plans
Free Sailboat Plans
A selection of some of the Free Sailboat Plans (pdf) that were published in magazines such as “Popular Mechanics”, "Popular Science" and the "Boat Builder Handbook".
If you need help with lofting out the plans click here for an article here which should help.
- Open Dayboats/Dinghys
- Rowing Boats
Open/Dayboat, Free Sailboat Plans
Everyone who digs boating has heard of the Hobie Cat, the sleek little catamaran that burst on the scene and captured the attention of all the fast-action sailors.

Marked by asymmetrical hulls and special trampoline supports, the Hobie can reach speeds above 20 mph and perform with a rare agility.
But it has one drawback.
It costs mucho dinero.
Thus, we introduce the Hobby Kat, sailboat plans, a build-it-yourself version of the “Hobie” that should cost from half to a third of the commercial version. If you have the moola, of course, go for a Hobie and have the time of your life on the water.
If not, try our Hobby
The homebuilt is not quite the same.
But she sails sweetly and fast—qualities which have made the “Hobie” popular
Even in a light air she’ll slip through the water at a fast clip.
She has no centreboards, leeboards or keel, and needs none.
The inside of each hull has built-in lift, like an airplane wing, so that as the boat heels and one hull digs in the boat is pulled back to windward.
Click Here for the Plans
She can run in very shallow water and the rudders kick up for beaching.
You can carry her on a trailer or even disassemble her.

Many a “stink pot” addict will take a second look at Tern because she planes in modest breezes, is easy to handle, and her streamlined prow arid pod-shaped, “inland scow” type hull offer slight water resistance. Then too, there’s a charm about the tiller of a sailer that’s not matched by the wheel of a motor-powered boat. Part of it is the challenge of making the most of nature’s free-wheeling breezes. Even with her 72sq.ft of sail, this Free Sailboat Plan is remarkably stable, and packs as many as four persons aboard
For thousands of inland lakes, Tern is the answer to sailing water sport, she is rugged and easy to launch
And she’s remarkably easy to build.
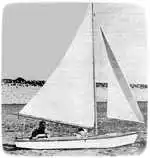
Falcon is a small, speedy, sporty sailboat which handles well. Tests on the original Falcon showed that she could easily out-distance boats of comparable size such as the one design class Snipe and Comet sailers.
And she will pace neck and neck with 18 footers with considerably greater sail spread.
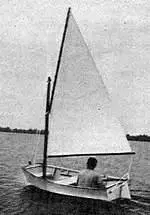
This strong, beamy, eight-foot pram may be sailed either cat-rigged or sloop-rigged.
The dagger-board may be adjusted forward to balance the helm when sailing with the addition of a jib sail.
Oars or a small outboard motor may also be used to power this versatile Free Sailboat Plans.
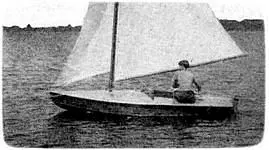
Dart” is a small two or three person sailing craft, designed for use on protected waters such as bays. lakes, rivers or wherever sheltered waters are found. Its construction will repay the builder handsomely and provide a fast sailing craft, light in weight, easily transportable and cheap to construct with all difficult joinery eliminated
It provides thrilling and economical sport.

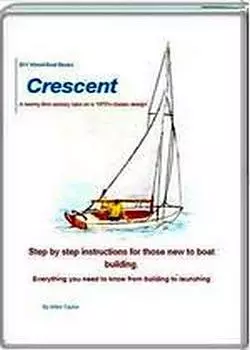
The 'Crescent', designed by C. T. Allen, is the ideal sailboat for day sailing on a small lake, river, or protected waters of a bay.
Centreboard design (Fig. 2) reduces Crescent's draft, so Shallow is not a problem.
Its broad beam of over 5½ft. makes it an ideal family boat because there is room for a cockpit large enough to accommodate four adults or two adults and three kids, and side and forward decks big enough to stretch out on when sun bathing.
"Jewel" is a 16' Crescent Sailboat being built by Mike Allen from the free sailboat plans by C.T .Allen in the 1958 "Boat Builders Handbook". And what a superb job Mike is doing check out his photos here .
Click Here for the Free version of the Plans
Sailing enthusiasts and backyard boat builders are not likely to find free boat plans for a sailing pram that can be built faster, lighter, stronger, or less expensively than Graefin-10. Two men can begin work on a Friday evening and have a smart, lively 10-ft. 85-pound sailboat in the water by Sunday evening (it’s been done).
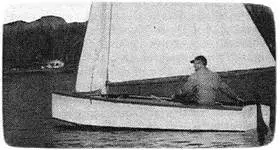
Zephyr Is a refinement of a type of boat developed by the English for use in the rough open waters of the English Channel. Not only is it fast under sail, but it can stand up under punishment. And it’s light enough to be easily loaded atop an auto or light trailer.
Breeze-Baby
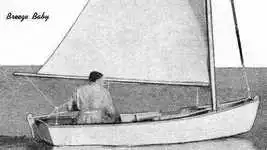
Skimming off a brisk wind or with the wind abeam, Breeze-Baby actually planes with one person aboard. Despite her rowboat lines that make her easy to build, she handles easily under her simple sail, an ideal first boat. Simple lines are adapted to plywood construction that’s strong, light and that keeps Breeze-Baby’s bilges dry
You can take her with you atop your car or on a lightweight trailer for summer fun wherever you vacation or get in a week-end’s sailing.

Cat’s Paw is easy to build because of the straight-sided hulls. The sheer line is flat and that simplifies building the form. Bow and stern are straight, so there’s no cockeyed bevel to fit and fuss with
She Is an Ideal boat to learn or practice sailing in because she will forgive so many mistakes.
Cabin Cruiser, Free Sailboat Plans
Previous posts
See What Others Have Posted

Recent Articles
Boat Winches
Jun 21, 24 04:18 AM
- Boat Plan Books
- Boatbuilding Tips
- Glass Cloth
- Stitch and Glue
- Strip Plank
You might like these

Knotty wood, problems with boat building timber.
Knotty wood, how to avoid structural problems with knots in lumber when using softwood timber for fitting out and boat joinery

Build a Boat, tips for the DIY Wooden Boat Builder.
How to Build a Boat, Wooden Boat Building methods for the DIY, backyard, self-builders explained, carvel, lapstrake and plywood

Wood Screws for Boat Building and Repair.
Wood Screws are the most widely used and versatile fasteners used on wooden boats. Which type to use and how to use them

Wood, Environmentally Friendly Boat Building Lumber.
Make sure that the Wood that you buy and use is sustainably grown and harvested.
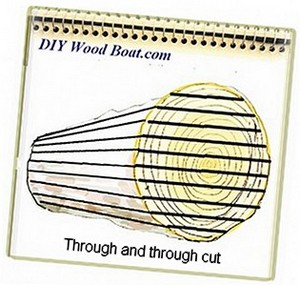
Timber, Lumber for Boat Building.
A brief description of the most common Timber used for building Wooden Boats how to choose wood for your project boat

Timber Properties
A brief guide to timber properties and wood, characteristics such as strength, stiffness and elasticity for choosing lumber for wooden boat building and restoration.
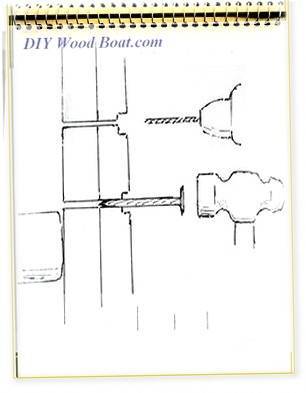
Rivets and Copper Rove Wood Boat Fastenings.
How to use Copper Rivets and Roves construction guide to fasteners on your wooden boat.

Ring Nails for Marine Fastening.
Ring Nails sometimes call Gripfast or ring shank, silicon bronze boat nails are renowned for their holding power. but how to get them out?

Plywood and Veneer Guide for Marine use.
A guide to plywood for boat building and why you should use the best marine grade you can afford.

Glue for Wooden Boat Building
Which Wood Glue to use when building or restoring a wooden boat, resorcinol to epoxy.

Rowing Boat Plans
Free Rowing Boat Plans for the backyard home builder, build your own rowing boat, dory, folding dinghy or pram using these simple plywood designs.

Free Motorboat Plans
Free Motorboat Plans for the backyard home builder, build your own speed boat, cabin cruiser, runabout or utility boat using these simple plywood designs.
Wooden Boat Kits.
Wooden boat building is easy and inexpensive with wooden boat kits. From row boats and kayaks to sailing cruisers, boat to be proud of

Supplies for Wooden Boat building and Maintenance
Supplies for Wooden Boat Building and restoration, how to choose the materials and marine chandlery for your project.

Small Boats, Made of Wood
What Everybody ought to know about building Small Boats, guidance and tips for self-building or restoring.
Owens Boats
Jun 05, 24 12:14 PM
Penn Yan Boats
May 28, 24 07:51 AM
Wooden Boat Restoration, Repair and Maintainence.
Wooden boat restoration, how to fix up an old wooden boat, one of the cheapest ways to get afloat and have a boat to be proud of.

Epoxy Resin for DIY Wooden Boat Building.
A guide to the epoxy resins and sustainable enrtopy resins to use when building wooden boats with marine plywood.

Wood Rot Repair and Treatment
Wood rot in wooden boats, how to treat, repair and replace rotten timbers in a wooden boat
Privacy Policy
Advertising Policy
Cookie Policy

I am perfectly aware that the majority of Wooden Boat aficionados are sensible folk. However, I need to point out that I am an amateur wooden boat enthusiast simply writing in order to try to help other amateur wooden boat enthusiasts. And while I take every care to ensure that the information in DIY Wood Boat.com is correct, anyone acting on the information on this website does so at their own risk.

- About Modern Wooden Boats
- Tips & tricks
- What’s inside a boat plan ?

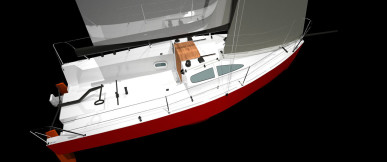
Idea 21 sportboat
The development of the family of small offshore capable sailboat plans : chined hull for the highest stability, vertical lifting keel, trailerable, suitable for club racing or cruising (two interior versions) , plywood and epoxy hull with the radius chine system, sparkling performances while sailing and reasonable interiors for coastal cruising.
| DOWNLOADS | ||
| 6,30 m | 27,5 m2 | |
| 2,50 m (trailerable) | 45-26 m2 | |
| 1,75 m – 0,50 m | outboard 2.3-5 HP on transom bracket | |
| 900 kg | ||
| 1200 kg | ||
| 1700 kg | ||
| 300 kg | ||
First boat launched : read the first impressions here
Idea 21 small sailboat plan is the latest development of my family of small plywood & epoxy sailboats plans for homebuilders : it was quite a time since i was thinking of an evolution of her smaller 19 footer sister, so i finally take the decision to publish this new plan. the goals of this plan is simple: add interior volume, simplify the work for homebuilders switching to a complete plywood & epoxy radius chine hull, enhance slightly the sparkling performances of idea 19, keeping the sailboat very balanced and suited for sailors ranging from enthusiast beginners to experienced seamen., first boat launched and several other boats in building stage make idea21 the most sparkling project on our catalogue, hull: chined hull on a small light sailboat has a simple reason to exist: it gives more stability to the sailboat when heeled, much more than a round hull similar sailboat. i managed to keep a very low wetted area of the unheeled hull, in order to achieve a good pace in light air and avoid excessive drag. stern sections are quite flat to gain speed downwind (idea 19 has been clocked with speed steadily in excess of 15 knots)., bow sections: experiences on racers showed that “knife-blade” bows may give you less resistance, but the price to pay is high in terms of buried bow sailing downwind, so i decide to provide this plan a large u-shaped section on the bow ; sails provide the sailboat plenty of power to defeat the small amount of added drag., sailplan: i have a very good starting point with idea 19, so we’re doing small adjustments and no revolutions: square top mainsail, 7/8 fractional rig , very wide single swept spreaders, no backstay, deck stepped mast with sturdy section, 110 % j jib, code zero, jennaker hoisted on swinging retractable bowsprit, and a good amount of sail area., keel and ballast: idea21 have a solid hard wood cored & unidirectional glass epoxy laminated lifting keel, with a naca optimised profile and a low resistance hydrodynamical shaped 280 kg lead bulb bolted on the keel tip; it can be made by a homebuilder, no need for professional welder; the fin area is on the low side, speed will help generating the required lift without adding too much drag. keel case is in 20 mm thickness plywood and epoxy laminated glass reinforcements, and it’s perfectly waterproof while sailing., full lifting keel version : after a request from a builder, idea 21 cruise is available in a version featuring an integral watertight keel case running form hull bottom to cabin top panels, this feature called flk (full lifting keel) will allow the boat to sail with keel partially raised or to motor with keel totally up, a good option if you sail in shallow waters frequently., cockpit: was one of the strongest point in idea19, we simply keep the same arrangement and dimensions, so we have a really huge area for the crew and a simple and sturdy building in plywood panels epoxy glued on a structure of bulkheads and stringers., interiors: here i focussed on several upgrades; i decided to split the project in two versions (so two different sets of plans, you have to specify on order), “sport cruise” or “racing” ; both versions have 4 berths, a classic v berth on bow and two quarter berth after; in the cruising version cabin is 55 cm longer, giving wider interiors, enough room for a separate toilette and more comfortable after berths ; in the racing version we have a marine toilet (there’s room for a jabsco compact one) under the bow v-berth; cabin height is 1.65 m in both versions. interiors plywood panels are detailed on plans., taking advantage form the first season of sailing, i can now say that i strongly advice the cruise version as long as you are not going to run a sailing school, thus needing extra space in the cockpit., wooden rig: starting form summer 2019 we deliver two extra drawings with the plans, both for race and cruise version, describing how to build a wooden rig suited for this boat. keep your budget low at the price of a small extra weight , how to build the boat: we chose the plywood & epoxy resin “radius chine” system, as for petrel 28 and hirundo 750, so the hull planking is in okume marine grade plywood ; planking the hull is quite fast , and the internal structure of the boat is made by plywood bulkheads, floors and solid wood longitudinal stringers, all glued with epoxy and strengthened with epoxy laminated glass tape, assembled on a cheap wood scaffold, keeping the hull light, sturdy and quite easy to build for homebuilders ; the goal is to keep the total weight of the 19 footer, raising the ballast fraction of the sailboat at the same time. here are a couple of pictures of the first planked hull perfectly showing the radius chine planking system.
a HUGE Thanks to Nils Theurer ([email protected]) for the awesome pictures taken during the first sea trials

Plans availability: Plans are available in italian and english. Plans are available in imperial units upon request (send me a mail before purchase).
Boat Reviews
- Boats Specs
- Marine Pros
- Boat Insurance
- Boat Warranties
- Boat Transport
- Boat Towing
- Marine Forecasts

Your Ultimate Boating Resource

DIY Boat Building: 8 Tips and Tricks for Building Your Own Vessel
Do you dream of your custom-built boat, but the exorbitant expenses of skilled workmanship make you feel like a fish out of water? Don’t throw in the anchor just yet! Dive into the realm of DIY boat construction and surf the waves of creativity. You may sail away on a sailboat as unique as you are with a dash of carpentry abilities, a treasure trove of tools, and a sprinkling of patience. We’ve compiled a list of must-know boat-building tips and tactics to help you succeed. Prepare to make waves and convert your dream boat into a thrilling reality!
1. Choose Your Boat Type and Design Carefully
The first step in any DIY boat-building project is deciding what vessel you want to construct. There are many different types of boats to choose from, including sailboats, powerboats, canoes, kayaks, and rowboats. Consider your budget, building space, and intended use when narrowing your options.
Next, find a suitable design for your chosen boat type. There are numerous online resources, such as forums and blogs, where DIY boat builders share their experiences and advice on specific designs. You can also purchase boat plans or check out books from the library. Remember, a simple design is essential for a successful build, especially if you have limited experience.
2. Learn the Terminology and Construction Techniques
Before diving into your project, take the time to familiarize yourself with the common terms and techniques used in boat building. Many great resources are available, ranging from books and articles to online forums and videos. Understanding the terminology will make it easier to interpret plans and follow instructions.
3. Invest in Quality Tools and Materials
You must invest in high-quality tools and materials to build a sturdy, long-lasting boat. While it can be tempting to save money by purchasing cheaper alternatives, these products may compromise the structural integrity of your vessel.
Additionally, if you don’t already own them, consider investing in some essential boat-building tools, such as:
Epoxy and Fiberglass
4. Create a Suitable Working Space
Devote an area in your home or garage to your boat-building project. Make sure the space is large enough for your boat, plus additional room for tools, materials, and mobility. This dedicated workspace allows you to keep your materials organized and reduces the risk of accidents due to clutter.
5. Develop a Project Timeline
Before beginning construction on your boat, create a project timeline that outlines each phase of the building process. This timeline should include tasks such as gathering materials, cutting and assembling parts, and applying finishes. It will help you stay on track and can provide a visual reference for what needs to be done and when.
6. Take Safety Precautions
Safety should always be a top priority when working with tools and hazardous materials like epoxy and fiberglass. To ensure your safety, be sure to:
Wear safety glasses, gloves, and dust masks when necessary
Ventilate your work area to help minimize the risk of inhaling toxic substances
Keep all tools and chemicals out of children’s reach
Store flammable materials in a safe container and away from heat sources
7. Start with a Solid Foundation
A well-built boat starts with a sturdy foundation – the boat’s backbone. Be sure to mill your timbers, beams, and ribs correctly and double-check that they align accurately. If necessary, use molds, jigs, or temporary frames to ensure the boat remains symmetrical during the assembly process.
8. Don’t Be Afraid to Ask for Help
Boat building can be a complex and challenging endeavor, but don’t be afraid to reach out for help if you’re feeling overwhelmed. Online forums, local boat clubs, and fellow DIY enthusiasts can be great sources of advice and support throughout your project. Few things are more satisfying than the sense of community and camaraderie formed with fellow boatbuilders.
Create That Beautiful Vessel
DIY boat building can be an incredibly rewarding experience, providing you with a beautiful, custom-made vessel and a sense of accomplishment once completed. By taking the time to do thorough research, plan your project carefully, invest in quality tools and materials, and adhere to safety precautions, you’ll be well on your way to building the boat of your dreams. Happy boat building!
RELATED ARTICLES
Outboard motor maintenance: tips for keeping your engine in top shape, the essential boat tool kit: tools every boater needs, the art of miniature maritime craftsmanship: ship in a bottle, antifouling paints: a guide to keeping your boat shipshape, gelcoat repair guide: everything boat owners need to know, latest posts, overview of the 2024 sea-doo rxp-x 325, overview of the 2024 parker offshore 2900 cc, what your boat’s beam is and why it matters, power cats of 2024: ultimate guide to the top power catamarans this year, don't miss, our newsletter.
Get the latest boating tips, fishing resources and featured products in your email from BoatingWorld.com!
Navigating the Heat: 10 Safety Tips for a Safe Boat Ride in the Summer Heat
What type of wood is used for pier pilings, what is the difference between a dock and a floating pier, what is the proper technique for pulling a beginner wakeboarder, what does ‘no wake’ mean on a lake, what is the difference between wash and wake, highs, lows, and tidal know-how: a deep dive into ocean currents, 10 essential tips for fishing near private property, the benefits of using a drift sock: guidance for anglers, lure fishing: secrets for imitating live bait and attracting fish, explore the untapped depths of america’s best bass fishing spots, beginner’s guide to standup paddle boarding: tips and techniques, boating for fitness: how to stay active on the water, kayak safety: how to stay safe on the water, anchoring in a kayak or canoe: how to secure your small boat, overview of the 2024 yamaha 252sd, overview of the 2024 tiara yachts 48 le, overview of the 2024 bass cat jaguar sts, 2024 pursuit os 445: an overview, 2024 aquila 47 molokai review, 2024 sea-doo switch 13 sport review, gear reviews, megabass oneten max lbo jerkbait review, fortress anchors fx-7 anchoring system review, fortress anchors fx-11 anchoring system review, fortress anchors commando anchor kit review, fortress anchors aluminum anchors review, stay in touch.
To be updated with all the latest news, offers and special announcements.
- Privacy Policy

- No products in the cart.
Build your own sail boat with Hartley Boat Plans. Hartley sail boats are the benchmark in reliable and sea worthy trailer sailers, in fact the name trailer sailer was coined by these amazing craft. Many of these build plans also have a printed study pack available to help you through your project.

Cape Bay 45
Cape Otway 37
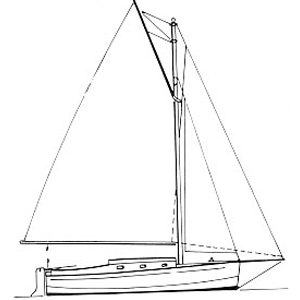
Chuckles 18

Dateline 51
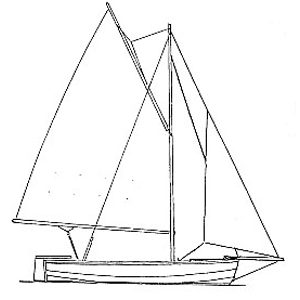
Eastcoaster 16
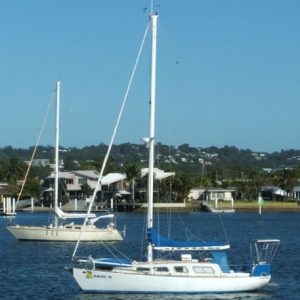
Easthaven 34

Hartley 16ft (5m) Trailer Sailer
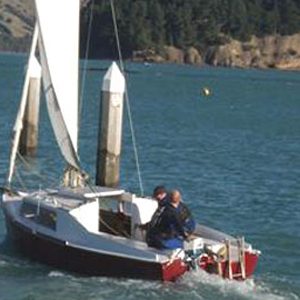
Hartley 30 (Plywood Version)

Hartley 30 (Steel Version)
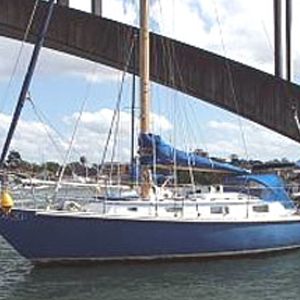
Royal Suva 52

Samson ‘C-Baron’ 55

Samson ‘C-Breeze’ 45

Samson ‘C-Deuce’ 45

Samson ‘C-Fever’ 62

Samson ‘C-Lord’ 53
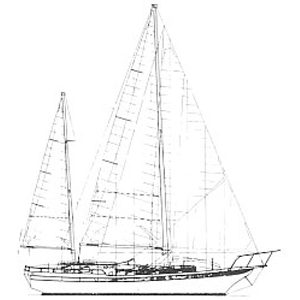
Samson ‘C-Quence’ 36

Samson ‘C-Witch’ 63
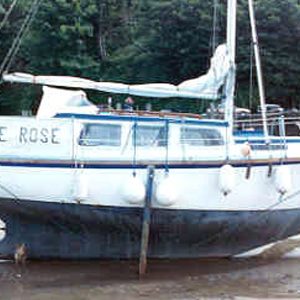
Tahitian 27
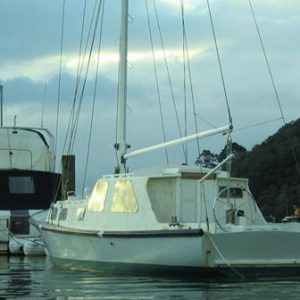
Tahitian 33
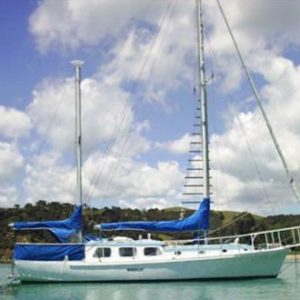
Tahitian 38

Tahitian 45-50
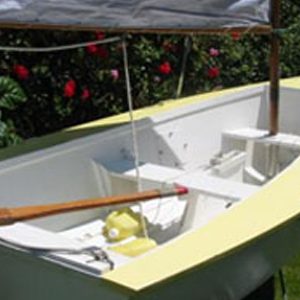
Westhaven 32
DIY Boat Building Plans
Sailing Boat Plans & Blueprints
Download over 500 Boat Plans. Click on the link below.
-->click here<--.
Table of Contents
Overview of Sailing Boat Plans & Blueprints
Sailing boat plans and blueprints are essential tools for anyone looking to build their own sailing boat . These plans provide detailed instructions and diagrams that guide builders through the entire construction process. They outline the design, dimensions, and specifications of the boat, ensuring that every component is built to the correct measurements. Having a plan before building a sailing boat is crucial as it helps avoid costly mistakes and ensures that the final product meets the builder’s expectations.
Key Takeaways
- Choosing the right sailing boat plan is crucial for a successful build.
- There are various types of sailing boat plans and blueprints available to choose from.
- Understanding the key components of a sailing boat plan is important for accurate interpretation.
- Customizing sailing boat plans can help meet specific needs and preferences.
- Building your own sailing boat can be a rewarding experience with many benefits.

The Importance of Choosing the Right Sailing Boat Plan
Choosing the right sailing boat plan is of utmost importance as it can make or break the building process. Opting for the wrong plan can lead to numerous problems, such as mismatched components, structural weaknesses, or even an unseaworthy vessel. It is essential to consider factors such as skill level and intended use when selecting a plan. Novice builders may want to start with simpler designs that require less technical expertise, while experienced builders may be more inclined to tackle complex custom plans. Additionally, considering the intended use of the boat is crucial as different designs excel in various sailing conditions.
Types of Sailing Boat Plans and Blueprints Available
There are several types of sailing boat plans and blueprints available to suit different needs and preferences. Stock plans are pre-designed templates that can be purchased from professional designers or online platforms. These plans offer a range of designs suitable for various skill levels and budgets. Custom plans, on the other hand, are tailored specifically to an individual’s requirements. They allow for greater customization but often require more expertise and can be more expensive. DIY plans are another option for those who prefer a hands-on approach. These plans provide detailed instructions for building a boat from scratch, allowing builders to have complete control over every aspect of the construction process.
Understanding the Key Components of a Sailing Boat Plan
| Component | Description |
|---|---|
| The main body of the boat that sits in the water and provides buoyancy and stability. | |
| Keel | A heavy fin or bulb that extends below the hull to provide stability and prevent sideways drift. |
| Rudder | A flat, vertical blade at the stern of the boat that is used to steer the boat. |
| Sails | The fabric sheets that are attached to the mast and boom to catch the wind and propel the boat forward. |
| Mast | A tall, vertical pole that supports the sails and provides leverage for steering. |
| Boom | A horizontal pole that extends from the mast and holds the bottom of the sails in place. |
| Lines | The ropes or cables that are used to control the sails, rudder, and other parts of the boat. |
| Winches | Mechanical devices used to control the lines and adjust the sails. |
A sailing boat plan consists of several key components that are essential for understanding the construction process. The hull design is one of the most critical aspects as it determines the boat’s stability, speed, and handling characteristics. Rigging refers to the system of ropes, wires, and hardware used to control the sails and mast. A well-designed rigging plan ensures efficient sail handling and maneuverability. The sail plan outlines the size, shape, and configuration of the sails, which directly affects the boat’s performance under different wind conditions. Understanding each component is vital as it allows builders to make informed decisions during the construction process.
How to Read and Interpret Sailing Boat Blueprints
Reading and interpreting sailing boat blueprints can be daunting for beginners due to the technical language and symbols used. However, with some guidance, it becomes easier to understand these complex documents. One tip is to familiarize oneself with the technical terms commonly used in boat building . This can be done through online resources or by consulting professionals in the field. Additionally, learning to recognize common symbols and abbreviations used in blueprints is crucial for understanding the design intent. Taking the time to study and interpret blueprints accurately will ensure that builders can follow instructions correctly and avoid costly mistakes.
Factors to Consider When Choosing a Sailing Boat Plan
When choosing a sailing boat plan, several factors should be taken into consideration. Budget is an important consideration as it determines the type of plan that can be pursued. Custom plans tend to be more expensive than stock plans, so builders must assess their financial capabilities before making a decision. Skill level is another crucial factor as certain designs may require more expertise than others. It is essential to choose a plan that aligns with one’s skill set to ensure a successful build. Lastly, considering the intended use of the boat is vital as different designs excel in various sailing conditions. Researching and evaluating these factors before selecting a plan will help builders make an informed decision.
Tips for Customizing Sailing Boat Plans to Meet Your Needs
While stock plans and custom plans offer a range of options, builders may still want to make modifications to suit their specific needs or preferences. When customizing a sailing boat plan, it is important to start with a solid foundation. Making minor modifications, such as adjusting the interior layout or adding extra storage, can usually be done without major consequences. However, if considering significant changes to the hull design or rigging, it is advisable to consult with a professional designer or naval architect. They can provide guidance and ensure that the modifications do not compromise the boat’s structural integrity or performance.
Where to Find High-Quality Sailing Boat Plans and Blueprints
Finding high-quality sailing boat plans and blueprints is crucial for a successful build. There are several sources available, including online platforms, boat shows, and professional designers. Online platforms offer a wide range of plans from various designers, allowing builders to compare options and find the most suitable plan for their needs. Boat shows provide an opportunity to meet designers in person and discuss specific requirements. Professional designers are another excellent source as they can create custom plans tailored to individual preferences and provide expert advice throughout the building process. It is essential to choose a reputable source to ensure the quality and accuracy of the plans.
The Benefits of Building Your Own Sailing Boat
Building your own sailing boat offers numerous benefits that make the endeavor worthwhile. One significant advantage is cost savings. Building a boat yourself can be more affordable than purchasing a pre-built vessel, especially if you opt for stock plans or DIY plans. Additionally, building your own boat allows for customization. You have the freedom to choose the design, materials , and finishes that best suit your preferences. This level of personalization ensures that the final product is tailored to your specific needs and desires. Lastly, building a sailing boat provides a sense of accomplishment and pride. The process requires dedication, patience, and skill, and completing such a project can be incredibly rewarding.
Common Mistakes to Avoid When Building a Sailing Boat
While building a sailing boat can be a fulfilling experience, there are common mistakes that builders should be aware of and avoid. One common mistake is rushing the construction process. Building a boat requires careful attention to detail, and rushing can lead to errors that may compromise the boat’s integrity. Another mistake is neglecting proper planning and research. It is crucial to thoroughly understand the chosen plan and gather all necessary materials before starting the build. Additionally, overlooking safety precautions can have serious consequences. It is essential to prioritize safety throughout the construction process to ensure a safe and seaworthy vessel.
Conclusion – Sailing Boat Plans & Blueprints
In conclusion, sailing boat plans and blueprints are essential tools for anyone looking to build their own sailing boat. They provide detailed instructions and diagrams that guide builders through the construction process, ensuring that every component is built correctly.
Choosing the right plan is crucial as it can make or break the building process. Considering factors such as skill level and intended use is important when selecting a plan. Understanding the key components of a sailing boat plan, as well as learning how to read and interpret blueprints, is vital for successful construction. Customizing plans to meet specific needs should be done with caution, and consulting professionals is advisable for major modifications.
Finding high-quality plans from reputable sources is essential for a successful build. Building your own sailing boat offers numerous benefits, including cost savings, customization options, and a sense of accomplishment. However, it is important to avoid common mistakes such as rushing the construction process or neglecting safety precautions.
By carefully considering these factors and following best practices, builders can embark on a rewarding journey of constructing their own sailing boat.
FAQs – Sailing Boat Plans & Blueprints
What are sailing boat plans and blueprints.
Sailing boat plans and blueprints are detailed diagrams and instructions that guide boat builders in constructing a sailing boat. They include information on the boat’s dimensions, materials, and construction techniques.

Why do I need sailing boat plans and blueprints?
Sailing boat plans and blueprints are essential for anyone who wants to build a sailing boat. They provide a step-by-step guide to building a boat, ensuring that the finished product is safe, seaworthy, and meets all necessary regulations.
Where can I find sailing boat plans and blueprints?
Sailing boat plans and blueprints can be found online, in books, and from boat designers and builders. It’s important to choose plans from a reputable source to ensure that they are accurate and reliable.
What should I look for in sailing boat plans and blueprints?
When choosing sailing boat plans and blueprints, look for plans that are detailed, easy to follow, and include information on materials, tools, and construction techniques. It’s also important to choose plans that are appropriate for your skill level and the type of boat you want to build.
Can I modify sailing boat plans and blueprints?
Yes, sailing boat plans and blueprints can be modified to suit your needs and preferences. However, it’s important to ensure that any modifications you make do not compromise the safety or seaworthiness of the boat.
How long does it take to build a sailing boat using plans and blueprints?
The time it takes to build a sailing boat using plans and blueprints depends on the size and complexity of the boat, as well as your skill level and the amount of time you can dedicate to the project. It can take anywhere from a few months to several years to complete a sailing boat build.
Written by DIY Boat Building Plans

How To Build an Aluminum Boat

Aluminum Boat Maintenance Tips
Practical Boat Owner
- Digital edition

Build a boat from a kit
- Ben Meakins
- February 19, 2015
There’s a great way to own a new boat on a budget – build it yourself. You could create a unique cruising yacht to be proud of and save yourself hundreds, even thousands of pounds into the bargain, explains Ben Meakins

In the late 1960s noted author and yacht designer Maurice Griffiths wrote: ‘There is nothing like sailing the boat you have constructed with your own hands, whose every timber, screw, bolt and fastening you know intimately.’ Take a look at the pages of any early copy of PBO and you’ll find it filled with adverts for kits for home building. But times have changed.
The advent of relatively cheap, mass-produced boats, the increased size of the average yacht and, to a lesser extent, the limitations of the EU’s Recreational Craft Directive, which states that if you build a kit boat you cannot sell it on for five years, have slowed the home building flood to a mere trickle. But building a boat you can truly call your own still can’t be beaten – and there are plenty of ways of going about it.
Motivation But why bother when it’s easier to buy a boat ready made? Well, for a start, it’ll save you money – and you’ll end up with a boat that’s worth far more than the kit that it came from. Then there’s the feeling of satisfaction you’ll get from sailing a boat you’ve built yourself. If you’ve been involved in the process from start to finish, you’ll have a boat tailored perfectly to your needs.
How long will it take? You skills and spare time will influence how long a project takes to complete. On balance, it’s fair to expect to finish a small pocket cruiser within 1-2 years, working on it part time. Two owners we spoke to provide a useful contrast, taking six months and nearly six years respectively – but it all depends on time pressures and the amount of modifications and custom-building that you put in.
Do you have space? The biggest limitation to building any boat is space. It may sound obvious, but there’s many a story of a proud amateur boatbuilder realising with dismay that he’ll have to remove large bits of masonry from his house if his shiny new boat is ever going to see the water. A garage, barn or lock-up is best for the UK’s inclement weather, and will ensure the best possible conditions for your build. If you can’t manage that, a large tent will suffice.
What skills are needed? It depends on the boat you choose. Most kit boats we’ll look at use the ‘stitch and glue’ technique, where plywood panels are held together by temporary ‘stitches’, or ties, while they are glued and glassfibred together. Phil Smith of Fyne Boat Kits says: ‘If someone can follow instructions and read a manual and have the time and inclination to study a set of plans then they should consider a build.’ If you’re in doubt, it’s a good idea to build a small dinghy first, to get an idea of the skills required. You can even use the small boat as a tender to your larger boat.
‘They say you should build your first boat second,’ says one owner. ‘That way you’ll get the boat you want and have the skills to make a good job of it!’ One major advantage to building a boat from a kit, as opposed to from a set of plans, is that the building methods will have been carefully thought through for home builders. Ray Anderson was a boatbuilding novice when he started to build his Swallow Boats Storm 17. ‘The hardest part of building my boat was getting confident in using epoxy well, but luckily it was all covered in the manual.’ he says. ‘The fit of the parts was excellent and the satisfaction as you move forward through the build is incredible.’
What’s available? Some companies will create a kit for you from a set of plans. Selway Fisher and Iain Oughtred have a number of designs listed on their websites from which Jordan Boats will build a kit. Fyne Boat Kits sell a number of their own and others’ designs in kit form, and Whisper Boats sell a range of kits designed and built in Australia – and the kits include everything from hardwood trim to screws.
Alternatively, you can buy a bare GRP hull moulding from a company like Lauren Marine of Southampton, which has recently started selling the hulls of Hunter Boats for home completion.
Go to it, then There’s no doubt that building your own boat is a challenge, but, in the words of Maurice Griffiths: ‘Go to it, then, and may the winds be fair for the little ship you will build.’
JORDAN BOATS
Jordan Boats will produce a kit from any set of plans with copyright permission, supplying you with all the plywood panels precision pre-cut. They are already tooled up to produce the kits for a number of Iain Oughtred, Selway Fisher and Dudley Dix rowing boats, dayboats and small cruisers, as well as a variety of craft from the pens of other designers. We asked three customers about their chosen boats.
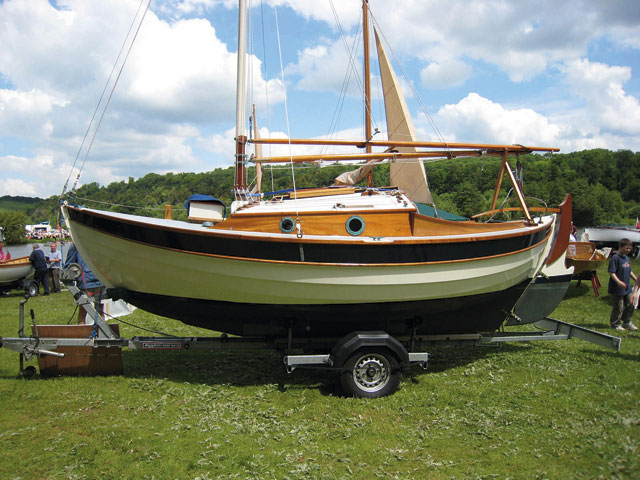
The Iain Oughtred-designed Wee Seal has plenty of character
Retired from the financial services sector, Gordon Simpson is excited about his project. ‘She’s finally beginning to look like a boat,’ he says. ‘I’m one plank away from finishing the hull!’ Gordon started building his 18ft (5.48m) clinker-planked, gunter-rigged Wee Seal a year ago. ‘My neighbour had recently built a rowing skiff, and I thought it looked like a great idea. I built an Iain Oughtred-designed clinker rowing boat first. I then started looking for an open boat, but my wife wanted something we could sleep on – so we settled on the Wee Seal. I wanted something with character, and she fits the bill.’ Gordon’s kit included a full set of cut plywood parts, but the solid wood – the keel, trim and framework – was down to him. ‘Having the ply ready cut on a CNC router made everything much easier for a first attempt, as it was so accurate,’ says Gordon. ‘If you’re willing to put the time and effort in, boatbuilding’s a great hobby to have!’ he continues. ‘The plans reckon it’ll take around 1,000 hours to build – and I hope to have her sailing by next summer.’
Price: £2,685. Kit includes all plywood parts and MDF moulds. Total cost will be around five times this price, for additional timber, glues, paint, fixings and rope.
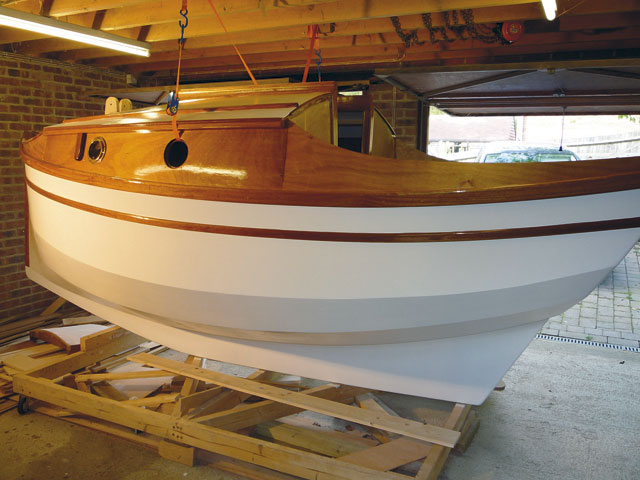
‘Too enjoyable to rush’ – this Tideway 14 is a classic pocket cruiser
Graphic designer Graham Young started building his Selway-Fisher Tideway 14 pocket cruiser three-and-a-half years ago. ‘It’s been so enjoyable I haven’t rushed it!’ he says. ‘The thing I’ve enjoyed most is that there’s no time limit – unlike DIY around the house, when everything’s in a rush, I’ve been able to take my time. But I reckon three more months should see it through.’ Graham was disappointed he could find no DVD guides to building boats – so took some time off from his build to film one with Alec Jordan of Jordan Boats (see panel, page 51). Graham has just finished painting the hull and is now moving onto the rudder and rig. ‘It’s been quite a challenge,’ he says, ‘but definitely worth it. I would advise not starting too big – if you’re not sure what you’re doing, start with something small, learn the tricks and work up.’ Working from a kit also helps. ‘Having all the pieces pre-cut gave me a great kickstart,’ he says.
Price: £1,768. Kit includes all plywood parts for the boat. Total cost will be around five times this price, for all the additional timber, glues, paint, fixings, sails and rope.
Cape Henry 21

Gary Wallis finished his Cape Henry 21 gaffer in under a year
The Cape Henry 21 was developed from the well-known and successful GRP-built Cape Cutter 19. With a similar look to the Cornish Crabber, it was designed by South African designer Dudley Dix. Gary Wallis liked the look of the Cape Cutter and had built aeroplanes before he started his Cape Henry, which he built in just under a year. ‘I had to take my (now) wife to Las Vegas and marry her to keep her off my back,’ he laughs, ‘but I worked every evening until 8 and all my weekends until I’d finished.’ He says he’d highly recommend building from a kit. ‘Having the plywood panels precision pre-cut made everything so much more accurate, and improves the finished boat no end.’ Jordan Boats are also ready to tool up the plans for two more Dix designs, the Mini Didi, a Mini Transat racer, and the Dix 28, a sporty cruiser-racer.
Price: £2,536. Kit includes all plywood parts. Total cost will be around five times this price, for additional timber, glues, paint, fixings and rope.
WHISPER BOATS
If you ever built one of those wooden dinosaur skeletons as a child, you’ll know exactly how these clever kits go together. The frames, bulkheads, shelves and seats are connected to the keel and to each other by a series of precision pre-cut slots and tabs which interlock to form a rigid skeleton on a ready-made, lead-filled keel. Whisper’s kits are made by Scruffie boats in Australia, and according to Max Campbell, the UK importer, are unique. ‘We include everything down to the last bit of hardwood trim and laminated frame,’ he told PBO. ‘It’s the provision of these machined or laminated parts that makes the difference between a real kit and just having plywood sheets cut to suit plans.’ Whisper reckon it should take only three months working full-time on the build.

Chris Nunn built his Stornaway Weekender in just six months
Chris Nunn pulled out all the stops and built his 18ft (5.48m) Stornaway weekender in six months after he retired and moved to Bridport in Dorset. ‘Mooring charges were becoming extortionate,’ he says, ‘so we wanted something that would fit on the driveway. It all went to plan, I just threw it all together and in six months she was ready to sail.’ In common with all the Scruffie boats, the frame comes ready cut and ready to be assembled quickly and easily. ‘Everything came in the kit, even all the screws, so it was just a case of getting on and building it!’
Price: £8,953 complete kit
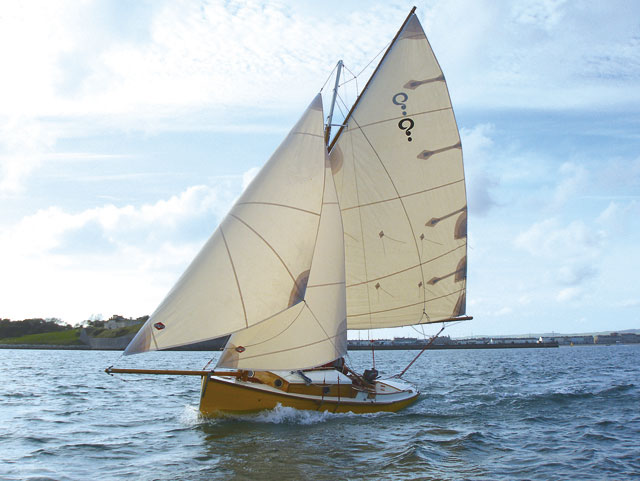
The Secret is Whisper’s best-selling model, and is a fast and capable boat
The 20ft (6.09m) Secret, described as halfway between an Essex Smack and a Sydney Harbour 18 footer, is Whisper’s most popular model. Max Campbell built one himself. ‘I was looking for a trailer-sailer to self-build, because I wanted control over the design and specification, but didn’t want the depreciation inevitable in buying a new finished boat,’ he explained. ‘My wife and I bought several sets of plans for other boats but always found a fatal flaw in their design – too ugly, or heavy, or wide, and then we came across the Secret, which fitted our bill perfectly.’ It only took a couple of weeks’ work to realise that the kit had taken most of the worry out of the build process, while leaving the satisfying building, and it still gave them plenty of scope for customisation. ‘From the first day there was no doubt that we were going to end up with a good, strong boat, and every day in the boat shed added significantly to what we’d done before. ‘The only woodwork I’d done before was building a model plane, and the process here was remarkably similar. Epoxy makes the whole process very forgiving – joints don’t lose either their strength or aesthetics if cut less than perfectly. ‘We were also grateful for the machined hardwood and laminated parts, because I don’t have a fully equipped workshop. We probably took about 1,500 hours, maybe more, and it did take longer than we’d envisaged, but in the end that didn’t matter because we enjoyed most of the actual building process, though fairing and painting did seem to go on for a long time!’
Price: £12,636 complete kit

This Scintilla has taken nearly five years to build, and is beautifully made
John Arter has been building his 24ft (7.31m) Scintilla gaffer in evenings and at weekends for five years. ‘The great thing about the kit is that it gives you a basic boat which you can personalise as much or as little as you like – I’ve put a lot of work in!’ he says. ‘I wanted a coastal cruiser, and the Scintilla has a wide hatch – so with a good awning over the cockpit, she’ll have standing headroom.’
Price: £12,352 complete kit
Contact: Whisper Boats, www.whisperboats.co.uk
FYNE BOAT KITS
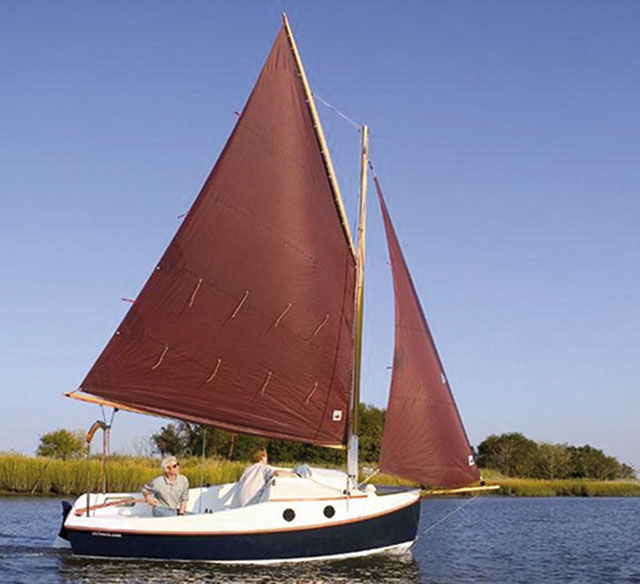
The Pocket Ship: seated headroom below and a good turn of speed
Long-established Cumbrian company Fyne Boat Kits’ newest design is for the Pocket Ship, a 14ft 10in (4.52m) gaff-rigged cruiser with two berths down below and seated headroom. The kit includes all panels, and the holes for the ties are already cut. ‘She’s a fast-sailing pocket cruiser with a dry and commodious interior. It had to be quick and easy to build or the project would never get finished, so stitch-and-glue plywood construction was a given from the start. The panels are supplied ready-cut and with all ‘tie’ holes pre-drilled. The cockpit was laid out for day-sailing comfort and is large enough for sleeping on warm nights,’ explains Phil Smith.
Price: expected to be around £3,000
Contact: Fyne Boat Kits, www.fyneboatkits.com
SWALLOW BOATS
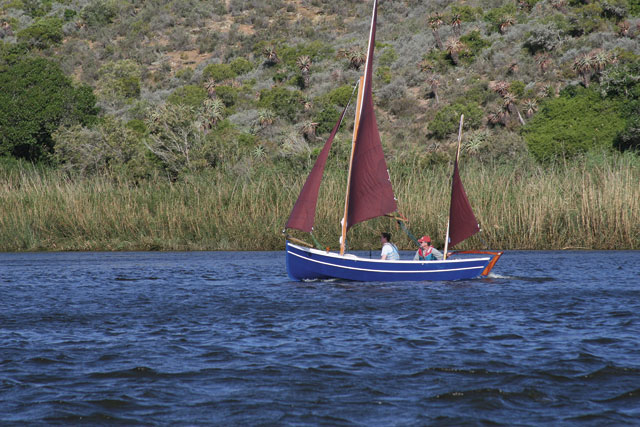
A daysailer like this Storm 17 makes a good, simple first project
Swallow Boats make a few small cuddy/cabin cruisers, such as the BayRaider (PBO February 2009), and will be releasing a kit version of the BayCruiser shortly. At present only their smaller models up to 17ft (5.18m) are available in kit form – and the Storm 17 open dayboat has found a loyal following. Ray Anderson got a kit shipped to South Africa. ‘When the idea to build a sailing boat got into my head I searched the internet for a suitable ‘old world’ type boat and eventually came across Swallow Boats,’ he says. ‘I fell in love with the looks of the Storm 17 and that was that. A lot of designs are all too much traditional building and I was put off. I wanted something that I could imagine building in a year or so. The Storm 17 has a low parts count and you have a lovely shape in a few weeks – you can pretend it’s almost finished! ‘It has been a fantastic project and totally satisfying. Every time I look at it I’m amazed at what started out as a few pieces of plywood.’ Price: £4,128 – everything included except paint and oars.
Contact: Swallow Boats, www.swallowboats.co.uk
Boatbuilding guides on DVD

This feature was originally published in PBO in 2009.
This Is the Easiest DIY Boat-Building Method We’ve Ever Seen
And the guy who discovered it is sharing all of his secrets.
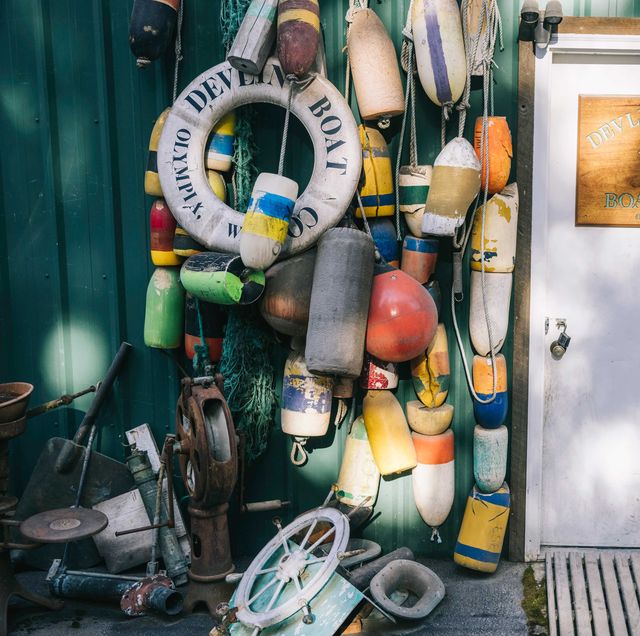
In the summer of 1974, Sam Devlin was working on a tugboat in Alaska when he read the first issue of Wooden Boat Magazine . He was immediately entranced. “I couldn’t shake the image of that wooden boat from my head,” Devlin says. “I can even see it today, almost five decades later.” Devlin had loved boats from a young age and had worked on fiberglass boats in the past, but the process lacked creativity, he says, and didn’t challenge him. This wooden boat, though, was something different.
A natural craftsman, Devlin believed wooden boatbuilding was a career he could be proud of. He leaned into the idea of making vessels that were both beautiful and functional—something that would last. Physical labor suited his strong, tall frame. And as a child of the ’60s, someone who came of age post-Vietnam, he felt the freedom to draw his own roadmap and forgo a traditional career.
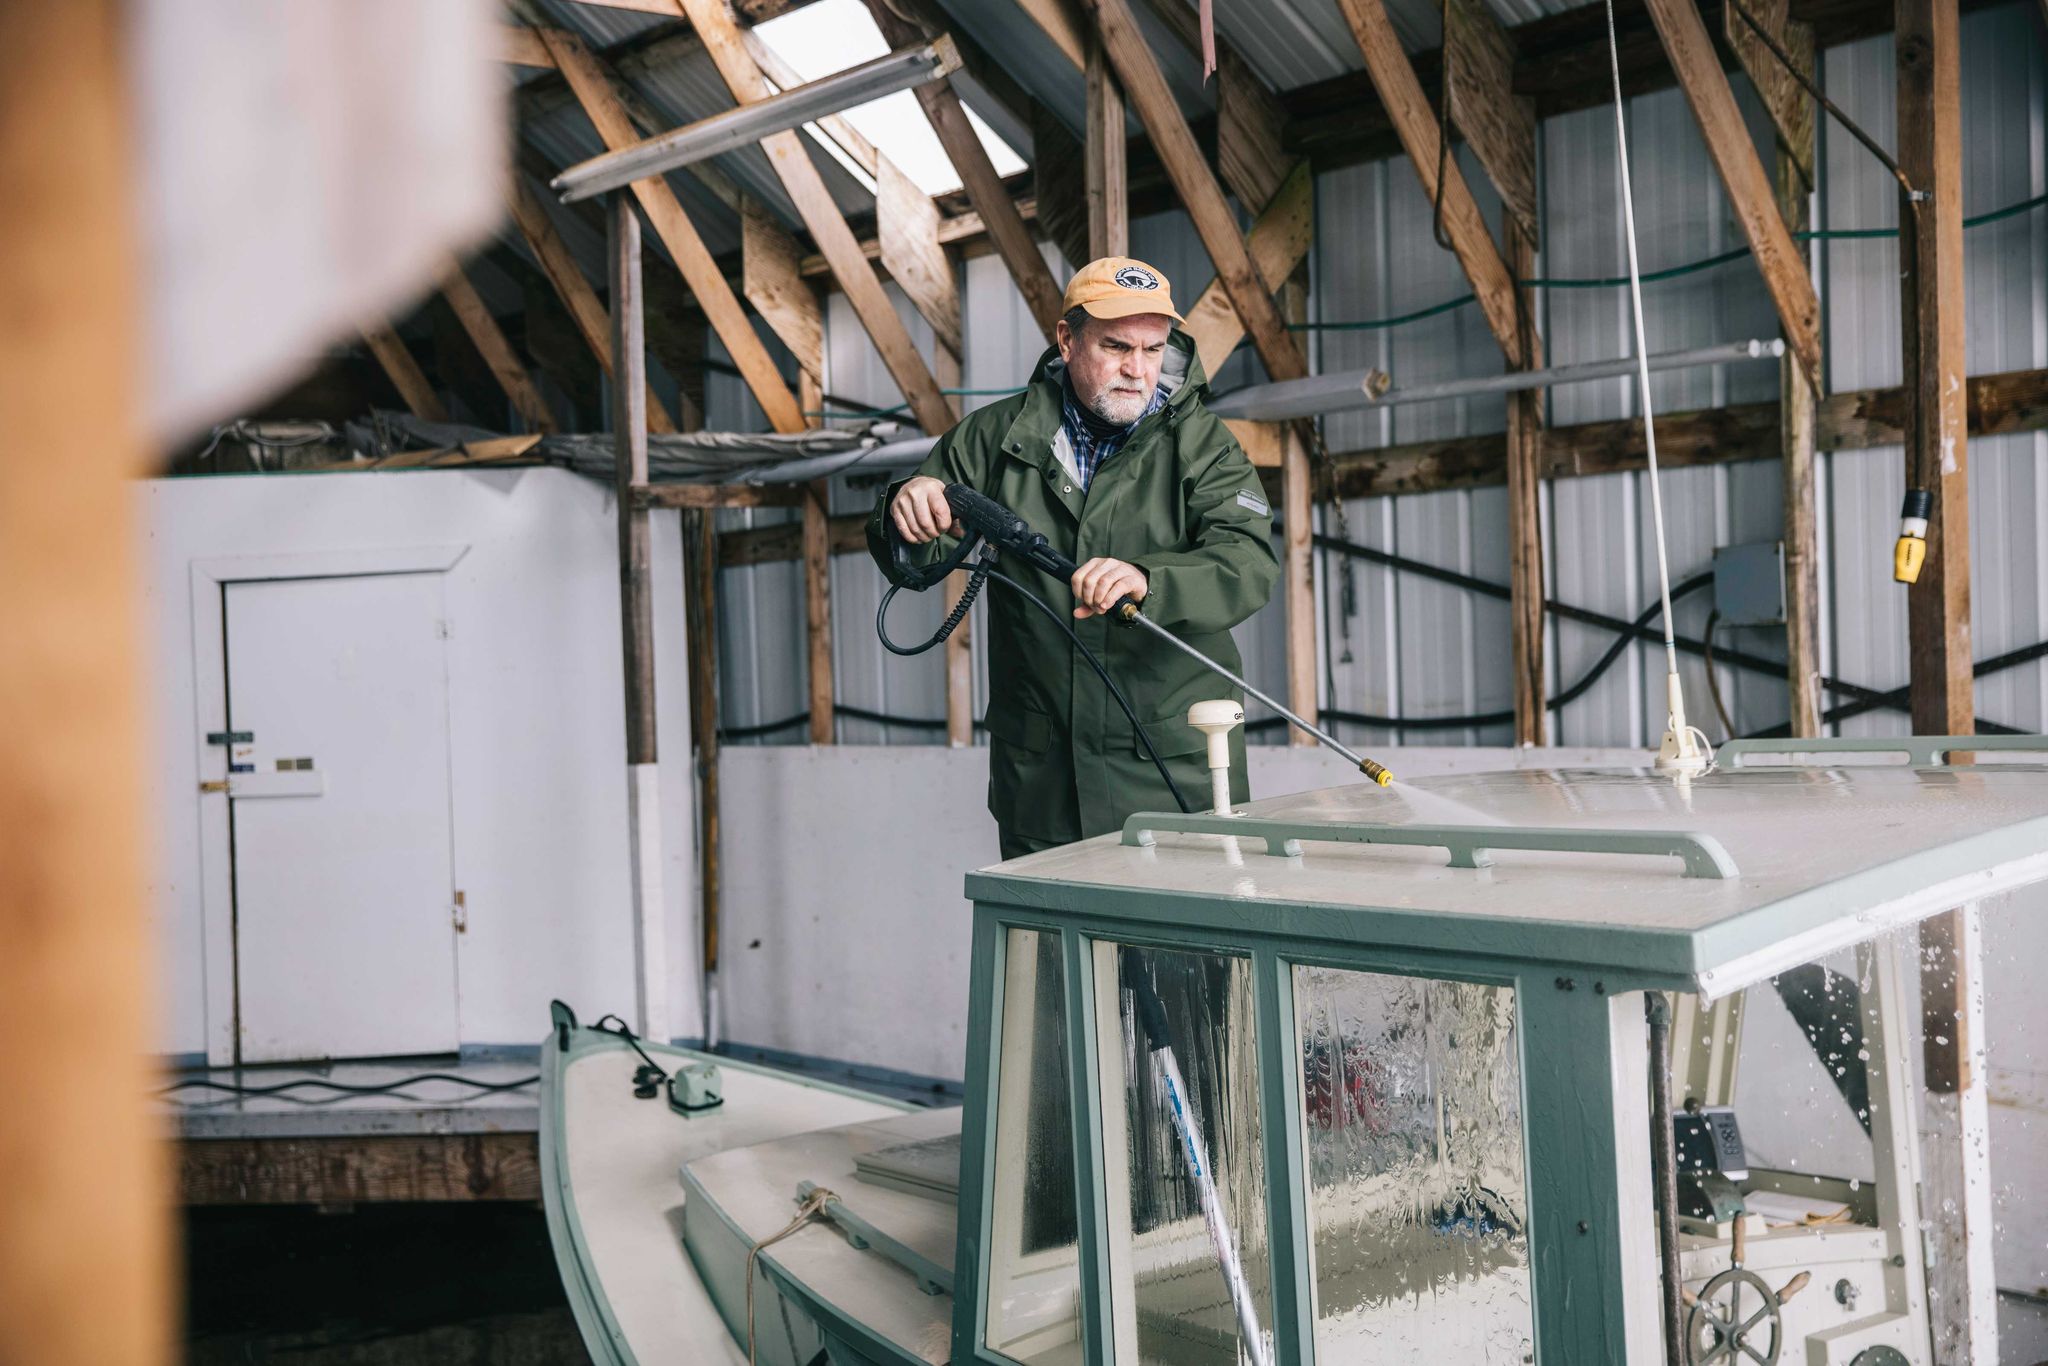
However, the wooden boat revival had just begun, and very few builders were sharing their processes. Devlin had to come up with his own from scratch. Starting in 1977 with hand drawings and small, to-scale models, Devlin created hull shapes that looked viable for small sail and motorboats. But one part stumped him: how to fuse the panels together.
Nevertheless, he forged ahead. “My dad agreed to buy the materials if I would build him a boat,” he says. Cutting the hull panels was the easy part. But they needed a method to attach them together. “We looked around the shop and saw baling wire and pliers, and two hours later we had the boat stitched together and looking like the shape we wanted. That was the eureka moment,” Devlin says. He had stumbled upon the stitch-and-glue method.
The stitch-and-glue method is a simple boat building technique popularized in the 1960s that creates a solid, one-piece hull, unlike most other wooden boats, which start with frames and bulkheads and build the hull on top. Using marine plywood panels stitched together with electric fence wire and sealed with epoxy resin, the process eliminates the need for frames or ribs, making it a simpler, faster construction. Stitch-and-glue doesn’t require expensive molds like fiberglass, and can be maintained over the long term, perfect for DIY builders.
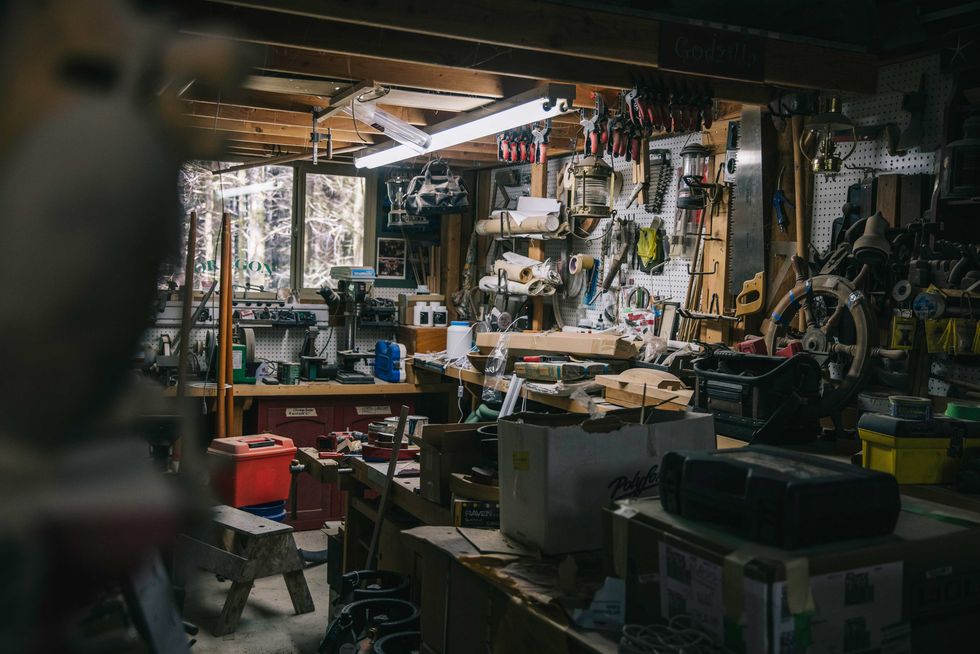
Devlin and his father continued to tinker with the shape and construction of their boat. A few days later they had a functional skiff. It wasn’t perfect, but it showed the stitch-and-glue process was more than viable—it had clear advantages over other boatbuilding methods.
Stitch and glue, generally speaking, has a remarkable ability to adapt. Without high tooling costs like most other boatbuilding mediums, it’s more accessible to more builders, which makes for rapid idea evolution and pervasion about the method. “With low barriers to entry from an experience side, we learned a lot quickly,” Devlin says. They learned that if they cheated on the grade of plywood, they would be sacrificing the integrity of the whole boat. They learned to use epoxy resins because they would seal stronger than more popular polyester resins. And moreover, they learned the process, the best order of operations, and how unique it was to quickly go from an idea to an actual, working boat.
Less than a year after finishing his first boat, Devlin embraced boatbuilding as a full-fledged career. Research led him to builders making small boats in England and New Zealand that used a method similar to the one he had devised with his dad, but not at the same scale or complexity he envisioned.
From there, he focused on improving the process. “We needed to nurture the method, testing the parameters and not constraining it with patents,” Devlin says. “My goal from the beginning was to proliferate the knowledge as much as possible and keep persisting and developing my own skills as a designer and builder.
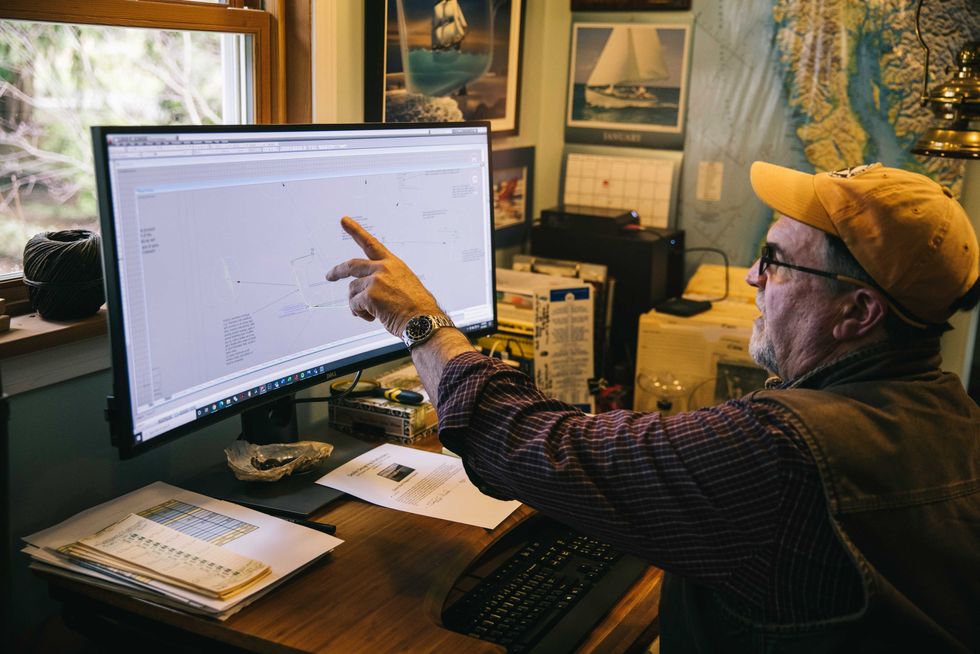
“Most people didn’t see the potential for boats over 15 or 20 feet with stitch-and-glue, but I didn’t believe in that limitation. I hung my boatbuilding shingle on the door of my shop at the time in Eugene, Oregon, and I got my business started in 1978 with 25- and 30-foot boats.” Devlin’s business has grown since then, adding members to his team, expanding his shop, and refining his process. Today he works on a variety of wooden boats, and currently is putting the finishing touches on a 40-foot ocean-going catamaran.
The biggest advancement in the stitch-and-glue method in the past decades has been computers replacing hand drawings. Using 3D modeling and CNC machines to cut out shapes, the panels of the boat are more accurate and easier to work with during assembly. This also allows boat designers like Devlin to ship kits to home builders with precut panels to assemble using their own tools.
In 2012 Devlin received the Lifetime Achievement in Boatbuilding and Design award by the Wooden Boat Foundation and Wooden Boat Magazine , after designing and building over 400 boats (ranging from 7 to 65 feet) with the stitch and glue method, which he helped improve and bring to the mainstream. To this day Devlin is still building boats, from his facility in Olympia, Washington. Here are his tips for making your own.
25 Steps to Building Your Own Stitch-and-Glue Boat
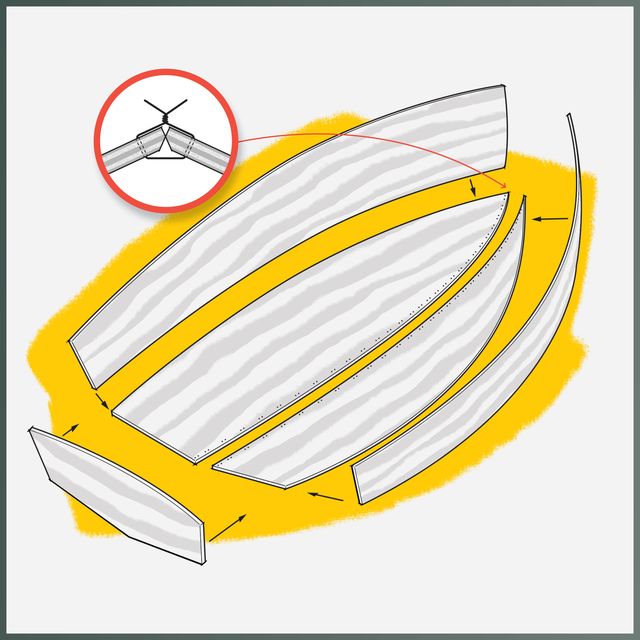
1. | Procure a set of plans, or scaled drawings of what you’re going to create. Devlin creates plans for hundreds of DIYers, detailing the peel shapes and all the materials you’ll need.
2 | If your boat is longer than 8 feet, edge-join the marine plywood panels end to end (called scarfing). If using a kit, the kit manufacturer will provide wave-to-keyhole type indexing to the ends of the panels that will help allow them to be joined.
3 | If you have a CNC router, use it to cut the panels to size (there are usually 5 to 8 for a small, simple boat). Skip to step 14.
4 | If you don’t have access to a CNC router, draw lines across the width of the panel at right angles to the long edge of the plywood, 1 foot apart.
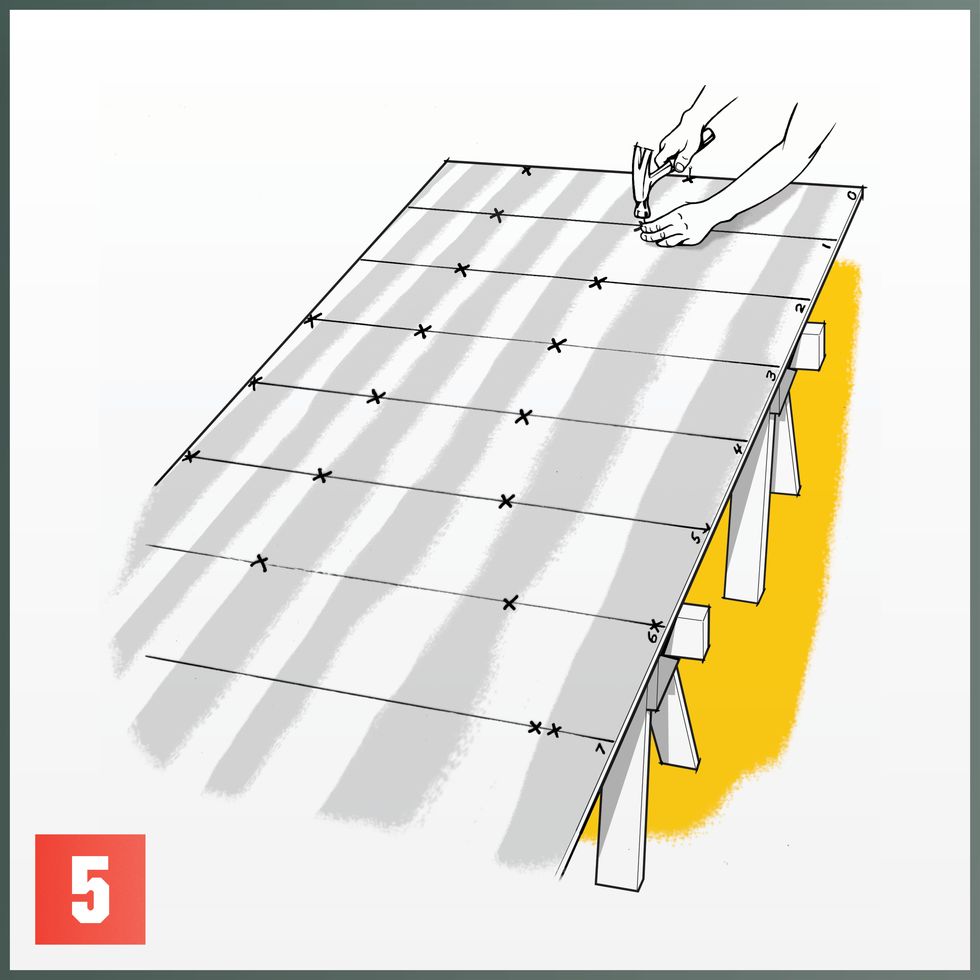
5 | Make marks at the bisects at each line, as shown on the plans, then hammer small brad-type nails (“fence posts”) partially into the plywood at each of those intersections.
6 | Draw smooth curves between these fence posts using a flexible wooden batten to span smoothly between each of the fence posts. When complete, remove the nails.
7 | Saw the panels out, leaving about 1/8 inch extra plywood overhang so you can see the line you drew.
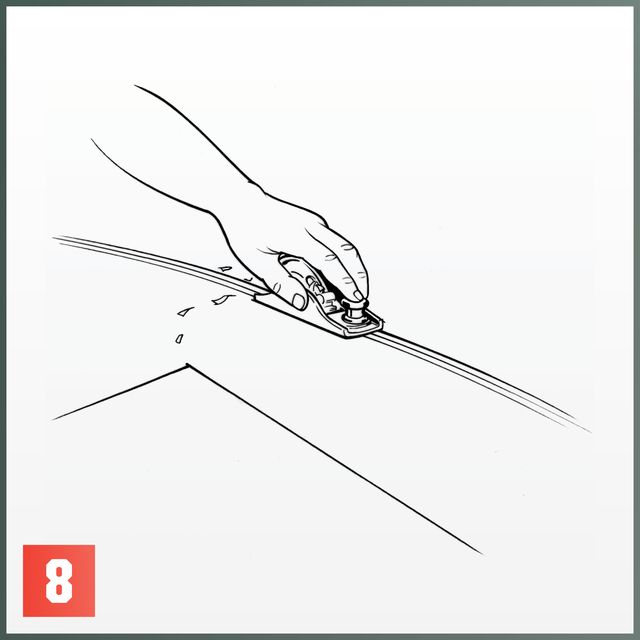
8 | Take both pieces and use a block plane to even them out so they’re symmetrical, smoothing the cutting lines out to the pencil line marks made previously.
9 | Do this for all of the panels of the boat, which together will make up the entire hull.
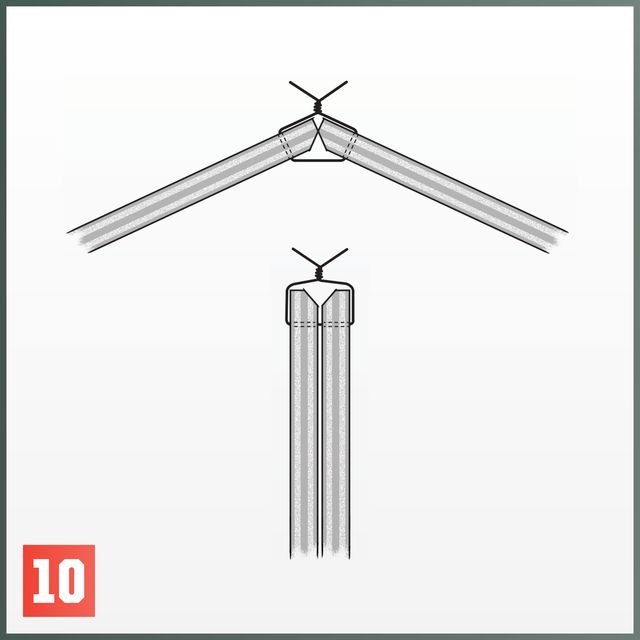
10 | Use a block plane to knock 45-degree bevels on half the thickness of the panel, on the inside surfaces (where it will mate with another panel).
11 | Scribe a stitch line, usually the thickness of the plywood plus 1/8 inch, and pre-drill small holes as marked on the designs. This works well on the bottom panels.
12 | For larger boats (those above 15 feet long), stitch upside down—it eliminates having to roll the boat over another time. A small boat can be stitched right-side up, because rolling one of these is much easier.
13 | For larger boats, set up the bulkheads, or athwartships (sideways) and longitudinal (lengthwise) structures that add structural strength and help define the architectural space of the boat. For small boats, use spreaders, which are small battens that open the top of the boat to the designed width, to stretch out the shear of the boat.
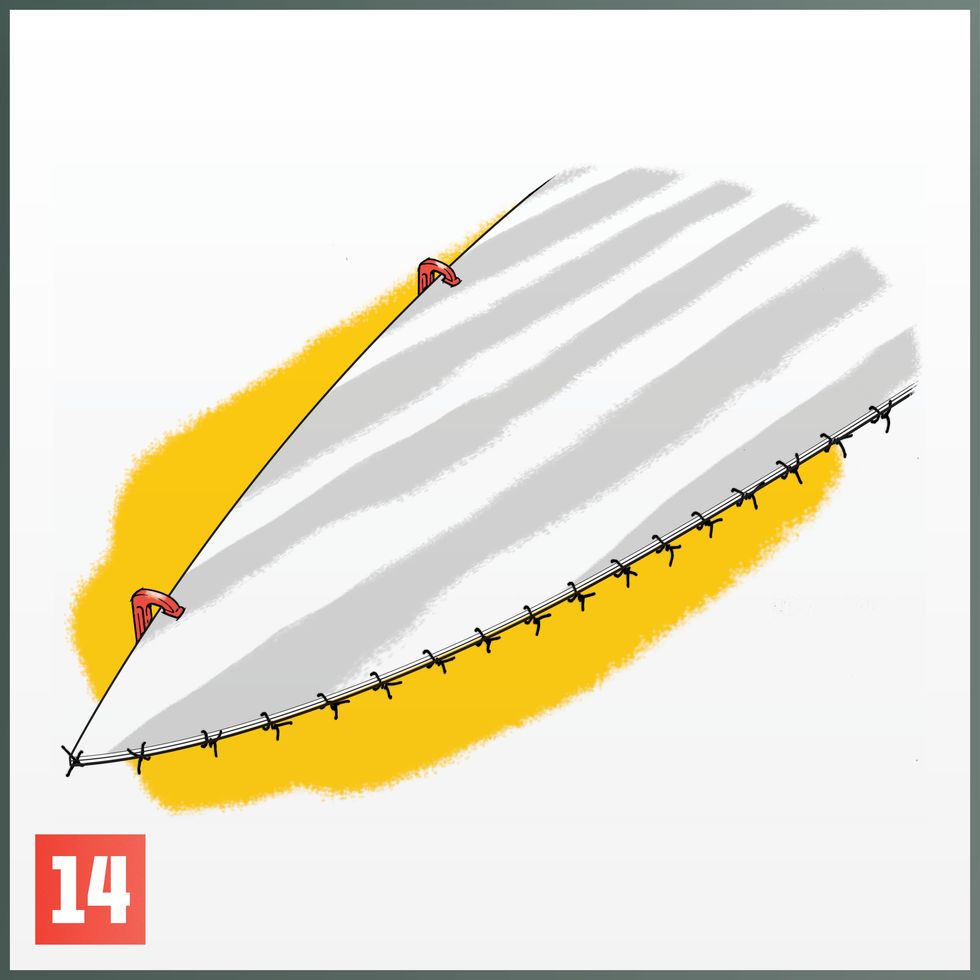
14 | Start with the two bottom panels laid one over the other (like a closed book) at the bow end and stitch the first two panels together at their keel edges. This process is similar to sewing two pieces of fabric together, but instead of a needle, you can feed the wire through the holes with your hands. It should be tight enough to keep the peels sealed together.
15 | Open the two halves of the bottom panels like opening the pages of a book and fit them over the bulkheads upside down. For small boats, use spreaders to maintain the correct shape.
16 | Repeat this process with each panel, stitching one side and then the other, from bow to stern. When all the panels are in place and the stitches are clamping the panels together into a boat shape, stitch the transom to the ends of the panels. For small boats, add spreaders to open up the top of the boat to the planned size.
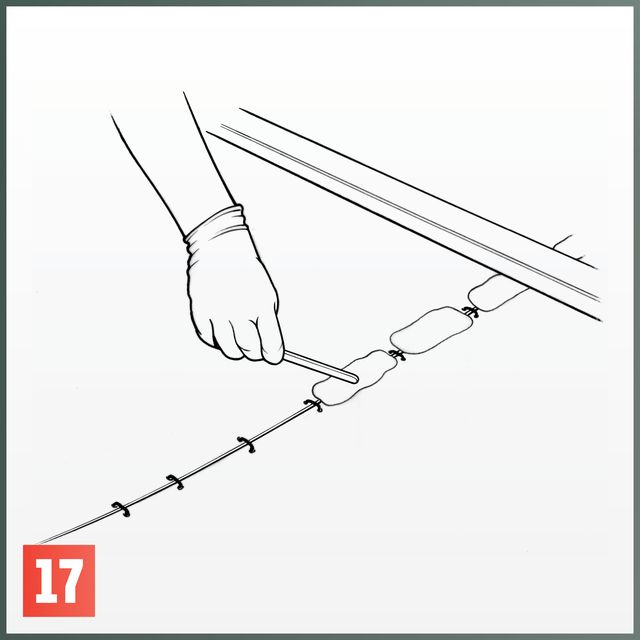
17 | Start epoxy tabbing, which is like tack welding, putting epoxy and fiberglass tabs between the wire sutures, on the interior of the hull.
18 | Once the tabs have cured solid, at least 24 hours but maybe more in humid climates, you can pull out all the wire stitches and lightly sand over the tabs to smooth things out.
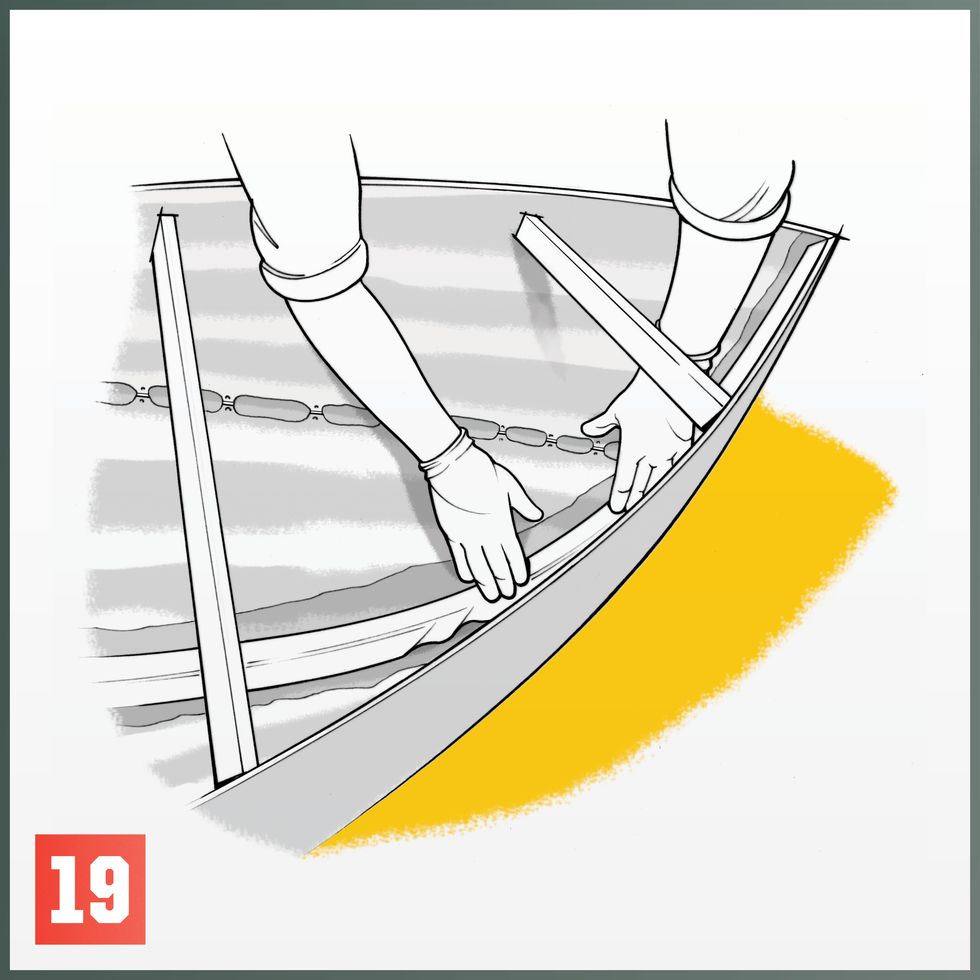
19 | Finish fiberglassing the interior seams of the boat. Set several layers of fiberglass tape in epoxy resin over the top. Then fiberglass the exterior plywood panel seams.
20 | Once the hull is to the designed thickness and all seams between the panels are taped with epoxy and fiberglass cloth layers, sheath the entire exterior of the boat with epoxy and fiberglass cloth. Some builders use a final layer of peel ply to control the resin-to-cloth ratio and eliminate air bubbles.
21 | Finish fiberglassing the seams of the interior of the boat, starting with narrow tapes up to the final width of the plans designated.
22 | Sand the boat inside and out to help smooth the edges and overlaps of the fiberglassing. Reseal with epoxy resin rolled and brushed over the hull as smoothly as possible.
23 | Sand and seal one final time and roll the boat over.
24 | Install the interior, such as seats, hardware, and the engine.
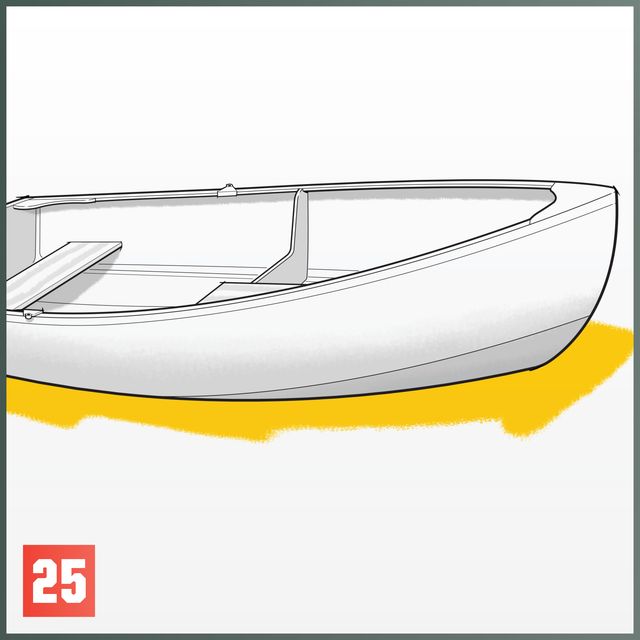
25 | Paint the entire boat, inside and out. Opaque paint offers the best UV protection, which is important to shield the boat from the sun’s reflection off the water.

.css-cuqpxl:before{padding-right:0.3125rem;content:'//';display:inline;} Pop Mech Pro .css-xtujxj:before{padding-left:0.3125rem;content:'//';display:inline;}
The Day Russia's Supersonic Jet Fell From the Sky

Sub USS Idaho Joins a Slow-Growing Naval Fleet

Russian Flaunts Nuclear-Tipped Air-to-Air Missile

Chinese Missile Tech Finally Caught Up To The U.S.

China's H-6 Bomber To Play Vital Role in Air Force

The Space Force is Calling for “Fires” in Space

Did This Man Solve the Amelia Earhart Mystery?

DNA Finally Solves the 'Enigma of Kaspar Hauser'

It’s Hot Bomber Summer in Alaska

Fourth-Dimensional Aliens Could Be Spying On Us

Two Long-Lost Euripedes Works Found in Egypt
How to Build a Wood Sailboat

Introduction: How to Build a Wood Sailboat
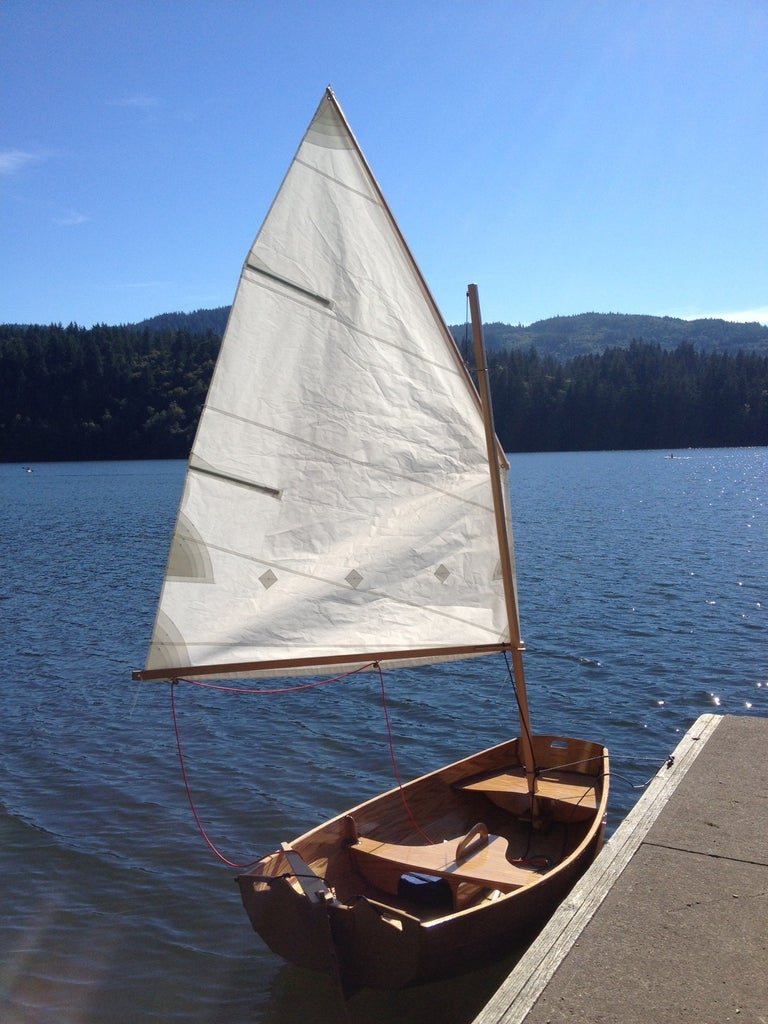
I've been wanting to combine my two favorite hobbies - woodworking and sailing for a long time, so I thought I'd build a boat. It's got classic lines and looks so dazzling in the sunshine that people constantly stop me at the boat ramp to ask me about it. There's something unbelievably rewarding about building something like this from scratch. This is definitely a boat that is much better built than bought . Here's how I did it.
The boat takes about 100 hours to build. I did it over 3 months, working a little bit just about every day and full days when my schedule permitted.
It will take about $1,000 in total to build if you buy everything at full retail cost (not including tools you might need to buy), but you can spread that across the length of the project. For example, you only need to buy one $30 sheet of plywood at a time, take it home, draw out the parts (loft) that fit on just that sheet and cut them out. That will take a couple of hours right there. Some boating supply stores (chandleries) might let you setup an account which might give you a discount if you tell them you're building a boat.
All of the skills needed to build a sailboat can be learned slowly, one step at a time. For example, if you've never fiber-glassed plywood before, just practice on a small piece first to get your confidence up. This was my first boat build, so I did a lot of learn as you go . Not only am I going to show you the right way to successfully build your own sailboat, but I'm going to share with you the mistakes I made along the way to hopefully save you from repeating them.
The end result will be a very attractive little 8 foot long pram, that is easily made out of 4x8 sheets of plywood that is light enough to put in the back of a small pickup truck or roll down to the local lake on the optional dolly. Anything longer would require you to either make a scarf joint (which is a bit tricky) or buy longer sheets of plywood (which is considerably more expensive).
What you will need:
Boat building plans
8 panels of 1/4" oak plywood 4'x8'
Pencil, Sharpie, ruler, tape measure, yard stick, etc.
Long flexible straight edge
Box of 1" brad nails
2 gallons of epoxy resin
1 gallon of epoxy hardener - SLOW
1 quart silica thickener
5 quarts wood flour thickener
1" masking tape
Japanese pull-saw
Table saw (helps, but optional)
Round-over router bit
Flush trim router bit
Palm/random orbital sander
220 sanding discs
Combination square
Drill bit set
Drill bit extension
Basic hand tools
Small diameter wire or zip ties
Wire cutter
12 C-clamps - 3"
Mixing cups, mixing sticks, rubber/nitrile gloves
16' x 60" of 6oz fiberglass cloth
2" plastic spreader
Gallon of waterproof glue
Glue roller
Silicone bronze screws
Stainless steel fasteners
Small blocks
Gudgeon & pintle - dinghy size
Patience - large
Elbow grease - large
For more detailed explanations on each step and more specific info/reviews on the materials and parts used, check out my boat build blog: www.Midnight-Maker.com
Step 1: Cutting Out the Parts...
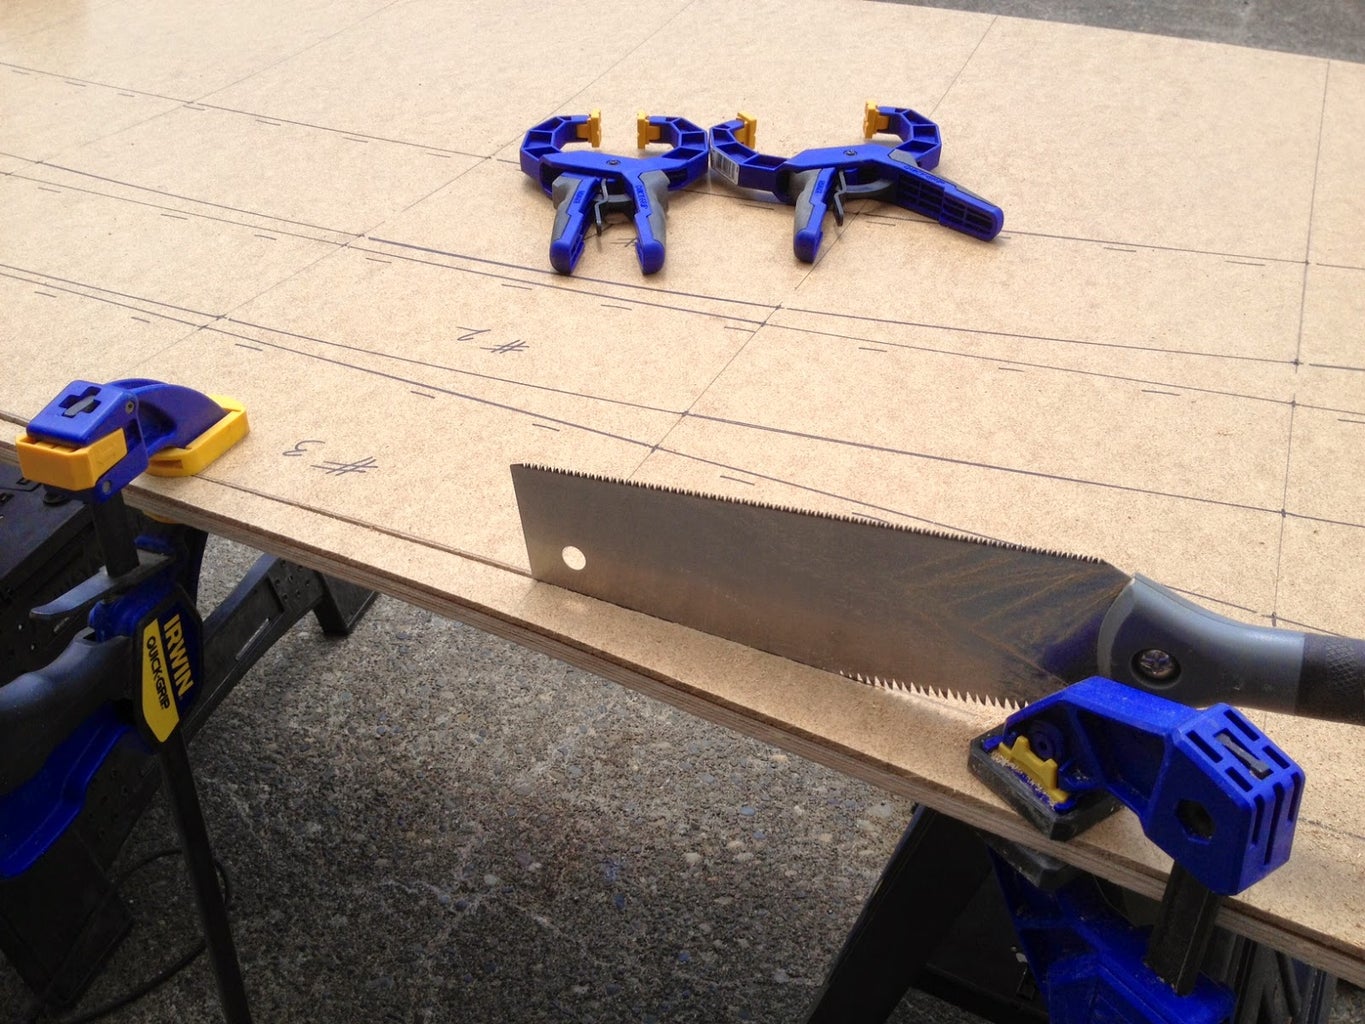
First, you'll need boat building plans. I purchased some very nice ones from a popular boat building website because I had a specific style in mind to build, a "pram". It's a Norwegian design with lots of buoyancy in the bow and building a pointy boat is a little more difficult. There are a bunch of free boat building plans (search "dinghy") online. Also, I wanted my boat parts to fit in a standard (read cheap) 4'x8' sheet of plywood. It also had to be light enough for me to load/unload/move myself. This boat weighs in at about 70 pounds. When on the custom dolly I built, it's very easy to move from the parking lot to the lake.
Next, you'll need to draw out the parts of the boat full-sized onto the plywood (lofting). I actually did this step on hardboard/masonite because I wanted to make templates of all the parts in case I ever wanted to build another one.
This step requires you to be very meticulous. Carefully transfer the measurements (offsets). They may or may not look correct because it's very non-intuitive to look at curved boat parts that are laying flat. Some parts actually bend the opposite way you think they should. To make the curves, I nailed a bunch of 1" brads into the panel and used a long, flexible straight edge (yard stick, etc.) bent to follow the curve, then I traced the curve with pencil/Sharpie. Once I removed the brads, I had perfectly smooth curves. Keep in mind that with the side panels that are symmetrical to both sides of the boat, only draw out one version and cut two stacked sheets at a time. This ensures the boat will not be lop-sided. Make sure to immobilize the two sheets together with screws outside of the boat parts or use double-sided tape/clamps, etc. to keep the parts registered properly.
Using a Japanese pull-saw allows you to control the cuts very carefully and it can follow the graceful curves. They cut on the pull stroke which means they're very easy to control. Make sure you leave a bit of your cut line, meaning cut just outside the line. This allows you a bit of a safety margin and you can always sand to the line to sweeten it up. This is where the elbow grease really kicks in. It takes hours to cut out the hull panels by hand, but it's worth it. I tried cutting the first part out with the jigsaw and it wandered all over the place and quickly cut inside the line before I knew it. Also, a jig saw blade can lean to one side which could mean two panels might not be the exact same shape. Using hand tools is a classic way to do woodworking and is a very gratifying process. With hand tools, things happen slow enough for you to be in total control, whereas power tools can quickly do unexpected damage. With the understanding that you're building a classic boat, using hand tools wherever possible is part of the philosophy.
The plans I bought were in metric and called for 6mm (1/4") and 9mm (3/8") plywood, but I wanted to make everything out of 1/4" plywood so the thicker parts in the plans were glued together with two layers of 1/4" (so at 1/2" they were a bit thicker than designed). I actually liked this because it made the boat feel sturdier and of course it was cheaper that way. The trade-off was that the boat would be a bit heavier.
For any of the parts that need to be doubled-up/laminated (e.g. the transoms), now is a good time to do that. Make sure you use "waterproof" glue instead of "weatherproof" glue like I did...
Spread a thin layer of glue over one of the "bad" sides (plywood usually has a good side and a bad side, glue bad sides together so good sides show on both outside faces), making sure it's completely covered (I used a special glue roller), then carefully place the other half on top. Align all of the edges together, then clamp them in place. Now put heavy things carefully on top to press the parts together. The glue should be dry in about 6 hours.
NOTE: It's considerably easier and safer to do any woodworking processes to the parts before you assemble the boat. This way, you can safely clamp pieces to the work bench and cut out handle holes, etc. Since my boat is a "lapstrake" design, I had to route a rabbet (groove located on the edge) carefully on the bottom edge of each side panel. This creates a shoulder for the parts to sit on, positively locating them while you're stitching the panels together. Likewise, the grab handles in the transoms are much easier to cut out before putting the boat together.
Also keep in mind that any mistake will be considerably more painful the further you are along in the build. For example, if I biff cutting out the grab handle holes while they're just loose pieces rather than when they're a permanent part of the boat, it's much easier to recover - just make another transom. If you had to patch a hole in the boat, it would be difficult and possibly never look perfect. No pressure...
Step 2: Assembling the Hull...
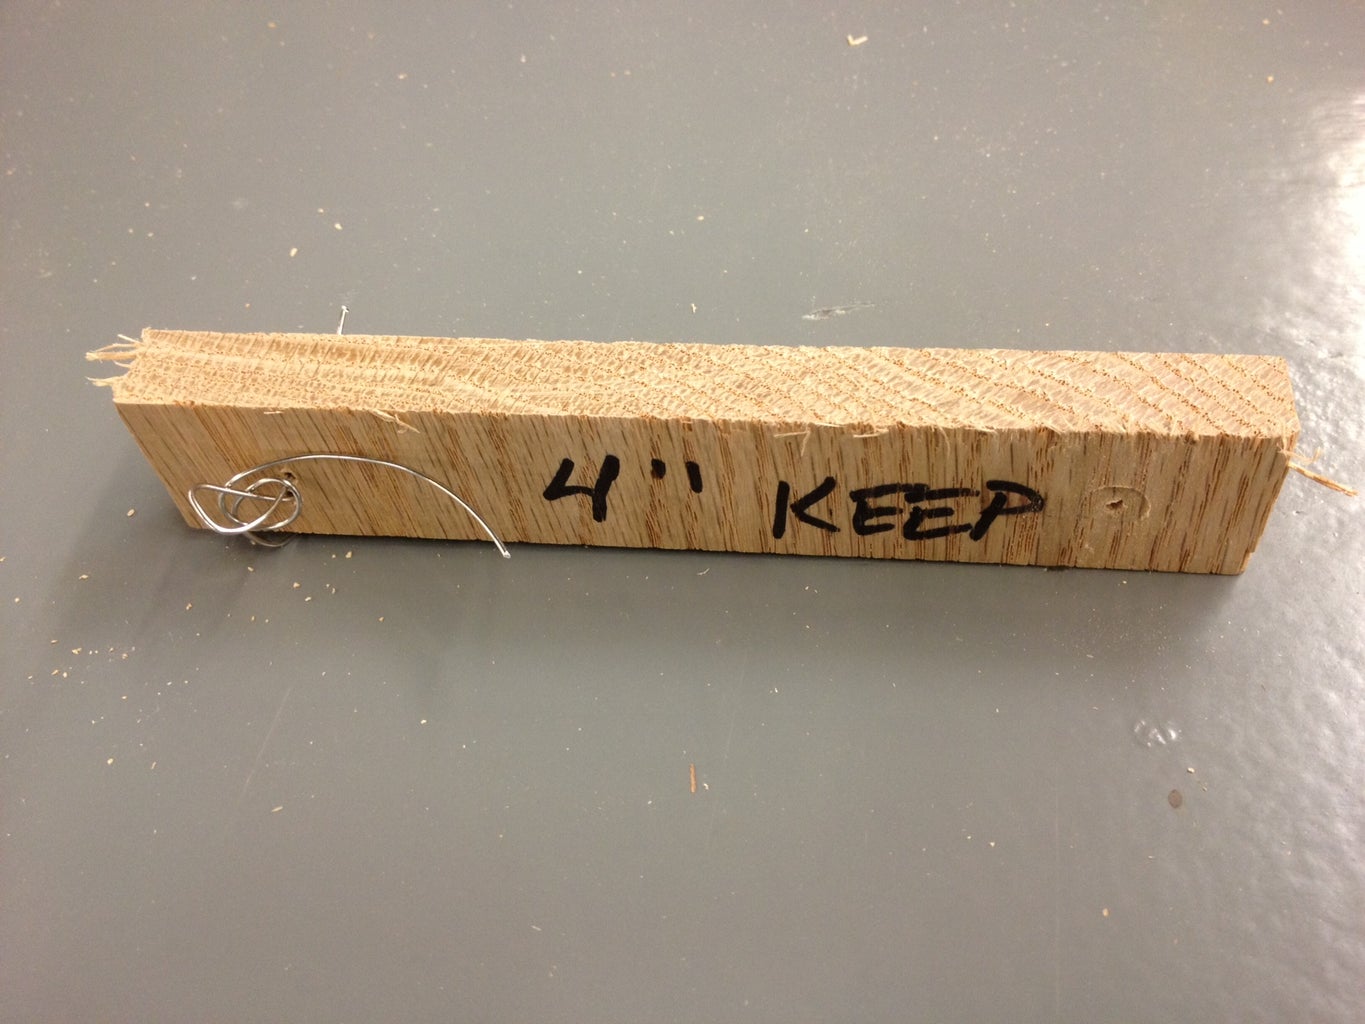
Once you have the bottom and sides cut out, you can start to "stitch and glue" the hull together. This is a technique used usually for smaller boats to be able to pull the hull form together without the need to build a frame or mold (which can take almost as long and as much wood as the boat itself).
I built a gauge stick to make sure my holes were perfectly spaced at 4" at 1/2" in from the plywood edge. It was 1" wide so either edge was the required 1/2" from the centerline. I worked my way down one side of each of each mated seam and drilled all those holes at once while the panels could lay flat on the bench. Make sure to use a backer block to prevent tear out on the back side, even with such a small drill bit.
With one mating panel drilled with a 1/16" drill bit, hold the mating panel in it's relative position. I used some spare twine to wrangle my panels into the proper orientation as I was marking them. Make a pencil mark where the mating hole should be, remove the pre-drilled panel and drill the second set of holes 1/2" in from the edge. This makes sure there's enough strength to hold the boat together.
The first pass on the stitches is just to get the hull together structurally. You can always go back and make the stitches fancier/tighter and tweak the position of the panels.
The stitches go from the inside out. Cut 6" lengths of wire and bend them into long, narrow U's that are the width of the distance between the holes. Stick the ends through the holes and carefully twist the tails together on the outside of the hull, making sure not to damage the plywood. If you're using zip ties, then the holes you drill will need to be bigger and you'll have to start on the outside, go in, turn around, then back out, then "zip".
Make sure your panels' rabbet shoulders are resting securely on the mating panel and carefully tighten all the stitches. For my boat, once I had two panels stitched to the bottom panel on each side, it was time to attach the transoms (ends). Once all of the exterior parts are stitched together, you should have something that looks like a boat. It will be a little rickety at this stage, but that's okay.
NOTE: In the photos I took of my build, you'll notice that the transom doublers (reinforcers) aren't in place. That was because I was following the instruction manual, but I think that was a mistake, so I highly recommend laminating (gluing) the doublers to the transoms before you stitch the boat together.
Step 3: Reinforcing the Hull Joints...
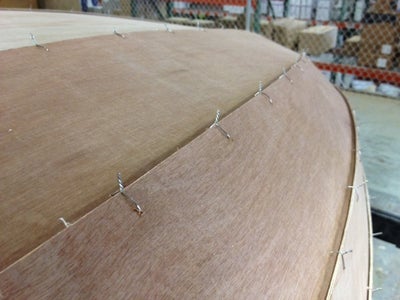
Now that the hull is stitched together, flip it over upside down. You'll be surprised at how stiff it is, considering how difficult it was to wrangle all those panels into position. Be careful, there's lots of poky wire ends sticking out all over the place.
I used a technique called "tabbing", meaning I made small, structural tabs from thickened epoxy that fit between the stitches, then I removed the stitches and made one long, larger fillet to connect the hull panels together.
Make sure your panels are perfectly aligned and tightened. I used a nipper to lop off most of the tails so they wouldn't get in the way, but that left very sharp spikes.
Make sure your boat is square. Take diagonal measurements from corner to corner, make sure the boat parts are parallel to each other, etc. because if there's a twist in your boat, the next step will make it permanent, which will affect the boat's performance.
Now mix up a batch of epoxy and silica thickener according to the manufacturer's directions (meaning each type of epoxy has a different resin to hardener ratio) until it's between the consistency of thick ketchup, but runnier than peanut butter (make sure to mix the 2 parts of epoxy together first very well before adding a thickener). Too thick and it won't fill the void, too thin and it'll run down inside the boat. Both are bad. I used a small syringe to inject the mix into the V intersection between the panels and checked underneath/inside to see if there were any runs.
Once the epoxy has partially set, use a glove wet with denatured alcohol to smooth out the "tabs" so they fit inside the V groove and don't extend above the intersection between the panels. This will give you good practice for the seams that will show on the finished boat. Be careful of the wire spikes.
Repeat this process for every seam on the hull. Let it cure overnight.
Once the tabs have cured, carefully remove the stitches. If the wire seems to be epoxied permanently to the hull, heat the wire with a lighter. That will soften the epoxy enough to pull the wire out. Be careful not to scorch the boat (you don't want a Viking funeral). Now repeat the thickened epoxy process for each overlap, except this time each seam will need to be one long, smooth joint. Let it cure overnight. This goes a long way in making the boat hull structural.
Step 4: Fiberglassing the Hull...
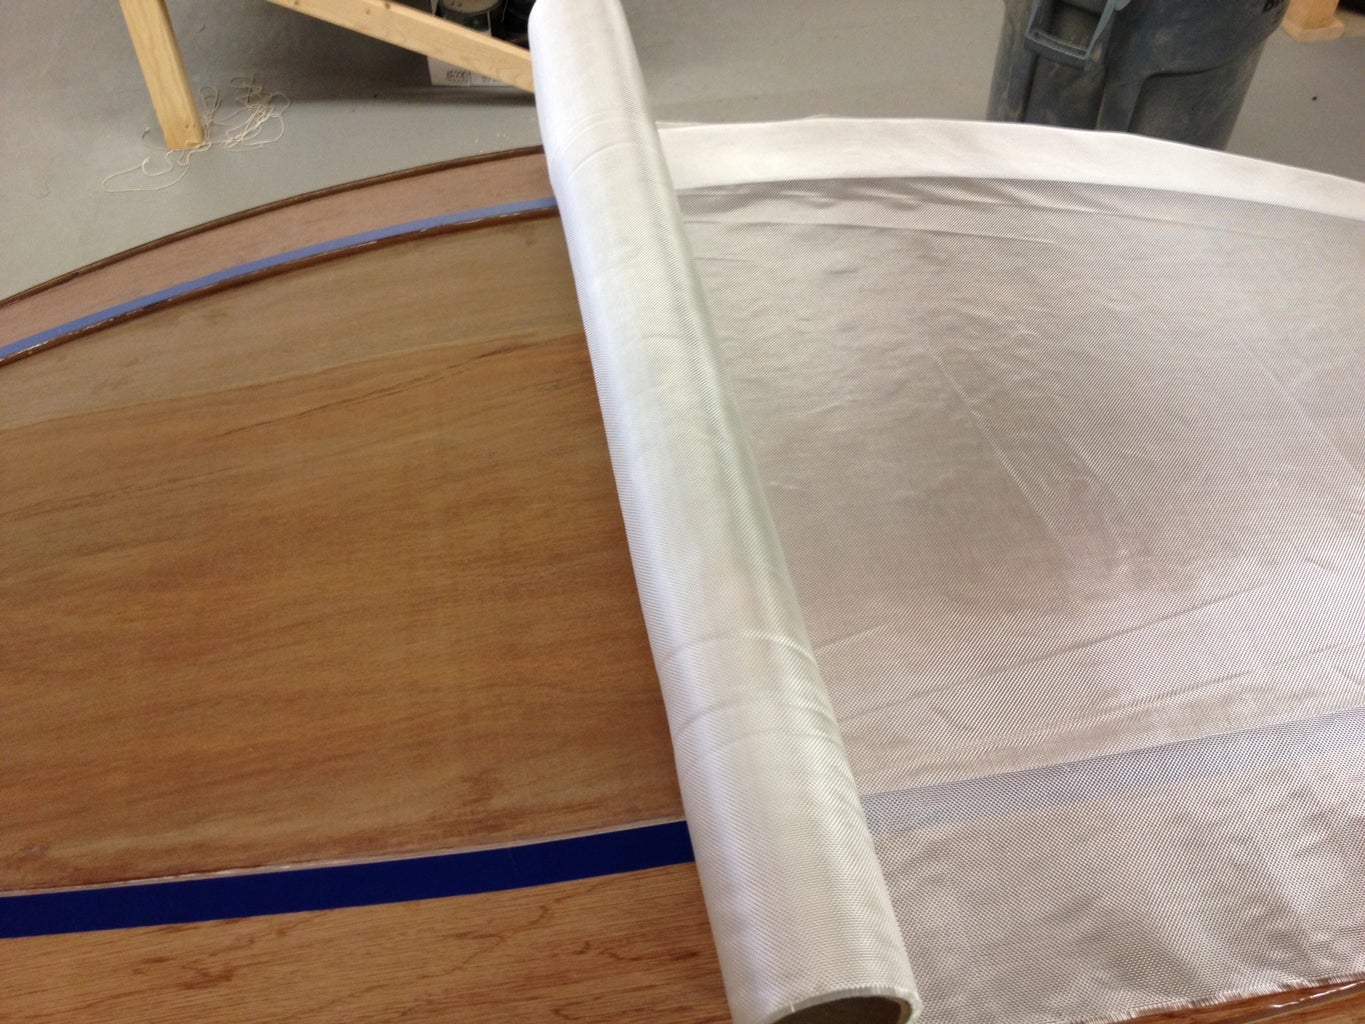
Now that you've got a permanent hull shape, it's time to make it waterproof and rugged. Fiberglass and resin over plywood is a tried and true Do It Yourself boat building technique which makes it strong and light.
Mask off the bottom panel and roll out your fiberglass cloth. Smooth the cloth out very carefully so as not to snag or tweak the fibers' orientation. Mix up an unthickened batch of epoxy (it will be the consistency of syrup). Starting at the stern, pour a small puddle of epoxy and spread it out nice and thin. You should be able to squeeze most of the epoxy out of the cloth, leaving only saturated cloth with no dry spots (which will appear white) but the weave should still be showing (meaning no extra epoxy is pooling). You should easily be able to see the wood grain through the cloth now.
Let the epoxy partially cure and using a razor, slice the dry fiberglass cloth away on the taped seam. Then remove the masking tape. Let the epoxy cure overnight.
Flip the hull over and mix up a batch of epoxy that is the consistency of peanut butter. I masked off the joint, but this step is optional, but keep in mind that it will be visible if you plan on finishing the interior bright (varnished wood). It's not as critical if you're painting the interior. With a plastic spreader, carefully make a large radius transition (fillet) between the bottom panel and the first side panel (garboard). Remove the masking tape when the epoxy mixture is partially cured and carefully scrape/wipe any unwanted mixture. It's much easier to remove now than having to sand it all off later. At this point, it's also a good time to fillet the transoms to the sides using 3/4" radius tabs between stitches and 1" finished fillets after you've removed the stitches. Let the fillets cure overnight.
Now, repeat the entire fiberglassing process on the inside. Except instead of just doing the bottom panel, make sure both the bottom and the garboard are fiberglassed. This is basically the waterline of the boat. The fillet should allow the fiberglass cloth to smoothly make the bend between boards. Remove the excess cloth when partially cured and let sit overnight. Some people fiberglass up onto the transom at this stage which will make the boat stronger, but that means you have to have already filleted the transoms to the bottom.
Step 5: Installing Interior Parts...
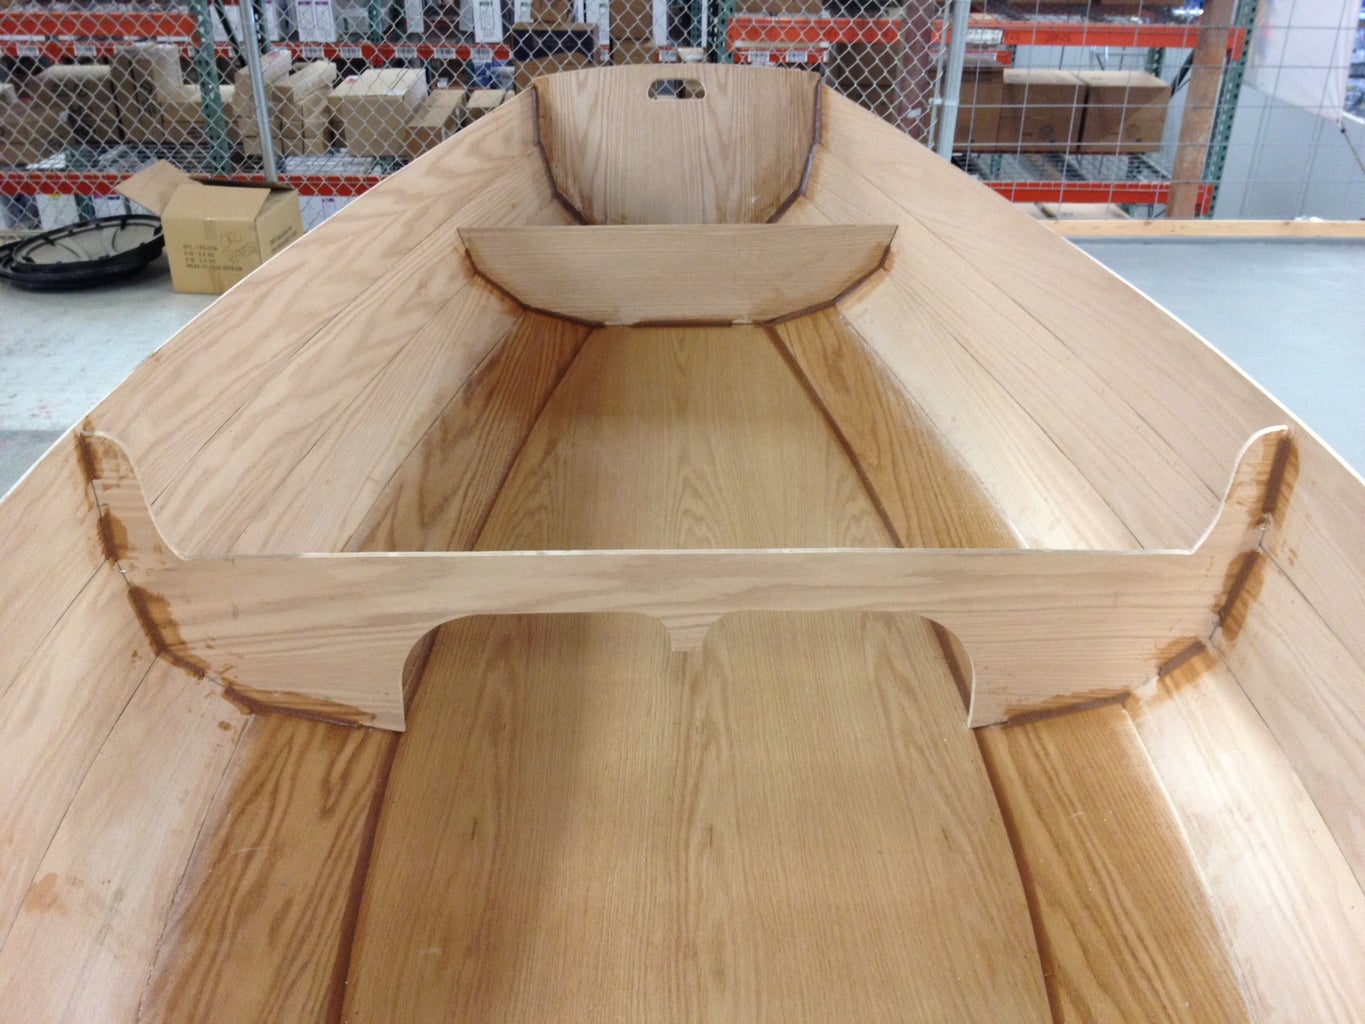
The bulkheads get stitched in place just like the panels. They will make the already stiff (and much heavier boat) completely structurally sound and push/pull the sides into their final shape. Then make 3/4" "tab" fillets between the stitches to lock them in place, remove the stitches and make long, smooth 1" fillets. The smaller fillets will get covered by the larger fillets. I used two different modified plastic spreaders to do this step. Each spreader was cut with a box knife and filed/sanded into its final shape.
While you're doing the previous steps, if you're in a time crunch, go ahead and build the daggerboard trunk. It's made of numerous parts that are pre-coated with a couple layers of unthickened epoxy, then glued together with silica-thickened epoxy. This makes it strong and waterproof as it will be below the waterline so must be completely waterproof.
The daggerboard trunk is the most important part of the boat, especially if you're making a sailboat version (this boat can easily just be used as a rowboat). Not only does it support the center seat (thwart), but it has to transfer all of the force from the sail to the water and if you run the boat aground, it takes all the shock loading from the daggerboard.
The daggerboard gets filleted into place like everything else. Make sure it's perfectly on the centerline of the boat as that will affect its sailing characteristics.
Next, let's make the daggerboard slot in the center thwart. I set up a straight edge with a spiral upcutting router bit. Make sure to enlarge the slots at the end of the center thwart so that it can fit around the fillets of the center bulkhead. Now is the time to ease the edges of the center thwart because you'll be sitting on it a lot, so it needs to be comfortable. Because it's so thin, I only routed the top edge of the center thwart that shows and just hand sanded the edge underneath (it's very problematic to use a round-over bit on the second side of a thin board). Paint all of the thwarts with three coats of unthickened epoxy, especially the undersides. Once the woodworking is done, the thwart can be epoxied into place with peanut butter (or you can jump to cutting the daggerboard slot in the bottom of the hull). Make sure the thwart fits snugly in place. Drop dollops of peanut butter on the top edges of the center bulkhead and daggerboard case and spread it out evenly (make sure none gets inside the slot to interfere with the daggerboard). Firmly seat the thwart (pun intended) into the goop and weight it down. Let it cure overnight.
While you've making sawdust, cut out the mast hole (partner) in the forward thwart by drilling holes in the four corners (for the square mast we're going to make), then cut out the sides, file it smooth, then round over the top edge with the router.
Any time after the bulkhead thwart fillets have cured, you can seal the airtank chambers. Paint the bottom, sides, inside of the bulkhead and transom up to the level where the thwart will be.
Step 6: Rail & Sailboat Parts...
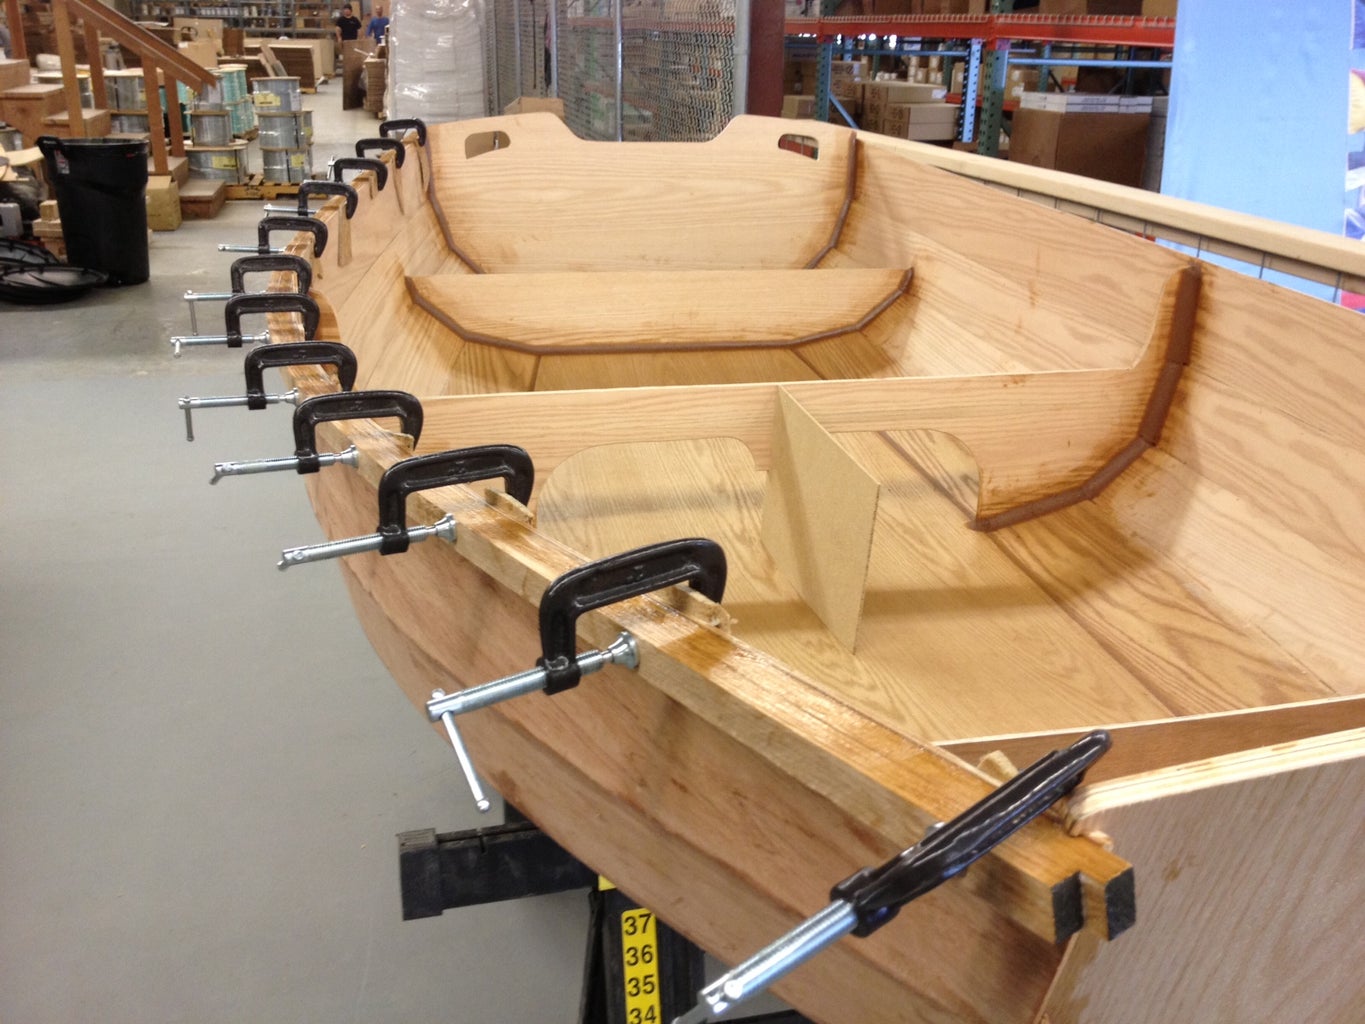
There are several processes in this boat building instructable that can be done concurrently. While you're waiting for the epoxy on one part to cure, you can be doing woodworking or epoxying another part. This step illustrates that point. While you're waiting for the epoxy on the rub rail (outwale) to cure, you can be fabricating the sailboat accessories (e.g. daggerboard, rudder, tiller, spars, etc.).
In order for the outwale to be thick/strong enough to be effective, you'll need to laminate it in two strips on each side. You can't bend a single piece that thick around the curvature of the hull without either breaking the wood or softening it by steaming it which is a complicated process.
Take a strip that's half the final thickness and a little longer than the boat edge (I made mine a bit beefier), mix up some peanut butter with the colloidal silica and carefully spread it on the inside of the strip. Starting at the stern, clamp it in place, perfectly align it with the top edge of the plywood. Now you have a long, springy lever to bend the wood strip along the compound curve. It dips both vertically (shear), and bows out at the widest part of the boat (beam), then back in toward the bow. At least every foot, clamp it as you go, moving forward. More is better. Toward the bow, the strip will get stiffer as it gets shorter. Once clamped in place, scrape/wipe off all the squeeze-out. It's much easier to remove now than after it hardens. Let it sit overnight. You'll have to repeat this three more times, meaning this step takes four days (if you're using "slow" epoxy hardener).
During those four days that you're dealing with the outwale, you can make major progress on the sailboat parts. They're completely separate from the hull. If you're just making a rowboat, then you can skip making these parts.
The daggerboard and rudder are cut out and laminated. Then a bevel is ground onto the leading and trailing edges to make it slice through the water more efficiently. Then they're covered in layers of epoxy. The mast step is assembled. This has to be very strong because all of the force of the sail is transmitted to the boat through the mast step and the mast is a very long lever arm. The rudder cheek plates and tiller also have to be assembled similarly to the daggerboard case.
NOTE: Whenever there's a hole to be drilled into any part of the boat, you must take additional steps to make sure the water doesn't penetrate and damage the wood. The correct procedure is to drill an over-sized hole, completely fill that hole with epoxy (I usually put a piece of masking tape on the back side to act as a dam), then once the epoxy cures, re-drill in the center of the epoxy plug the correct hole size. That makes each hole in the boat possibly a 2 day process, so plan accordingly. You can also use 5 minute epoxy to knock out a bunch of holes quickly, but be careful, they're not kidding. This stuff gets rock hard very quickly and will permanently glue anything touching. This is exactly how you drill the hole for the pivot point for the rudder/cheek plate assembly. If the pin is 1/4", then drill 1/2" hole and fill that with epoxy. Now the 1/4" hole will fit nicely in the center and be completely waterproof.
Since all the parts need several coats of unthickened epoxy and they just about all have holes in them, I hung them up with some twine and painted them on all sides, one layer at a time, for several days. Make sure the rudder doesn't get too thick to fit inside the cheek plates.
Step 7: Making the Spars...
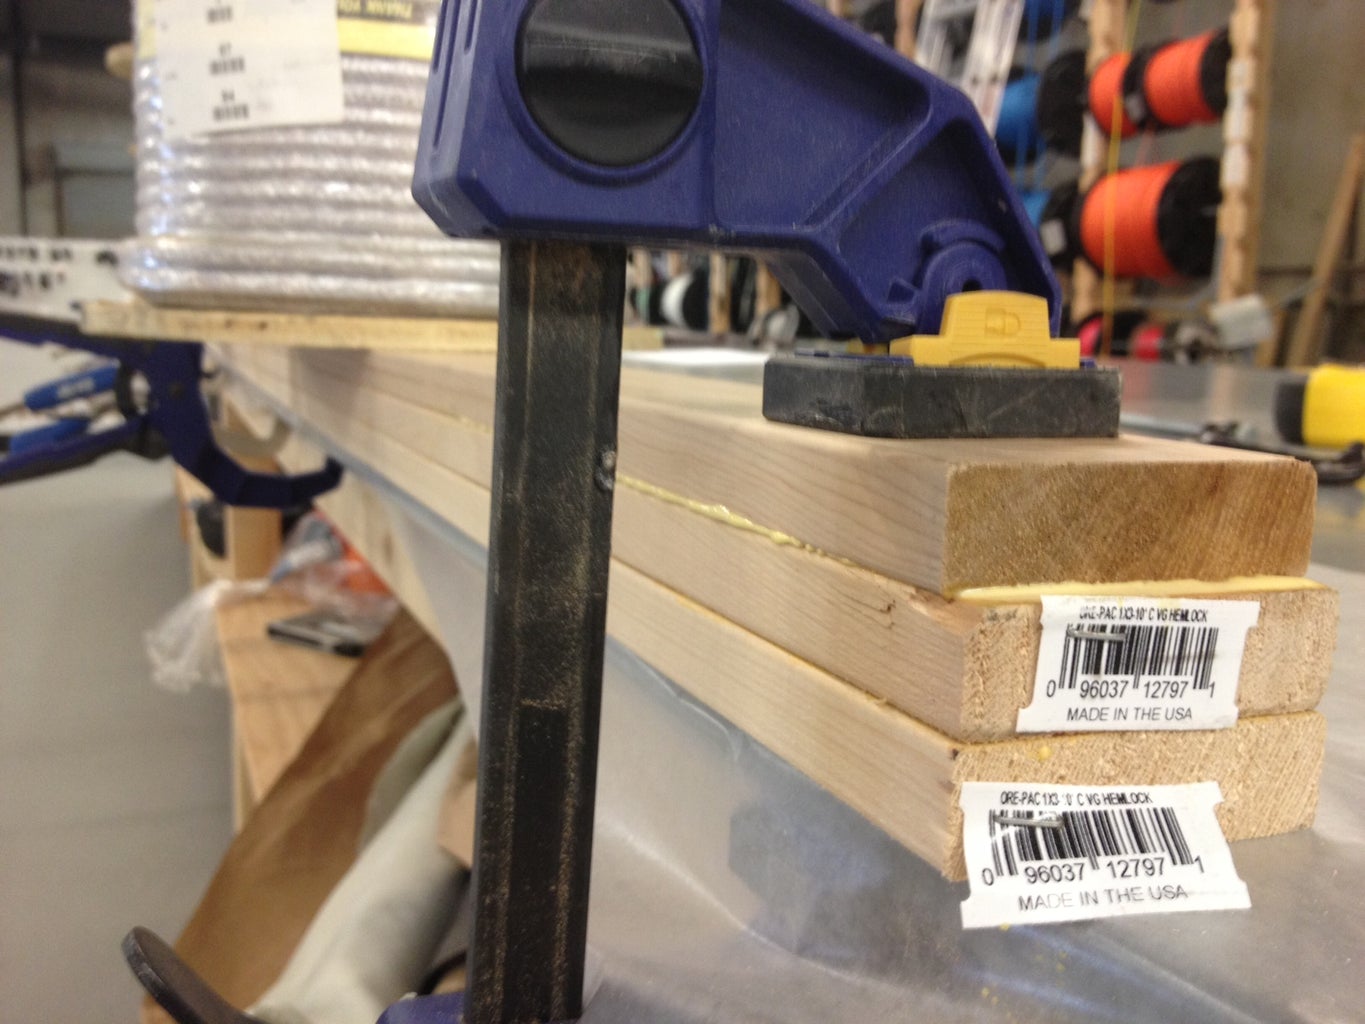
More sailboat parts you can make while waiting for other parts to cure are the spars, the structural parts that support the sail. The mast is another glue up. I used 3 - 1x3's of hemlock. A relatively soft wood, but with a nice tight grain with no knots. A mast would break at a knot, regardless of how strong the wood is. Using the waterproof glue, align the pieces as perfectly as you can then clamp up the assembly and let dry overnight. Then run it through a table saw to get the final dimensions. Use a router and a round-over bit to ease the edges. Cut to length and sand the sharp corners. It should fit easily, but snugly into the forward thwart.
The boom (bottom of sail) is a little more complicated. Cut out the gooseneck (boom pivot point) by using a hole saw first, making sure to clamp it securely to the workbench, then cut out the profile. This gets attached to another piece of 1x3 hemlock, after it's been cut to length and the edges have been rounded over.
The yard (top of sail) is easy. Just cut to length and round over the edges. Drill and fill any holes in the spars at this time. You'll need at least one hole on each end to lash the sail grommets to.
This time, everything gets covered with several coats of varnish, epoxy is not necessary. The varnish protects the wood from water and UV damage.
The reason we had to make at least the mast at this point is because we'll need it in the next step to establish the location of the mast step.
Step 8: Finishing Up the Interior & Exterior...
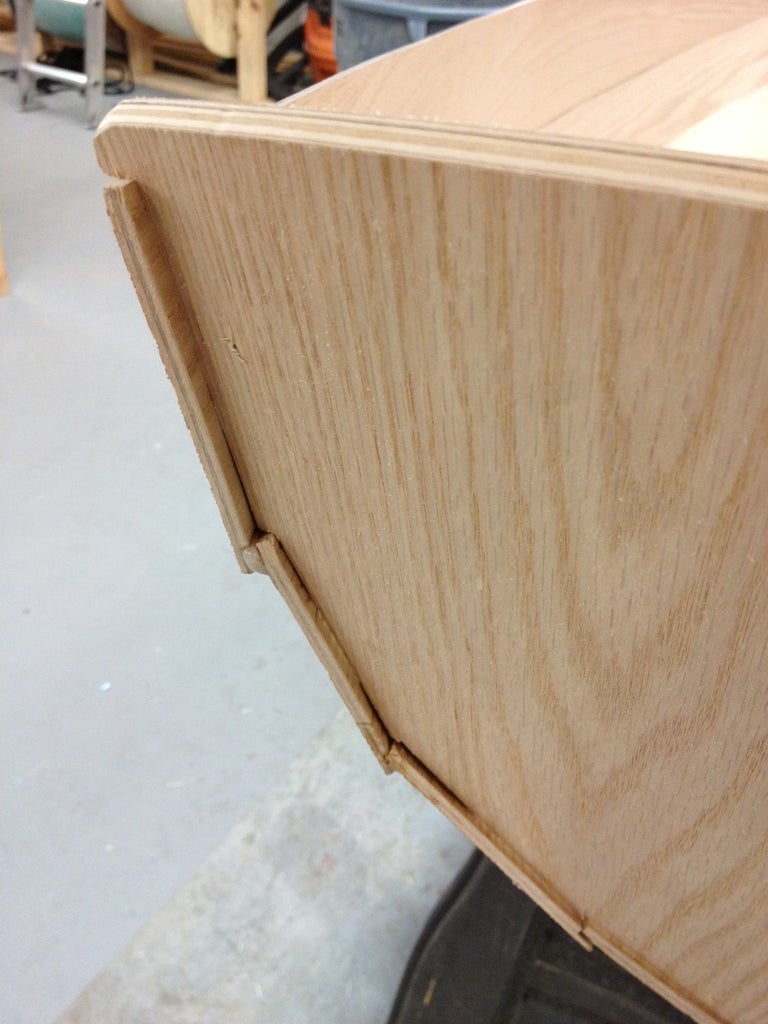
Once the outwales are successfully attached, trim them flush with the face of the transom(s). While you're at it, use a flush cut saw (with no sawtooth offset to mar the wood) to trim the sides flush with the transom. This will show you how well your injected silica mix worked earlier. Now you're ready to install the mast step.
The mast step must be precisely located on the floor (sole) of the boat to give the mast the proper angle (rake). This is very important because it directly affects the boat's ability to sail upwind. Using your mast, insert it into the forward thwart (partner) and into the mast step. With the mast at a 3° angle (mostly vertical but with a small, yet noticeable and graceful tilt toward the stern of the boat), trace the location of the mast step. Use a combination square to make sure it's perfectly aligned side to side (athwartship). You can now set the mast aside. Drill and fill holes in the bottom of the boat so that you can securely screw the mast step from the outside of the hull. The mast base must also be epoxied to the sole with peanut butter. After it's screwed into place but before the epoxy cures, make sure to test fit the mast again and verify the rake angle is correct. It would be a little messy at this point if you had to tweak it, but at least you wouldn't have to cut it off.
Now comes the most unpleasant part of the whole build. On your hands and knees, make a 1" radius fillet on the underside of every part in the boat. I didn't worry about making these pretty, just structural and water tight (these create the flotation tanks that keep the boat from sinking if you capsize). Let that cure overnight.
Next is the scariest part of the build, making the slot in the hull for the daggerboard. Using a drill bit extension, from the inside of the boat, reach down through the daggerboard case and drill a hole at each end of the slot through the bottom of the boat (make sure to use a backer board). Drill a couple holes in between, then take a jigsaw and connect the dots. This weakens the hull enough so that the router won't tear out any extra wood. Note, this step can easily be done prior to affixing the center thwart. Using a flush trim/laminate router bit, let the bearing run around the inside of the daggerboard case. This will make the hole in the hull perfectly match the slot. This is important because you don't want a shoulder on the inside for the daggerboard to hit and you don't want to damage the waterproof lining of the case. Last, ease the sharp edge of the daggerboard slot with the router and a small radius round-over bit.
The skeg must be cut to fit the curve of the hull (rocker), then using silicone bronze screws, attach it to the hull using the same drill and fill/peanut butter techniques. Make sure to snap a chalk line on the centerline of the boat for reference. Then make a 1" fillet where it meets the hull which will support the skeg and make it strong. The skeg keeps the boat tracking straight in the water. I optionally used some fiberglass cloth to cover the skeg and overlap onto the bottom to make the entire assembly stronger and more waterproof. The skeg will take the brunt of the abuse when launching, beaching, loading and unloading, etc. I also installed a stainless steel rubstrake on the aft end of the skeg with this in mind. In wooden boat building, silicone bronze screws are often used because they won't corrode when encapsulated like stainless steel screws can.
Install the skids parallel to the skeg. These are solid pieces of hardwood because they will also take a lot of abuse when the boat is sitting on shore, protecting the thin hull from rocks, etc. They get installed the same way as the skeg, although it's a little tough to bend the wood along the rocker. Scrape off the excess peanut butter once they're screwed in place.
I also installed the optional outboard motor pad at this point because I plan to use an electric trolling motor on the back to quietly putter around the lake in the evenings to relax with the family after work.
That should be the last parts that go into making the boat!
Step 9: Finishing the Hull...
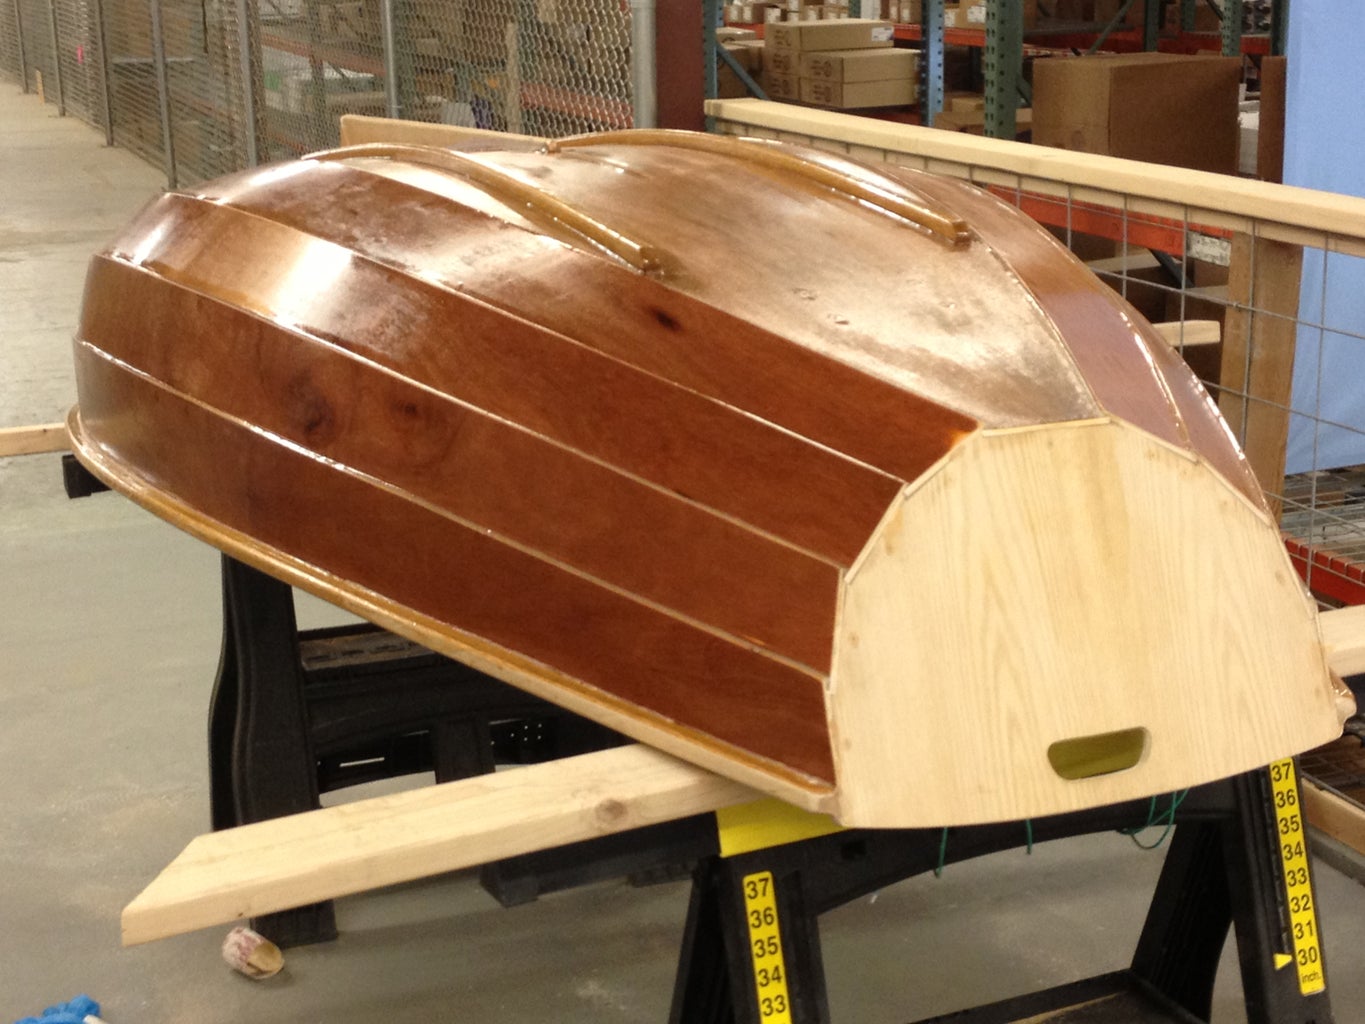
Now comes the last dash to the finish line. One of the more tedious steps is that you now have to sand the entire boat. I actually built the entire boat inside, but for the sanding stage, I took her outside. Several hours of sanding all of the fillets nice and smooth. Everything will show in the finished product whether you paint the boat or leave it "bright" (unpainted). If you've been careful about cleaning up the peanut butter as you go, you should be able to sand the boat with mostly 220 grit. Be careful not to sand through the thin veneer of the plywood. After the sanding is done (make sure to use a dust mask), vacuum the entire boat and then wipe it down with a tack cloth to remove any dust. I also reversed the hose on the shop vac and used it to blow the sawdust off since I was outside.
Next, you must coat the entire interior and exterior with 3-4 coats of unthickened epoxy. This makes the entire boat waterproof. It will also give you an idea of how beautiful the wood will look when varnished. This is why a lot of boat builders decide to leave their boats bright so the beauty of the wood shows through.
Mix up 1 cup batches of unthickened epoxy and pour out large puddles onto the surface. Taking a foam roller, distribute the epoxy in a smooth coat. Now take a wide foam brush and gently smooth (tip) the rolled out surface. This should remove any lap marks or bubbles. Move along to the next area, making sure to not touch the wet parts. Also, make sure no dust or bugs get on your finish or it'll mean even more sanding later.
Start with the exterior first. It'll be much easier to get good by practicing on the convex surfaces. The interior is more tricky because you want to prevent sags and pooling by only applying very thin coats.
Make sure to check with the manufacturer's directions during this step in case you have to deal with "blushing", a thin layer that can sometimes form on the surface of epoxy when it cures. This could cause your layers to not stick to each other. If your epoxy does blush, it's easy to just wipe the entire boat down with a rag soaked in acetone after each coat has cured. Some people sand between coats of epoxy. This is how you would make an extremely smooth/shiny finish, so if you want your boat to be museum quality, invest the effort. I'm planning on banging my boat around so opted out of an extreme, fancy, mirror finish.
I was originally going to paint the exterior of the hull, which would require priming and painting, but I'm leaving it bright for the time being. The good news is that you can always paint later if you change your mind, but if you paint it and change your mind, it's tough to go back. There aren't a lot of pics of this step, which took a couple of days because there wasn't much visible progress after that first coat went on. At this point, any surface that's not painted should be varnished using the same "roll and tip" method as the epoxy, with the optional sanding between coats. Note that epoxy has no UV resistance, so to keep your boat from getting sunburned, you must either paint or varnish every surface. Giving a boat a "museum quality" paint and/or varnish finish can literally take as long as building the boat.
Step 10: Making the Sail...
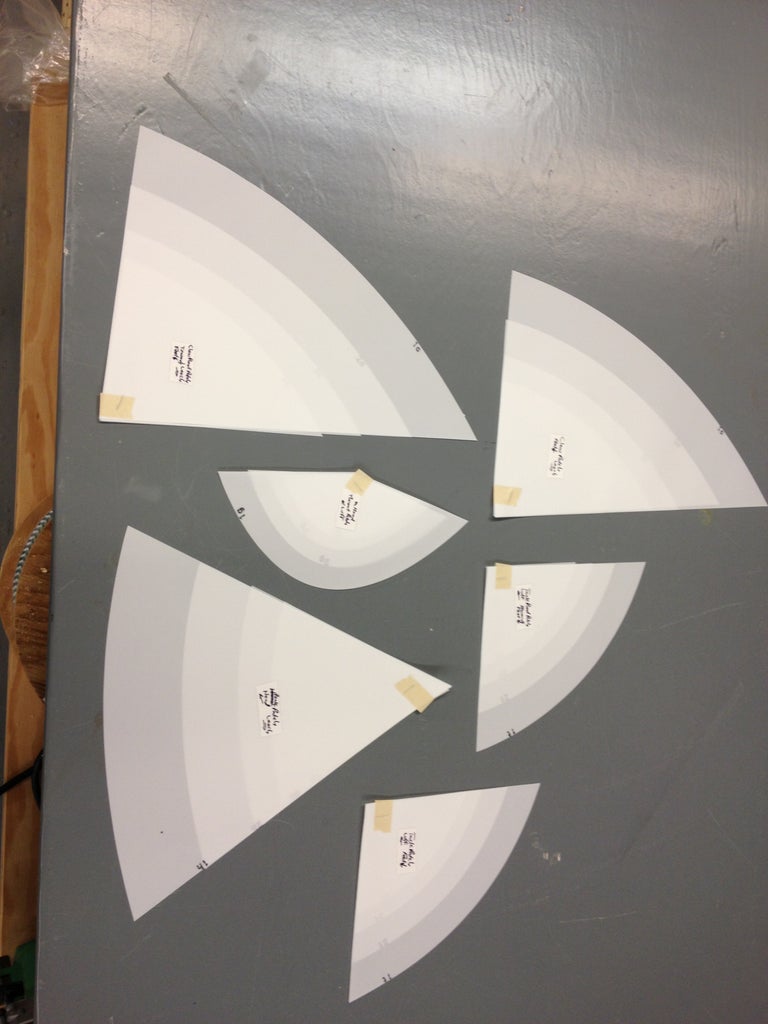
Another step you can do while other parts are curing is make the sail. This particular design uses a "lug" sail, a classic looking sail for small boats with wood masts. It increases the sail area (therefore the force generated by the wind) without it having to be as tall as a modern sailboat mast made of aluminum. There is a kit from an online sailmaking company that you can get for a reasonable price. The Dacron cloth panels are all cut out by a CNC machine, so they fit perfectly together. I used a regular, domestic sewing machine, not an industrial one. The only time I had trouble was when sewing through all 7 layers at the reinforcement patches. When I got to those parts, I had to manually push down on the foot of the sewing machine with a flat-bladed screwdriver (minus) to help push the needle through the Dacron. We jokingly call Philips head screwdrivers "plus".
The panels/parts all come labeled. The directions were a bit confusing because they suggest you make sub-assemblies after the fact to make wrangling the large sail easier but they mention it after you've already sewn the large panels together. It's important to understand what parts go together while the panels are still small and more manageable. For example, the batten pockets are tricky enough to build on a single panel, much less the finished sail. Building the sail was about as difficult for me as building the boat, but it was worth it.
The lug sail gets reinforcement patches on all four corners where you attach it to the spars (bend), and there's also a reefing point for when the wind starts to pick up (freshen). Modern sails have three corners (Marconi rig).
I opted for the less expensive white Dacron sail kit, but there's also a classic red (tanbark) colored kit that's $100 more expensive. Before I sewed a single stitch, I carefully traced every part of the sail kit onto painter's tarp poly film so I can always use the templates to build another sail, all I need to do is buy the tanbark cloth.
Step 11: Rigging Your Sailboat...
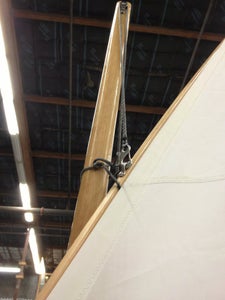
This seems to be the trickiest part for most people, probably because there are numerous ways it can be successfully rigged, depending on your experience, preferences or criteria. It's confusing because you have to know what the finished setup will look like in your mind while you're staring at a pile of ropes. I chose a setup that allows the most room in the cockpit for a full-sized adult, so the mainsheet is led forward of the skipper's position. This keeps the skipper's attention forward so they're looking where they're going. I have another boat where the mainsheet is behind the skipper and it takes some practice getting used to.
The lines I made up (rope becomes a line when you give it a job description) were the halyard (hauls the sail up), the mainsheet (adjusts the angle of the sail to the wind = trim) and a traveler bridle (where the mainsheet attaches to the boat). I got fancy and spliced all my ends, but you can just as well use a bowline knot.
I installed a cheek block at the top of the mast instead of the large diameter hole in the directions. I wanted the halyard to run as smoothly as possible when setting the sail. Then I installed a pair of cleats at the base of the mast, one for the halyard and one for the downhaul (cunningham). With both of these lines pulling in opposite directions, it locks the sail in place, flat, so it effectivley acts like a wing. The main halyard attaches to the gaff with a snap onto a padeye. This allows easy on/easy off when rigging at the boat ramp. I also used a small loop (parrel) around the mast and through the eye to keep the gaff located close to the mast. I looped the downhaul over the boom and down to the cleat to try to keep the gooseneck from twisting. Note, except for the blocks, just about all of the hardware used on rigging a boat this size can come in stainless steel or brass/bronze, depending on the look you're going for. If you plan on installing oarlocks to row the boat, this decision becomes even more important to the final look of the boat.
For the mainsheet, I made a short bridle between the handles on the transom with a small eye tied in the center. This allows a place for the snap on the end of the mainsheet to attach to. I could've just as easily allowed the snap to slide, which would give the bridle the function of a traveler, but would affect its pointing ability (sail upwind). The mainsheet is then run to a block on the end of the boom, then to another block in the middle of the boom. This leaves the main cockpit area unobstructed with running rigging. Make sure your mainsheet is long enough for your boom to swing forward of 90° to the boat, with enough to still come back to the cockpit for the skipper to control. A stop knot at the end of the mainsheet will keep the mainsheet from getting away from you and give you something to grip.
The rudder pivot hardware (gudgeons and pintles) must be installed perfectly vertical and on the exact centerline of the boat so that she will sail well. Drill and fill the necessary holes for this hardware. Be careful with the spacing. It's designed to be easily installed and uninstalled while underway.
With this particular rigging layout, when under sail, the skipper must constantly keep the mainsheet in hand, which is a good idea anyway for safety reasons (if you get hit by a gust of wind = puff, you won't get blown over = capsize). The tension on the mainsheet is easily manageable for any size skipper. On larger boats, the mainsheet is held by a fiddle block with a cam cleat, which is not necessary for a boat this size. With that being said, a possible future upgrade would be to install a block and a camcleat somewhere on the centerline of the boat so that more advanced sailors wouldn't need to constantly have to oppose the tension on the mainsheet. Of course the trade-off would be the hardware would probably be somewhere you might want to sit.
Another upgrade I figured out after actually taking her sailing would be to rig up a bungee/shock cord system that will hold the daggerboard both in an up and down position. With the current setup, the centerboard is held down by gravity and must be pulled out of the slot when beaching.
Step 12: Go SAILING!
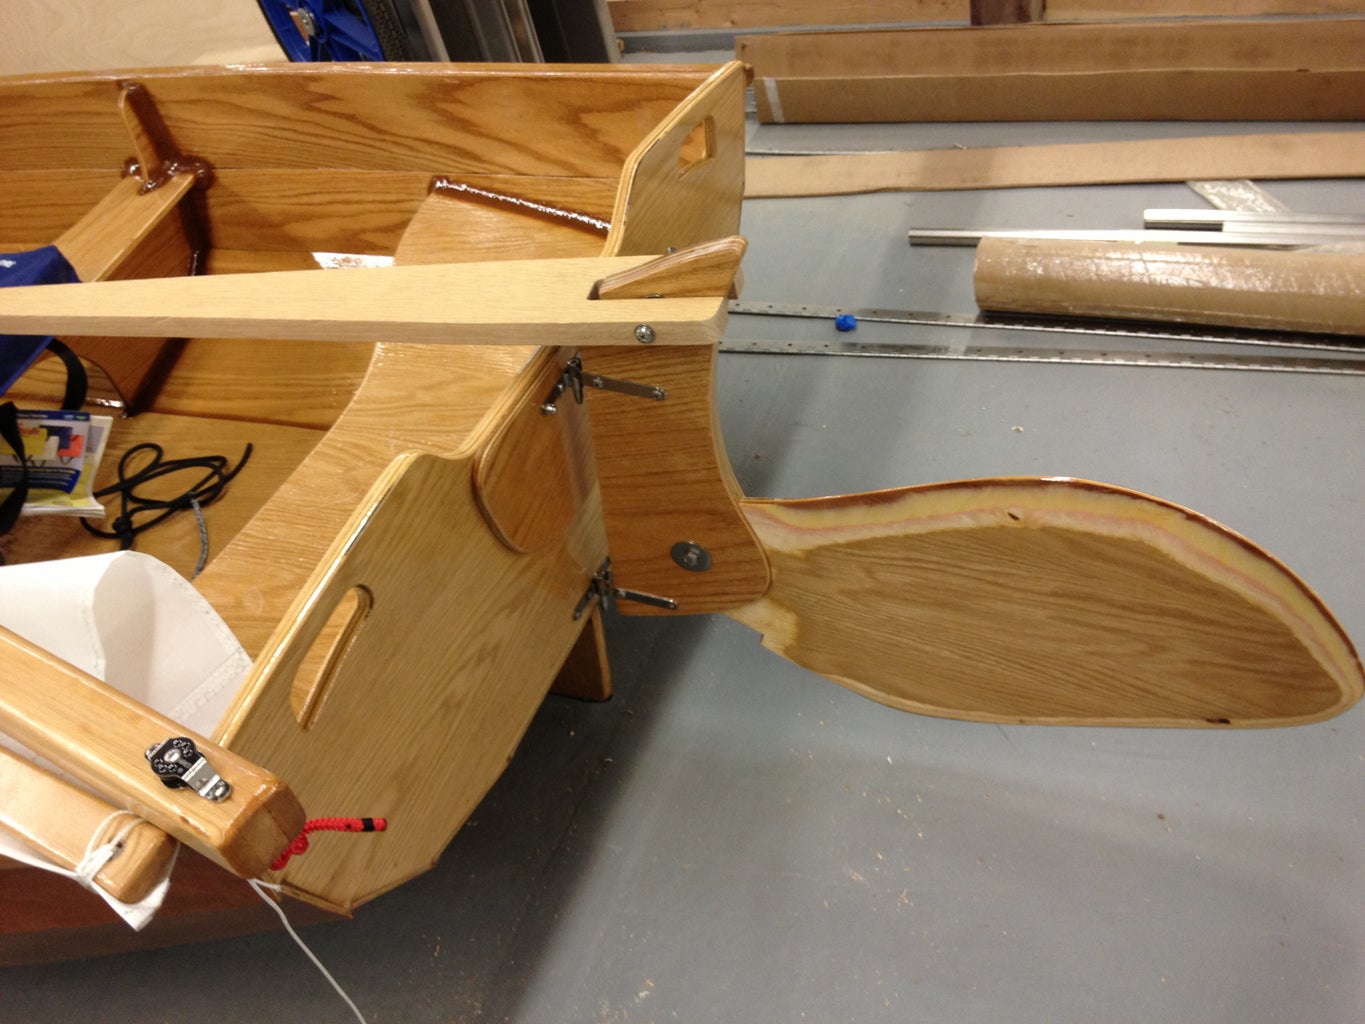
Because I wanted to be able to go sailing by myself if needed, I made a dolly out of 2x4's and large pneumatic tires (which makes the dolly float). The dolly fits securely between the center and aft thwarts when driving out to the lake. The sides on the dolly lock against the skids on the bottom of the boat so it can't twist. Roll the sail up with the spars and wrap it with the main halyard. At the designed length, the mast doesn't fit inside the boat, but it seems a bit long, so some people have cut the mast down enough so that it fits inside the boat.
Out at the lake, unload the boat, slide the dolly underneath and you're ready to roll down to the ramp. At the launch, roll the boat out into the water until it floats off the dolly, toss the dolly off to the side out of everybody else's way. Drop the daggerboard into the slot and install the rudder assembly. Facing into the wind (important), stick the mast into the receiver hole (partner), tie off the downhaul (cunningham) and hoist the sail until the downhaul is tight, then cleat off the main halyard. Reave the mainsheet (run the line through the blocks) and you're ready to go sailing.
I've found that this boat sails very well. The lug sail makes it very easy to sail upwind (weather helm), it's a little more tender for a large adult, more so than a boat with a hard chine, like an El Toro/Optimist but it's a lot more graceful looking. The payload is very reasonable for a boat this size. My wife and son can easily (and safely) go sailing with me and I don't even need anyone's help to get it rigged and launched. All in all, this is one of the best projects I've every built. I hope you too can discover the joy of building your own boat and then take her sailing. Remember, in sailing, the wind is free, but nothing else is...
This is my very first Instructable after many years of referencing this excellent site to build numerous cool projects (you should see my next post). Anyway, I hope you enjoy it and please feel free to ask any questions you may have and I'll do my best to answer them. I'm planning on building a larger boat in the near future so stay tuned...
Recommendations

Microcontrollers Contest

Woodworking Contest

Art and Sculpture Contest

- Accessories
- Built Boats
- Information
- Rowing Boats
- Sailing Boats
- Motor Boats
- Surf and Paddle Boards
Sailing Boat Plans
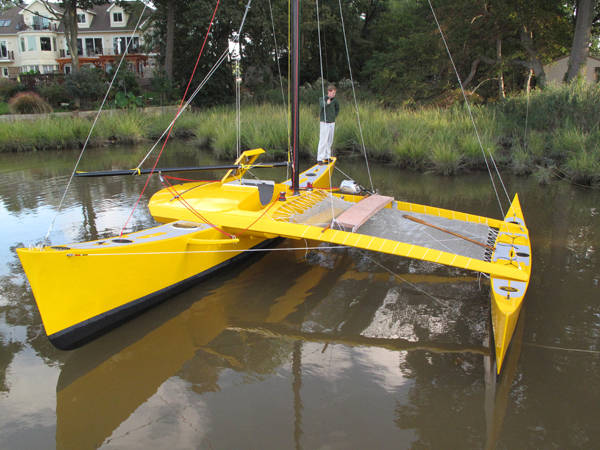
Madness Pacific Proa
A lightweight Pacific proa for fast cruising or daysailing.
More information
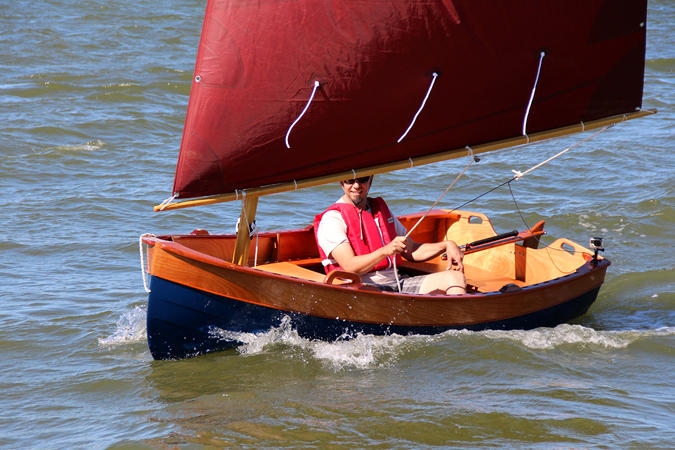
Tenderly Dinghy
A traditional-looking 10-foot clinker dinghy for rowing, sailing and motoring that is stable, handsome and easy to build.

Eastport Pram
A pretty, light, tough, roomy and easy to build 7 foot 9 inch pram dinghy that can be rowed or sailed.
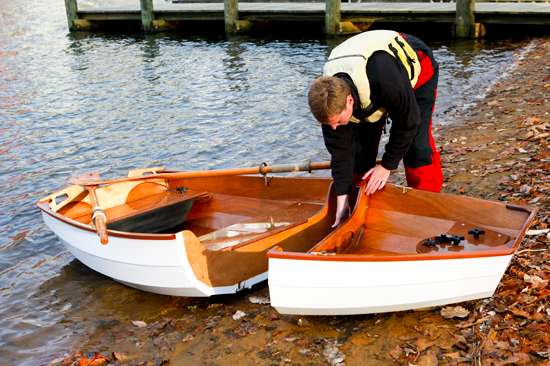
Nesting Eastport Pram
An easy to build rowing and sailing pram dinghy that splits into two nesting sections for compact storage.

A 15 foot clinker style double ended family boat that can be rowed, sailed or motored.

Skerry Raid
A small, decked, wooden cruising boat for coastal expeditions by sail and oars.

Lighthouse Tender
A stable but fast double-ended rowing or sailing boat based on a traditional Maine Peapod.

Northeaster Dory
A 17 foot clinker dory for solo or tandem rowing or sailing.

Southwester Dory
A lightweight beach cruising and expedition boat for sailing, rowing and motoring, which can also be built as a motor launch without the sailing rig.

The Duo is a simple-to-build rowing and sailing dinghy that can nest for easy storage. It makes a good tender as well as a fun sailing dinghy.

Jimmy Skiff II
A stable, flat-bottomed rowing and sailing boat that also handles well under motor, for family outings, fishing and day sailing.

Goat Island Skiff
A simple lightweight sailing boat with excellent performance.
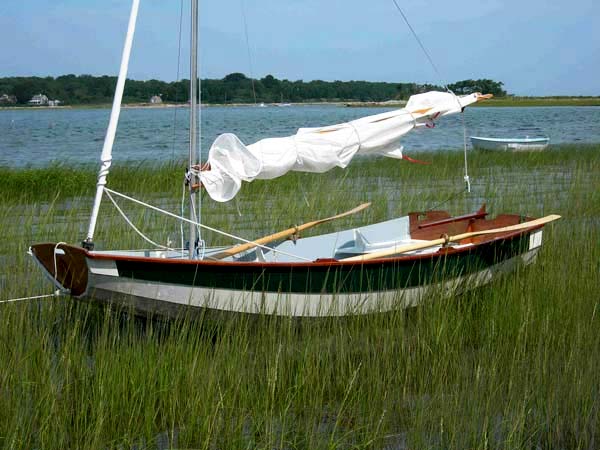
PassageMaker
An 11 foot 7 inch clinker style pram dinghy that performs beautifully when rowed, sailed or motored.
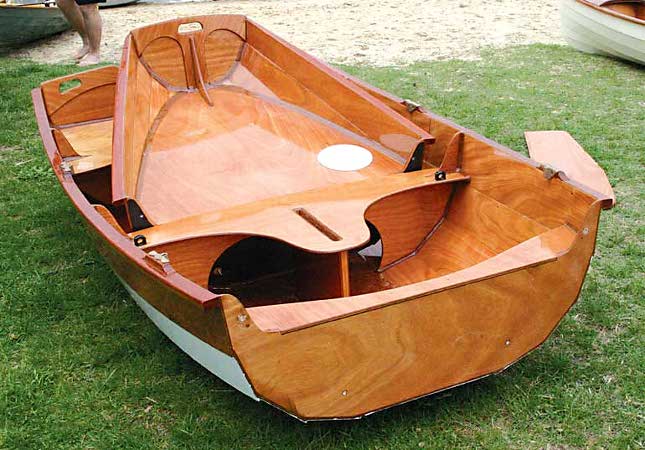
PassageMaker Take-Apart
An 11 foot 7 inch clinker style pram dinghy that can be nested to save space.

Pixie Beach Catamaran
The Pixie is a fun car-toppable beach catamaran that sails well with one or two crew and is popular among people who are new to sailing catamarans but who are not that interested in racing.
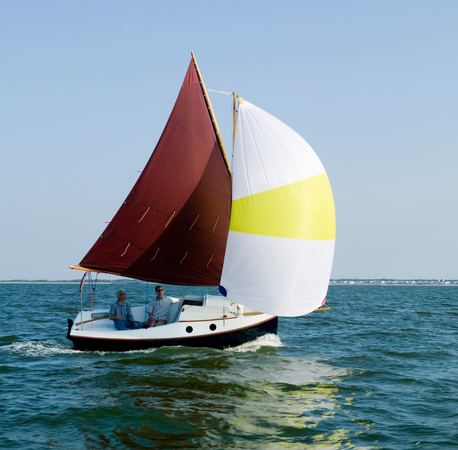
A fast-sailing 15 foot cabin cruiser with a dry and commodious interior.
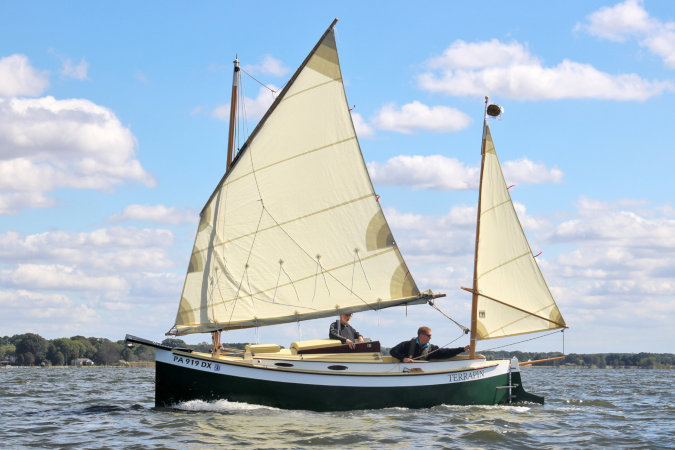
Autumn Leaves Canoe Yawl
A modern wooden canoe yawl for engineless coastal cruising by sail and oars, designed to be affordably built by an amateur.
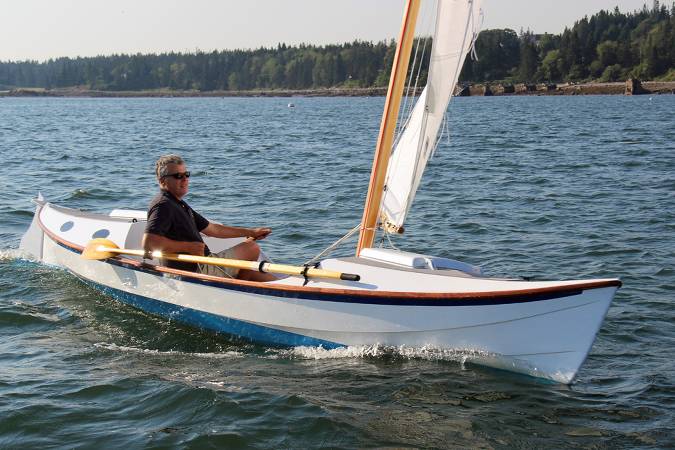
Faering Cruiser
A serious rowing and sailing boat for coastal cruising, with a small cabin aft.
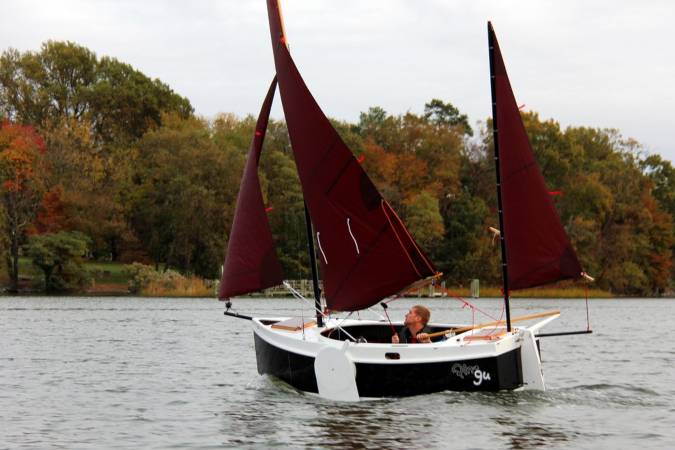
Nesting Expedition Dinghy
A very compact sailing beach cruiser that can be nested in three sections for storage in a corner of a garage.
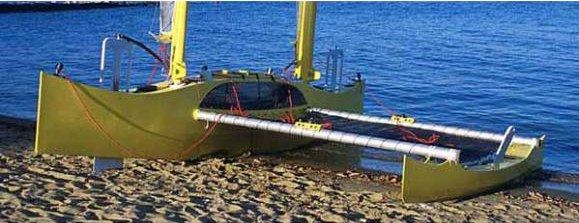
Mbuli Pacific Proa
Plans for a very light and fast Pacific proa beach cruiser.
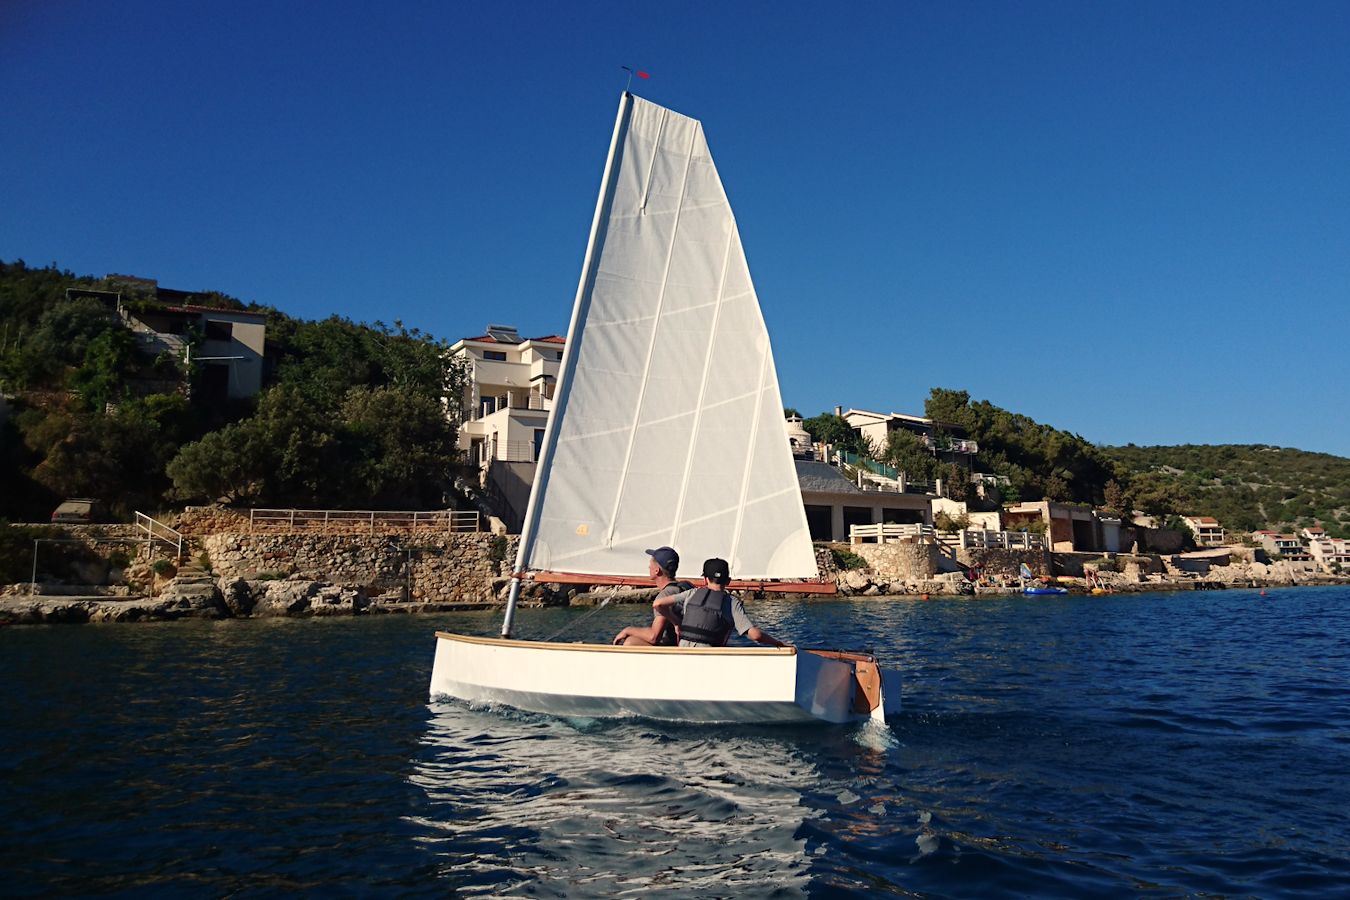
A versatile nesting dinghy for day sailing and camp cruising with a comfortable double berth.

Outrigger Junior
A finely-proportioned and lively sailing canoe with a huge lateen sail for lots of speed.
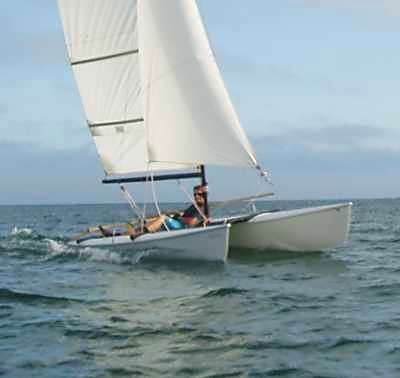
Quattro 14 Beach Catamaran
A lightweight single-trapeze beach catamaran for racing that is easy to build.

Quattro 16 Beach Catamaran
A high performance twin-trapeze racing catamaran that is lightweight and easy to build.

Strike 15 Trimaran
The Strike 15 is a high-performance racing trimaran with folding outriggers designed to be easy to sail by older or less experienced sailors and easy to launch from the beach.

Strike 16 Trimaran
The Strike 16 is a dry, comfortable trimaran for four-person day-sailing or two-person weekending.

Strike 18 Trimaran
The Strike 18 is a dry, comfortable trimaran for family day-sailing with an optional, removable, cabin top to convert it into a pocket cruiser.

Tryst Trimaran
A light and stable 10 ft trimaran that is very easy and fun to sail and can nest for compact storage.

Zest Racing Dinghy
The Zest is a single-handed racing dinghy with a plywood hull and comfortable sitting-out wings.
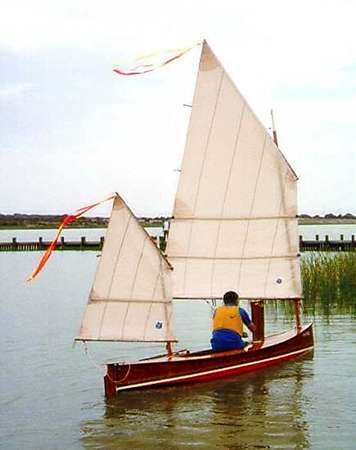
Beth Sailing Canoe
A light sailing canoe combining a traditional rig with a high speed hull.
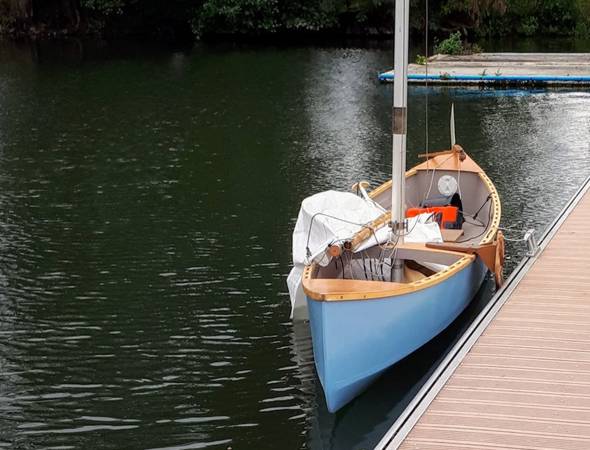
Kombi Sailing Canoe
A truly dual-purpose wooden canoe for exciting sailing and family paddling.

Viola Sailing Canoe
A lightweight plywood sailing canoe with the performance and stability of a good sailing dinghy.

A low-cost sailing dinghy that is easy to build and fun to sail for clubs, regattas and sailing lessons.
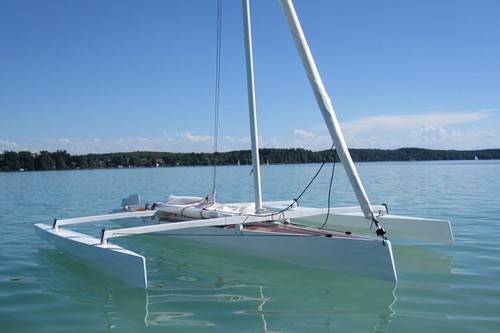
A pretty little demountable trimaran designed for speed and easy handling by one or two people on lakes, rivers and bays.
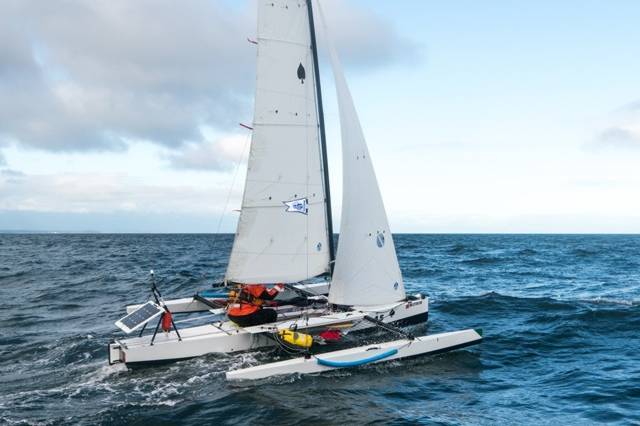
TriRAID 560s
A light and fast adventure trimaran for 1-2 people designed for raid competitions.

Sailing Outriggers
Outrigger floats to turn a canoe or kayak into a fast sailing trimaran.
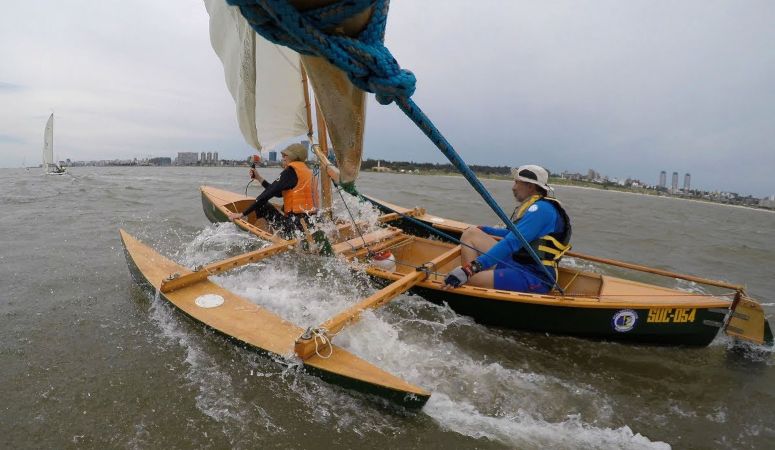
Drop-in Outrigger Plans
Light and easily removable outrigger floats that turn a canoe or kayak into a formidable sailing boat or a stable fishing platform.
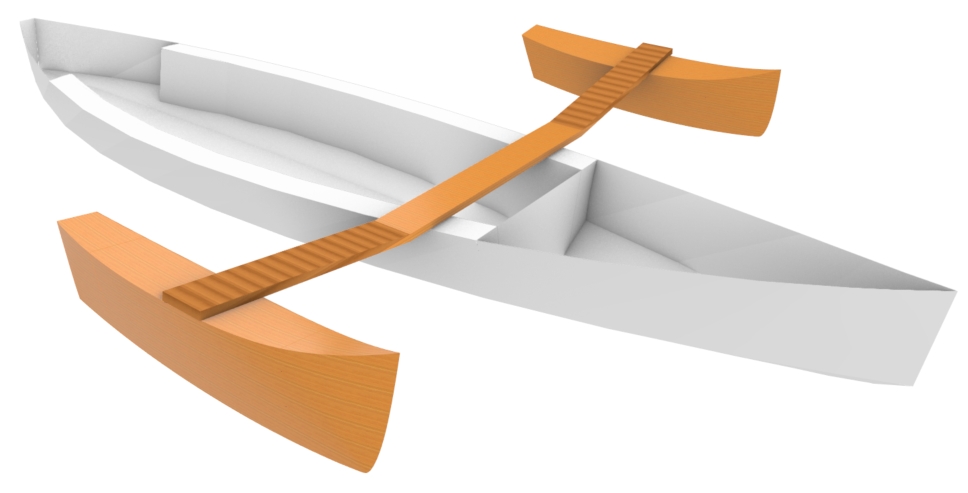
Mini Drop-in Outrigger Plans
Small outriggers for a sailing canoe, to aid stability for learners and for extra safety for more adventurous sailing.

Drop-in Canoe Sailing Rig Plans
A simple lug rig that can be added to an ordinary canoe or kayak to add the ability to sail.
- Fyne Boat Kits — Old Cooperage Yard, Gatebeck, Kendal, Cumbria LA8 0HW
- Telephone: +44 (0)1539 567 148
- Email: info [at] fyneboatkits.co.uk
Copyright © Fyne Boat Kits

Your shopping cart is empty!
Sailboat Plans 30-40ft

Bruce Roberts sailboat designs
Boat plans 30 - 40 ft .
This section of Bruce Roberts sailboat designs and boat plans cover the following vessels in the range of 30 to 40 foot. The Roberts, Classic, Henry Morgan, Offshore, Power Cat, PCF 36/40, and Canoe Stern designs. Boat building plans using steel, aluminium, fiberglass wood/epoxy, dependant on the design, are available. Information and prices are on each individual design page.
Study Plan Packages contain all the sheets #1 from the actual plans. Sail Plans and the various accommodation layouts pertaining to the design are shown on these sheets. There may be anywhere from two to eight #1 sheets which are all to scale and which measure between one meter and two and a half meters long each. They are intended as a more in-depth overview of the design in which you are interested.
Material Lists for the basic materials required to build the hull, deck and superstructure are included in the study plan package to help you with your budgeting. Where Fibreglass is mentioned as a material this means Balsa sandwich / Foam sandwich, Single skin or C-Flex. Most steel plans can be adapted to aluminium construction. Both moulded ply and strip plank can be used in conjunction with the wood epoxy saturation method. Sail and rig details are also shown on the study plan sets.
As the Study Plan Packages include the basic measurements in scale for the accommodation layouts, you can customize the layouts to suit your needs if what is presented is not exactly to your liking.
The link to download the Study Plan Packages is emailed to your email address and generally within 24 hours, The link to the Full Plan Sets is also generally emailed within 24. All study plans and full plan sets are downloadable in .pdf format for you to have printed at a nearby print shop. The study and full plan sets are available on CD's on request with postage cost depends on country.
To View drawings , photos, information and prices of the design that interests you just click on that design.
Payments: We only accept payments through PayPal. This method of payment protects both of us. Please be aware that there is no obligation or need to be a member of PayPal to use them to pay us using the normal various methods of payment.

Pram Dinghy Boat Plan
Roberts Pram Dinghy This Pram dinghy can be built in fiberglass or plywood. The pictures sho..

Classic 31 Boat Plan
Roberts Classic 31 This is an earlier design that some traditionalists may find appealing. It may..
Roberts 310 Boat Plan
Roberts 310 This design may be built with either a regular trunk cabin or a pilot house. It is al..
Henry Morgan 32 Boat Plan
Roberts Henry Morgan 32 This is an earlier design that traditionalists may find appealing. It is ..

Roberts 34 Boat Plan
Roberts 34 This is an earlier design that still enjoys a great amount of popularity. It has been ..
Canoe Stern 341 Boat Plan
Roberts Canoe Stern 341 Designed by Graham Shannon this is for those of you that are looking for ..
Roberts 345 Boat Plan
Roberts 345 Originally this was designed for lightweight frameless multi-chine steel construction..
Roberts 35 Boat Plan
Roberts 35 This is a classic modern design that has been built as a production boat in many parts..
PCF 36-40 (Pacific Coast Fisherman) Boat Plan
Roberts PCF 36-40 (Pacific Coast Fisherman) This design may be built as a motor sailer for family..
Roberts 36 Boat Plan
Roberts 36 This design is a well proven world cruiser as many are currently sailing in different ..
Roberts 370 Boat Plan
Roberts 370 Such has been the response to this design that plans for it's construction are availa..
Offshore 38 Boat Plan
Roberts Offshore 38 Full plans for this design are available for building in round bilge Fibergla..
Power Catamaran 39 Boat Plan
Roberts Power Catamaran 39 These catamarans were designed to be built using the fibreglass panel ..

Roberts 39 Boat Plan
Roberts 39 This design is available only in multi-chine hull form, sloop or, with the addition of..
Roberts 392 Boat Plan
Roberts 392 This design is a companion to the Roberts 39 which until now had only been available ..

Roberts 40 Boat Plan
Roberts 40 This design comes with either a centre cockpit or a pilot house layout. There is adequ..

- Basic Kayaking Knowledge , Learn
15 Free Boat Plans You Can Build This Week (with PDFs)
Boatbuilding is one of the most ancient forms of craftsmanship still alive today. As long as our ancestors have had a curiosity about exploring open waters, they have been practicing and honing their boatbuilding skills.
To be honest, however, building a boat is no small task. It will require a lot of work and patience to ultimately create a finished product that you are happy with and that is actually seaworthy.
Of course, we have also included a few free boat plans. You can keep in your back pocket for the next time you are asked to build a cardboard boat as part of a contest or lakefront teambuilding adventure.
We hope that these resources help you in your journey to build your own boat!
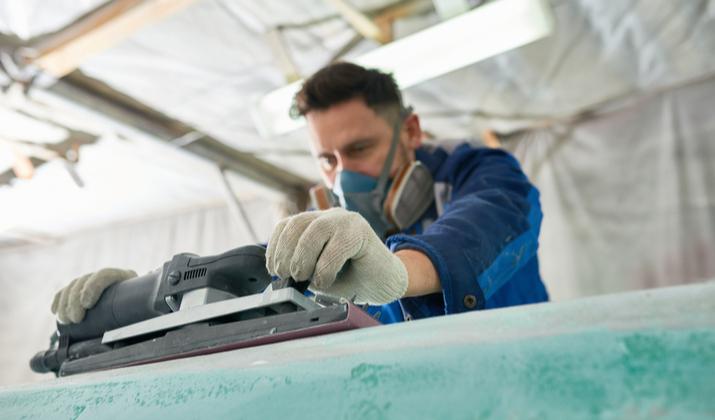
Photo by SeventyFour via Shutterstock
Free Boat Plans
- The Wanigan
- The Slipper
The Handy Andy
- The Jolly Roger
- The Hobby Kat
The White Duck
- The Sea Midge
The Crazy Cardboard Boat
Why Build Your Own Boat?
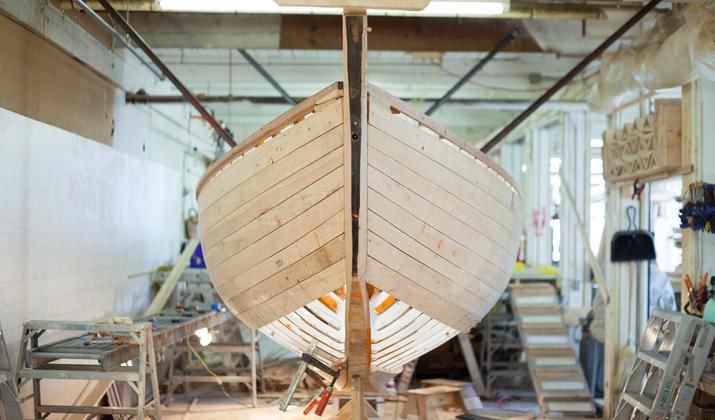
Photo by Halsey via Shutterstock
There are a lot of reasons why you should explore building your own boat versus buying a pre-made model. Here is a quick breakdown of the most obvious benefits:
- You will know the ins and outs of your finished boat better than anyone
- It can be a great project to work on with your teenage or even adult children
- You will gain valuable skills molding and shaping wood and other materials
- You can design your boat for your specific needs
- You don’t have to trust the sometimes-questionable manufacturing of mass-produced boats
- You can create a boat that functions as your second home on the water
- You can save money if you source materials mindfully
Of course, most first-time boatbuilders still experience some level of trial-and-error. With patience and perseverance, however, you can craft a one-of-a-kind vessel that has no equal anywhere in the world.
Free Boat Plans You Can Build This Week (with PDFs)
1. the wanigan.
PC Duckworks Boat Builders Supply
The Wanigan boat began as a garvey design, which is one of the older boat plans known to the Americas. Traditionally, these boats were built as work scows and were very popular among American summer camps.
The design itself is very simple, but these boats can carry heavy loads. It can also handle a trolling motor being mounted to the stern so you can cover more ground if you want to use it as a fishing boat.
The creator of this boat plan became aware of some of the downsides of the garvey design, such as the heavier weight that made it less efficient than some other designs. So he combined elements of dory and wanigan designs to create a hybrid.
The main changes include an enlarged beam, tilted lathes to provide a stiffer hull, and knocking off the top strakes to reduce the boat’s overall weight.
The Wanigan text
These additional The Wanigan drawings  may also prove useful for your build process!
2. The Mouse
The Mouse is one of the most compact and nimble boat plans we have found for this list. It is an easy build and also a great boat for two kids or a single teenage paddler.
The original builder began with a one-sheet boat design in an effort to create the lightest and most affordable boat possible. This means it is only suited for calm waters and should not be used in high winds or wavy conditions.
That said, it was built in roughly 12 to 24 hours of work time and doesn’t require a full workshop to construct. The main material that is required for building this boat is quarter-inch plywood. But the builder recommends using one-inch by half-inch pine or something a little sturdier.
The plywood and pine components are held together using a method called ”˜stitch and glue’. This method requires choosing one of the best glues for kayak outfitting , which are typically made of epoxy and glass tape rather than something cheaper like polyurethane.
The Mouse Instructions
Also, here are a few extra useful The Mouse Notes for builders
3. The Slipper
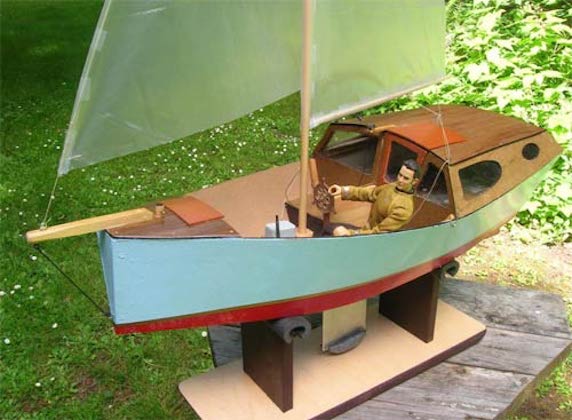
The Slipper is the first of many sailboat plans on our list and it is faster, easier, and cheaper to build than most. It also features a deeper cockpit than many other sailboat designs, which makes it safer for intermediate sailors.
This sailboat plan features dual steering stations so that you can sail from inside or outside of the helm. It also includes a centerboard trunk that hardly intrudes into the cabin at all. So that, it is easier to work around while you are in the cockpit.
The exterior hull and cabin of this sailboat feature a modified dory design using two sheets of plywood ripped to three feet wide before being joined together. The resulting hull is a modified V-shape that reduces drag.
The centerboard of this boat can also be winched up to the level of the top of the cabin or lowered down to alter the draft. This allows you to customize the boat design for a stiffer and more weather-worthy vessel if you need it.
The Slipper was also intentionally designed with an aft cabin that naturally helps to keep the bow pointed into the wind whether you are underway or the boat is anchored in the port.
The Building Slipper
4. The Handy Andy

PC DIY Wood Boat
The Handy Andy is a great little 10-foot portable rowboat for hunting, camping, fishing, and other recreational uses. It is actually the only folding boat design on our list, which makes it best for folks that need the most portable boat plan possible.
This boat features a 42-inch beam and a depth of about 15 inches at the mid-section. It also weighs roughly 80 pounds when assembled and can handle up to three average-sized human passengers.
The design boasts a flat bottom with canvas-bound edges and the primary material used for construction is ⅜-inch marine-grade plywood. Despite its lightweight nature, this rowboat can handle trolling motors or even outboard motors with a maximum of five horsepower.
Once finished, the hull can be folded or unfolded in less than a minute’s time.
This design makes it one of the only boats on this list that can be stored in a truck bed or easily carried by two people to be launched at more remote locations.
5. The Junior

If you are looking for an all-purpose dinghy that can handle almost any use you might imagine, look no further than The Junior free boat plan. It can carry three or four average-sized adults and is much easier to row than a traditional dinghy.
It is also durable enough to be equipped with a small outboard motor. You could even set it up with sailing equipment if you want to use it as a sailing vessel. As we said, this is truly an all-around boat design!
This boat plan requires constructing three frames that will provide the majority of the load-bearing support. The builder recommends using ¾-inch framing with ⅜-inch plywood as the exterior material for this boat build.
Resin glue and flathead screws are also required to hold this boat together. But there is a full list of materials included in the plans we have linked to below. Sticking to that plan should also give you enough leftover materials to construct two six-foot oars for rowing this boat until you install a trolling motor or outboard motor down the line!
6. The Jolly Roger

Channel your inner Captain Morgan when you are following these plans to build your very own Jolly Roger boat. This flat bottom boat design is designed for pond fishing . It can also be a useful yacht dinghy for getting from your dock to a larger vessel anchored offshore.
The plan follows conventional dinghy construction methods but also includes a few modifications that will save you time and energy. The wide design is super stable for boaters of all ages.
The keel, frame, chines, and risers are all cut from ¾-inch oak, ash, or any other trusted hardwood you can get your hands on. For the smaller components, the builder recommends using cedar, cypress, fir, or white or yellow pine.
Because this boat plan is also sturdy enough to handle a small motor, it includes important points for protecting the wooden hull from spark plug damage.
Be careful to follow these guidelines to build the safest boat possible if you imagine installing a motor down the line.
The Jollyroger
7. The Cork

The Cork is another simple rowboat design. This one trends away from the flat bottom plans that we have included thus far. Instead, it features a deeper, V-shaped hull that makes it better suited to more efficient rowing and easier maneuverability.
It can be rowed easily from either seating position and is durable enough to handle up to three average-sized adult passengers. The ends of the boat are identical, which allows for multi-directional rowing.
The list of materials required for this boat plan should cost you between $30 and $50, depending on your location and hardware costs there. The resulting build is lightweight enough for two people to be carried and also to be transported on top of a vehicle .
Inside the boat, the builders use aluminum tubing to secure the struts that hold the seats. This material choice keeps the overall weight of the boat down while still adding the necessary rigidity across the beam of the boat.
8. The Hobby Kat

The Hobie Cat is one of the most iconic and recognizable small sailing vessels ever made. This Hobby Kat plan is your answer to building your own iconic sailboat without spending thousands of dollars.
Your finished boat will be able to handle speeds of up to 20 miles per hour. It will be a super fun vessel for windy days on the lake or bay. The builder was able to construct the hulls, decking, and rudder for this boat while spending little more than $200.
From there, they purchased and installed the mast, boom, sail, and rigging, which brought the total amount spent to roughly $650 (still much less than a name-brand Hobie!). Without the mast and sail, this boat weighs roughly 165 pounds and is constructed using primarily 3/16-inch marine plywood.
You can also elect to build your own mast, boom, and sail if you have the time and skills to do so.
Those elements are not included in this boat plan, but they do offer some recommendations for where to buy these components!
The HobbyKat
9. The Tern

Named after the common seabird found around the world, the Tern is a lightweight and nimble sailboat with a 72 square foot base design. She is made for inland sailing and planes very well in moderate breezes.
The hull design also provides minimal water resistance and the small floor plan makes this boat easier for intermediate sailors to handle. Even though it offers a small footprint, this boat is sturdy enough to handle up to four adult passengers.
One of the best things about this boat plan is that it can be built almost entirely by using only common hand tools.
Of course, you can speed things up if you have power tools and you are skilled enough to use them correctly.
The Tern boat plan includes a 20-foot mast, but you can shorten that length if you desire. The plan includes a complete list of materials and step-by-step instructions on how to plane and assemble each element.
10. The Falcon

As you might expect from its name alone, the Falcon is an incredibly speedy sailboat for its size. It boasts a 14-foot centerboard and can handle two to four passengers, depending on its size and weight.
In tests of the original build, the creators claim that this boat out-distanced many Snipe and Comet sailing vessels as well as pacing evenly alongside longer 18-foot sailboats. When finished, your boat will have a six-foot beam and a total weight of roughly 475 pounds.
For the main framing components, they recommend using white oak and plywood will be the main material used in the hull construction. The hull features a V-shaped that was inspired by larger schooners.
The Falcon is best suited to sailing on bays, lakes, and wide rivers. It is also a boat plan with just under 120 square feet of deck space and it is a great build for amateur craftsmen and sailors.
11. The White Duck

The White Duck is a flat-bottomed rowboat with a total length of 13’6” and a four-foot beam. The cockpit is approximately 15 inches deep all the way around and this boat can handle up to five passengers while maintaining buoyancy and stability.
When fully constructed, it will weigh roughly 200 pounds, but the final weight will depend on the type of lumber you choose for your build. This boat plan features plywood planking over solid wooden frames.
The White Duck is built with a pointed bow that cuts nicely through the water. The flat stern of this boat design will make it easy to attach a small outboard motor with a maximum of six horsepower.
As you might expect from its name, this rowboat is a great option for duck hunting trips. That being said, it is a highly versatile craft that can also be used for pond fishing or casual rowing on your nearby lake.
12. The Sea Midge

The Sea Midge is one of the smallest rowboats on our list and it is ideally suited for one average-sized rower or two small paddlers. It is only about 8 feet in length and offers a 52-inch beam at its widest point.
The Midge’s small dimensions make her ideal for navigating narrower creeks and streams. With an approximate weight of 62 pounds, she is easy to maneuver on the water and can also be much more easily transported than some of the larger boat plans on our list
The Seamidge
13. The Zephyr

The Zephyr is a compact and speedy dinghy sailboat that measures roughly 14 feet long and approximately five feet across. This boat style was originally developed for safely crossing the English Channel. This means it can stand up well in rough waters.
When finished, it is also light enough to be transported on a small trailer or on top of a larger vehicle.
The boat plan calls for using hemlock or fir for the framing and oak or Douglas fir for the keel and chines.
14. The Gypsy

The Gypsy is a small cruising sailboat that is meant to be equipped with an outboard motor for powered locomotion. The original design resulted in an incredibly seaworthy vessel that logged more than 6,000 nautical miles in her lifetime.
It includes a comfortable cabin that makes it well-suited for multi-day sailing adventures. This boat plan includes improvements on the original design that will help you build an extremely durable and long-lasting sailboat.
The Gypsy boat design will help you construct a vessel that can handle a motor up to 25 horsepower so that you can enjoy cruising speeds of up to nine miles per hour.
While it may require a bit more of an investment in time and money, it will also help you produce one of the best boats you can build with a free boat plan!
15. The Crazy Cardboard Boat

PC Saint Dominic Catholic School
Finally, let’s talk about a crazy cardboard boat plan that you can build in less than a day. This is a great boat plan to bookmark for your next teambuilding project so that you can earn bragging rights with your coworkers.
The plan calls for using 1.5 sheets of cardboard. But you can use the remaining half sheet to build your own boat paddle if you want to get creative.
Triple-thick cardboard is best for this boat plan. But you can always double up thinner sheets if that is all you can find.
These plans include an easy-to-follow diagram for marking, cutting, and folding the cardboard sheets to create the hull of your boat. From there, it calls for using contact cement and construction adhesive to seal the edges and corners.
If you are looking to save a little money on this build you could also use duct tape and then wrap the entire design in plastic sheeting to provide waterproof qualities.
Overall, this build is one of the cheapest and easiest on our list. It is also a great project for hot summer camp days on the lake or river!
15 Free Boat Plans You Can Build This Week (with PDFs) – Final Thoughts
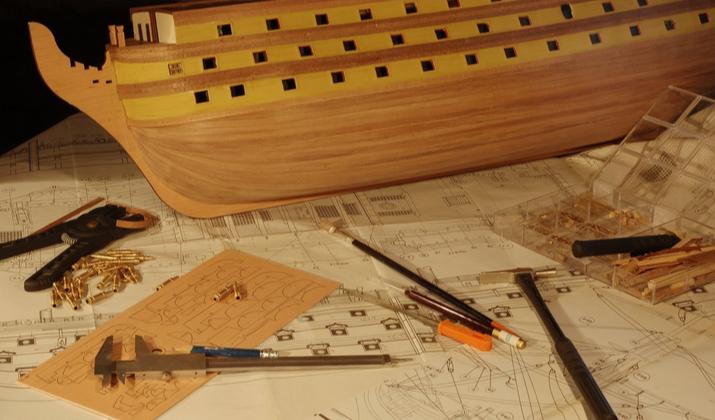
Photo by Alexandra Soloviova via Shutterstock
We hope that you now have a couple of free boat plans to inspire you to begin your own construction project.
Don’t hesitate to check out YouTube for some useful boat-building videos when you are getting into the nitty-gritty of these build processes!
Enjoyed 15 Free Boat Plans You Can Build This Week (with PDFs)? Share it with your friends so they too can follow the Kayakhelp journey.
Share on pinterest.
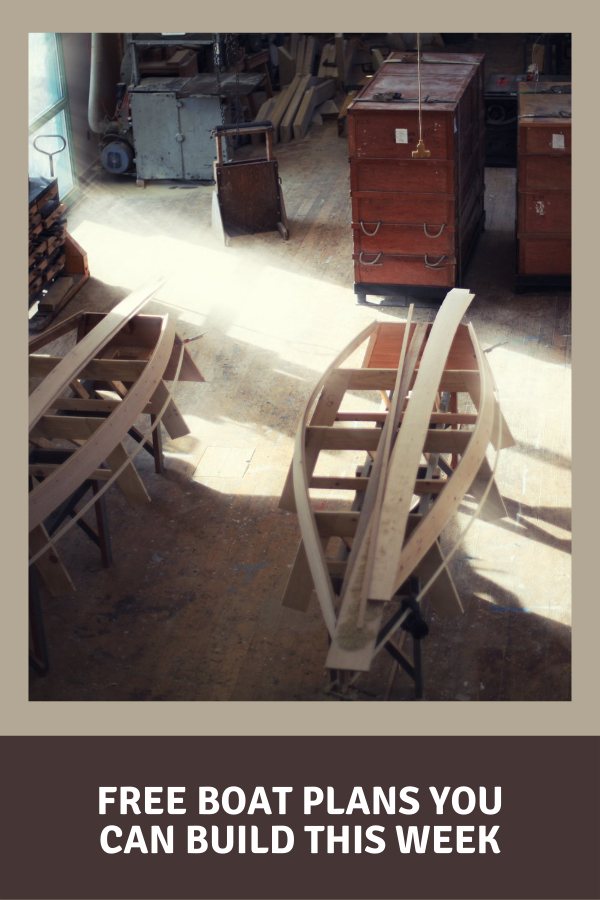
Peter Salisbury
Pete is the Owner of KayakHelp.com. Born and raised in Cleveland, Ohio, he grew up kayaking, fishing, sailing, and partaking in outdoor adventures around the Great Lakes. When he’s not out on the water, you can find him skiing in the mountains, reading his favorite books, and spending time with his family.


Kevin Boothby Sailing
Build Your Own Self-Steering Windvane

For the short-handed sailor planning long ocean crossings, a self-steering windvane is not essential but darn close to it. For boats with stern-hung rudders, a self-steering windvane can be constructed with readily available materials and a modest level of skill.
It’s all about leverage. There will be an air paddle which will weathercock to the wind and provide enough torque to move the trim tab which we are going to mount on the trailing edge of the rudder. The trim tab will be a slender, high aspect ratio blade, and we will add some “balance” to it–a little bit of the blade will lead the shaft–all so as to lessen the torque required to move the trim tab when the water is flowing over it and thus increase the amount of leverage the air paddle has over it.
Let’s start with building the trim tab. The trim tab should be somewhere around 10 to 15 percent of the area of the rudder. We decide on the correct diameter of shaft for the blade. In my case this was a 5/8″ diameter stainless steel shaft. We then drill several (say four) holes to take through-bolts which will hold the wooden blade to the shaft. Below is the rough blade held to the shaft with 1/4-20 bolts. Notice the thinner piece on the leading edge, this will give it some balance.
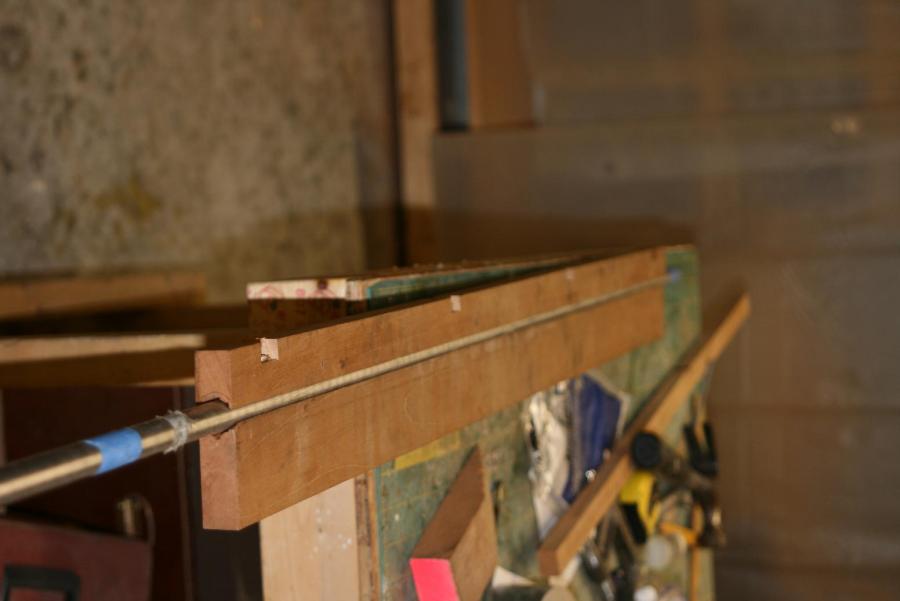
We then permanently attach the blade with the bolts and 3M 5200 and begin fairing:
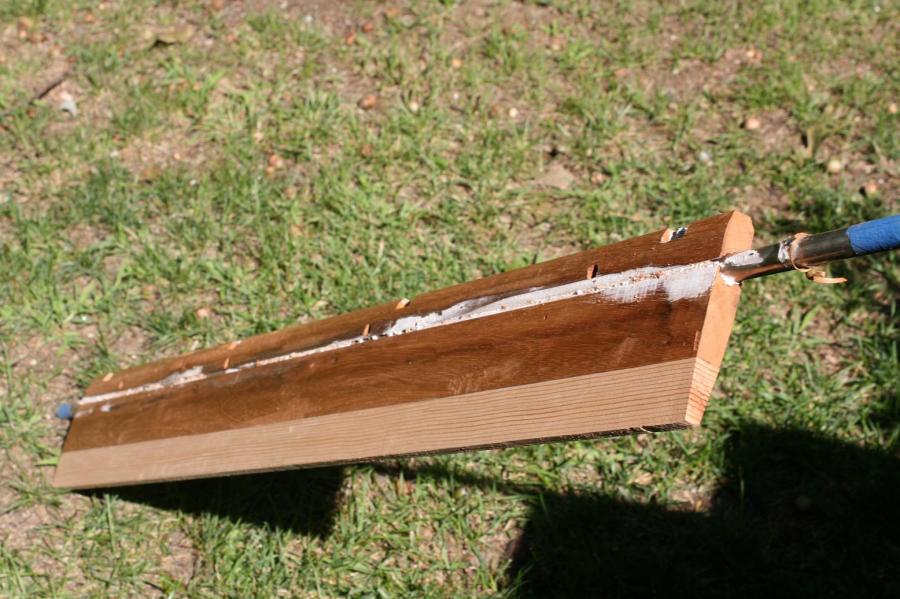
Following fairing and shaping we will then encase the entire blade in fiberglass roving and epoxy, this will add a great deal of strength and durability.
Now we have to mount it on the end of the rudder. But before we start drilling any holes, we need to work out some geometry. The trim tab must be mounted such that the air paddle will attach at the “no action point”; that is, where the trim tab shaft intersects the axis of rotation of the rudder. This is important because if the air paddle is not attached at this point, the turning of the rudder will wag the air paddle back and forth resulting in poor performance. Hopefully the diagram below will make this clear:
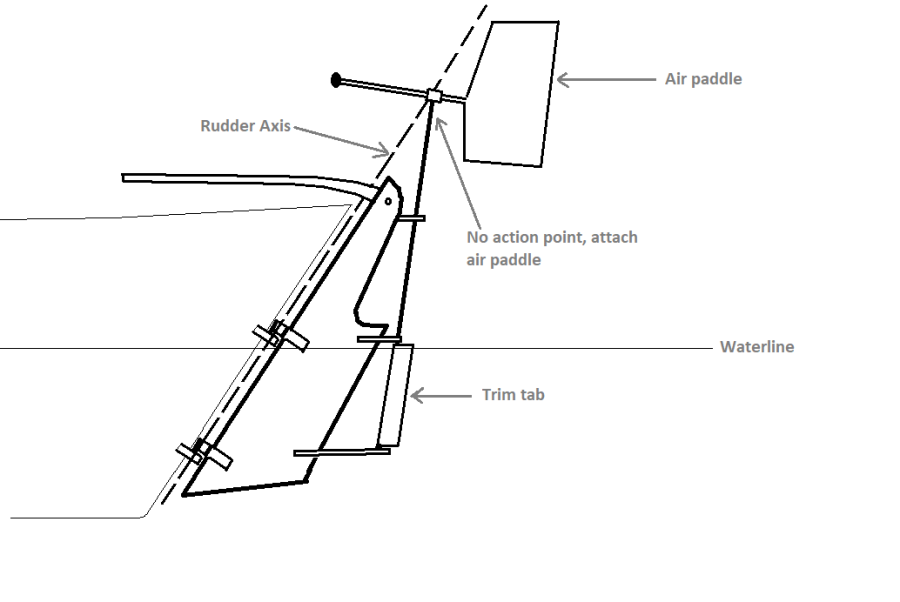
For the gudgeons on the rudder I used 1″ thick pieces of ash which I cut like opened jaws to slide onto the trailing edge of the rudder. They were finally attached with through-bolts and plenty of 3M 5200. For the bottom gudgeon I drilled a slightly oversized hole for the shaft to drop down through. On the inside of the hole I put a few laminates of epoxy and fiberglass roving to minimize friction and make it snug (note: I’ve since inserted a nylon bushing, which works better).
Similarly for the upper gudgeon EXCEPT that I opened the hole to the outboard end so that it formed a “U” and then closed it with a small U-shaped piece of plywood bolted on top and facing inboard (see pics below). Why? So that the trim tab can be removed for servicing.
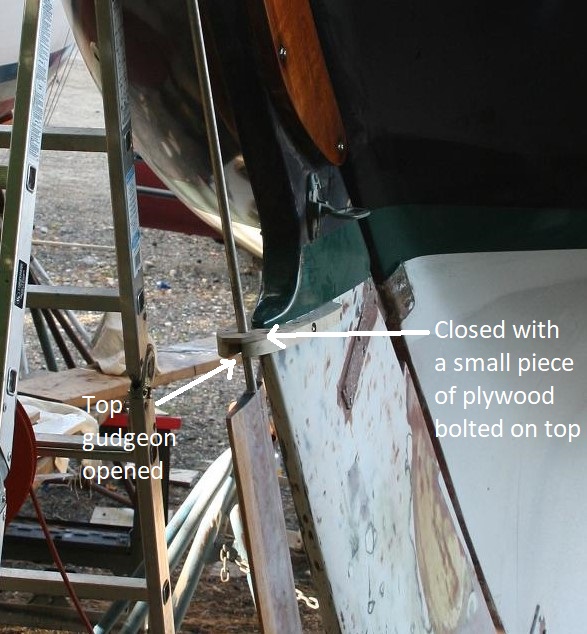
And finally there is a third gudgeon at the rudder head, which is simply screwed onto a wooden cleat mounted there, again so that it can be easily removed.
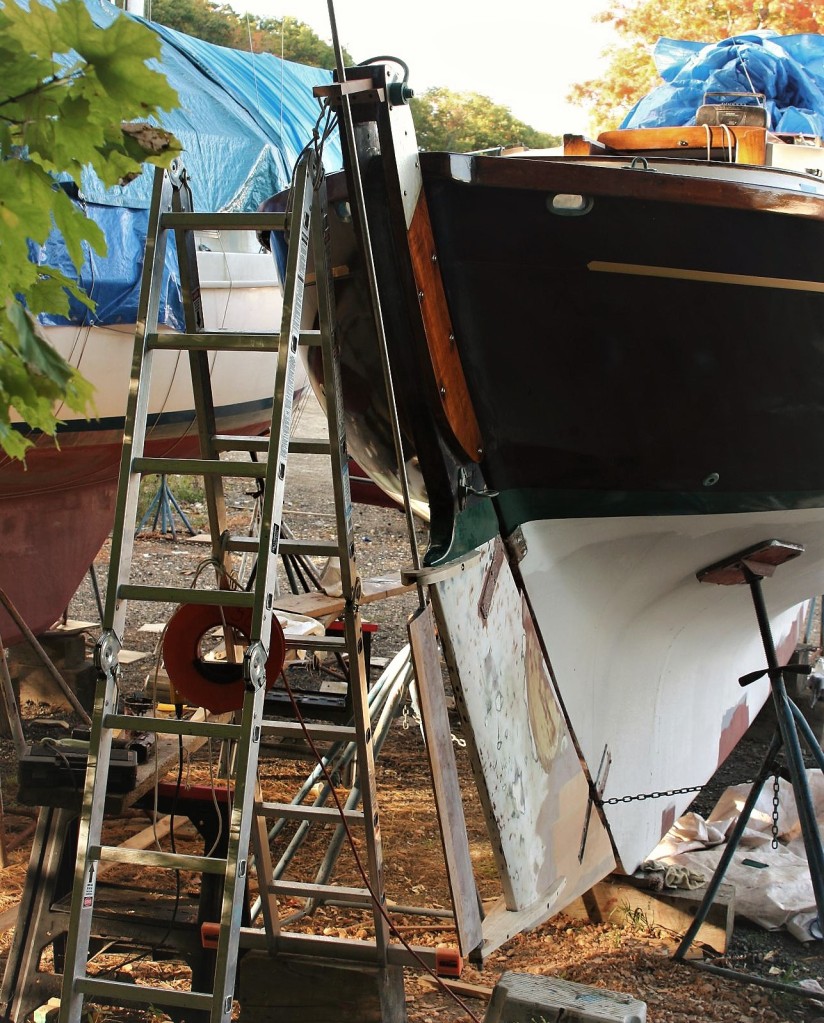
Now we have come to the issue of attaching the air paddle. First of all, the air paddle needs to be balanced. This means the axis where the trim tab shaft runs through it is also the center of mass, or if the shaft was held horizontally and the air paddle free to rotate it would not choose to do so absent any wind. Since the plywood air paddle has weight, this will require a counterweight for which I used a regular shaft zinc clamped to a wooden dowel.
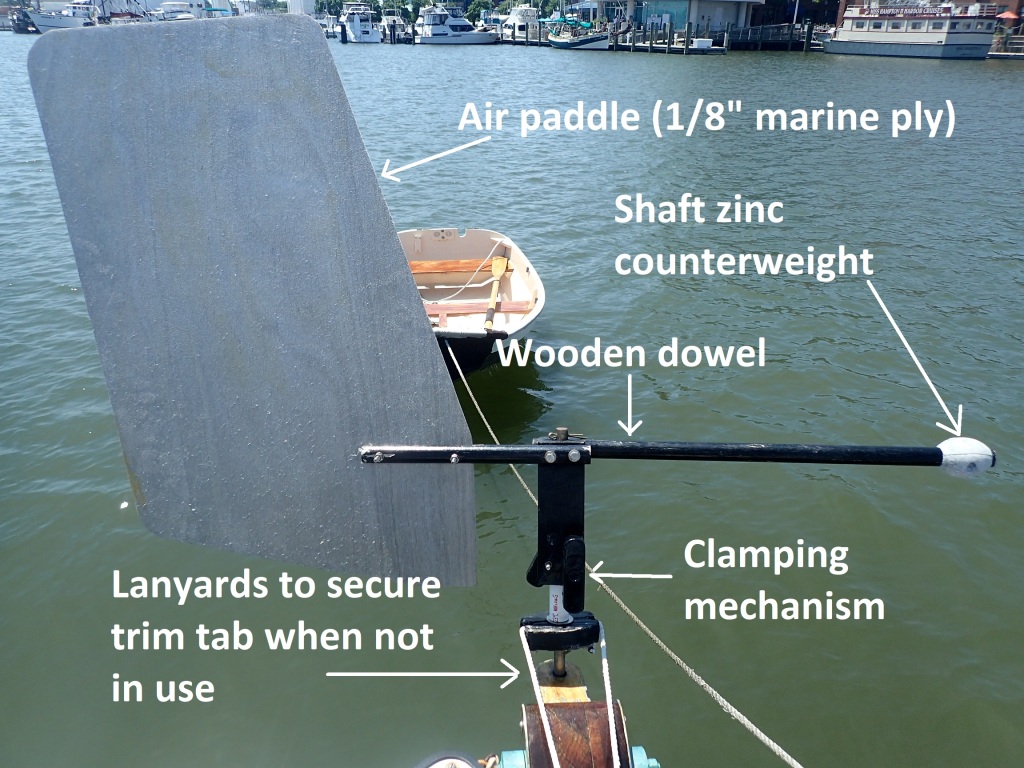
With our air paddle and counterweight constructed the last remaining item is the engaging mechanism. I opted for the simplest possible, simply boring a hole up a rectangular piece of timber for the shaft to pass through, and then sawing about halfway up from the bottom (see above photo). The air paddle and counterweight are bolted at the top, while at the bottom, on either side of the bored shaft hole, are 1/4-20 bolts with big handles on them. The opposing nuts are set in epoxy. Thus the air paddle can freely turn on the shaft until I tighten the bolts, when it clamps onto the shaft and the windvane is thus engaged.
And that’s it. So far this vane has steered me over 30,000 miles. I can get it to work in winds down in the 3-6 knot range, and then it has steered the boat while running before a gale under bare poles. In order to work well in light airs the gudgeons must be greased from time to time. This can easily be accomplished in the water while donning a mask and snorkle. Just lift the trim tab up a few inches (it cannot actually pop out of the bottom gudgeon before the blade runs up against the upper gudgeon–with the little plywood cap on, of course), clean, grease, and set back down.
Now one peccadillo I have found with this type of steering vane is the tendency to over-steer. It tends to shove the helm too fast and too far on either side, causing the boat to sail a slalom course. One cure for this is to attach shock cords to your tiller lashings which will greatly dampen the effect. The size and setup of the shock cords will vary from boat to boat. Here is my current setup shown below:
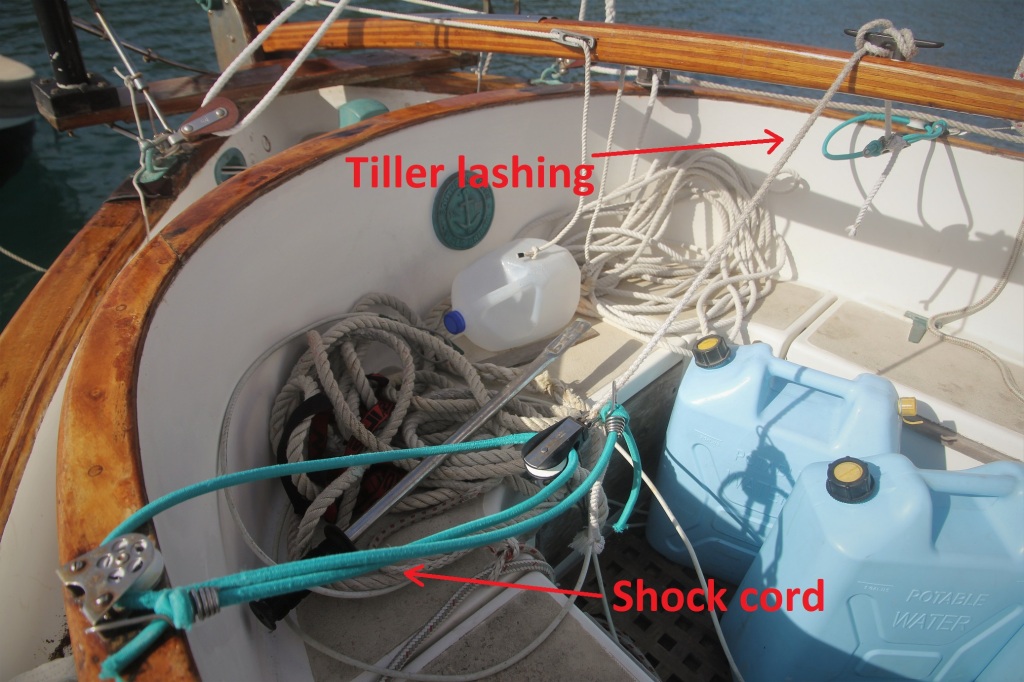
Latest Posts
Conquer nature, kill god.
Our long and difficult relationship with nature needs to be understood in a first hand way. Sunshine State Politics January, 2024 Thus far my sailing sojourn to Florida and the Keys has been spectacular. I’m not merely talking about the weather, which of course comes as a welcome change from November in New England. The…
First my story (sorry to bore you) The solitary reader supplies his own assessment of his relationship to those he meets in print. This can result in some unpleasant reckonings with reality, yet by the same token, the lover of literature may become confident enough about everything he has worked out in his mind as…
The Quota Women of the Ocean Race
Diversity, Equity, and Inclusion is now queen of the seas “I Wasn’t a Quota” Margaret Thatcher famously bristled at the suggestion that her rise to power and ability to rule had anything to do with her sex. In a 1993 interview with NPR she is quoted as saying: “Well, I would like (the assessment of)…
“The Future is Female” Has Us All Going Broke
Modern feminized women are taught that men are either tyrants or incompetent boobs, so it’s better to rely on the government, as the government has the power to coerce men to hand over their money and to punish them for unacceptable behavior. Part I: The Assemblywomen I regard it as a matter of course that…
Something went wrong. Please refresh the page and/or try again.
Share this:

- Already have a WordPress.com account? Log in now.
- Subscribe Subscribed
- Copy shortlink
- Report this content
- View post in Reader
- Manage subscriptions
- Collapse this bar
Set sail with 5 of the most fun boating excursions in the D.C. area
If the weather is fair but D.C.’s usual going-out scene is starting to feel a bit drab, well, look to the water. There you’ll find boats with DJs and dancing, and boats with open bars and craft beer tastings. The vibes feel better on the river, with the breeze ruffling your hair. The views are better, too, allowing passengers to take in colorful sunsets and perspectives of the Lincoln Memorial or Reagan National Airport that can’t be appreciated from dry land.
We’ve spent the past few weeks on different vessels, from multi-sailed schooners to the sightseeing deck of the Potomac Water Taxi. We know there are trendy new options on the river, but as much fun as they sound, we decided not to include Hot Tub Boat Tours (starting at $449 for a private tour for two people) or the Potomac Paddle Club Pedal Boats (minimum group size of eight for reservation), and focus on cruises where anyone can hop on board, whether for date night or a BYOB outing with a small group of friends.
Whitlow’s on the Water
Beloved neighborhood bar Whitlow’s has existed, in various forms and locations, since 1946, but never quite like this. Whitlow’s on the Water, the largest tiki boat from local water transportation company Sea Suite Cruises, claims to be “situated at the cross-section of novelty and nostalgia.” That feels true no matter which generation of Whitlow’s you were part of: the ’80s 11th Street NW crowd, the Y2K 20-somethings in Clarendon or the current iteration of partygoers at the newest U Street NW reincarnation. Because the vibe at Whitlow’s, whether on land or on the water, is nothing if not consistent.
That means you can expect rowdiness, kitsch and a free-flowing bar. The 21-and-over boat, which takes off from Georgetown on weekdays and Navy Yard on weekends, is an homage to Whitlow’s on Wilson’s tiki rooftop: a straw roof canopy, faux bamboo siding, hanging surfboards that proudly declare “it’s 5 o’clock someplace.” There’s also an 18-foot U-shaped bar and plenty of space for up to 48 passengers to shake it to a soundtrack of throwbacks.
For weekend passengers, the trip kicks off with a vodka or tequila High Noon. For additional drinks, the bar menu includes five beers (all $7 or less), wines ($11), and the requisite orange crush and rum punches ($12), plus rail and premium liquors and mixers. Chips and light fare are available for purchase, but you can also bring your own food.
Over the course of the 105- to 120-minute venture, you’ll pass National Airport, where the planes soar seemingly just overhead — though the roar might be drowned out by a spirited drinking game set to AC/DC’s “Thunderstruck.” You might round the Anacostia past East Potomac Park just as someone pops an overflowing champagne bottle to celebrate the passengers marking birthdays. By the time the party lights come on and the disco ball descends, you’ll hardly notice you’re passing under Frederick Douglass Memorial Bridge (which also marks last call). The patrons, in captain’s hats and Hawaiian shirts, might celebrate the ride with tequila shots.
You’d be forgiven for thinking this all sounds a little like a frat party cast at sea. Or like a tailgate gone nautical. Or, frankly, like an average night at Whitlow’s.
Monday through Thursday, 3100 K St. NW, $40. Friday through Sunday, 1492 Fourth St. SE, $40-$50. seasuitecruises.com .
D.C. Sail’s American Spirit
Much of the time, D.C. Sail’s 65-foot schooner is the nautical classroom of the National Maritime Heritage Foundation’s community sailing program. But every other Friday night from May to October, American Spirit embarks on a sunset cruise, open to individual passengers looking for a more casual boating experience.
The gaff-rigged, steel-hulled ship comfortably fits around 35 passengers, who can take a seat on the hull’s bench (board early to claim a limited cushion). The boat has little fanfare: a white boat with three sails, looking classic and rugged next to the multimillion-dollar yachts parked alongside it at the Wharf. Its charming simplicity speaks for itself by the time the air horn blows and the crew starts unfurling the sails — this is not a tourist attraction or a party boat but a chance to disconnect from the bustling city and unwind for a glorious three hours.
Follow the lead of regulars and bring a picnic. There’s no food, drink, plates or cutlery available for purchase on board, so you’ll want to pack everything in advance — most passengers bring sandwiches, charcuterie and snacks. Wine and beer are permitted, but leave the spirits at home. If you’d rather not prep a meal, grab takeout from a restaurant on the Wharf; Grazie Grazie and Chopsmith have sandwiches, Colada Shop has handheld Cuban fare, and a recently opened Bartaco location is just across the pier.
A few more things to note: The cruise’s route depends on wind and weather, but you can count on departing down the Washington Channel to the Potomac. Even on sweltering days, strong breezes and a setting sun mean the vessel can get chilly; dress accordingly. Note that open-toed shoes are banned, and you’re best off wearing sneakers (even if they don’t match your sundress). In contrast to many other regional boating excursions, kids are not only permitted but welcomed. They’ll still need a ticket, but strollers are allowed and can be stored below deck.
Alternating Fridays, 650 Wharf St. SW. dcsail.org . $75; $25 for members.
Boomerang Pirate Ship Cruise
It should be noted: The pirate life is not for everybody. But for those willing to walk the plank and fall into some drunken kitsch, this two-hour excursion on the Potomac is the way to spend an evening on the water.
On other trips, this 54-foot, custom-built ship (complete with 12 “cannons”) is the stage for an interactive pirate-themed children’s show. In 2013, Boomerang Boat Tours opened the boat for adults in need of a swashbuckling adventure — parents, yes, but also bachelor and bachelorette parties, birthday celebrations, Greek life formals, and legions of 20-somethings in pirate attire. It’s the sister boat to Boomerang’s 21-plus yacht cruise, which also features an open bar but disappointingly lacks pirates.
Once you board, grab either a rum punch or an orange crush to get settled in. The captain will make some pirate-speak-laden announcements — plenty of “grog” and “arrrrrs” — before the music kicks off and blares for the rest of the evening. If your cruise is like the one we attended, you might experience a riveting mashup of “Sit Down, You’re Rockin’ the Boat” and Aqua/Ice Spice/Nicki Minaj’s “Barbie World” before you’ve fully departed Washington Harbour.
The ship won’t take you far, but you will pass the Kennedy Center, Lincoln Memorial and Washington Monument before you loop around near the Tidal Basin. By then, the open bar has been flowing for over an hour and the dance party on the main deck has surely kicked up to tunes from “Mr. Brightside” to Shaboozey’s “Tipsy” (sea chanteys, it seems, are not quite as easy to get down to). If you need a respite, head to the second-level deck, which is lined with benches and has the music turned down.
At the bar, you’ll find beer, wine and seltzers, plus an extensive cocktail list with summertime mixes: creamsicles, raspberry crushes, blue breezes and margaritas. Bartenders accept cash, Venmo or Cash App tips. Outside food and drinks aren’t allowed, but the crew offers prepackaged chips and snacks about halfway through the voyage.
Saturdays through October, 3100 K St. NW. ridetheboomerang.com . $65.
Tall Ship Providence
Of all the vessels cruising up and down the Potomac, only one can claim it was cast to portray a pirate ship in two “Pirates of the Caribbean” sequels. (Spoiler: It was destroyed by the Kraken.) And only one can help you imagine what it was like to sail with Revolutionary War hero John Paul Jones, hauling ropes to raise sails and sleeping in hammocks below decks — while sipping a local craft beer and working on your tan.
The Tall Ship Providence was built for America’s bicentennial — a reproduction of an 18th-century sloop that served as a privateer and trading vessel before becoming one of the first ships purchased for the fledgling Continental Navy. It arrived in Alexandria in 2019, and today, docked along the waterfront at the Senator John Warner Maritime Heritage Center, it serves as a floating classroom, where groups of students and Scouts, as well as curious tourists, take living history tours led by guides in period clothing.
The real fun happens when Providence’s crew casts off and the ship begins running on the Potomac, under a mix of sail and motor. Passengers are drafted to help pull the halyards and raise sails (under supervision, of course), while acrobatic members of the crew scamper up rope ladders into the rigging. During the sail, the crew leads tours down to the hold, to discuss how the crew of 70 — seventy! — slept, ate and went to the bathroom, and into the relative comfort of the captain’s cabin, where you’ll hear more about Jones’s derring-do.
Of course, you’re free to just relax and enjoy the wind in your face. Climb a short wooden ladder to the quarterdeck, the sunny area where the captain steers the ship, or grab canned beer, seltzer or cocktails ($8-$11) from the tiny bar, and find a space along the gunwale where you can enjoy the passing scenery and chat with a sailor, who might casually mention that two of the cannons on board can actually fire black powder.
Providence’s regular voyages focus more on sailing into the past than on party boat vibes; on recent trips, we’ve seen several multigenerational family groups enjoying a birthday or special occasion. Things are a little looser on the monthly Pirates of Providence sail, where tricorn hats and eye patches are encouraged and the Ship’s Company Chanteymen perform salty songs of the sea, and on monthly Craft Beer Sails, which include guided tastings from Heavy Seas, Port City or another brewery once you’re underway. Back in port, share tales of your trip over glasses of potent rum punch at Providence’s dock bar, where you can hear the water splashing under your feet.
Daily sails offered twice per day, Thursday through Sunday. Specialty cruises offered monthly. 1A Prince St. (at Waterfront Park), Alexandria. tallshipprovidence.org . $55-$65 adults; $47-$57 ages 3 to 13; Free for children 2 and younger. Craft Beer Sails $76.
DIY Potomac Water Taxi bar crawl
Going sailing on the Potomac can be fun, but it’s hardly a voyage of discovery. On most tours, you board the boat, enjoy drinks and maybe some dancing on your two-hour tour, then eventually wind up back at the dock where you started.
If you’d rather choose your own adventure, set sail on what we call the water taxi crawl — a favorite way to spend a lazy day that combines the thrill of being on the water with the freewheeling benefits of a neighborhood bar crawl. You’re cruising on the Potomac River, enjoying the breeze and taking in landmarks from interesting new angles, until the boat arrives in port. Then you can choose your own vibe for the next hour or two: a dockside rum drink, a wine bar, an Irish pub with live music. Maybe hit a bookstore or an art gallery. Get back on the boat, find yourself in a new place and start the process over again. Repeat until the boats stop running.
The Potomac Water Taxi runs between the Wharf, Old Town Alexandria and National Harbor, taking about 30 minutes to travel between each stop. Download the City Experiences app to check boat times and purchase tickets; to make the most of the crawl, you want the one-day pass , which offers unlimited trips for $36 on weekdays and $46 on Saturday and Sunday.
The first boat leaves each port between 11:25 a.m. and noon each day, then water taxis are scheduled every 30 to 90 minutes until the evening. Check that schedule carefully on the day you’re traveling: On a recent Friday, a couple of boats were canceled, which made our itinerary less flexible but still enjoyable.
Stop 1: The Wharf
On weekends, plan to meet up at Cantina Bambina , a no-frills rooftop dock bar directly over the water taxi’s office, so you won’t have to go far to board. The menu is simple: dark and stormys, margaritas, cans of beer. Outside food is allowed, so hit Grazie Grazie for a Philly-style sub or Falafel Inc. for affordable vegan sandwiches. If you’re going out during the week, the Cantina doesn’t open until 4, so consider people watching from the Brighton’s patio across the street while you wait for your ship to come in.
On board between D.C. and Virginia
The water taxi has two levels. The uncovered rooftop deck is lined with metal benches, perfect for sightseeing, while the lower level is enclosed, offering shelter from summer squalls, as well as bathrooms and a small bar selling snacks and cans of beer, wine and hard seltzer. Upstairs, sit on the port (left) side to see boats tied up at the Wharf, or the Frederick Douglass Bridge across the Anacostia; grab a seat starboard (right) for unobstructed views of planes landing and taking off from National Airport.
Stop 2: Old Town Alexandria
Alexandria has been a bustling port for 275 years, and it embraces its location along the Potomac. Steps from the dock is Vola’s Dockside Grill , which offers the choice of eating at tables next to the water, inside at an air-conditioned bar and restaurant, or in a retro tiki lounge. Either way, go for the crab dip or a pile of steamed shrimp coated with Old Bay chili crisp, washed down with a frozen orange crush or a Port City Optimal Wit. If you’d prefer to drink on top of the water, make the short walk downriver to Barca , constructed from shipping containers atop an old pier. The vibe is fun and nautical, with sparkling rosé, sangria and frozen rum drinks accompanying Spanish-style tapas, and views of boats sailing by.
Beyond bars, the blocks near the dock are full of activities: The Torpedo Factory houses dozens of artist workshops and galleries. A string of small green parks lie along the river, including the bench-filled Waterfront Park. Its centerpiece is a sculpture inspired by an asteroid that struck the Chesapeake Bay region more than 35 million years ago, and the metallic “ Interstellar Influencer ” delights kids of all ages by emitting clouds of mist.
On board between Virginia and Maryland
This section includes passing under the Woodrow Wilson Bridge and views of the historic Jones Point Lighthouse . For the best selfie op of the trip, head to the bow (front) of the boat after it passes under the bridge, when the Potomac opens up downriver, providing a perfect, expansive backdrop. There are dramatic views of the Capital Wheel Ferris wheel as the taxi makes a sweeping turn toward the dock.
Stop 3: National Harbor
As the boat pulls in, take a minute to marvel at “The Awakening,” the statue of a buried giant moved from D.C.’s Hains Point to National Harbor’s “beach” in 2008. The closest bar to the dock is Redstone Grill , a national chain that boasts a curving patio and outdoor bar looking toward the water. The food is people-pleasing — steak, baby back ribs, flatbreads — and so is happy hour, which brings $2 off draft beers and $3 off spirit-and-mixer drinks and wines by the glass from 3 to 6 p.m. on weekdays. It’s worth pulling up a stool at the edge of the patio for prime people watching.
A few minutes’ walk away, try V-No , a Black-owned wine bar offering flights and by-the-glass pours on its patio, as well as frequent tasting events. The Brass Tap is National Harbor’s best craft beer bar, a bright, modern tavern with dozens of drafts from Maryland and regional breweries, including Nepenthe, Dewey and Evolution.
Check National Harbor’s calendar when planning; depending on the day, you might catch an Air Force or Navy band performing in the waterfront plaza or a movie on the giant outdoor video screen . For unusual photo ops, don’t miss the parks along American Way, home to life-size statues of Winston Churchill, George Washington, Marilyn Monroe and Rosie the Riveter, among other outdoor displays.
You can mix and match the itinerary at will: If you’d rather start the day in National Harbor, the first boat out of the Wharf heads there after a five-minute layover in Alexandria to pick up more passengers. Or try grabbing coffee at Misha’s in Old Town before boarding the first boat to explore the shops at the Wharf. Consider yourself the cruise director.
Potomac Water Taxis run daily, though schedules vary. See cityexperiences.com/washington-dc for schedules and tickets.


IMAGES
COMMENTS
For the record, my first boat, a 13ft 6in sailing dinghy, required 419 hours. My second, a 19ft gaff sloop, consumed about 3,000. A friend in British Columbia took 6,000 hours for a meticulously crafted 23ft Bermuda sloop. ... diy Sailing Sailing Dinghies. Related. Boat Reviews.
Check out my Patreon to help support the boat build! - https://www.patreon.com/jackwood25Guten Morgen! After months of building and filming, I'm finally post...
Sailboats that you can build from home will likely be a small boat under 20 feet. These could be from many different boat suppliers such as B&B Yachts, Brooks Boat Designs, and Chase Small Craft. Boat plans will vary based on your budget and how much time you have on your hands. Based on my previous experience, building your own boat will take ...
affiliate links Cabin Cruiser, Free Sailboat Plans Petrel You can build this 16ft boat as a day sailer or an overnighter with cabin. Petrel is a Free Sailboat Plan that fulfils the greatest possible variety of uses in one model, offering the builder either an open-cockpit racing craft with comfortable accommodation for day sailing or a snug cabin model with accommodation for overnight trips to ...
Draft keel down/up: 1,75 m - 0,50 m. Engine: outboard 2.3-5 HP on transom bracket. Equipped boat weight: 900 kg. Design displacement: 1200 kg. Max. displ: 1700 kg. Keel ballast: 300 kg. Plans can be purchased here: Nautikit order page. First boat launched : read the first impressions here. Idea 21 small sailboat plan is the latest development ...
Building an 11ft Plywood Boat from start to finish using the Stitch and Glue method. Pointing out mistakes and how to avoid them.BOAT PLANS: https://plywood...
1. Choose Your Boat Type and Design Carefully. The first step in any DIY boat-building project is deciding what vessel you want to construct. There are many different types of boats to choose from, including sailboats, powerboats, canoes, kayaks, and rowboats. Consider your budget, building space, and intended use when narrowing your options.
Boat plans. Hartley Boats has the widest range of boat plans for sail boats, power boats, catamarans and trimarans, dinghys and small craft, canoes and kayaks, surfboards and surf skis, vintage power boats, self steering capabilities and trailers. Established in 1938, more than 100,000 boats have now been built by enthusiasts from our plans.
Westhaven 32. $ 285.00 - $ 300.00 (USD) Build your own sail boat yatch from 9 feet to 63 feet in length. Fully featured wooden boat plans for home construction in Plywood, Steel and Fibre Glass.
A compilation of the 30 weeks I spent building my Goat Island Skiff . Yes, a plywood sailing boat full build!from lofting to cutting and coating the panels w...
Whether you're looking to build a small sailing yacht or a large motor yacht, selecting the right plan is crucial. ... by. DIY Boat Building Plans updated April 17, 2024, 12:40 am. Pontoon Boat Plans & Blueprints. by. DIY Boat Building Plans updated April 17, 2024, 2:13 am.
Sailing boat plans and blueprints are essential tools for anyone looking to build their own sailing boat. These plans provide detailed instructions and diagrams that guide builders through the entire construction process. They outline the design, dimensions, and specifications of the boat, ensuring that every component is built to the correct ...
Long-established Cumbrian company Fyne Boat Kits' newest design is for the Pocket Ship, a 14ft 10in (4.52m) gaff-rigged cruiser with two berths down below and seated headroom. The kit includes all panels, and the holes for the ties are already cut. 'She's a fast-sailing pocket cruiser with a dry and commodious interior.
25 Steps to Building Your Own Stitch-and-Glue Boat. George Retseck. 1. | Procure a set of plans, or scaled drawings of what you're going to create. Devlin creates plans for hundreds of DIYers ...
Optimist Sailboat Build: Building the Wood/Epoxy Optimist In 1947 a gentleman named Clark Mills designed a small sail boat for kids to learn to build and sail called the Optimist. This boat was designed to be built from 3 sheets of plywood, with basic woodworking abi…
Reave the mainsheet (run the line through the blocks) and you're ready to go sailing. I've found that this boat sails very well. The lug sail makes it very easy to sail upwind (weather helm), it's a little more tender for a large adult, more so than a boat with a hard chine, like an El Toro/Optimist but it's a lot more graceful looking.
Sailing Boat Plans. A lightweight Pacific proa for fast cruising or daysailing. A traditional-looking 10-foot clinker dinghy for rowing, sailing and motoring that is stable, handsome and easy to build. A pretty, light, tough, roomy and easy to build 7 foot 9 inch pram dinghy that can be rowed or sailed.
Boat plans 30 - 40 ft. This section of Bruce Roberts sailboat designs and boat plans cover the following vessels in the range of 30 to 40 foot. The Roberts, Classic, Henry Morgan, Offshore, Power Cat, PCF 36/40, and Canoe Stern designs. Boat building plans using steel, aluminium, fiberglass wood/epoxy, dependant on the design, are available.
PC DIY Wood Boat. The Handy Andy is a great little 10-foot portable rowboat for hunting, camping, fishing, and other recreational uses. ... Without the mast and sail, this boat weighs roughly 165 pounds and is constructed using primarily 3/16-inch marine plywood. You can also elect to build your own mast, boom, and sail if you have the time and ...
DIY boat building:This was by far my biggest project ever: a 11m sailing yacht, weighing 9 tons, build from scratch over the years together with my wife. It ...
Depending on the size of your boat, you'll want to use 1/4in to 3/8in prestretched polyester doublebraid for your lazyjack lines. Don't use nylon—it stretches when wet so the lines flop around and don't hold the bunt of the sail so well. I used 1/4in Sta-Set for the risers, and 5/16in for the lower lines—simply because I didn't have ...
Let's start with building the trim tab. The trim tab should be somewhere around 10 to 15 percent of the area of the rudder. We decide on the correct diameter of shaft for the blade. In my case this was a 5/8″ diameter stainless steel shaft. We then drill several (say four) holes to take through-bolts which will hold the wooden blade to the ...
DIY: Installing Davits. Davits are a good way to keep the dinghy safe and ready to use on short notice. After many hours of discussion, my wife, Vicki, and I decided to install a set of davits on Freelance, our Pearson 36 cutter. We hoped davits would solve our dinghy storage problem and save us time getting the dinghy in the water.
A YouTube couple spent ten years building two huge homemade yachts in their backyard, with each yacht taking almost five years to complete ... DIY. Couple spent 10 years building two huge homemade yachts in their backyard. ... The two sailing yacht models were massive, too — with one 38ft wooden vessel followed by a 46ft one made from steel. ...
As the boat pulls in, take a minute to marvel at "The Awakening," the statue of a buried giant moved from D.C.'s Hains Point to National Harbor's "beach" in 2008.